
In this guide, we will cover exactly how to fold a money origami bat using a dollar bill.
This bat can be made in 5-10 minutes and is perfect for a Halloween decoration or party favor.
The following tutorial is a beginner to intermediate level and will look cool even with some imperfections.
For more dollar folding guides see our main guide, 30+ Money Origami Tutorials.
OTHER HALLOWEEN MONEY ORIGAMI GUIDES:
How to Fold a Dollar Bill Into a Money Origami Bat
For this dollar bat, we will start on the front side of a one-dollar bill.
STEP 1: Fold the dollar in half widthwise
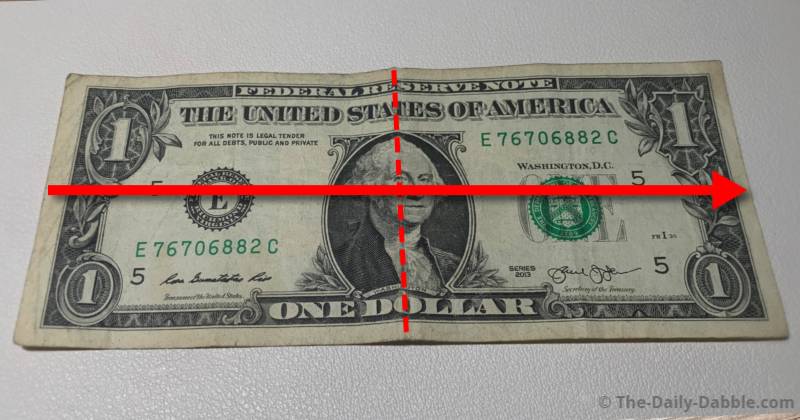
Fold the bill in half, rub the crease, and then unfold the bill.
STEP 2: Fold both outer edges to the bottom one
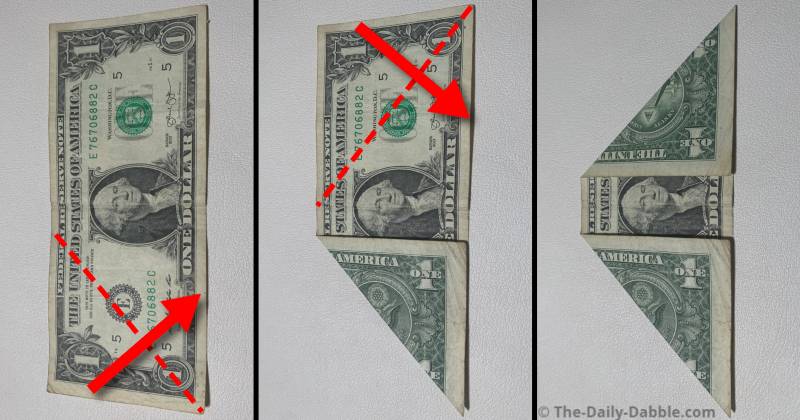
Bring the left and right edges of the bill diagonally down to meet the bottom one.
Crease the edges of the folds well.
STEP 3: Fold the top down and then back up over itself
Start by taking the top down to meet the bottom.
After creasing that edge, bring the lower edge of the fold to meet the new upper edge.
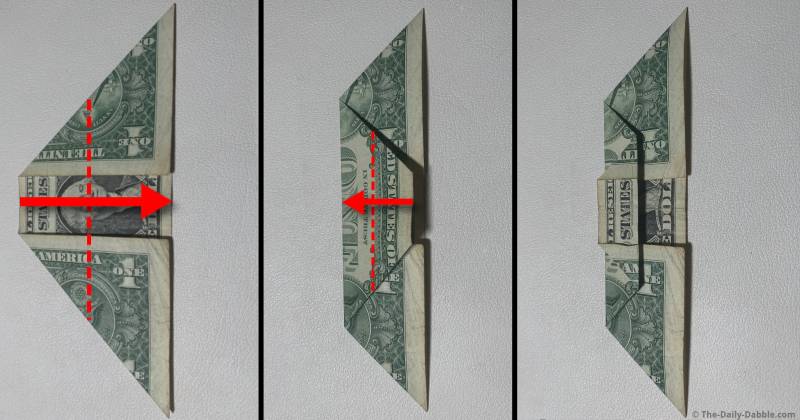
STEP 4: Unfold the last step and its crease to the top
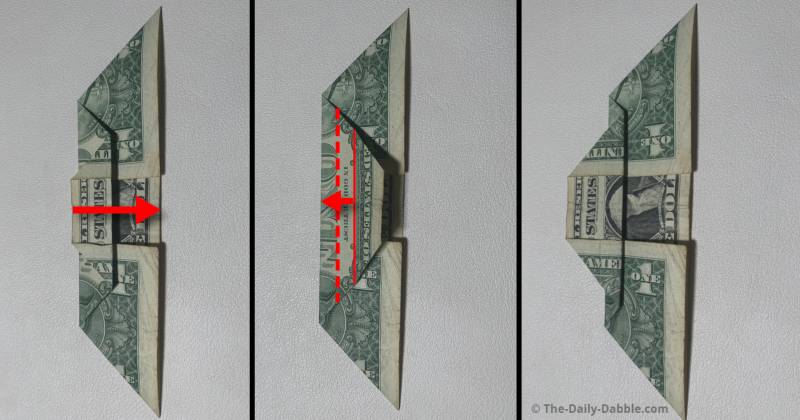
Use the most recent crease by folding it to meet the top edge of the dollar bill.
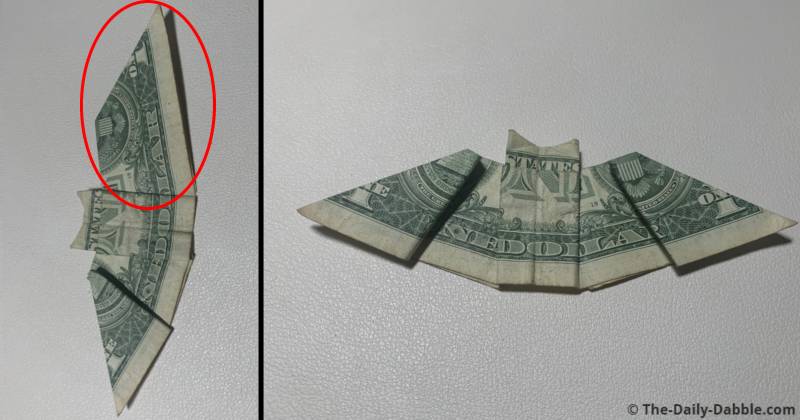
STEP 5: Fold the first bat wing
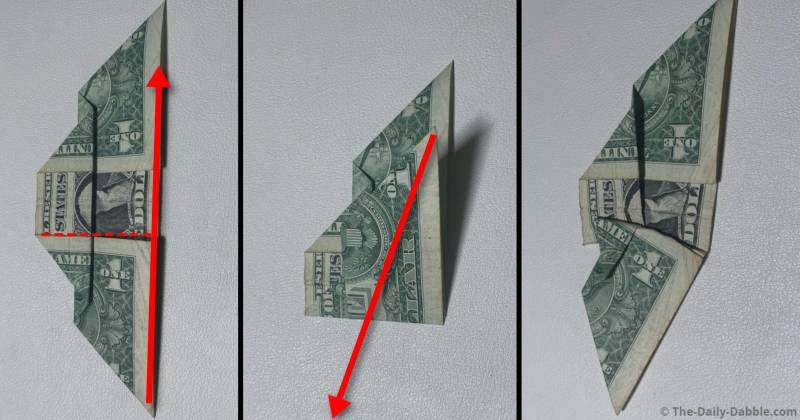
Start by bringing one side over the center while keeping the bottom edges aligned.
The fold will be at the middle edge where the back side meets the front as shown.
Crease the fold and then fold it back over diagonally at an upwards angle.
As long as you give it some angle and the top point is just above the head, it should look fine.
STEP 6: Fold the opposite wing to mirror the other
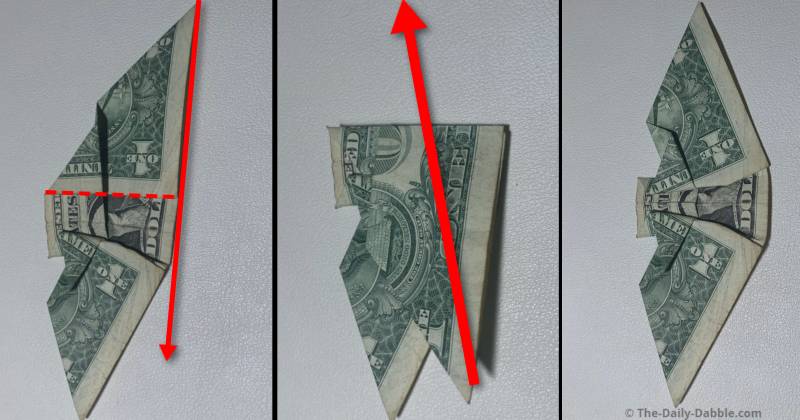
Fold the other wing just like you did the first.
You can use the picture as a guide, but it is ok if it doesn’t perfectly resemble it.
It is better to focus on mirroring the way you folded the other wing.
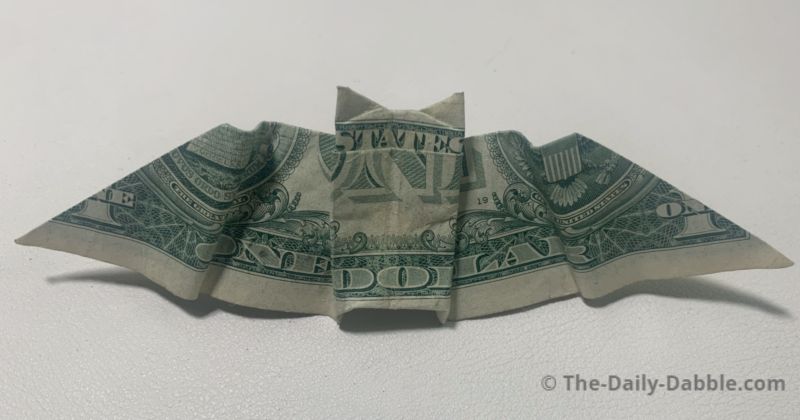
STEP 7: Make the bat’s ears

First, fold down the top of the head, using where the border meets the green as a crease line.
Next, hold the center of this portion, while folding the outer corners up, to make the ears.
You can flip the bill over and shape the ears a bit more to your liking if needed.
STEP 8: Shape the first wing
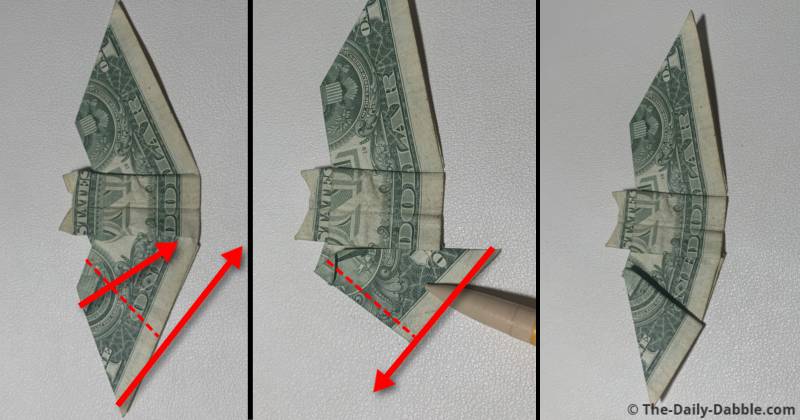
To give the wings a bit more definition, bring it down and then fold it back over itself just a bit.
When you bring it down, match the diagonal edge to the edge of the bat’s body.
After that fold has a crease, bring it over a small portion of itself diagonally.
STEP 9: Shape the other wing the same way
Shape the other wing the same way, matching the opposite, to keep things symmetrical.
STEP 10: Make some bat feet by folding the bottom tips
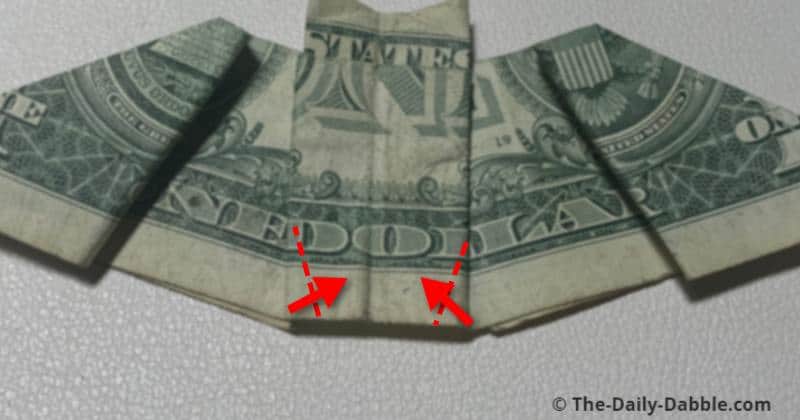
Lastly, you can make little bat feet by folding the bottom center corners at an angle.
Optionally, you can also shape the legs a bit better by tucking behind the bottom center.
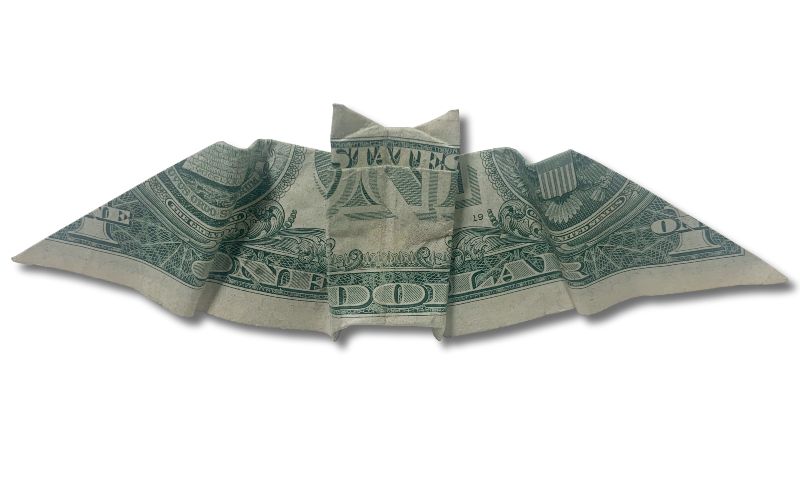
Now you have your own money origami bat!
You may also like these other folding guides: