
In this guide, we will cover how to fold an easy money origami boat with detailed instructions.
This beginner-level tutorial has 13 steps but they are all pretty simple to follow.
It will only take about 3-5 minutes for most to make this for a quick tip or gift.
This is based on the traditional origami boat design, but of course, in dollar form.
You may also like these other money origami guides:
Let’s get started!
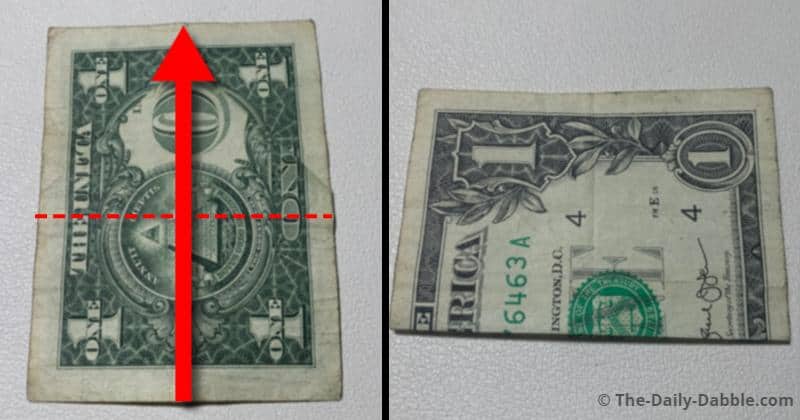
For this dollar boat, we will start on the front side of a one-dollar bill.
STEP 1: Fold the dollar in half lengthwise
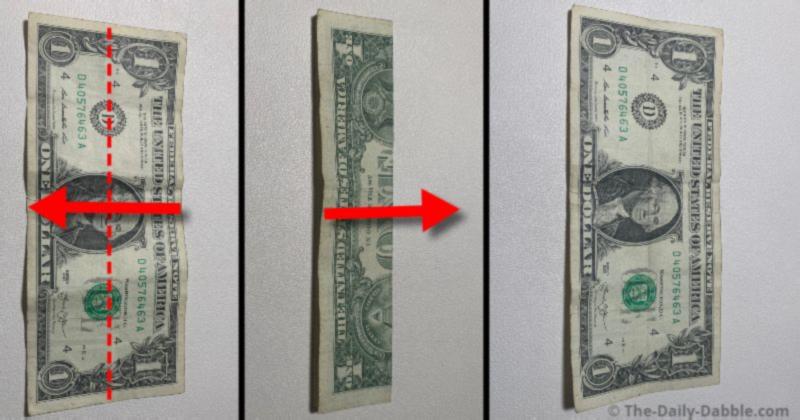
Fold the bill directly in half lengthwise, crease the fold, and then unfold it again.
STEP 2: Fold the dollar in half the other way
Fold the bill in half widthwise and rub the edge to crease it well.
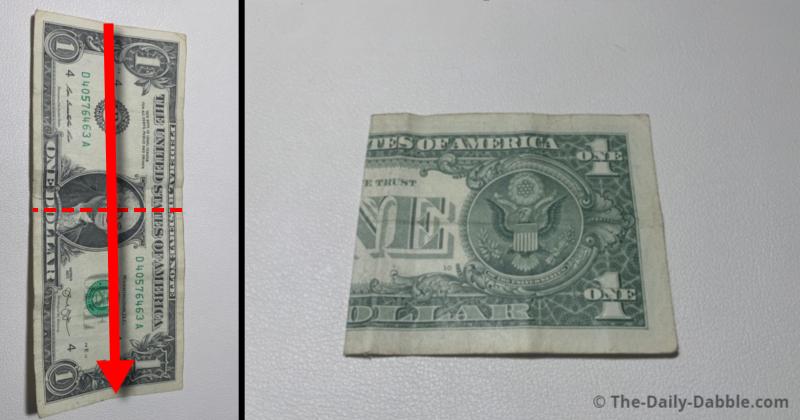
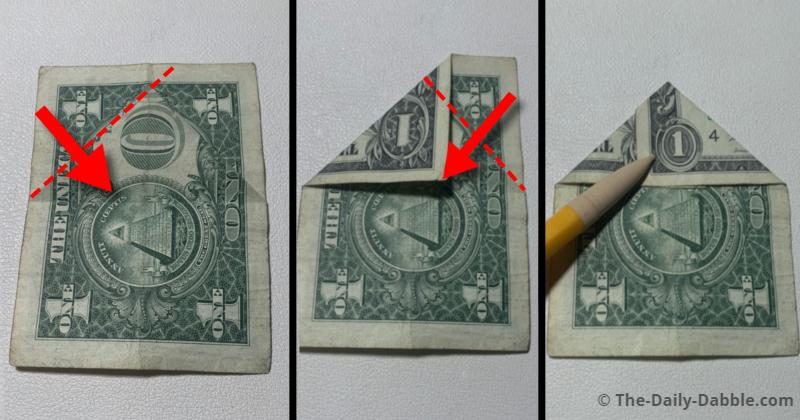
STEP 3: Fold the top corners to meet the vertical crease
On the creased end of the bill, bring both corners to meet in the middle.
STEP 4: Bring the top layer of the bottom up
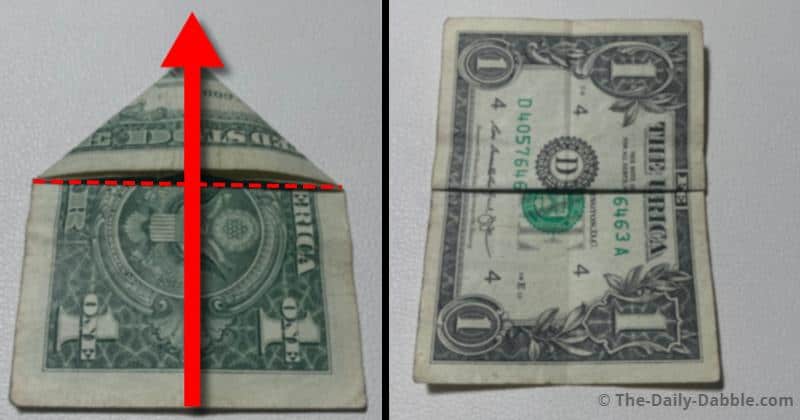
Grab the top layer of the open side of the bill and bring it up all the way.
After creasing the middle edge, flip the bill over to repeat the process in the next step.
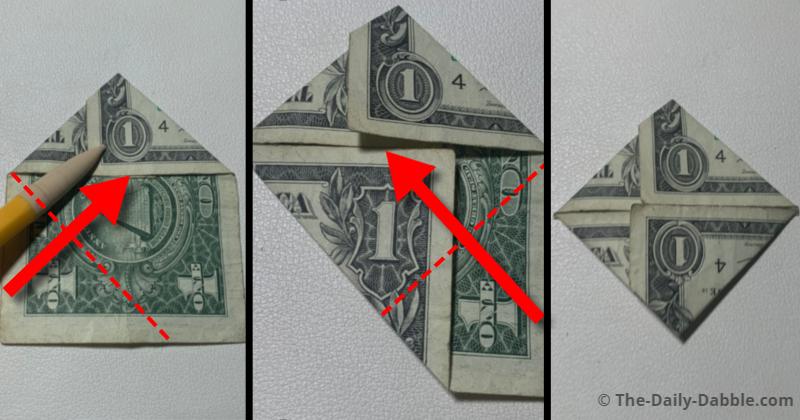
STEP 5: Bring the other layer up to meet the top
Match the fold in the last step by folding the bottom up to the top.
Crease this and then unfold this step before the next one.
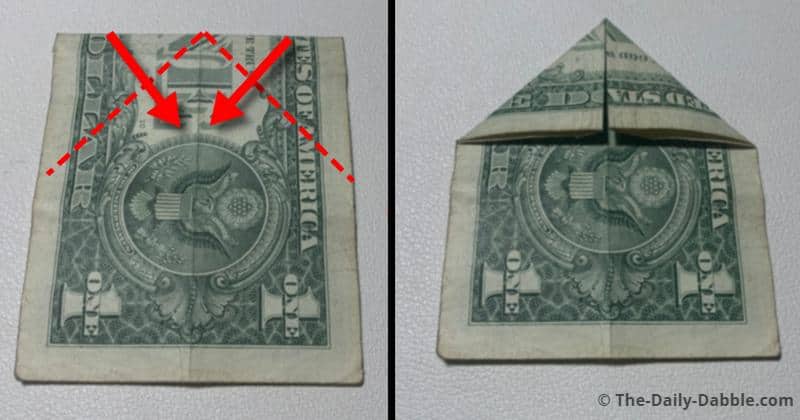
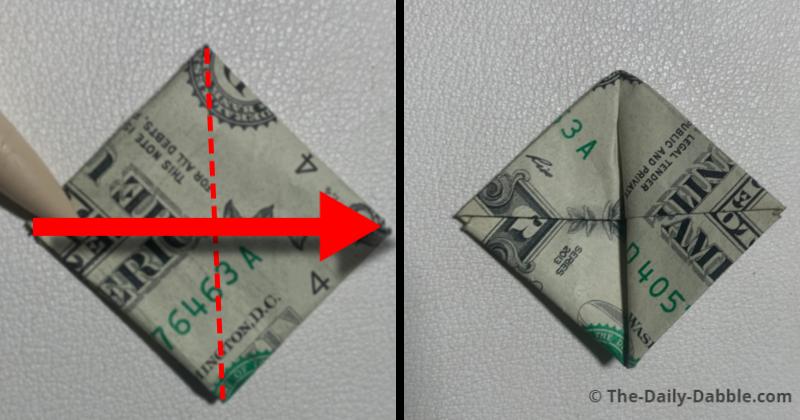
STEP 6: Bring the top edges to the horizontal center line
Start by folding the top left edge diagonally down along the middle crease.
Next, fold the right side in a similar manner along the middle line.
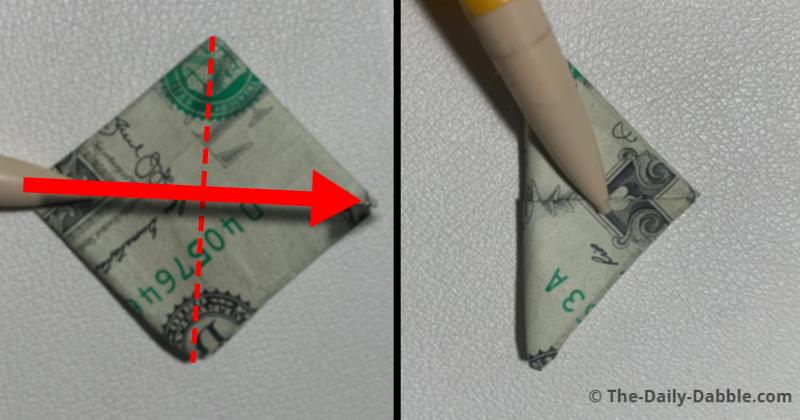
STEP 7: Repeat the process with the bottom
Bring the left and then the right edges up diagonally up against the vertical center crease.
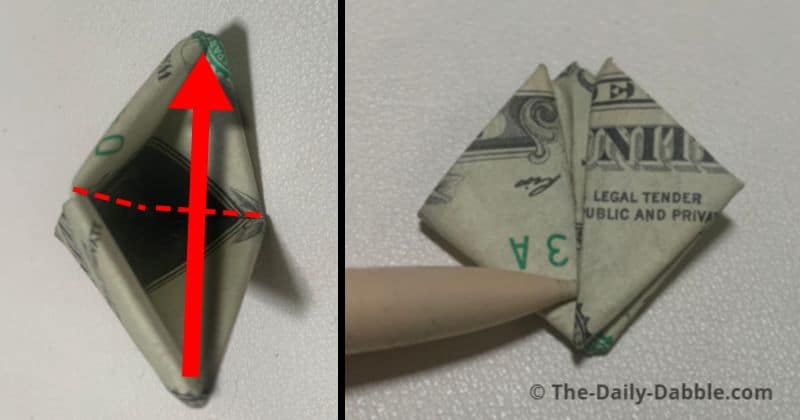
STEP 8: Fold the bill in half and then open it up
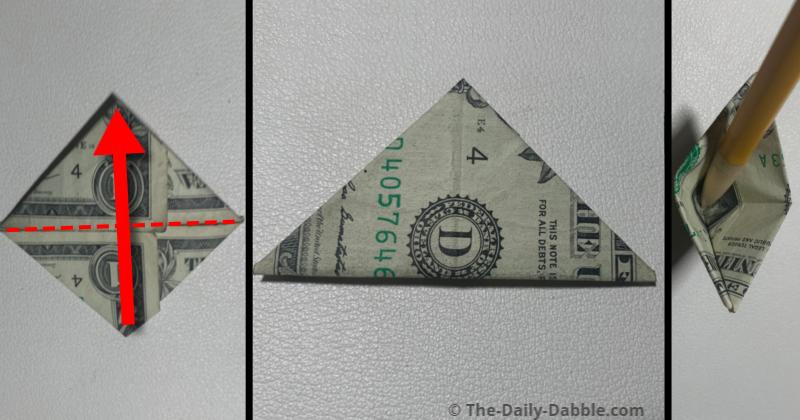
Fold the dollar in half from point to point where the vertical crease is the folding line.
To prepare for the next step, start opening the non-pointed side.
STEP 9: Squash the bill back into a square

Squash one point to the other to half it into a square.
STEP 10: Fold the top layer in half from left to right
Bring the left point to the right one, folding just the upper layer over on this side.
Flip the dollar over when you have creased this fold.
STEP 11: Form a small triangle by folding the next flap over
Repeat the process of the last step by folding this layer over to form a triangle.
STEP 12: Open up the pocket and squash it the opposite way
Open up the pocket side and bring the sides together to flatten it the opposite way.
It should now look really similar to the dollar tulip!
STEP 13: Slowly pull the edges outward to form the boat
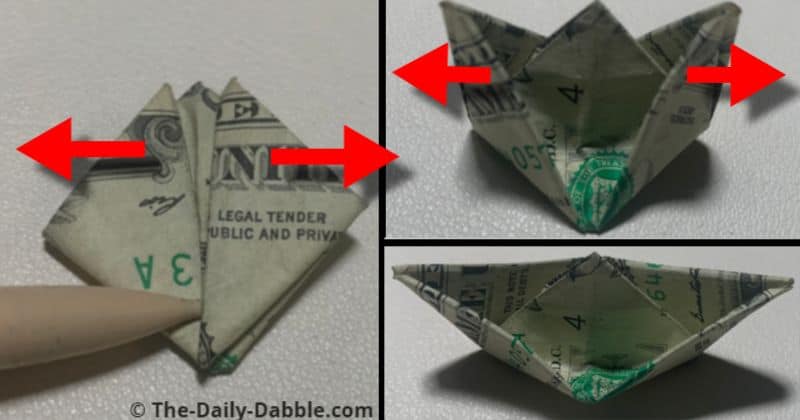
Pull the right and left edges simultaneously outward to complete the boat!
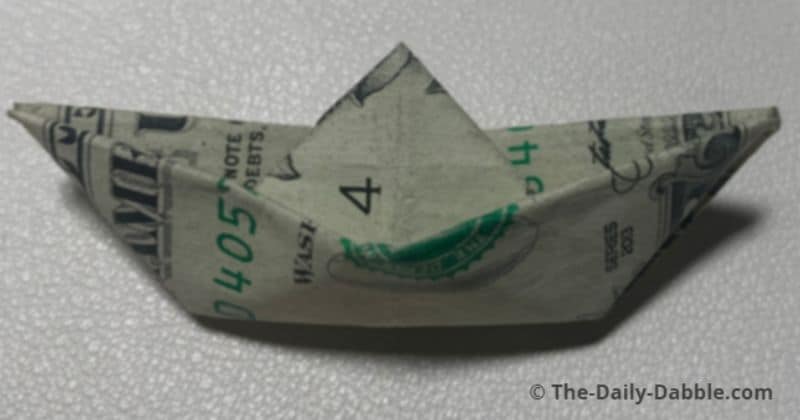
That’s how you fold a dollar bill into a boat!
We have 30+ dollar bill origami guides if you want to learn how to fold some more!
If you want to keep going, check out the money origami hat tutorial, which is similar to this one!
Happy Folding!