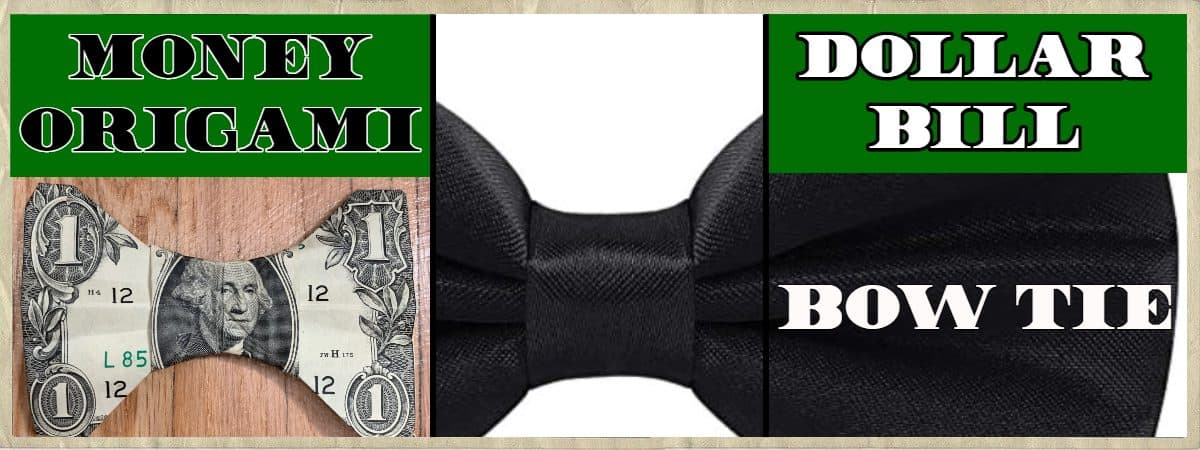
Make a quick and easy money origami dollar bill bow tie quickly with this guide.
You could give this neat dollar origami as a gift or even wear it.
Follow along and you will have your own bow tie in just a few minutes!
Let’s Get Started!
You may also like these other dollar bill origami guides:
We will start folding on the front side of a fresh dollar bill.

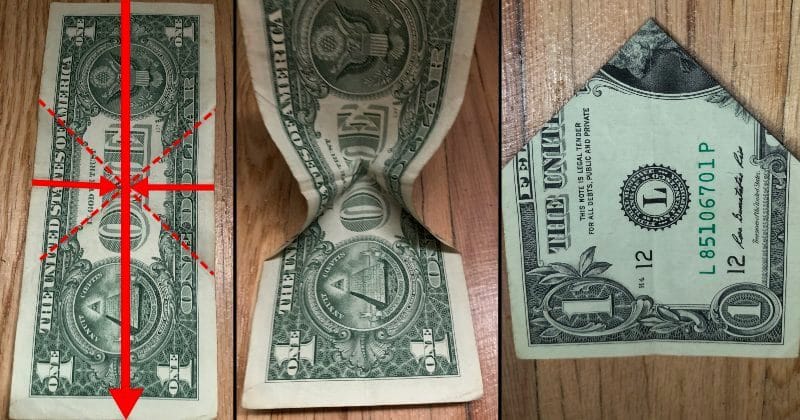
STEP 1: Fold the bill in half both ways and crease

You can first fold it lengthwise to crease it and then unfold it.
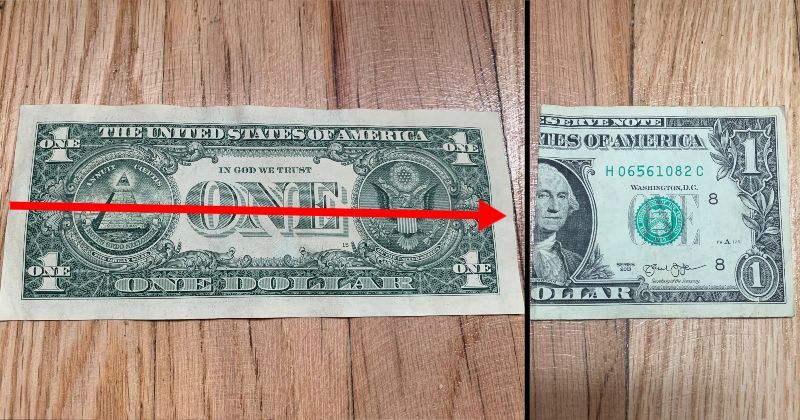
Then with the bill face down, fold it in half the other way from left to right.
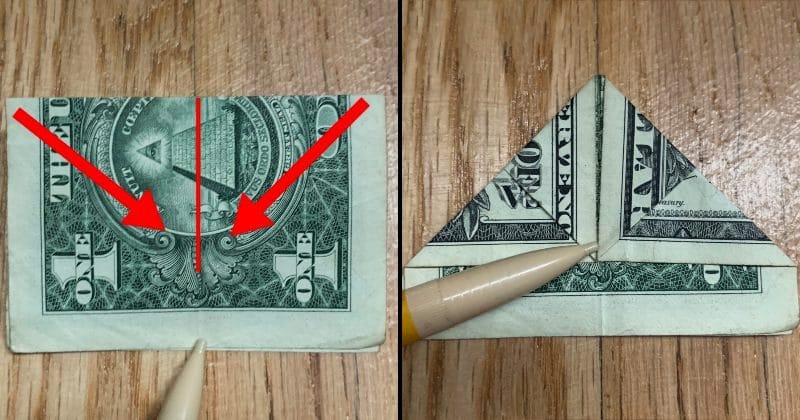
STEP 2: Fold top corners of the closed side to the middle crease
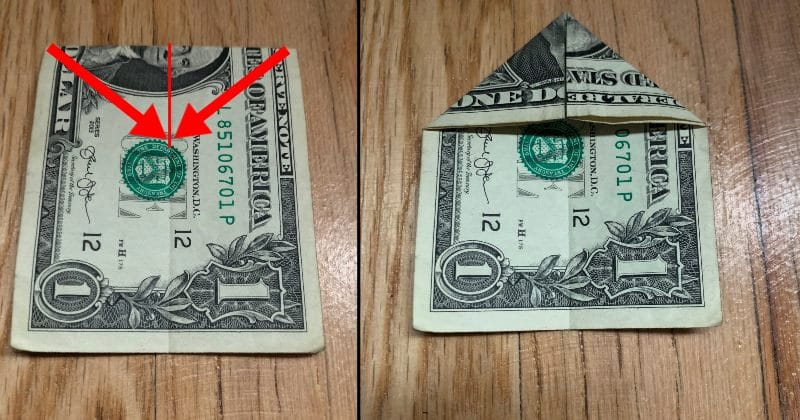
When you have made the crease, unfold it and fold the corners over the same way to the other side of the bill.
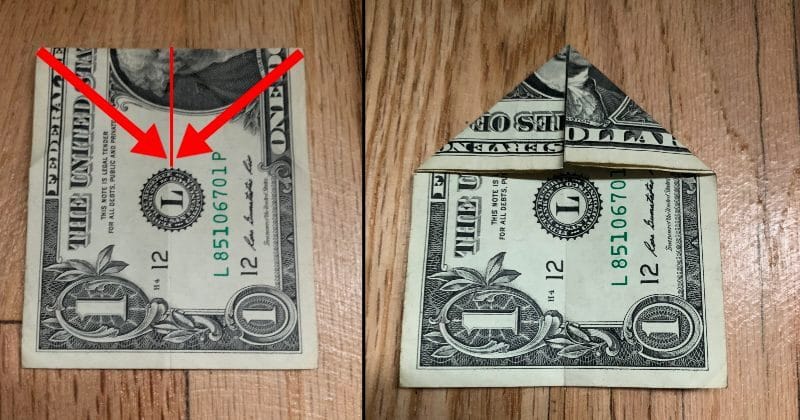
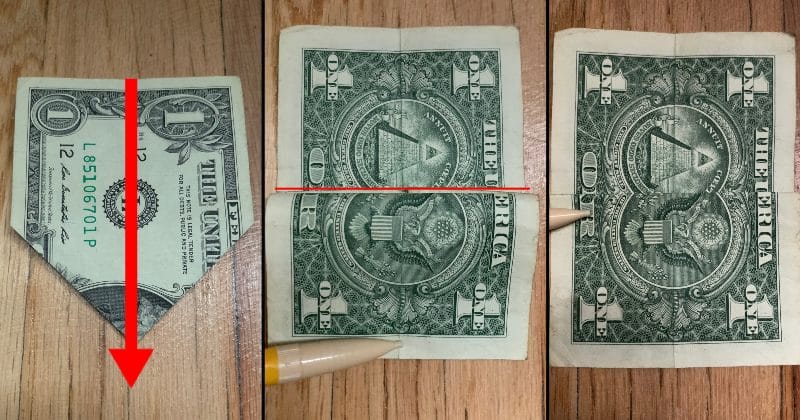
Making sure to crease all your folds well will make the rest of the folds a lot easier.
Now you can unfold the bill completely and put it face down.
STEP 3: Squeeze fold the sides and fold the top down over them to make a point
Your folding down over the creases you made in the previous step.
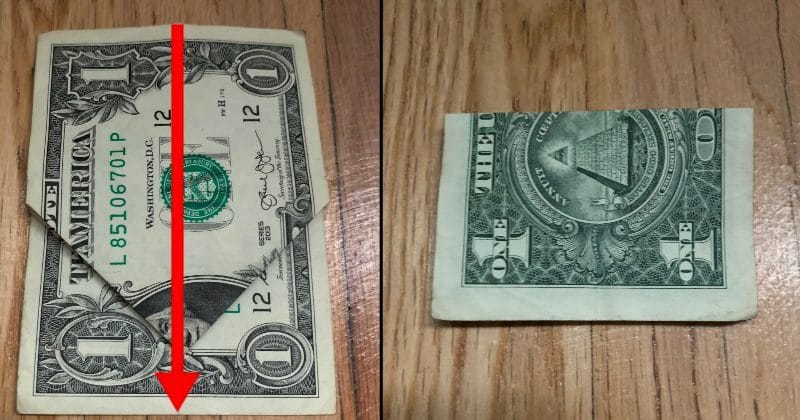
STEP 4: Fold the non-pointed side down over the point on both sides
Your crease mark will be right on the middle edges, as shown.
Once you have made the first fold, you can flip it over and use the last fold as a guide.
STEP 5: On both sides, fold the top corners down to meet at the middle crease
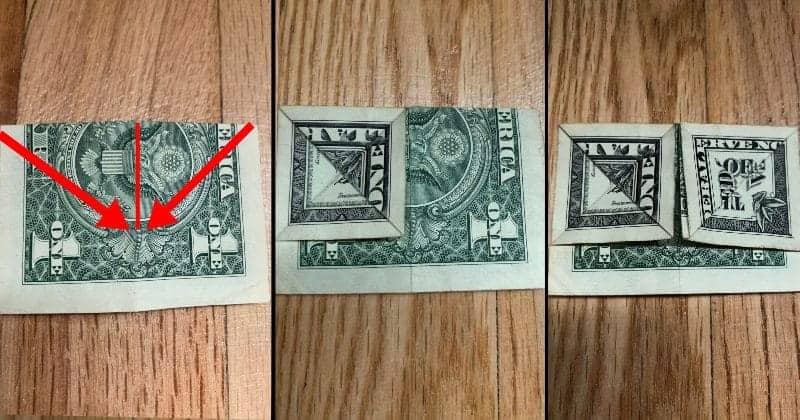
Try to make the fold as even as you can, but they don’t have to be perfectly on the crease.
When you fold the top layer corners down on both sides, it should form a point like in this picture.
Make sure you crease all of your folds well.
STEP 6: Slowly pull the sides apart until the whole thing is flat
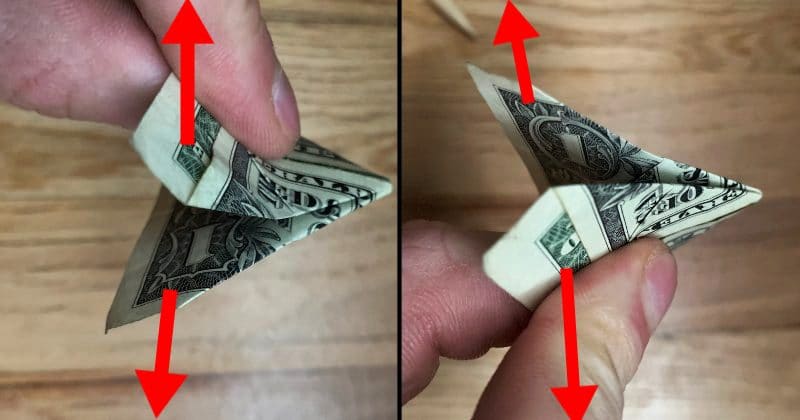
First, tightly hold the folds you previously made.
Then with George Washington facing you, slowly pull both sides away from each other and his face will fold flat.
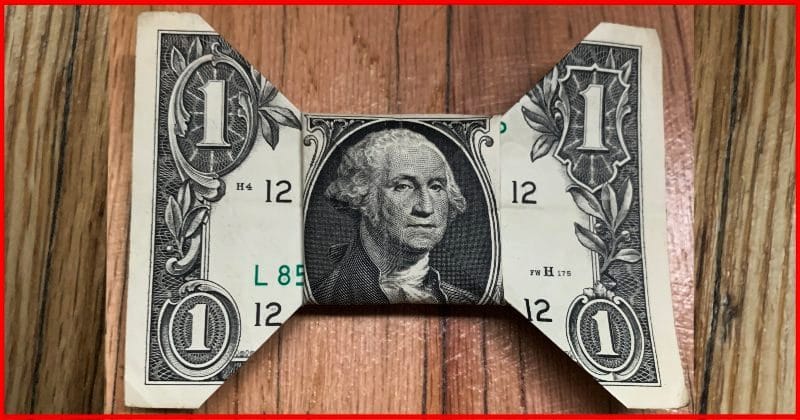
You can leave the bow tie like this or fold the white edges behind, as shown in the next picture.
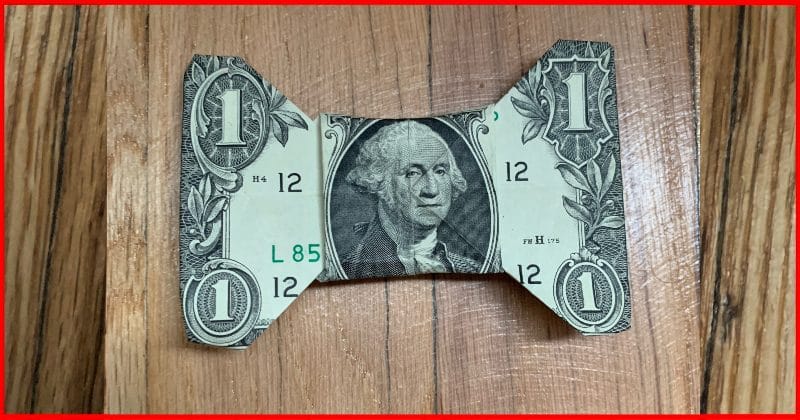
You can get even fancier if you want and shape the bow more to your personal liking.
To do this, you can make the middle skinnier by slowly tucking and shaping it to the back.
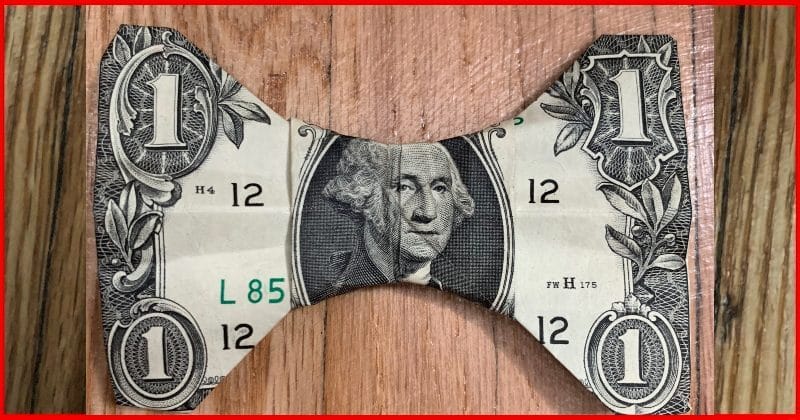
We hope you like your sweet new dollar bill origami bow tie!
Check out some other easy dollar bill origami guides: