
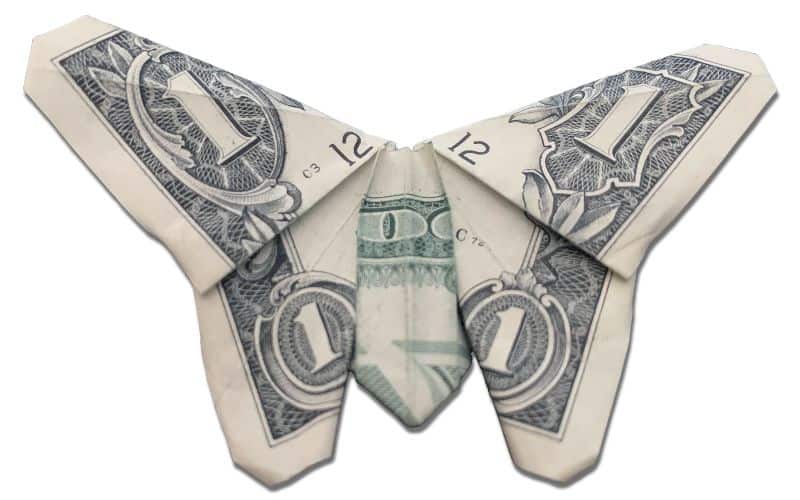
Here’s how to fold a money origami butterfly step-by-step from a dollar bill with this guide.
This could make a great gift for a friend or be used as a creative way to give tips.
These instructions might be a little difficult for beginners, but it’s a fun challenge!
For more folding guides be sure to visit our our Money Origami article to see them all.
Let’s get started!
How to Fold a Dollar into a Money Origami Butterfly
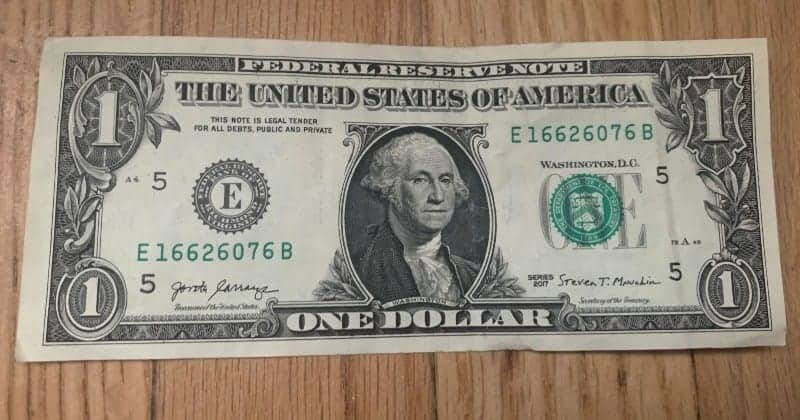
We will start folding the dollar bill origami butterfly on the front side of a straight one-dollar bill.
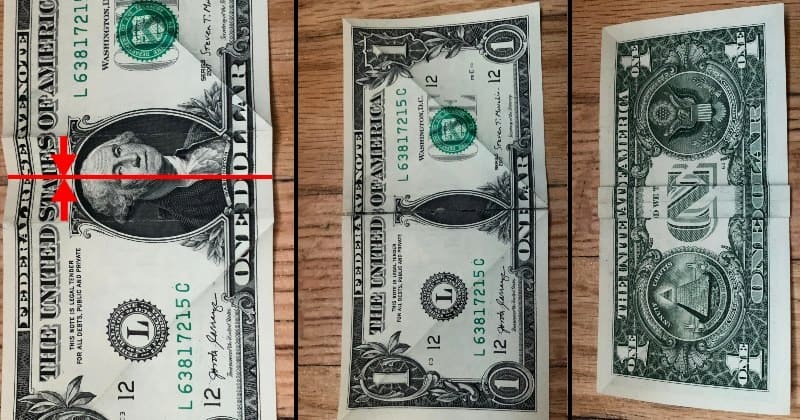
STEP 1: Fold the bill in half from left to right
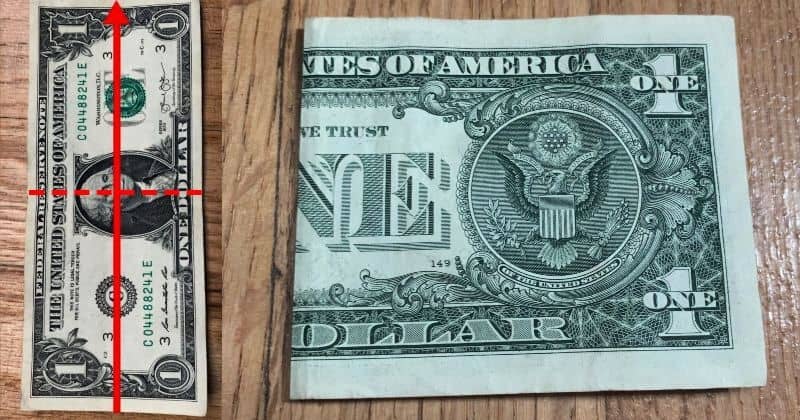
After folding, make sure to crease the bill well and then flip over to the pyramid side.
STEP 2: On the back left, fold diagonally up to the top right
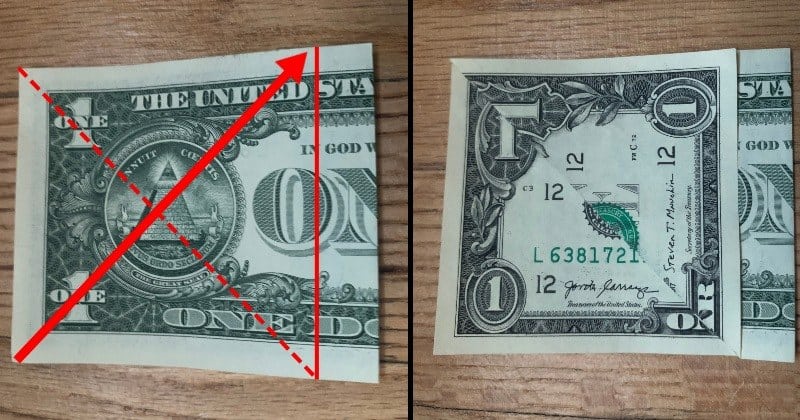
Fold the bottom left corner to the top right above the “S” in “STATES.”
Crease the bill and then flip the bill over.
STEP 3: Flip over and match the fold on the other side

Make a mirror fold on this other side from bottom right to above the other “S” in “STATES.”
STEP 4: Fold the flap over to crease on both sides
Fold over the leftover rectangular flap and crease it on both sides.
Once you are done, unfold the bill and flip it to the front side.
STEP 5: Fold the two middle creases to the center
Fold the middle creases you just made to the center crease as shown.
STEP 6: Fold the bill in half twice and crease
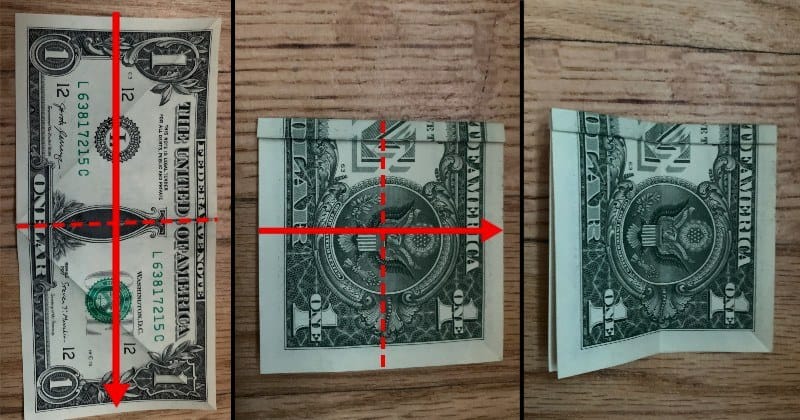
Fold the bill in half from left to right on the front and crease it.
Then on the back where the eagle is showing, you will fold it in half again.
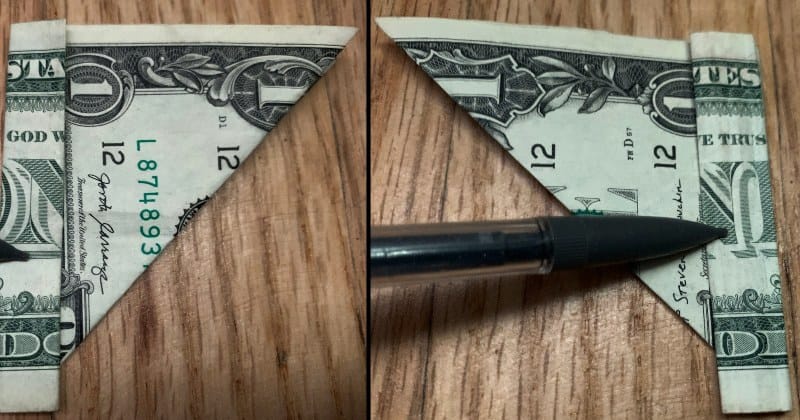
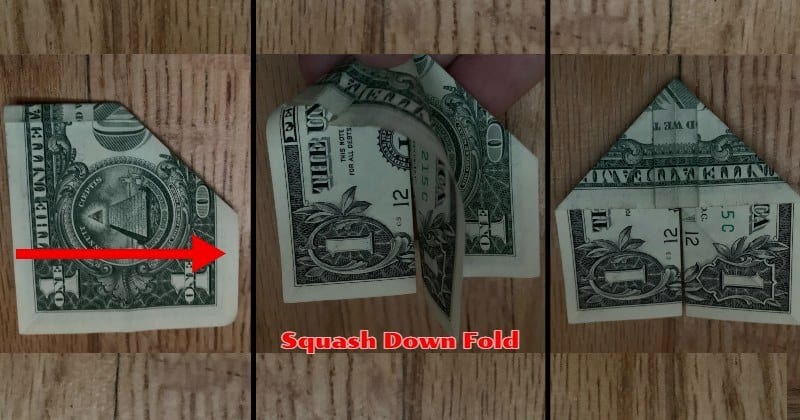
STEP 7: Squash fold from left to right into a point
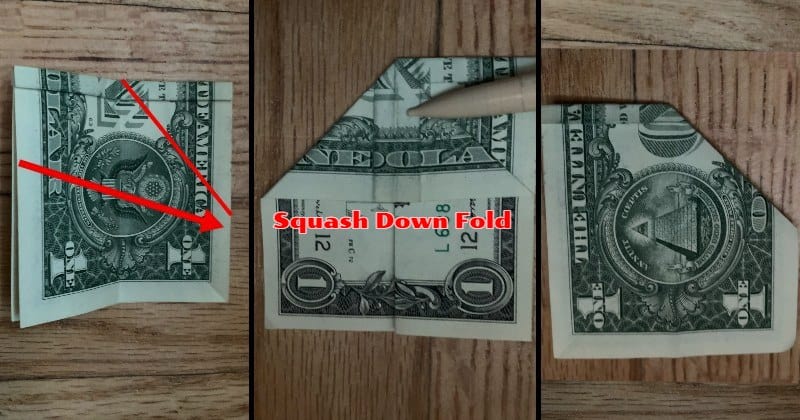
Start by pulling the left half over the center crease and then begin to open it.
Take your time squash folding it into a point like shown.
You can stick a pen or pencil underneath the pointed flap to help you get it all straight.
STEP 8: Flip over and mirror the last squash fold
Make a mirror squash fold to the last one on the other side.
STEP 9: Fold the wings to the lines and crease
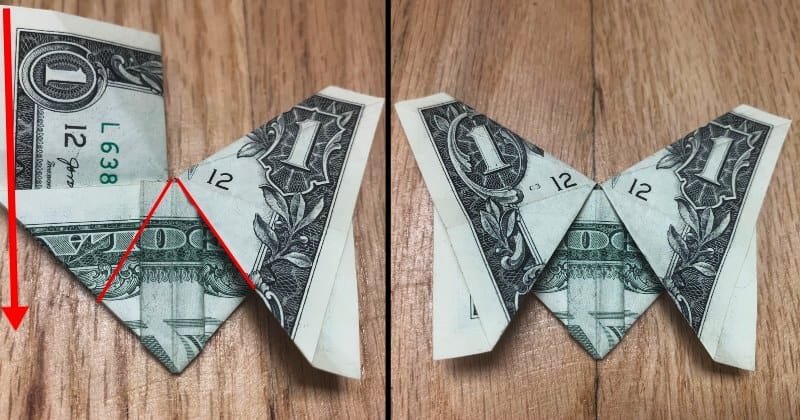
Pull both the wings down and fold to the line shown.
They don’t have to be exact; just try to get them as even as possible.
STEP 10: Fold the bottom part of the wings down
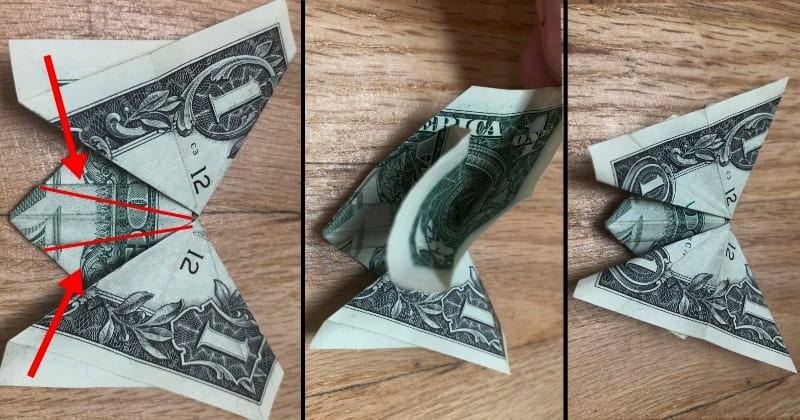
Open the wings a little bit and just manipulate the middle inside part until it moves down.
STEP 11: Fold the upper wing creases to the lines
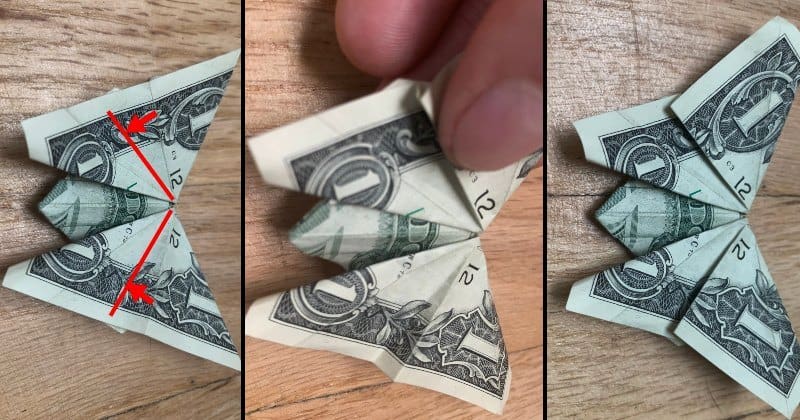
Push down on the middle of the wing a little bit and fold the top creases to the lines.
Again, they don’t have to be exactly as shown but rather just as even as possible.
STEP 12: Finish the Money butterfly with shaping
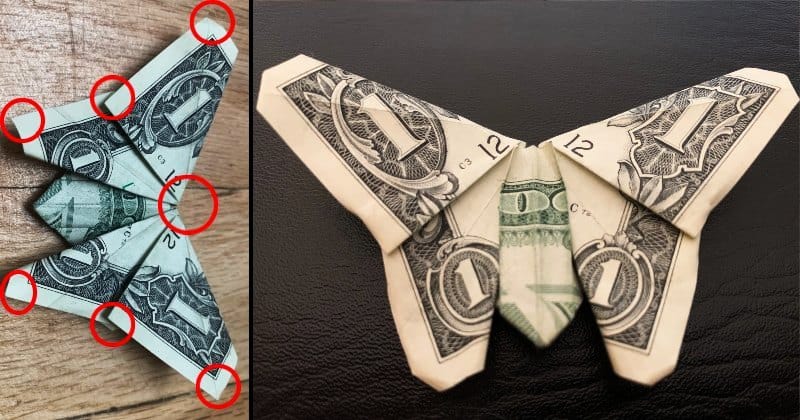
You can shape the wings to your liking and fold little antennas on the head.
On the wing corners, you can just do simple rounding folds as shown.
Starting where the wings are folded over in the mid-wing, you can grab and roll the edges over a bit.
Now you know how to fold a dollar into a butterfly!
Happy Folding!
You may also like these other money origami animals guides: