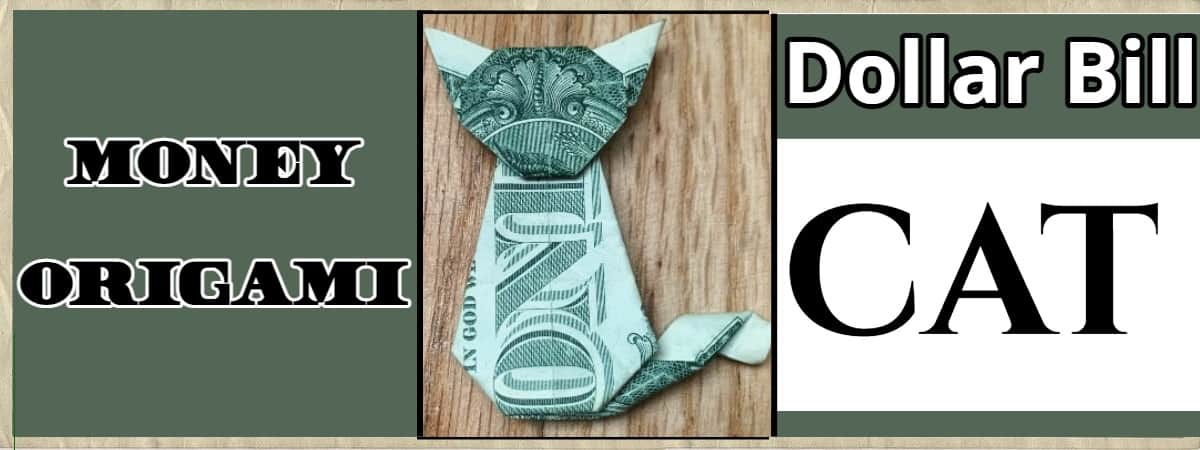
Learn to make a dollar bill origami cat with this detailed 12-step folding guide.
This fold is not super difficult but can take 5-10 minutes to complete.
This could make a great gift for that cat lover you know as a thoughtful cash gift.
See our main Money Origami article for all our folding ideas!
How To Fold a Dollar Bill Into a Money Origami Cat
You may also like these other animal dollar origami guides:
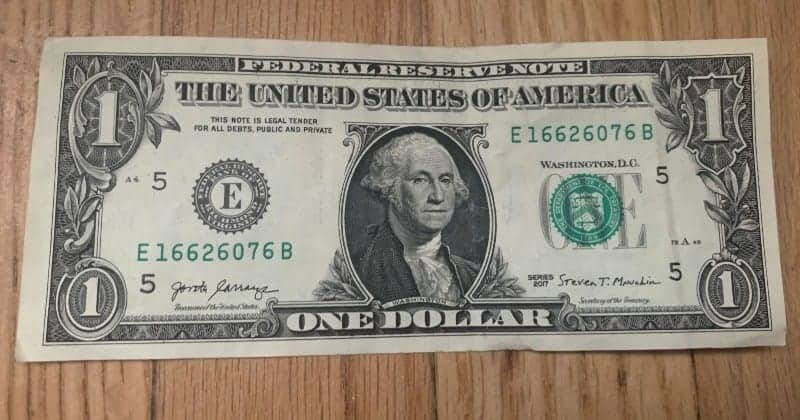
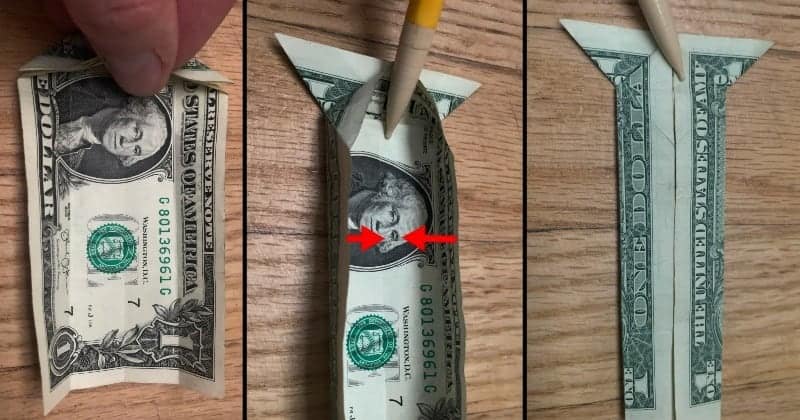
Let’s start on the front of a straight one-dollar bill.
STEP 1: Fold the bill in half lengthwise
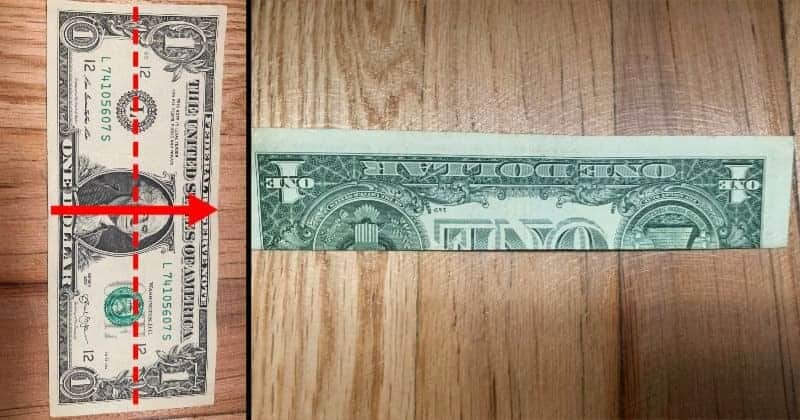
Make a fold directly in half from bottom to top by matching the edges evenly.
Make sure to crease the edges and then unfold the bill again.
STEP 2: On the left side, fold both corners to the half
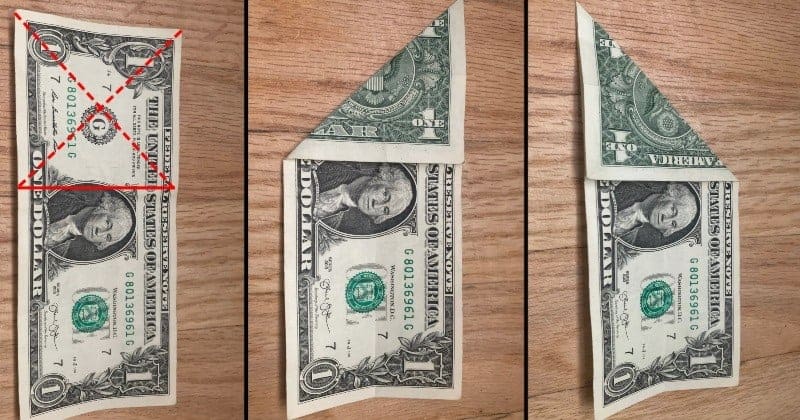
Fold the lower left tip diagonally across evenly matching the left edge of the bill to the top edge.
After creasing that fold, make a similar fold the opposite way and crease it.
Open and flatten the bill once both folds are made.
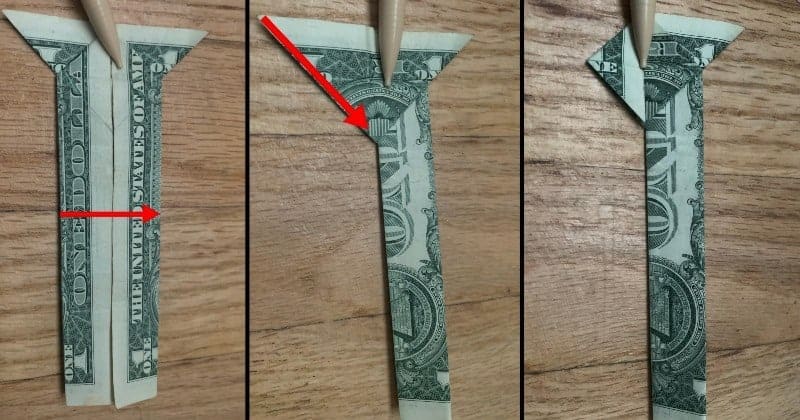
STEP 3: Fold both top and bottom lengthwise to the middle
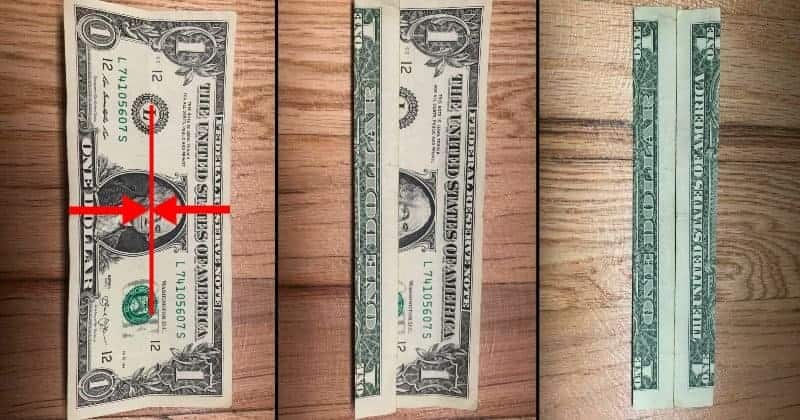
Bring both the upper and lower edge to meet directly in the middle.
Crease the edges and unfold the bill once more.
STEP 4: Pinch the sides of the bill and fold the edge up
First, pinch the left edge evenly in half, and then gently push over towards the center.
This is kind of a half-squash folding it into a triangle while sticking the edge straight up.
STEP 5: Squash fold the left edge down into a triangle
Complete the squash fold into a triangle and crease the edges.
This is simply folding the top layer into an even triangle over the lower one.
You can use a pen or a pencil to make sure it folds evenly inside.
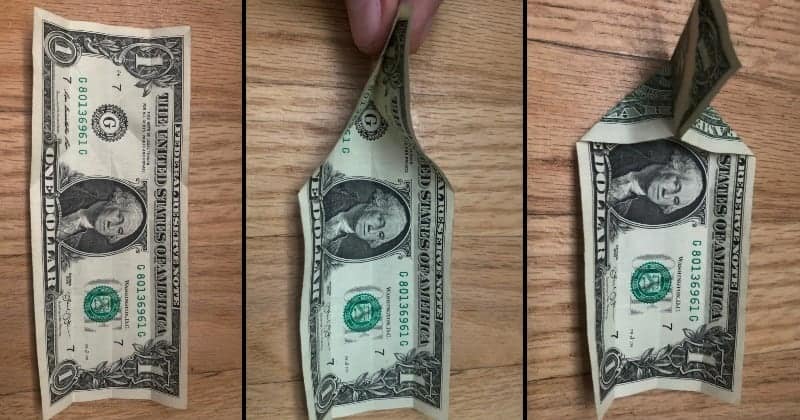
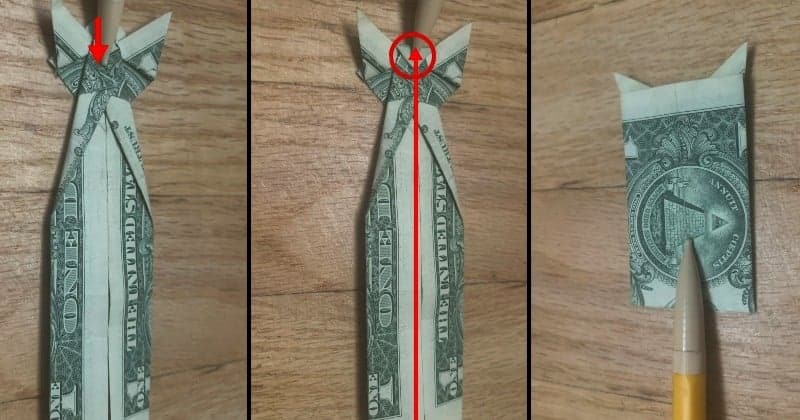
STEP 6: Pull up on the triangle and fold it to the other side
Pull up gently from the bottom of the triangle, and as it folds over to the other side.
Then close the middle edges inward as shown and flatten it well.
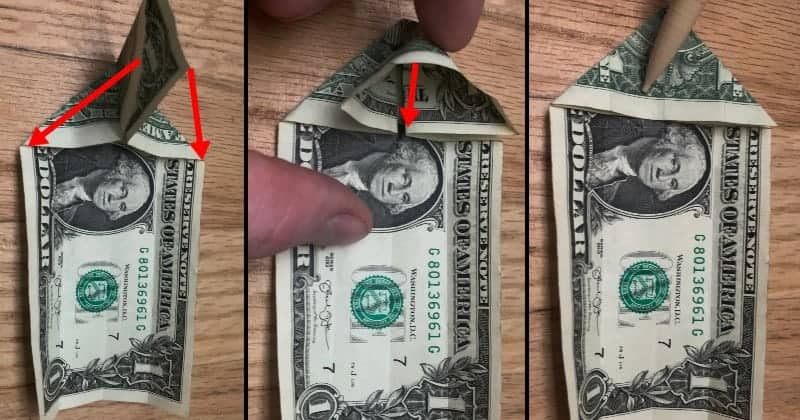
STEP 7: Fold both of the cat ears
With the triangle part at the top, fold in half from left to right lengthwise.
Fold the top left part of the triangle down towards the bottom tip.
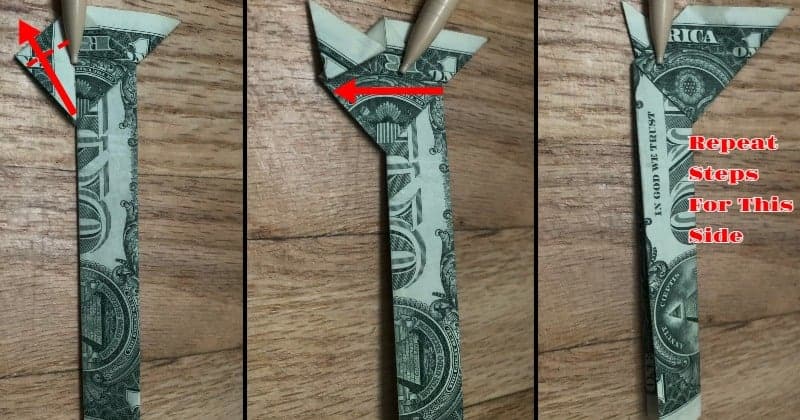
Fold that tip back partially up to make the ear.
You will then fold it lengthwise back over to repeat the process to make the other ear.
To help make them even, you can adjust them by looking at both ears from the other side.
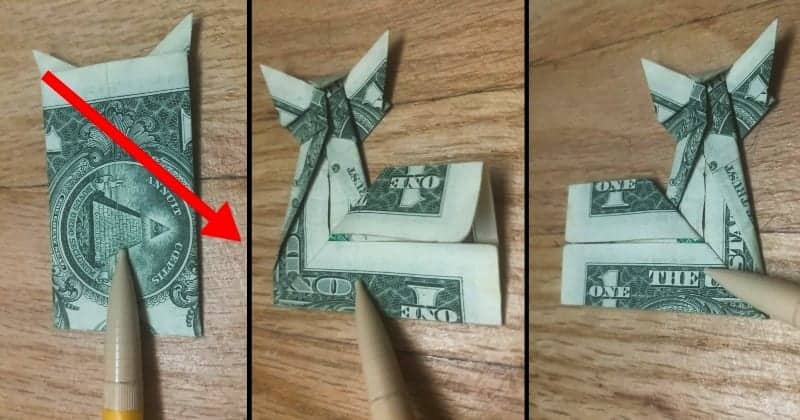
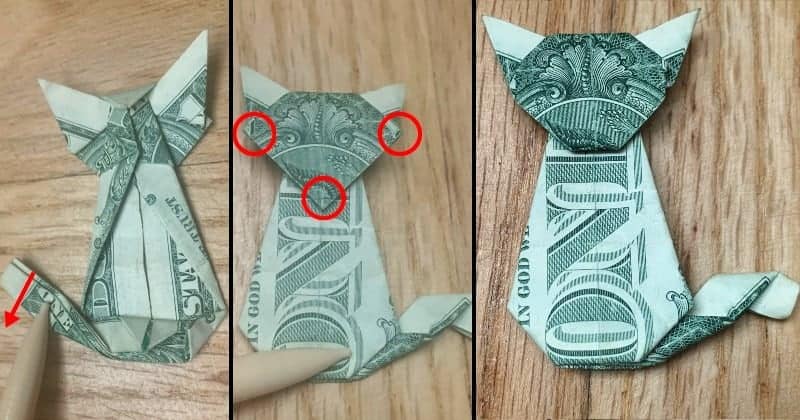
STEP 8: Shape the neck and body of the cat
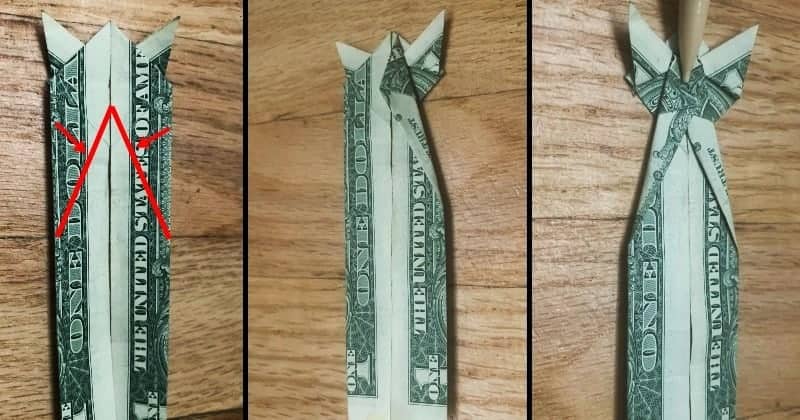
You can use the red lines provided as a guide as to where to fold or just eyeball it.
Again, you can look at the front while your folding and get both folds as even as possible.
Crease all the edges hard when you get them where you want them.
STEP 9: Fold the top tip down, then fold from bottom to top
Fold the top tip between the ears down and crease it the best you can.
Then fold the bill in half from the very bottom to the top of the head.
STEP 10: Fold the left and right edges to the meet bottom
Fold both edges one at a time to meet the bottom and crease them well.
We are first matching the left side to bottom, unfolding it, and doing the same on the right.
STEP 11: Pinch the flap in half and shape the bottom corners
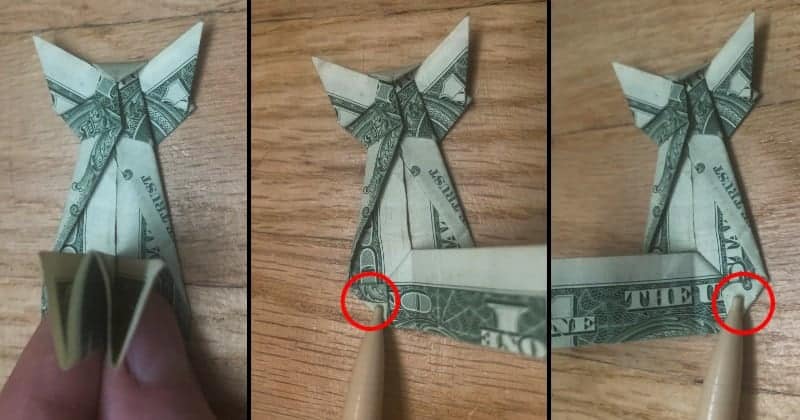
Fold the bottom flap lengthwise by pinching it like shown.
Then make small triangle folds on both bottom corners to shape it.
STEP 12: Fold the tail and finish shaping
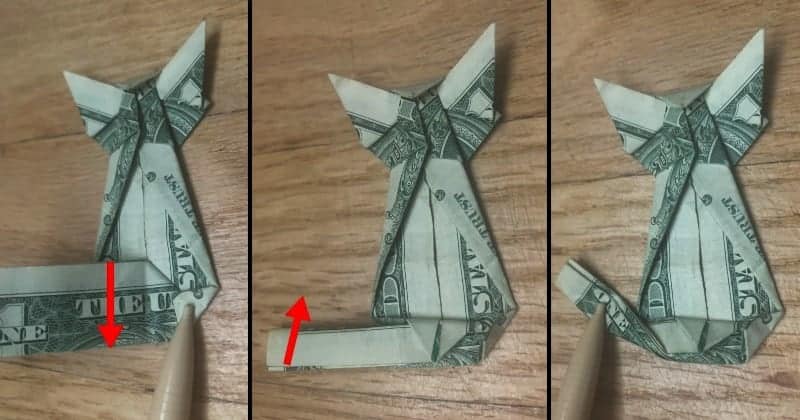
Fold the tail in half lengthwise again and crease it as well as you can.
You can shape the tail by twisting it one way then the tip part of it the other way.
The tail can be a little tricky, so just take your time and fold it till it looks good to you.
You can also shape the face, as shown by folding the tips underneath.
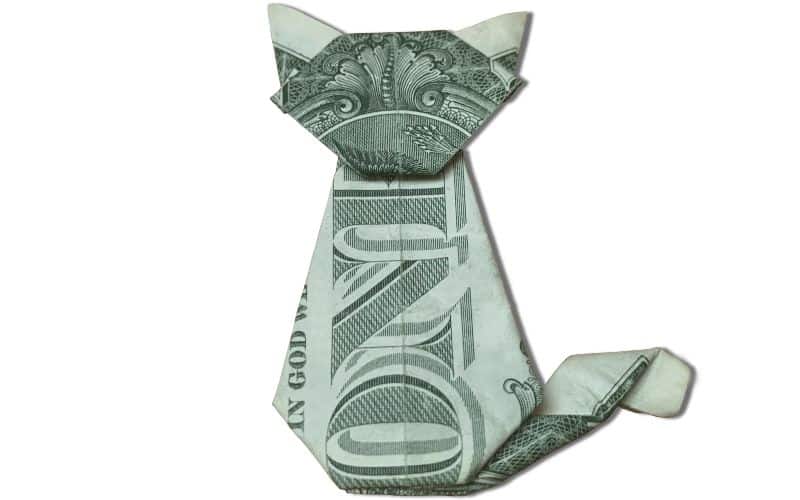
Now you know how to make a money origami cat!
Happy Folding!
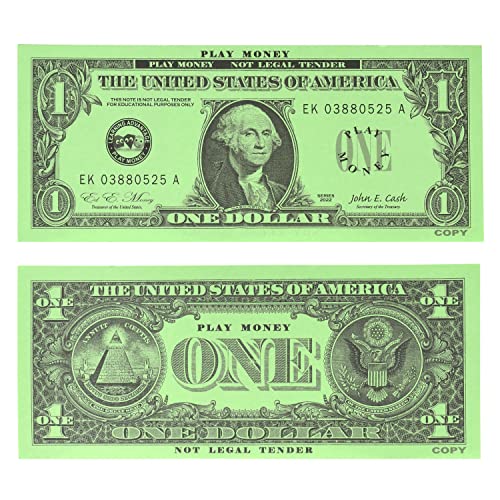
- Practice folding, or designing your own money origami with the help of fake bills
- Double-sided and Actual Size - Choose from $1, $5, $20, $50, or $100 design
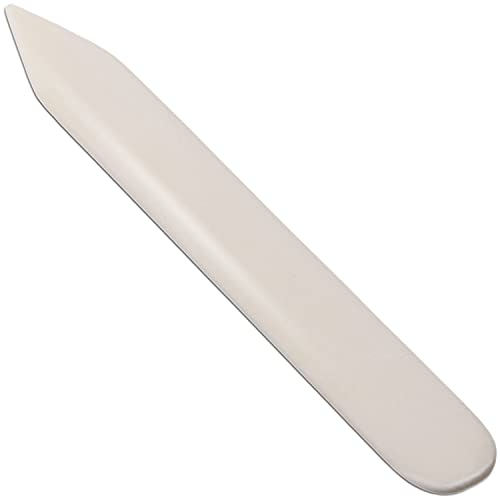
- Use this handy little origami tool to score, crease, smooth, or burnish paper, tissue, and cardboard.
- This 6-inch bone folder is made from durable genuine ox bone, not inferior plastic or wood.

- High-Quality Origami Paper 200 Sheets 20 Vivid and Vibrant Colors
- Same Color on Both Sides, Holds a Crease, Won't Curl at the Edges
- Most Popular Size 6 Inch by 6 Inch
You may also like these other money origami animal guides: