
You can use this money origami guide to make a sweet little dollar bill origami guitar.
This sweet little guitar can be used as a cool way to leave a tip or just be used as a creative way to gift money.
Do you know a lover of music or guitar? Well, just break out a dollar bill and follow along!
If you want to practice without wasting all your fresh and crisp dollar bills, consider picking up some fake money.
Here is our favorite fake folding money for origami on Amazon.
Let’s Get Started!
You may also like this other dollar bill origami guide:
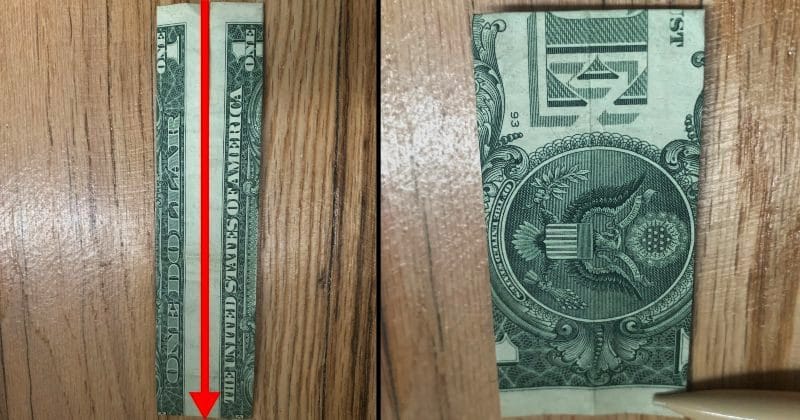
We will start folding on the front of a fresh one-dollar bill.
STEP 1: First, fold the bill in half lengthwise

You can crease the fold and then unfold the dollar bill all the way again.
STEP 2: Fold both the top and bottom lengthwise to meet the middle crease
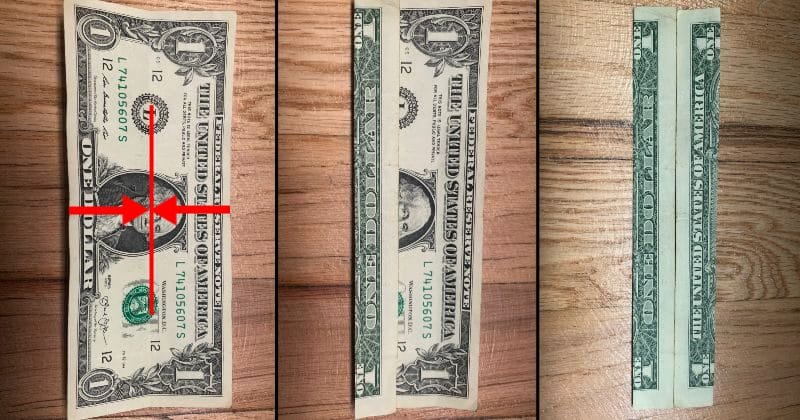
Try to fold these as evenly as possible, and once you crease both sides you can flip the bill over.
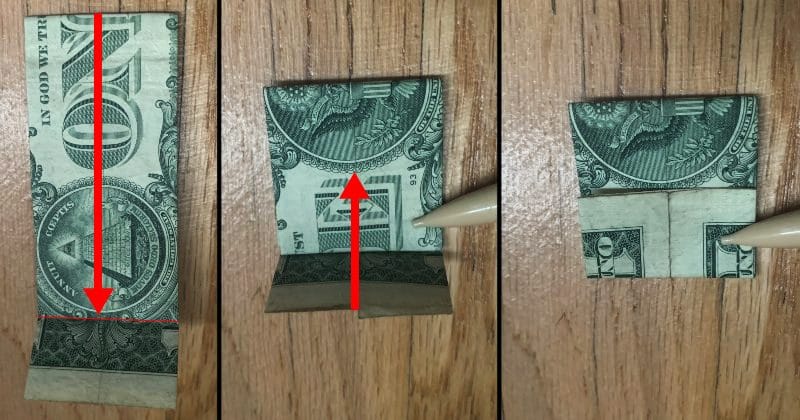
STEP 3: Fold the bill in half from bottom to top
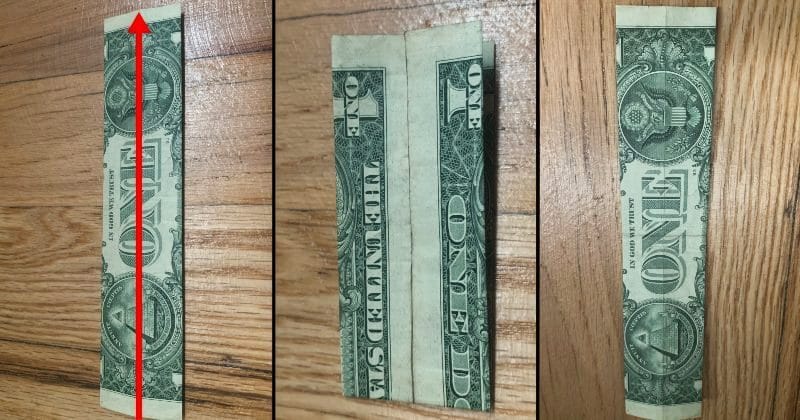
This fold is going to have the eagle at the front base of the guitar.
However, if you want the pyramid on the front base of the guitar, do this step with the pyramid at the top of the bill instead of the bottom.
STEP 4: Make two folds on the bottom half of the bill
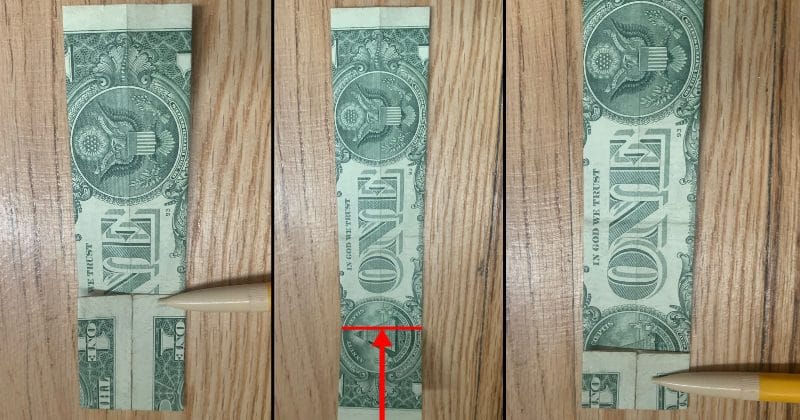
First, fold the bottom to the middle half crease, and then unfold it.
Next, fold the bottom to the crease that you just made.
STEP 5: Flip the bill over and fold it from top to bottom
Once you have creased the bill again, you can flip the bill back over.
STEP 6: Fold the top of the bill to meet the crease under the fold
You can fold the flap over the top to align the crease, but we’ll be unfolding the bill for the next step.
STEP 7: Fold the middle crease from the middle to the edge of the pyramid’s circle
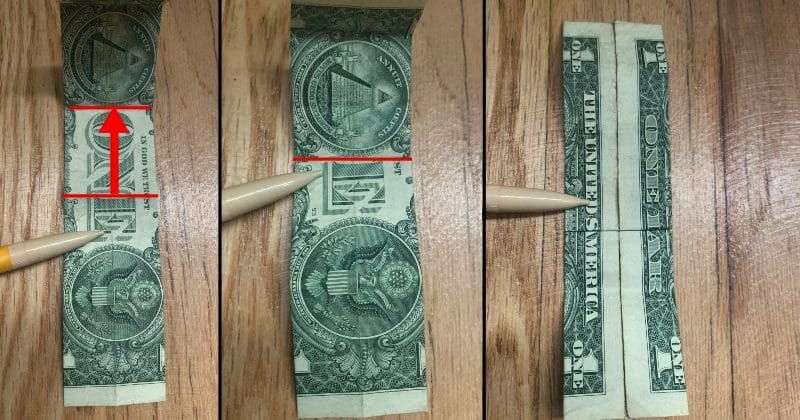
After you make the crease you can flip the bill over.
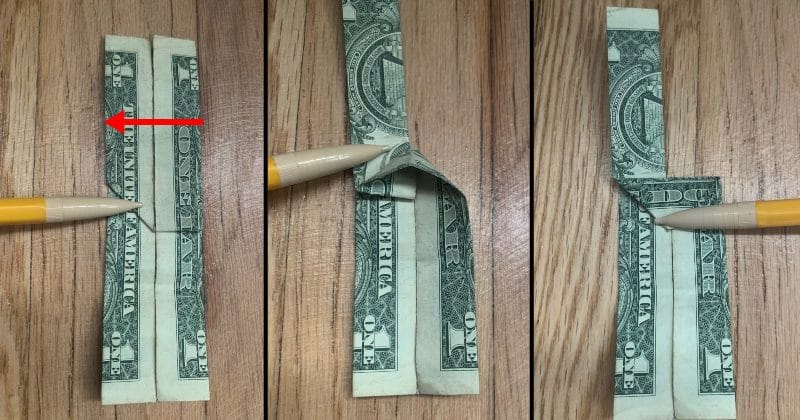
STEP 8: Begin making the skinny part of the guitar with squash folds
First, fold from the left all the way across to the right side.
When you do this you will notice a triangle will form. This is what you need to squash down.
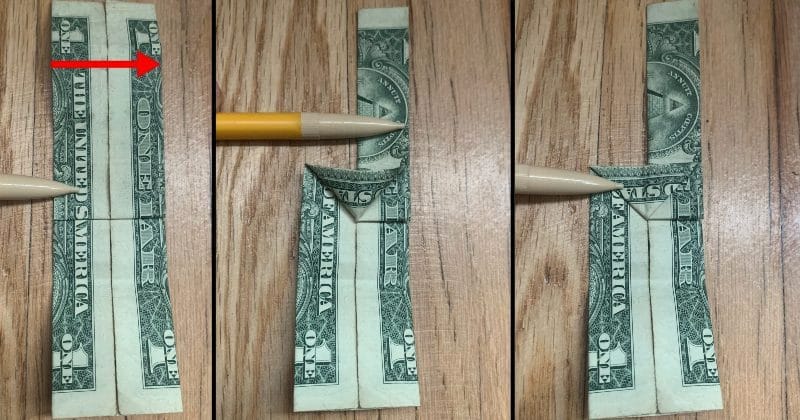
After the first squash fold, you repeat the same step from right to left.
STEP 9: Fold both sides to meet at the middle crease
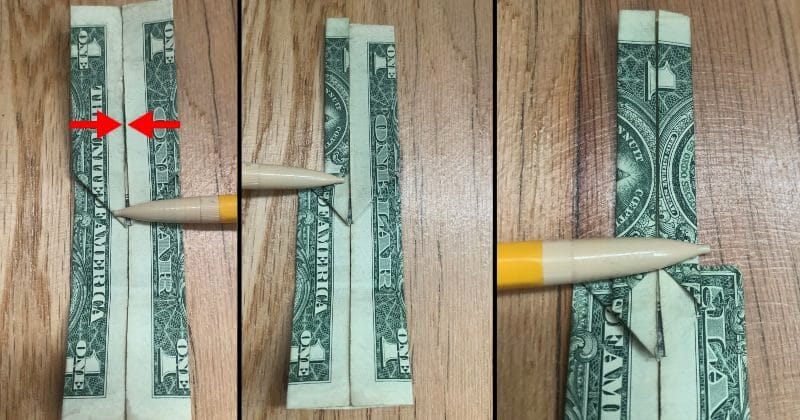
STEP 10: Fold both sides to the middle one more time
Just remember to try and keep everything as straight as you possibly can.
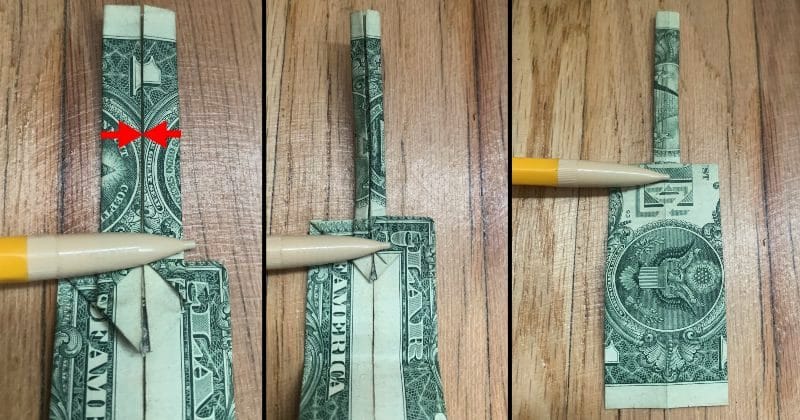
STEP 11: Somewhere just below the eagle circle, fold the bill to the back
Make the fold and then flip it over to make sure it is aligned as you crease it.
STEP 12: Open the fold you made and reverse fold it into the guitar
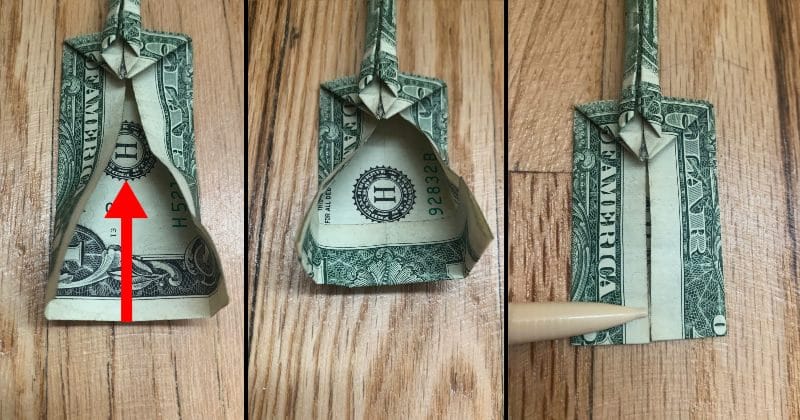
Just imagine that you’re making a fold as if everything was totally flat from the very bottom to the bottom of the letter “H” circle, then align the edges to crease it down flat.
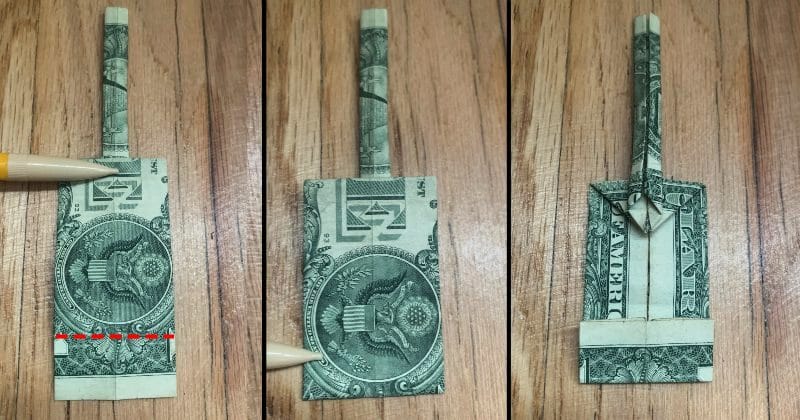
STEP 13: Make a small squash fold from the circle to the middle of the “E”
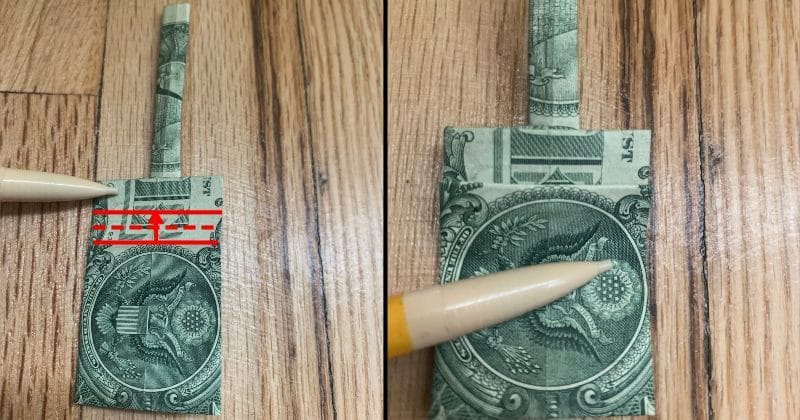
Put your finger above where you want to make the fold, then push the lower half to squash to crease it.
STEP 14: Shape the edges of the fold you just made.
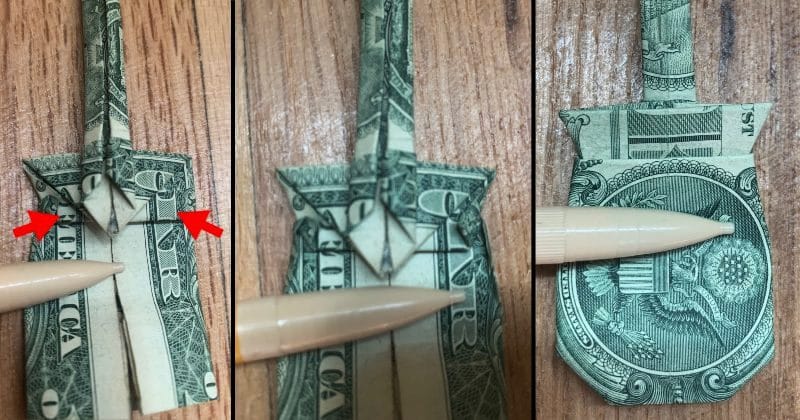
This can be tricky, so just take your time and use your fingernails to shape this part how you want.
You can start by folding the tips of where the creases meet on the back.
If you start moving them a little, you’ll figure out how to shape them to where you want them to go.
STEP 15: Make two folds to shape the frets of the guitar

You can use the above line for reference or just fold where you think it looks good.
After the first fold down, hold the top folded part with your fingers so you can make a little bend back on the tip.
STEP 16: Put the final shaping touches on your guitar
On the back, you can widen the top tip to give it a better shape.
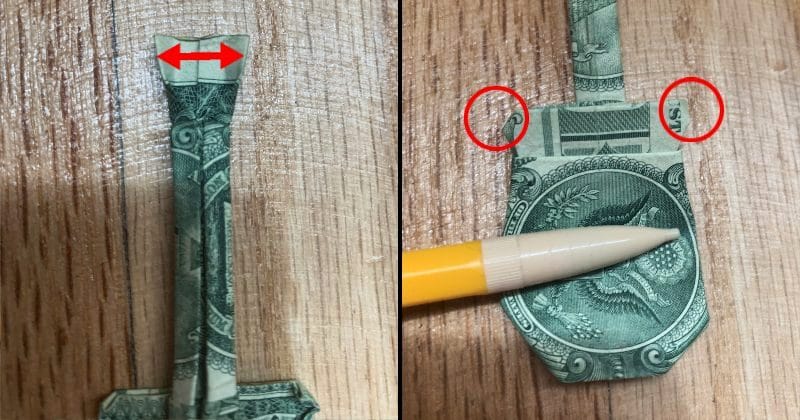
Then you can try to round the edges all around the base of the guitar to your preference.
This part can take some time. I used the eagle circle on this guitar as a basis for the shape, as you can see.
Just keep folding back the edges until it looks good to you!

Now you know how to make an awesome dollar bill guitar!
Check out some other easy dollar bill origami guides: