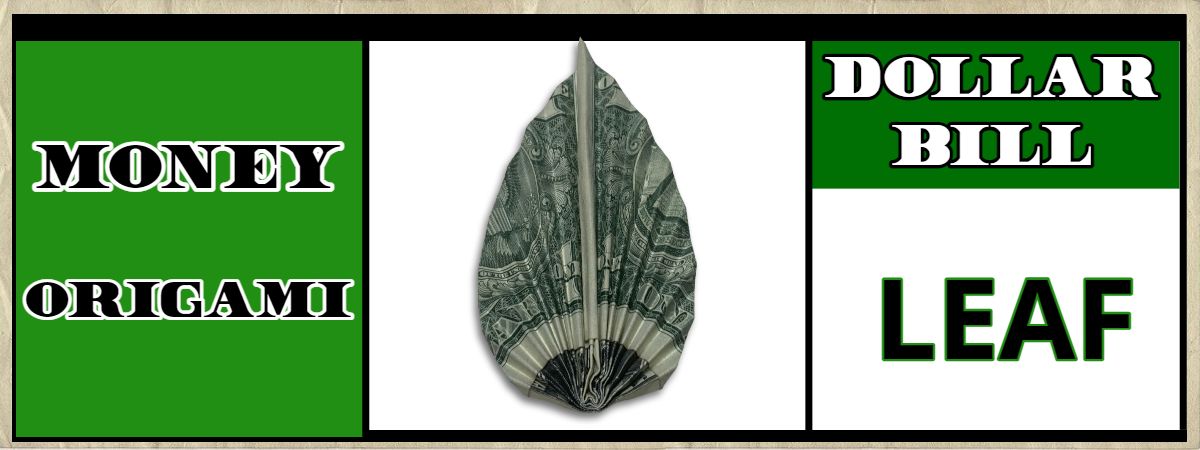
Follow this guide to make a dollar bill origami leaf for cool gifting or tipping idea.
This design is relatively easy, but it can take 15-20 minutes because there are a lot of little folds. However, you can make a quicker simplified version as explained in step four.
Be sure to check out other 50+ money origami tutorials for more folding ideas!
Let’s get started!
Pair this dollar leaf with these other guides:
You will just need one dollar and the folding will start on the front.
STEP 1: Fold both outer edges to the top
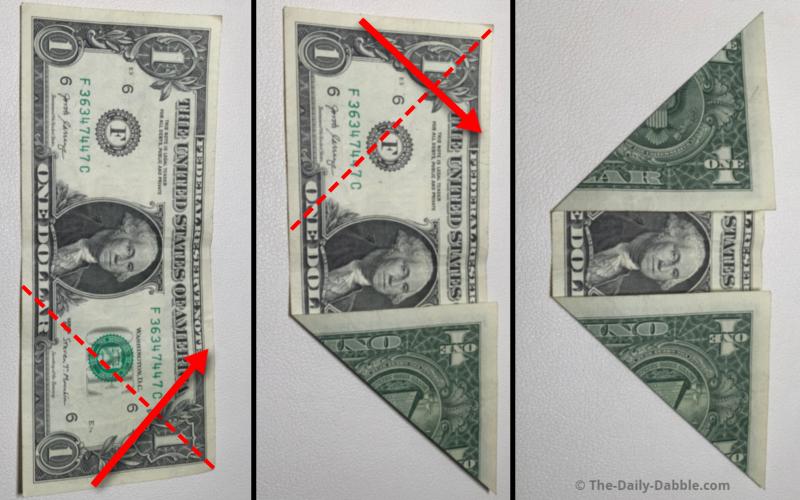
Start by taking the left and right edges up to meet the top one.
Make sure everything is nice and straight and then crease the edges well.
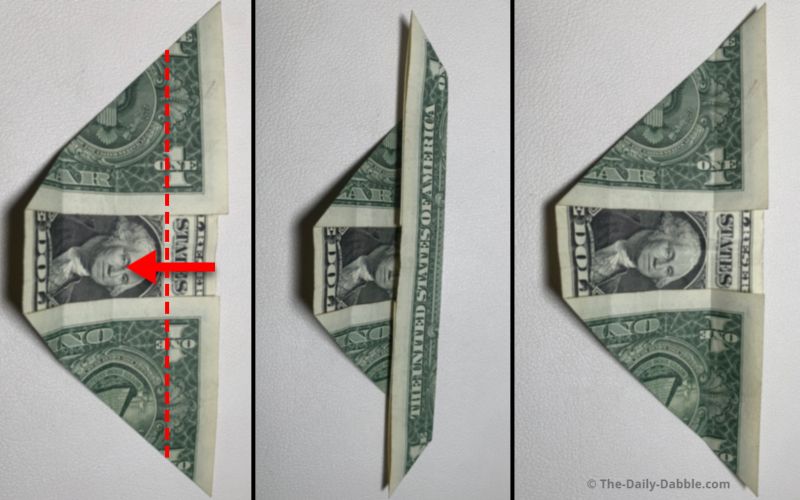
STEP 2: Fold the dollar in half from the bottom up
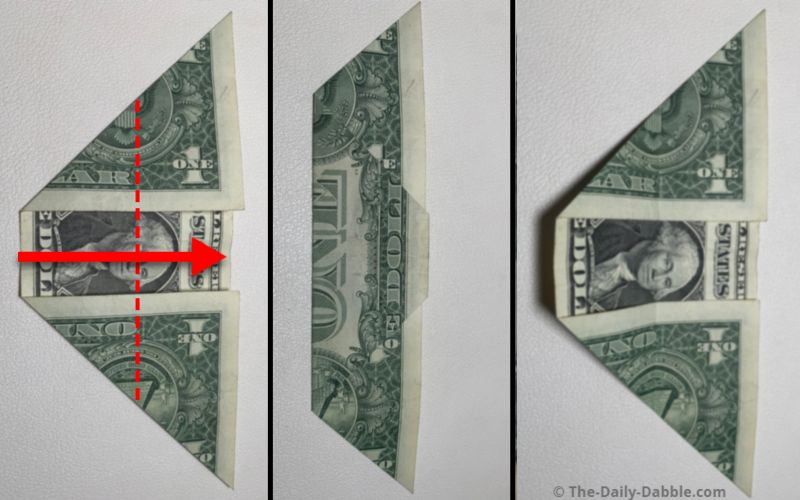
Bring the bottom little edge to the top, folding the bill in half widthwise.
Make the crease and then unfold this step.
STEP 3: Fold the bottom to the crease
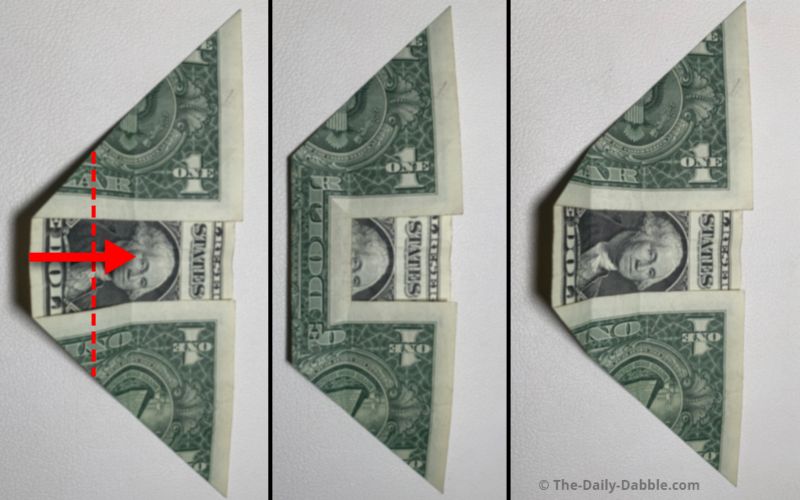
We are dividing the bill into fourths by making two more creases.
Fold the bottom to the crease made in the last step.
Press the edge well and unfold this fold.
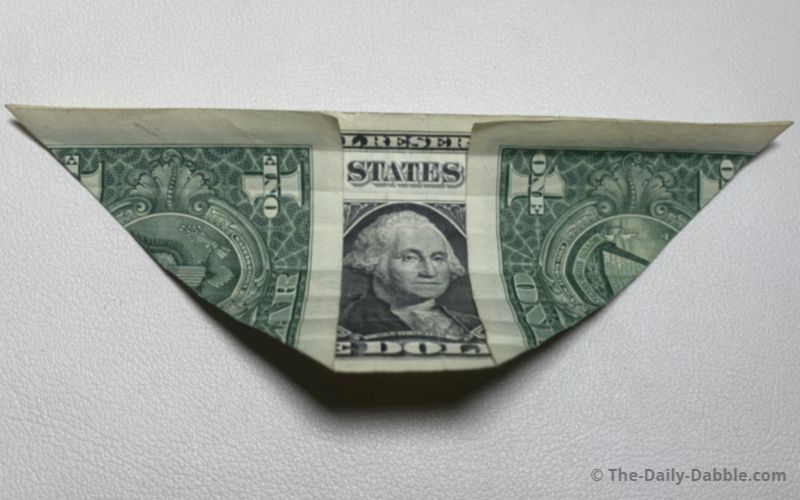
STEP 4: Take the top to the middle crease
Simply fold the top edge to the middle line and unfold it after a crease is made
NOTE: At this point if you want to fold the simplified version, skip step five.
You will be making half the fold, which is much easier and takes less time.
STEP 5: Make four more creases

Divide each section in half one more time for a total of eight creases.
Be sure to press the creases well and to keep everything nice and even.
Flip the bill over when you are done with these folds for the next step.
STEP 6: Make the first folds on the opposite side
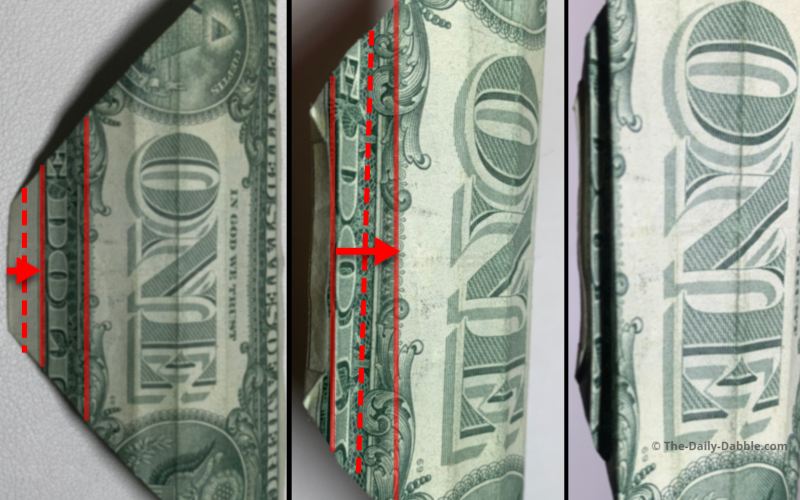
Fold the small bottom edge over to the first crease.
Press it well and keep checking everything stays aligned.
Make the first valley fold by slowly working the crease to touch the next one.
This step will take some time to keep everything even with these small folds.
NOTE: If you are folding the simplified version you use these same steps.
Fold each crease to touch the next crease, you will just have fewer folds.
STEP 7: Continue pleating all the way
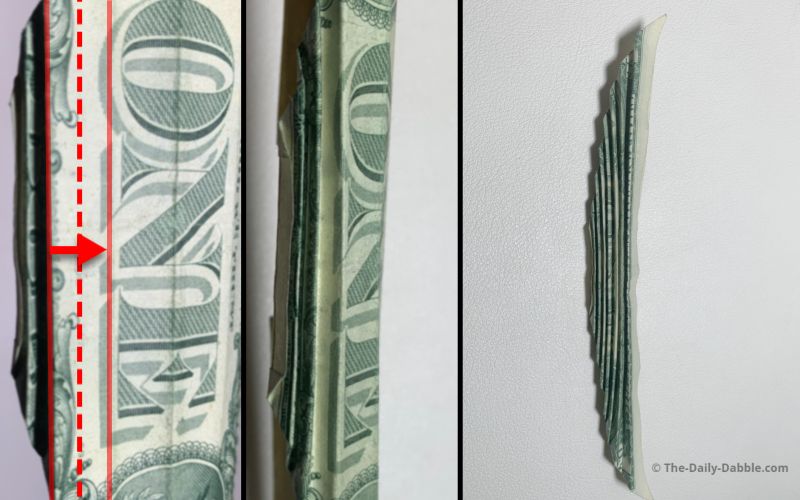
The rest of the folds will be made from crease to crease all the way up.
Pinch the folds together after each one to solidify the creases and even stuff out.
STEP 8: Open it up a bit and pinch the middle
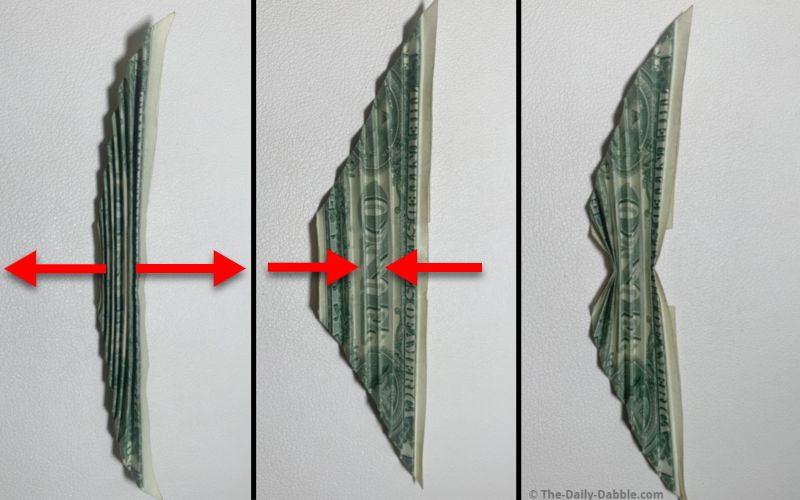
Carefully stretch the folds out and even them up if necessary.
Once you have it where you like, pinch the middle.
STEP 9: Pinch the middle while folding it together
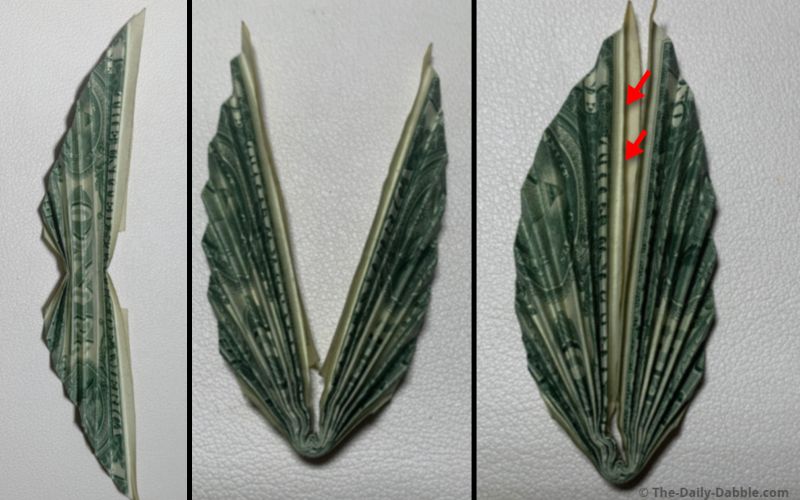
Repinch the middle and evenly bring the top edges to meet vertically.
Connect the leaf by bringing one center fold over the other.
You can open the flap as shown and slide in the whole fold from the right.
The leaf doesn’t stay together very well without a little manipulation.
To get it to hold really tight you can twist the very top point over to the other side.
Money Leaf: Front and Back
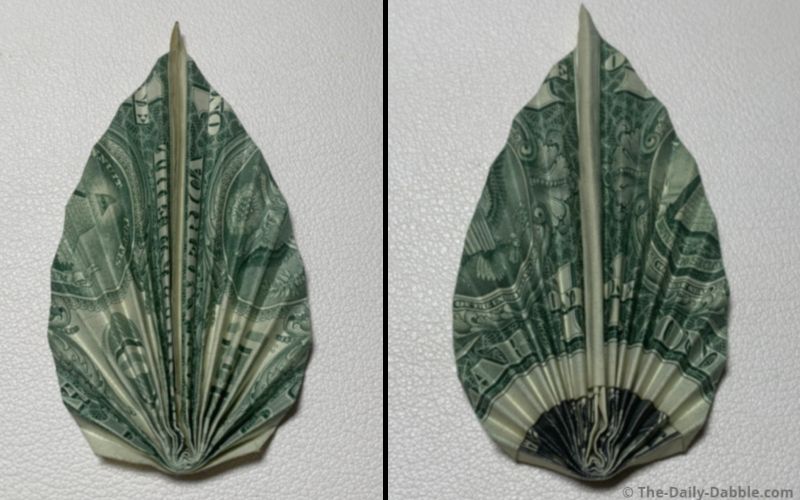
Now you know how to fold a money origami leaf!
Check out our money origami flowers that you can combine this leaf with!
Happy Folding!