Learn how to fold the letter “B” from a one-dollar bill with this detailed guide.
With this money origami letters tutorial, you can start spelling with cash.
This is one of the most challenging letters to make, but can usually be completed in under 10 minutes.
Let’s get started!
STEP 1: Fold the bill in half lengthwise
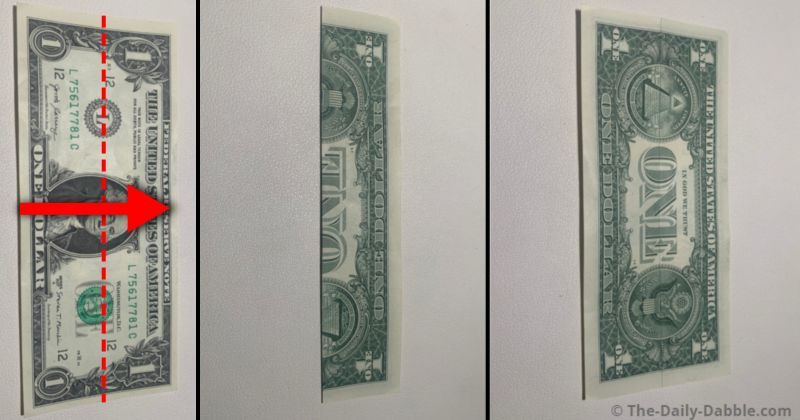
The first few steps consist of getting folding the bill into one sixth.
Start by folding the bill directly in half and then unfolding it after a crease is made.
The next step will start on the back side of the bill.
STEP 2: Fold the bottom half in thirds
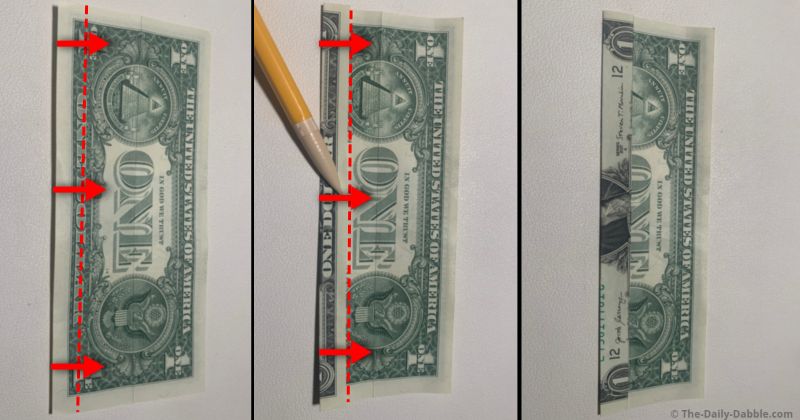
To get the lower half evenly into thirds, it will require two even folds.
The first fold’s crease will be directly in the middle of the words “ONE DOLLAR.
For the second one, simply fold it to the center line.
STEP 3: Fold the other half in thirds
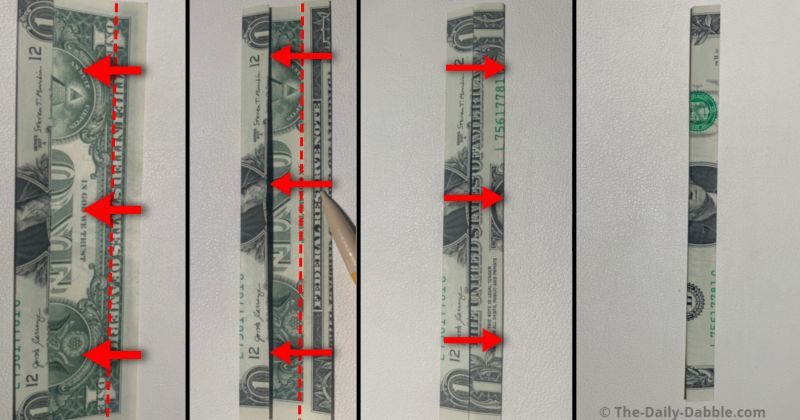
Fold the opposite half in thirds just like the previous step.
The first fold will end up touching the edge of “IN GOD WE TRUST” as a reference point.
For the second fold again, bring it to the center crease.
Lastly, fold it over on that initial middle crease to make it one skinny piece.
STEP 4: Make a diagonal fold over to the right
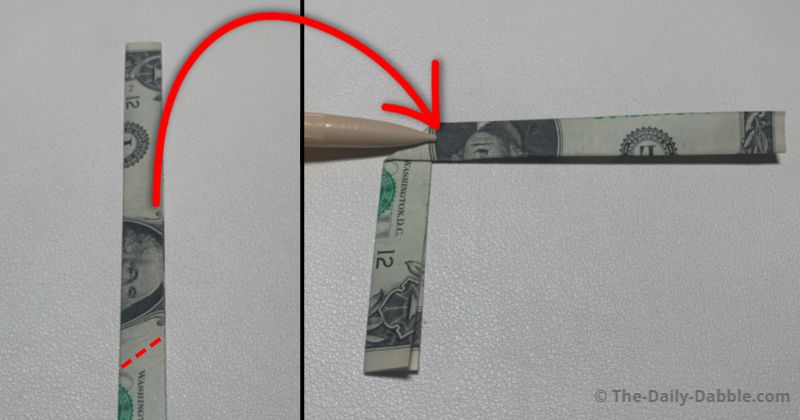
Starting on the side with the eyes, make a slanted fold towards yourself and over to the right.
The edge of the fold will be touching the letter “W” in Washington.
Make sure the fold is square and rub the folded edge well to flatten it as much as you can.
STEP 5: Bring the folded over itself

Fold the previously folded edge over and flatten it down.
Try to keep everything as even and straight as possible, and be sure to press hard on each step.
STEP 6: Fold the long side along the short one

Grab the long piece and twist it toward you to make this fold under the face portion.
Make another crease, where shown, to fold it parallel with the short side.
STEP 7: Start forming the top portion of the B
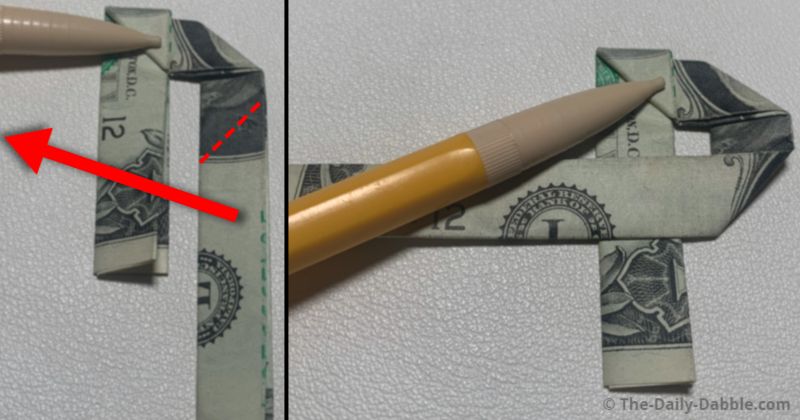
Fold the right side over the left to form the upper part of the letter B.
NOTE: Try to make everything as even as possible, but you can go back and adjust sections if needed.
STEP 8: Fold the long section under itself
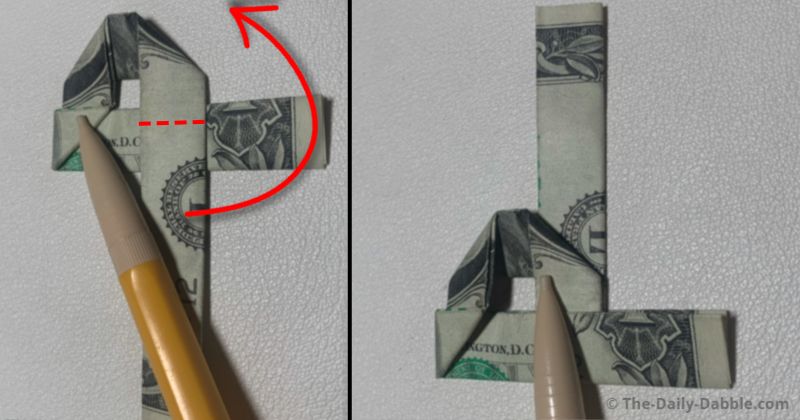
Finish the top portion of the B by folding the long piece straight under itself.
Make the crease to where you can tuck the folded end into the left side later.
STEP 9: Make another slanted fold under
Try to keep everything symmetrical as you make the diagonal crease.
Bring it straight down and parallel with the left side of the letter.
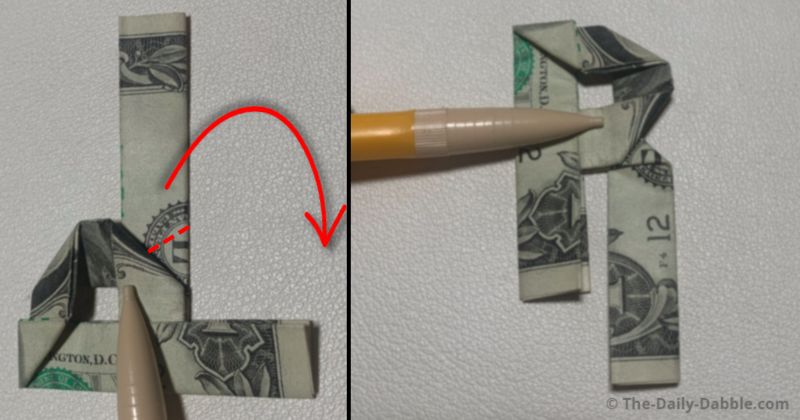
STEP 10: Make the last fold and tuck
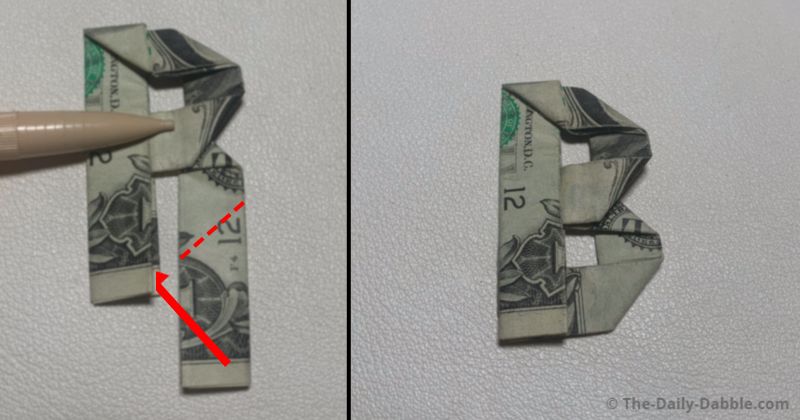
Make the last slanted crease and either tuck the tip in or underneath the bill.
Take some time to even things out as this is one of the tougher letters to get looking decent.
You can also “cheat” and put some tape on the back to hold it together if needed.
PREVIOUS: Dollar Bill Origami Letter A
NEXT: Dollar Bill Origami Letter C
ALL DESIGNS: Dollar Bill Origami Tutorials
Happy Folding!