
This guide covers exactly how to fold a dollar bill origami letter C step-by-step.
These money origami alphabet tutorials can help you spell a message for a unique gift!
The letter C is very easy to make and can be done in about 5 minutes.
Let’s get started!
STEP 1: Fold the bill in half lengthwise
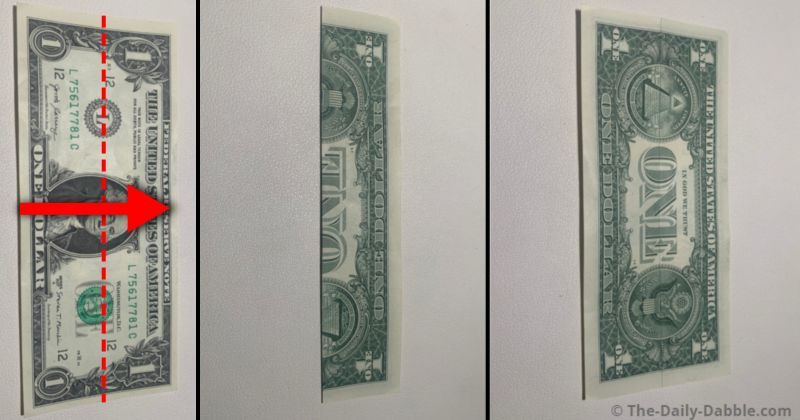
The first three steps will get the bill folded over neatly into one-sixth.
Start by folding the bill in half lengthwise to make a crease.
After the folded edge is rubbed well, open it up and start on the back side of the bill in the next step.
STEP 2: Divide the lower half into thirds
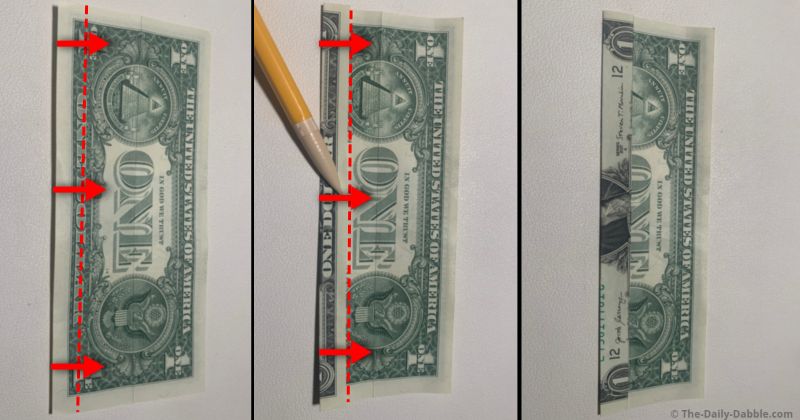
Fold the lower portion in thirds by making two folds to the center.
The first fold will crease right in the middle of the words “ONE DOLLAR”.
Use the pictures as a reference for where to fold to one the first one.
The second fold will go to the center crease line.
STEP 3: Finish folding the bill into a sixth
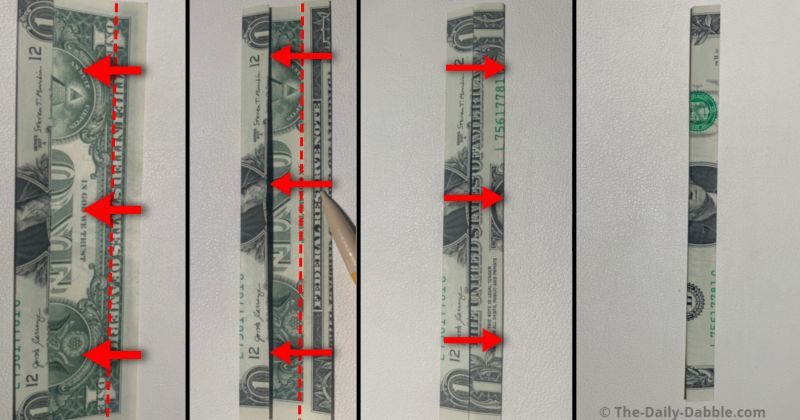
Fold the upper half into thirds and then over itself again to make one skinny piece.
The first fold will go to the edge of the words “IN GOD WE TRUST.”
After folding the second to the center crease, make one more fold to complete this step.
STEP 4: Make the first shaping fold
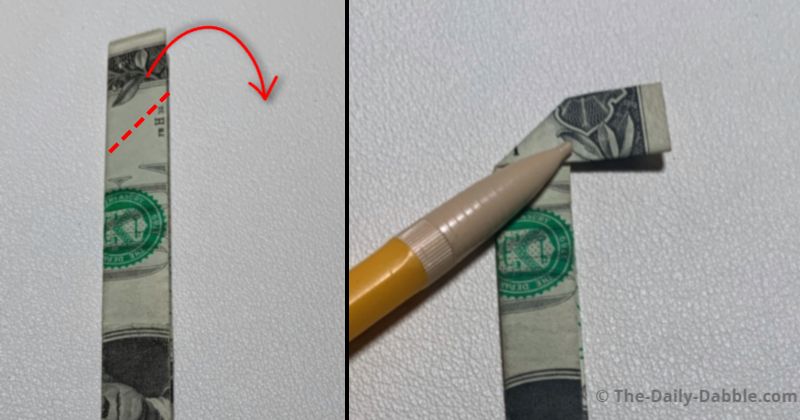
The next few steps will involve making a diagonal fold to start shaping the letter.
Make the first fold over the bill and to the right
NOTE: Be sure to rub the edge of each fold thoroughly to help keep it flat all the way through.
STEP 5: Fold the longer portion over to the right
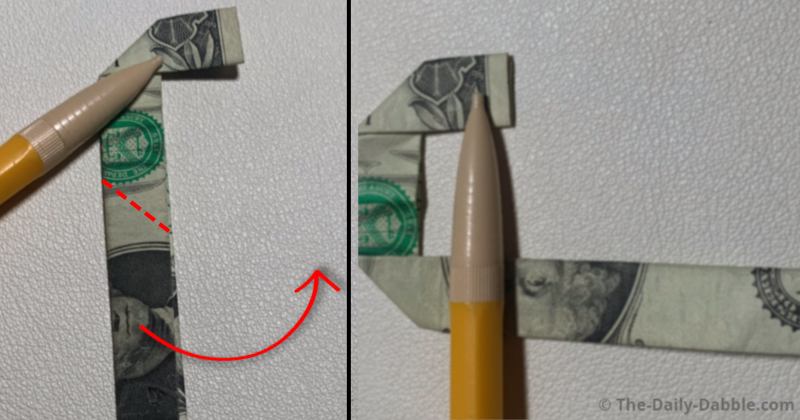
This fold will form the top portion of the letter C.
Bring the lower portion over forming a crease where shown.
The short and long sides will be parallel to make the C as straight as possible.
STEP 6: Form the bottom of the letter
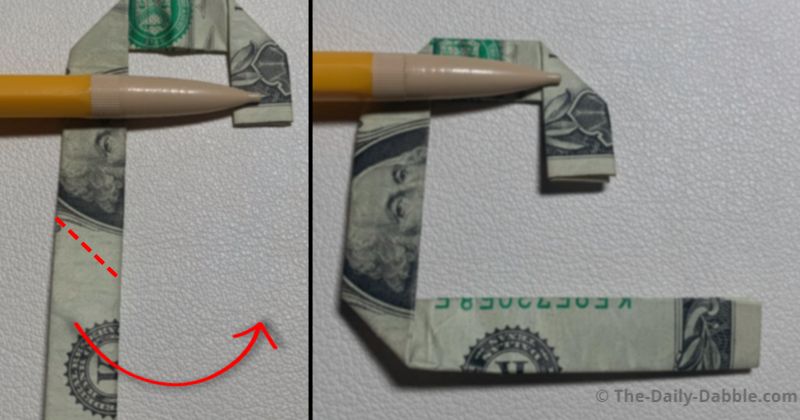
Using the picture as a guide make a crease and fold the long side underneath and over.
Remember to press the edges and manipulate it till it is nice and even.
STEP 7: Make one more slanted fold over and up
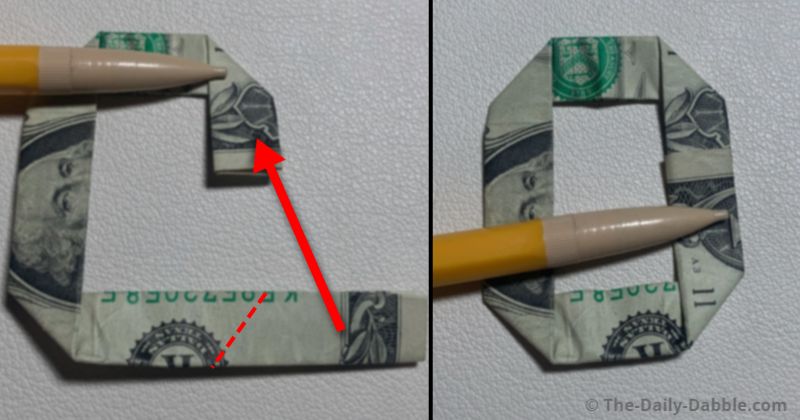
Fold the straight part one more time up and even with the fold from step 4.
In the next and final step, you can finish shaping these right flaps.
STEP 8: Shape the back to hide it from view
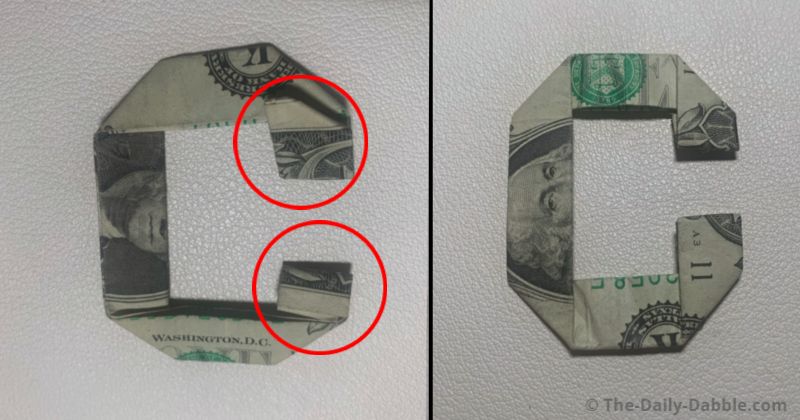
Flip the bill over and fold the right tips over so they are hidden from the front view.
At this point, you can make adjustments to straighten the bill to your liking.
To help flatten the letter, you can put it under some heavy books for a while if needed.
Now you know how to make an easy money origami letter C!
PREVIOUS: Dollar Bill Origami Letter B
NEXT: Dollar Bill Origami Letter C
ALL DESIGNS: Money Origami Folding Guides
Happy Folding!