Learn how to fold a dollar bill origami letter E with these money origami folding instructions.
This letter is not hard once you figure out the basic folds and can be made in about 5 minutes.
Use this guide to spell a name or message for a loved one as a fun and unique gift.
Let’s get started!
STEP 1: Fold the bill in half lengthwise
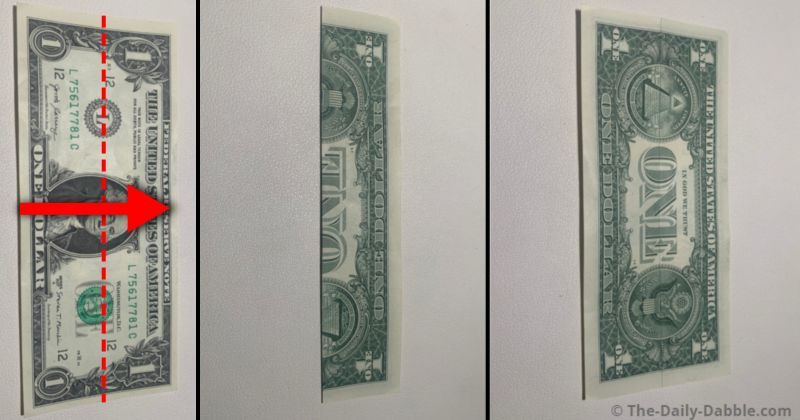
The first three steps consist of getting the bill into one third.
Start by folding the bill in half lengthwise to make a nice crease.
Open up the bill again to the backside for the next step.
STEP 2: Divide one half into thirds
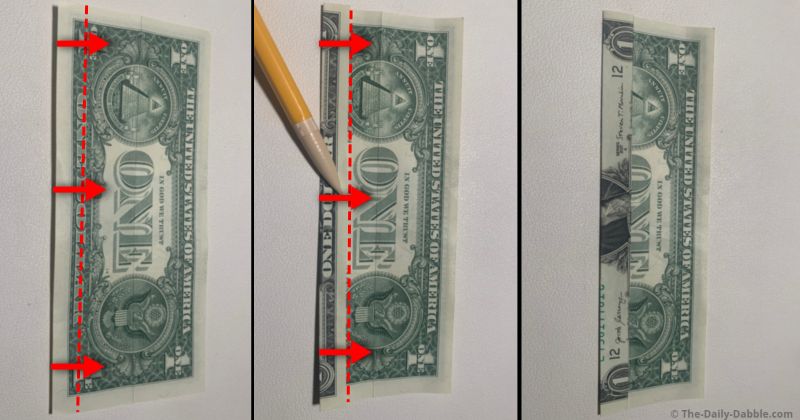
Make two folds to the center of the lower half.
The first fold will barely cover the tip of the eagle’s tail on the right, and the banner under the pyramid on the left.
For the second fold, you simply have to fold it to the center crease.
STEP 3: Fold the upper half into thirds
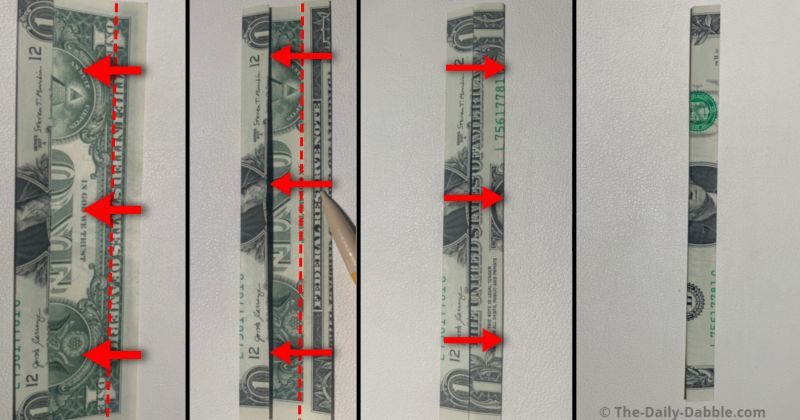
Fold the upper half lengthwise into thirds just in a similar way to the lower half.
Get the bill into one long skinny piece and then open it up so that is in one-third.
The fourth step will start with the bill in one-third on the side showing the face.
STEP 4: Make the first shaping fold
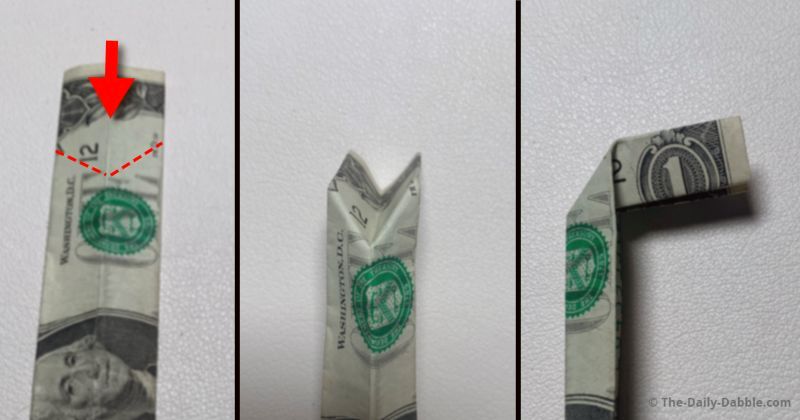
Press on the middle crease of the tip to make two diagonal creases as shown.
Flatten the fold down so that it is nice and even.
STEP 5: Make a point to the right side of the face
Make two diagonal creases, the opposite way of the previous, to form a point.
Hold the middle while pinching above to make this point.
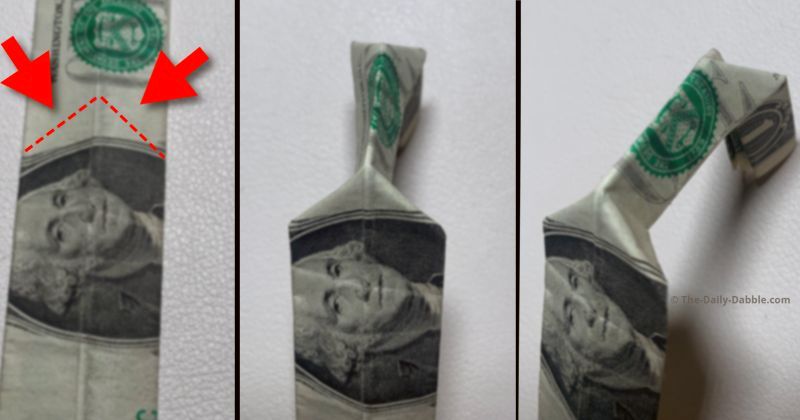
STEP 6: Mirror the last step on the left
Similarly to the previous step, make an opposite-facing point on the left of the face.
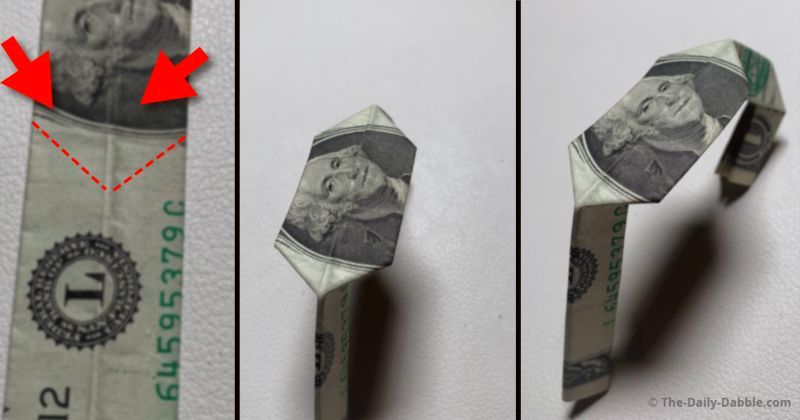
STEP 7: Fold it in half from right to left

Form the middle line of the letter E by folding the middle portion over on itself.
After the flat middle portion is halfed, continue by pressing the right flaps over the left.
STEP 8: Fold the straight portion like step 4
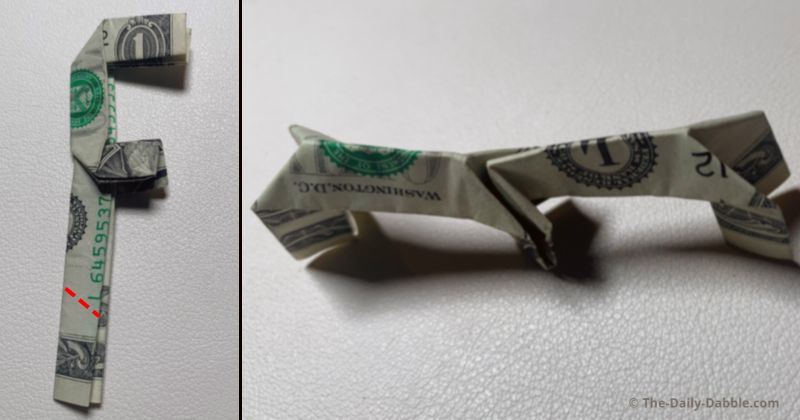
Make a slanted fold and press the center of the lower tip to even up the E.
Try to make sure everything is even and press the edges of each crease well.
STEP 9: Reverse the folds of the outer lines
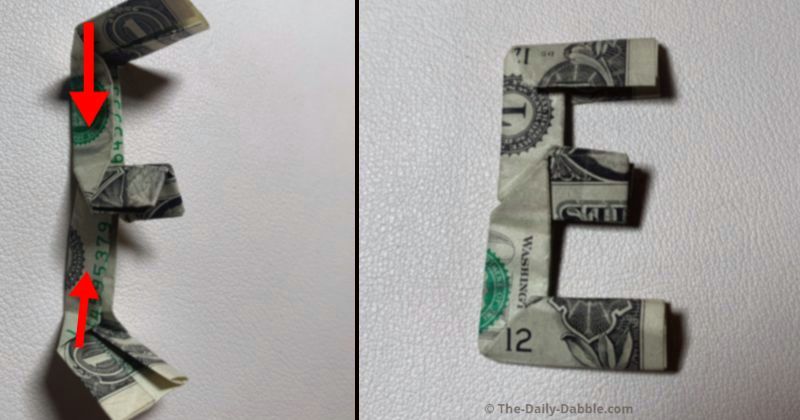
Pull the flaps of the folds made in steps 4 and 8 in and over the E to straighten up the corners.
To make this a bit clearer, the folded edges will go from being pointed out to in towards the middle line.
Now you can make an easy money origami letter E!
PREVIOUS: Dollar Bill Origami Letter D
NEXT: Dollar Bill Origami Letter F
ALL: Fold Dollars Into Letters A-Z
Happy Folding!