This tutorial has step-by-step pictures for folding a dollar bill origami letter F.
Folding the letter F is one of the easier ones to do and can be completed in less than 5 minutes.
Use these money letter folding guides to make a unique message for a fun gift!
Let’s get started!
STEP 1: Fold the dollar in half lengthwise
We will start on the backside of a dollar bill.
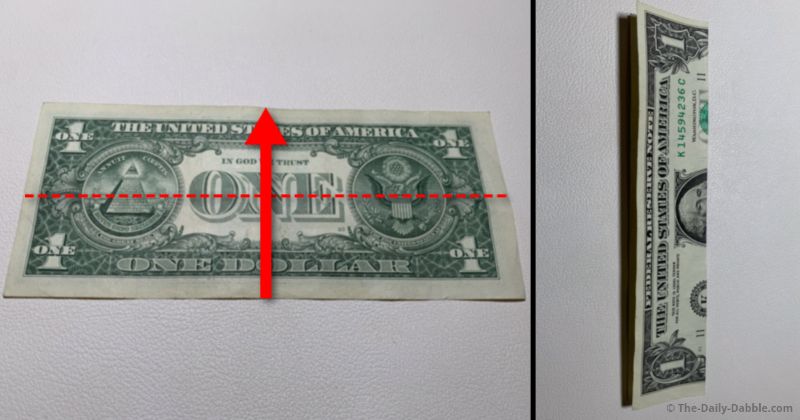
Fold the bill straight in half lengthwise and rub the folded edge to make a good crease.
Open it back up for the next step.
STEP 2: Fold the lower half twice lengthwise
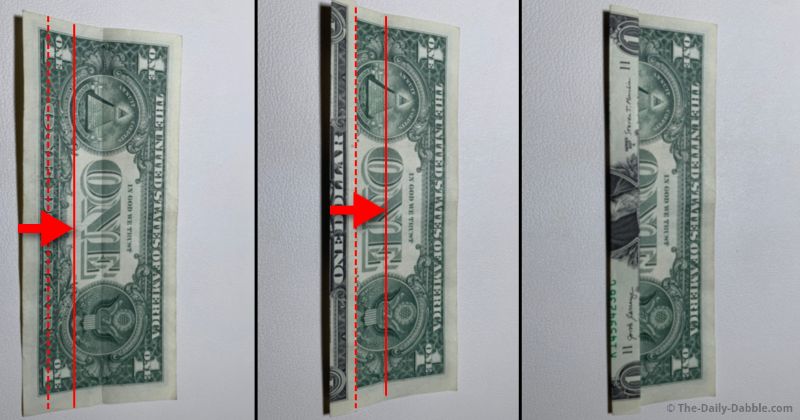
The next two steps will get the dollar into a single piece that is one-sixth of the bill.
Fold the lower half over evenly twice to the center.
Use the picture as a guide for where the crease will be on the first one.
The second fold will go to the initial increase in the middle.
STEP 3: Get the bill into one sixth
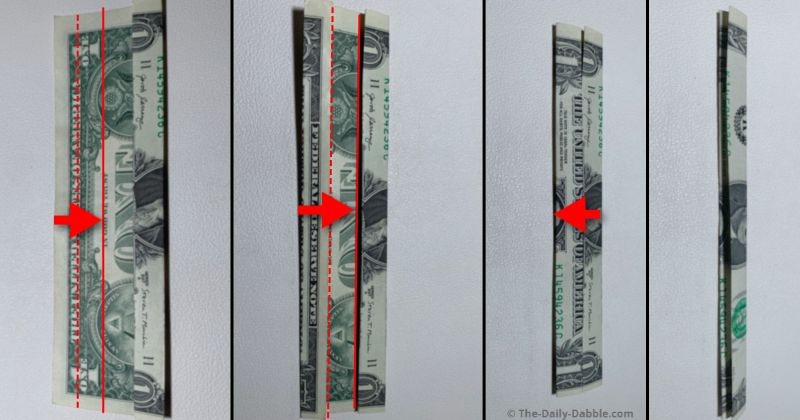
Fold the remaining flat half in a similar manner to the center.
Next, fold it over itself into one undivided skinny piece.
Once the last fold edge is rubbed well to flatten it, unfold this very last fold.
STEP 4: Make the top line of the F
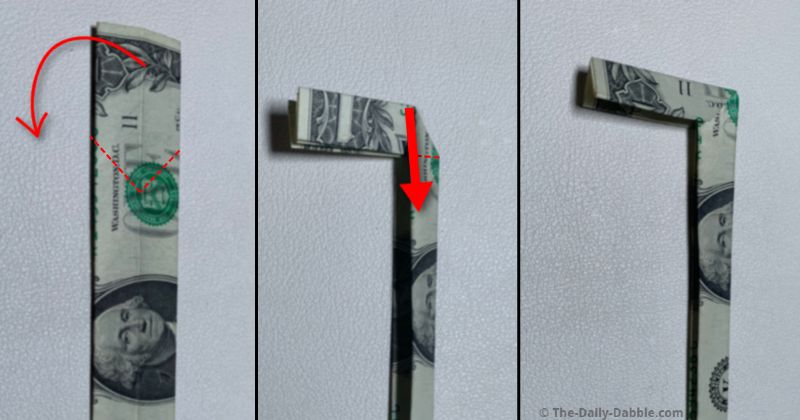
We will start on the side showing George Washington’s face.
Hold the middle and press down and in towards the V-shaped creases.
Even it out so that this edge is somewhat of a right angle.
Lastly, bring the top edges on both sides down to make a square corner top right.
STEP 5: Bring the lower part up
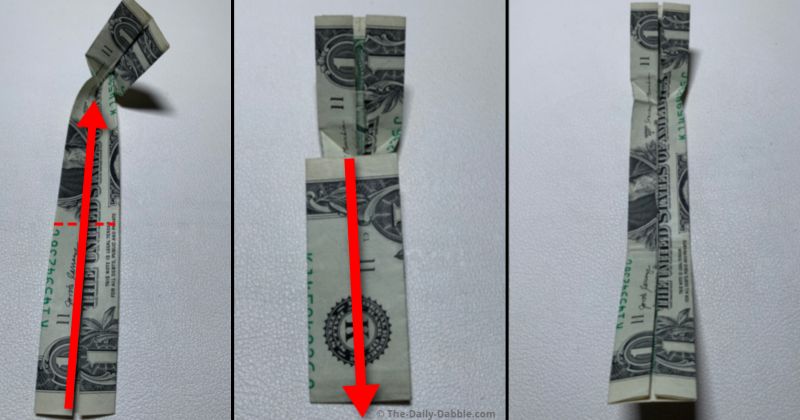
Open the longer skinny portion and fold it flat to the creases made in the last step.
Flatten the crease well and then open it back up.
STEP 6: Fold the lower end like step 4
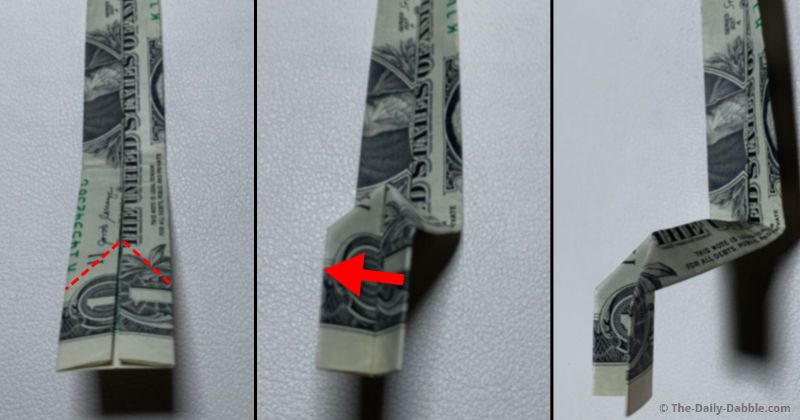
This line will be the lower of the letter F so it will be shorter.
Make the fold just like in step with the creases pointing to the center.
STEP 7: Finish the letter F
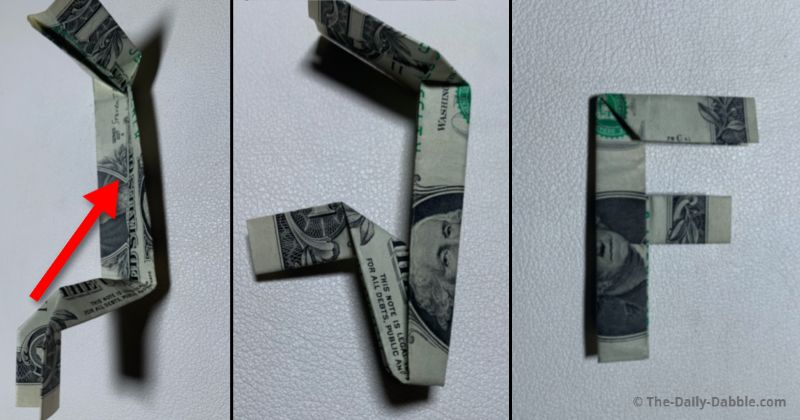
Bring the lower portion inside the middle and then flatten everything to form the letter.
At this point, as not every fold will be perfect, you can straighten and flatten the F.
Putting the letter under something heavy like a few books for a while can help.
That’s how you make an easy money origami letter F!
PREVIOUS: Dollar Bill Origami Letter E
NEXT: Dollar Bill Origami Letter G
ALL: Money Origami Alphabet Letters
Happy Folding!