
In this tutorial, we will cover how to fold a dollar bill origami letter M in a few minutes.
This is an easy design with detailed pictures to help with eight guided steps.
You can use these money letter folding guides to spell a message for a fun gift.
Let’s get started!
STEP 1: Fold the bill in half lengthwise
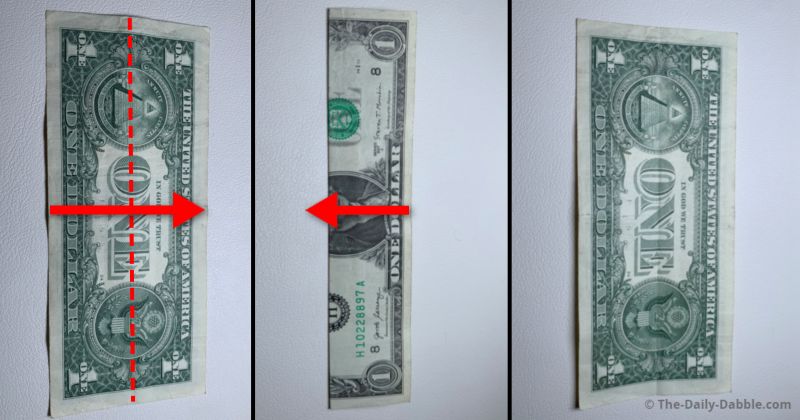
We will start on the back of a one-dollar bill for this letter.
Start by folding the dollar in half lengthwise.
Press the folded edge all the way across to make a nice crease and then unfold it.
STEP 2: Make two folds to the center
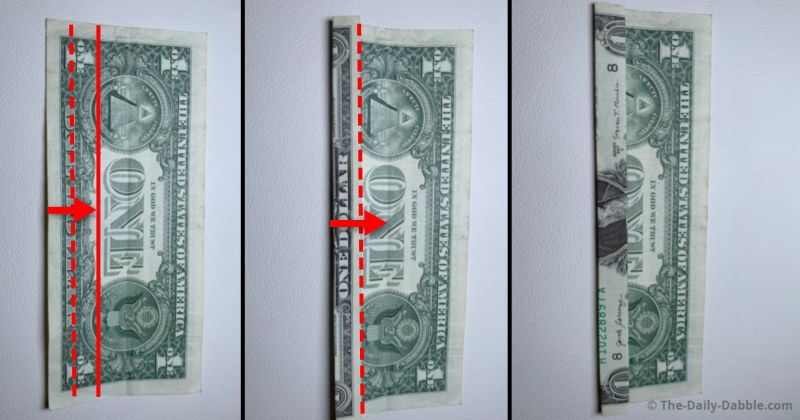
Fold the lower side in thirds by making two even folds to the middle crease.
The solid line can give you an idea of where to fold to and the dashed line is where the crease will be.
STEP 3: Fold the opposite side the same way
Make another two even folds to get to the center crease line.
Flip the dollar over to the flat side for the next step.
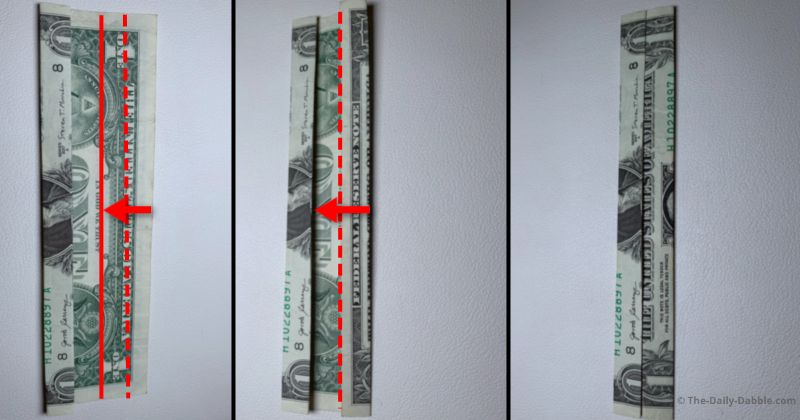
STEP 4: Make two creases pointed in
Make one fold with two creases by pinching and pushing the left side in a bit.
This is how all the remaining folds will be done so once you get a hang of it it will be smooth sailing the rest of the way.
STEP 5: Make two creases on the other side
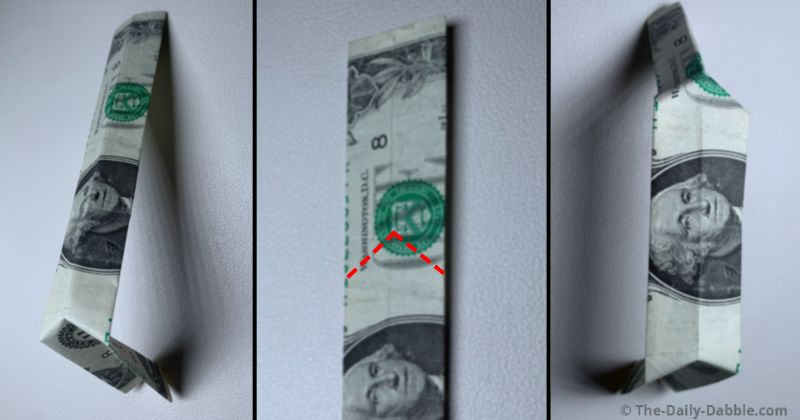
These folds will make two more creases pointed the other way on the other side.
Once you have pinched the folds a bit to ensure the creases are made you can flatten the bill.
STEP 6: Fold the bill in half from left to right
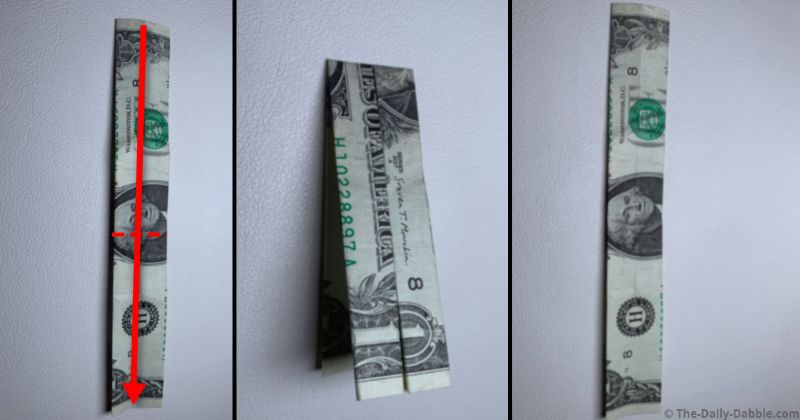
Match the left and right edges to make a vertical crease in the center.
This fold is just to help with the final shaping of the letter.
STEP 7: Make another two creases in the center
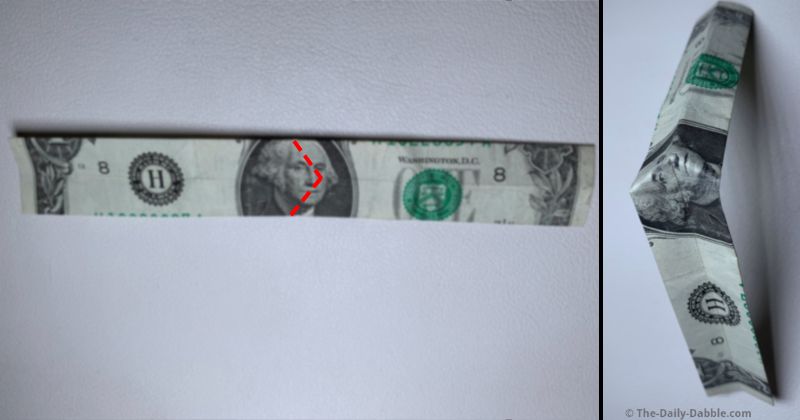
Just like in previous steps, make these last two creases in the center.
These creases will be pointed to the right as shown.
After the folds are made you can lay the bill flat to start the next step.
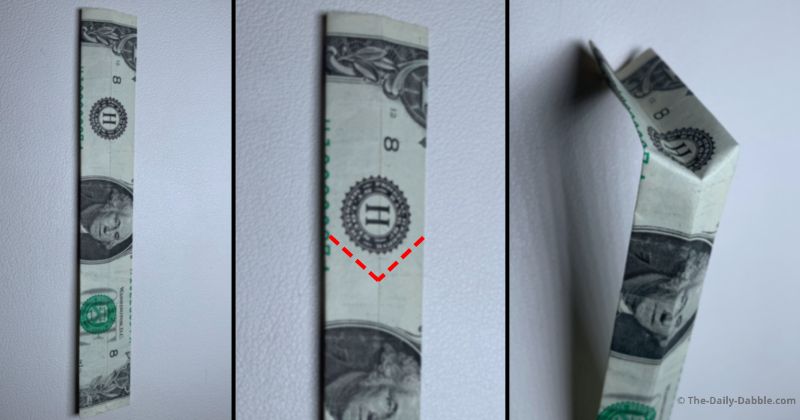
STEP 8: Close and flatten the letter M
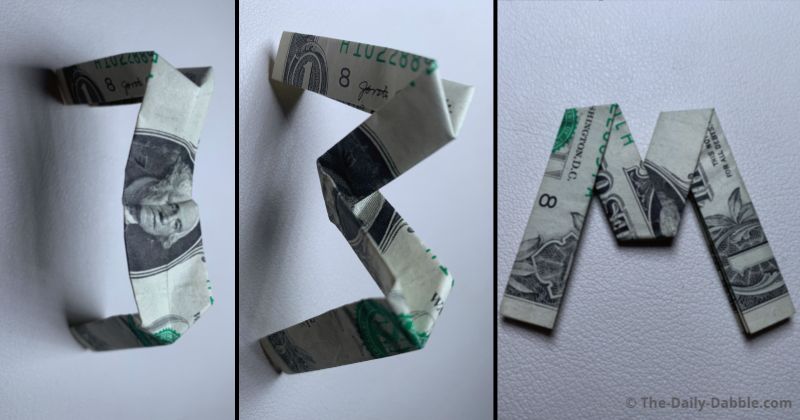
Start by refolding the two outer creases made in steps 4 and 5.
Next, remake the center crease made in step 7 and close it partly up.
Lastly, flatten the letter and even it up as needed.
Now you know how to make a money origami letter M!
PREVIOUS: Dollar Bill Origami Letter L
NEXT: Dollar Bill Origami Letter N
ALL: Money Origami Alphabet Letters
Happy Folding!