Follow this guide to learn how to make a dollar bill origami letter R.
This guide is pretty straightforward and will take about 5 or more minutes to follow.
If you are looking to spell a message or name for a gift, we have dollar-folding tutorials for each letter.
Let’s get started!
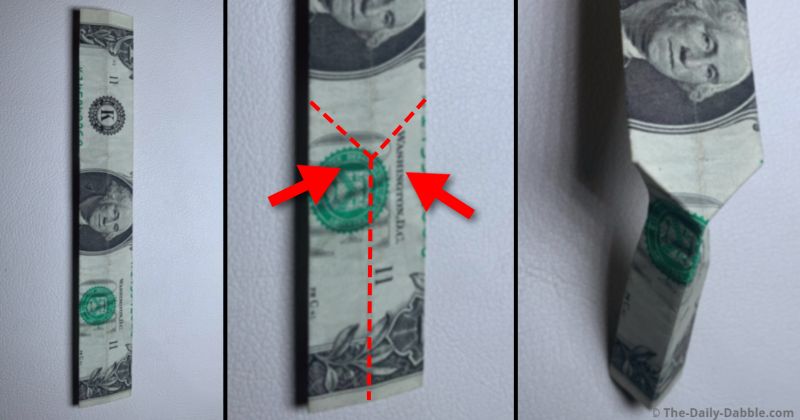
STEP 1: Fold the bill lengthwise in half
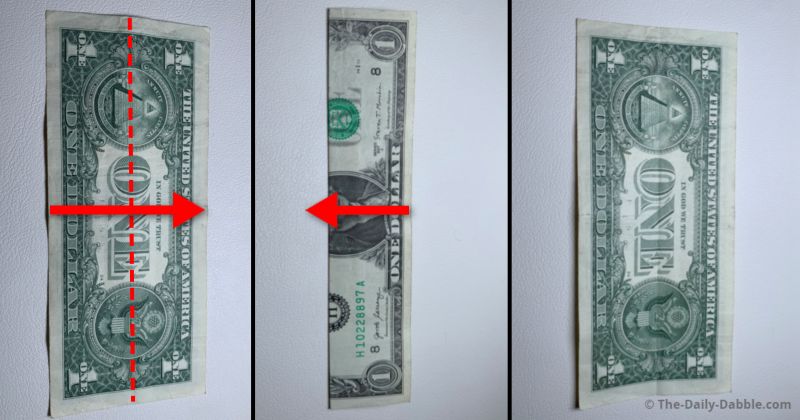
For the letter R we will start on the back of the bill and simply fold it in half.
Make a direct lengthwise fold to make a crease in the center.
Once the edge is pressed to make the visible line, open the fold up.
STEP 2: Make another two lengthwise folds
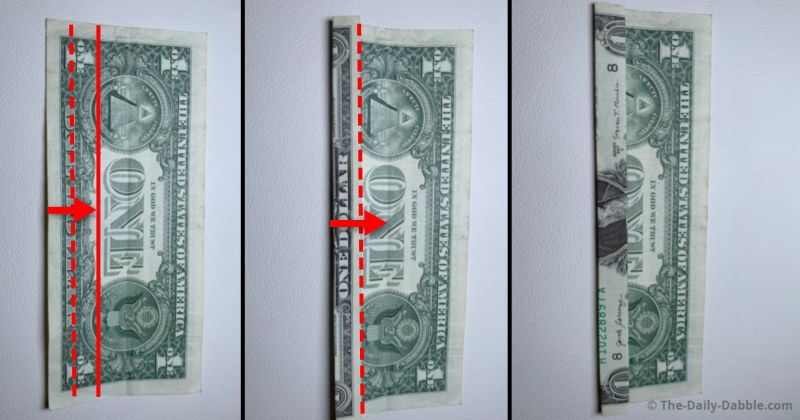
Starting from the bottom, make two folds as even as possible.
The solid line can give you an idea of where to make the first fold two.
Next, take that folded edge to the center crease line.
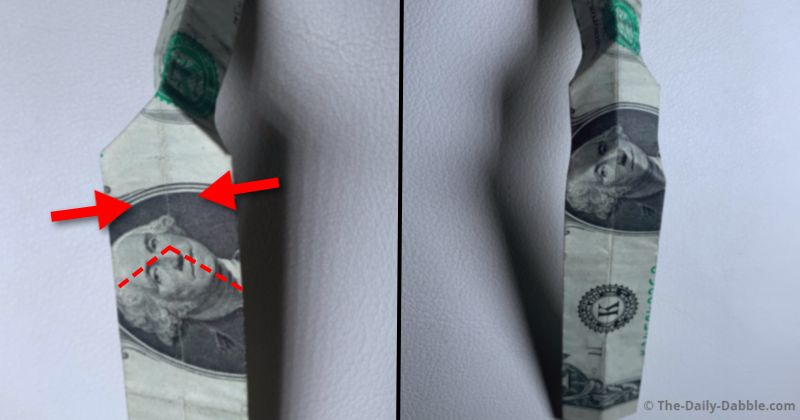
STEP 3: Mirror the folds on the upper half
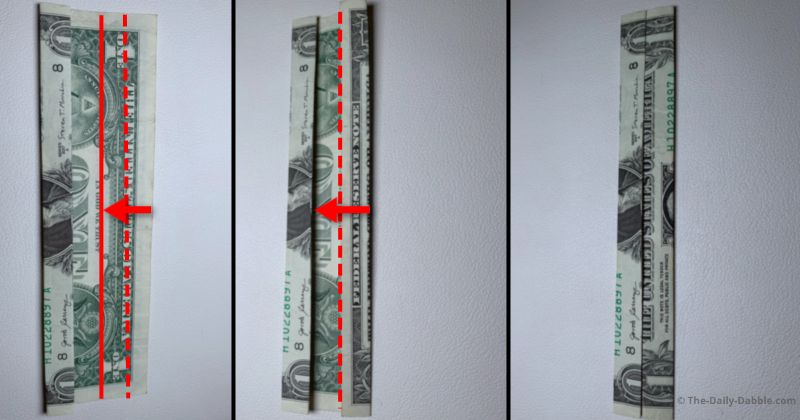
Starting from the top now, make two folds to get to the center.
Press the edges of each fold well to help everything stay flatter in the end.
STEP 4: Make a pointed crease on the right side
Hold the middle and pinch the end in to form the creases as shown.
Use the middle horizontal crease line that is already there to bend the end.
STEP 5: Make another crease further left
Using the same technique as before, make another similar style crease.
Leave the left end unfolded for now as we are going to make another fold like this.
STEP 6: Make one more point the other way
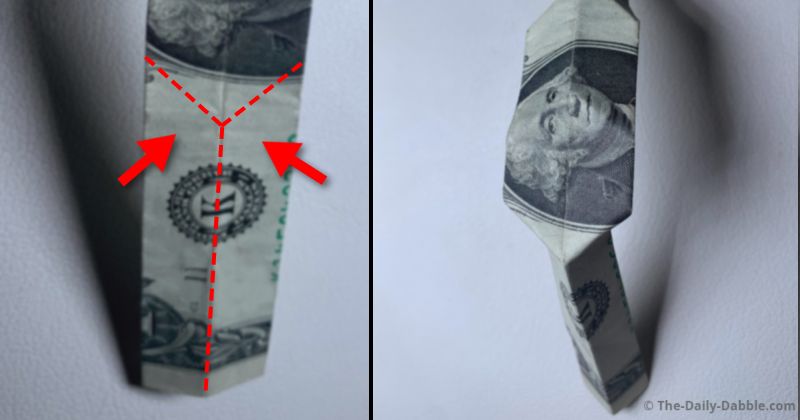
Further to the left, make an outward pointed crease.
Pinch the end in as shown to prepare to close and finish shaping the letter.
STEP 7: Close the flaps and bend the long end
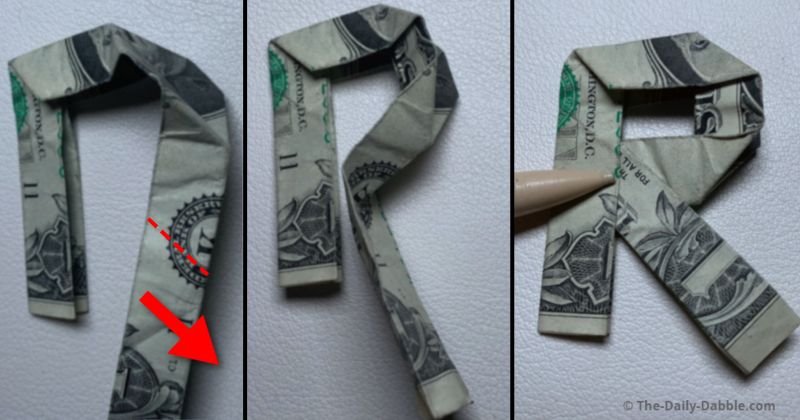
Start by bringing the top center flaps of the R down.
Next, take the long side and bend it until it is at the angle shown.
Take some time to get this one right if your length seems a bit off.
The upper right flaps close outwards, so the opposite of the top center ones.
STEP 8: Shape and even the letter
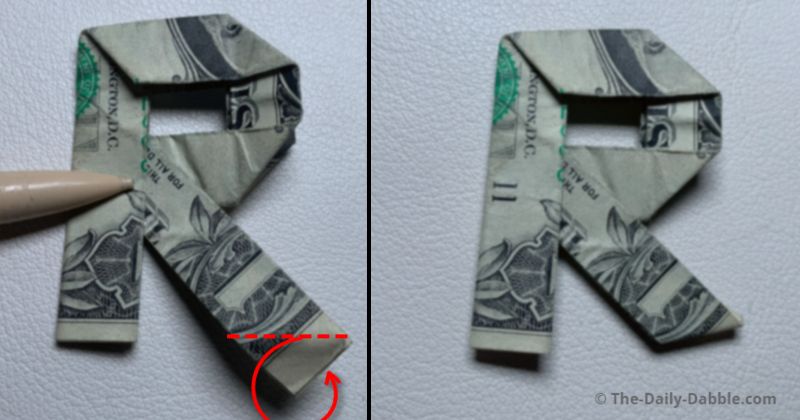
Even flatten the letter as needed if it looks a bit off.
You can make one last fold to shape the bottom if desired.
To help keep everything in place you can put the bill under a heavy book or use a little tape.
Now you know how to make a money origami letter R!
PREVIOUS: Dollar Bill Origami Letter Q
NEXT: Dollar Bill Origami Letter S
OTHER DESIGNS: DIY Money Origami Folding
Happy Folding!