This guide shows how to fold a money origami letter S in nine detailed steps.
Spell a special message like “Merry Christmas” for a fun to give the gift of cash!
Learning how to fold one of these letters usually takes about 5 minutes.
Let’s get started!
STEP 1: Fold the bill lengthwise in half
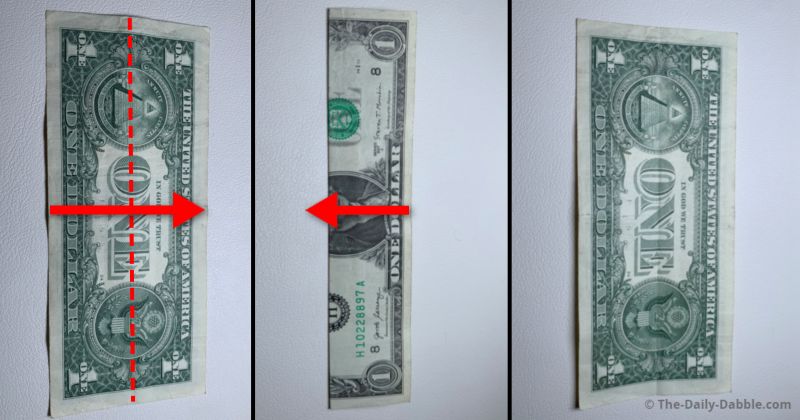
We will begin on the back of a one-dollar bill for this letter.
Fold the bill in half lengthwise to make a crease and then unfold it.
Rub the edges of each crease in this guide to make them visible.
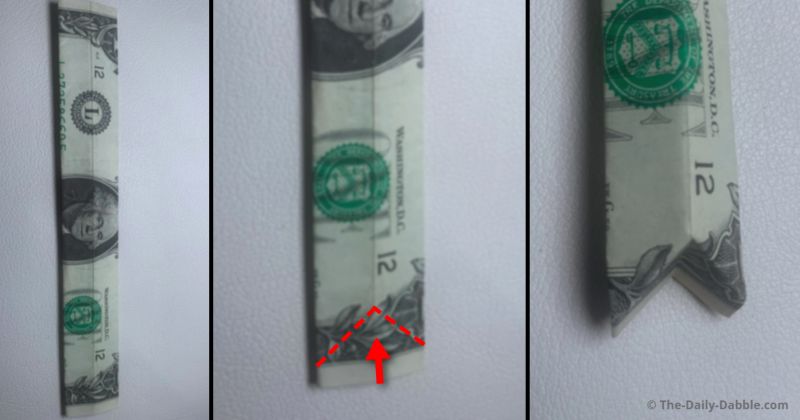
STEP 2: Fold one half into thirds
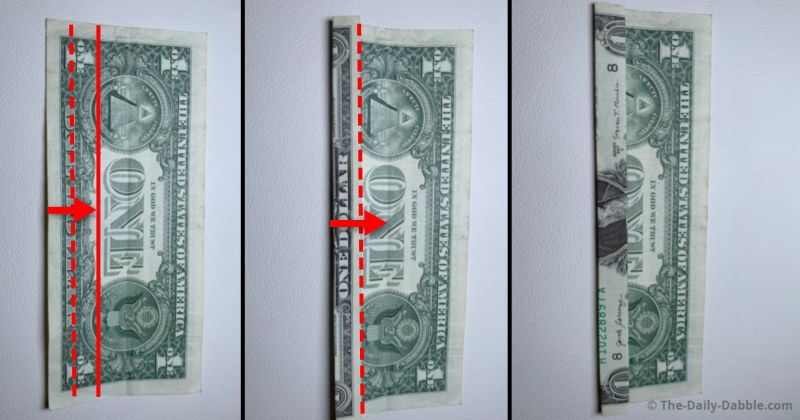
Evenly divide the lower half into thirds by making two even folds.
The dashed line shows about where the crease should be and the solid shows where to fold it to.
Make the second fold to barely before the middle crease.
STEP 3: Repeat these folds on the upper half
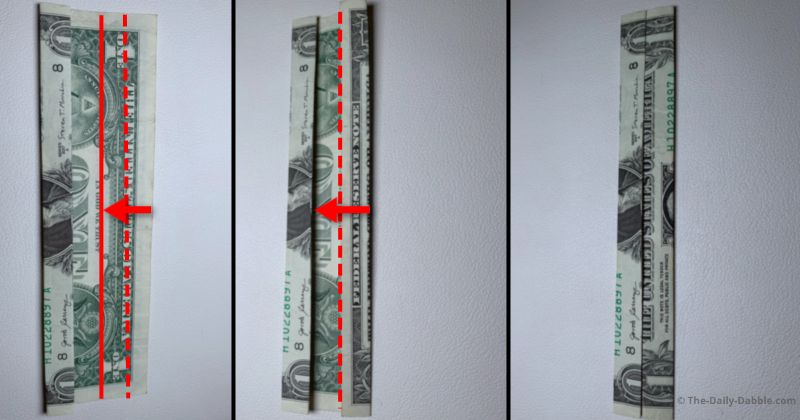
While keeping things nice and straight, make another two folds to the center.
Flip the bill over to the face side for the next step.
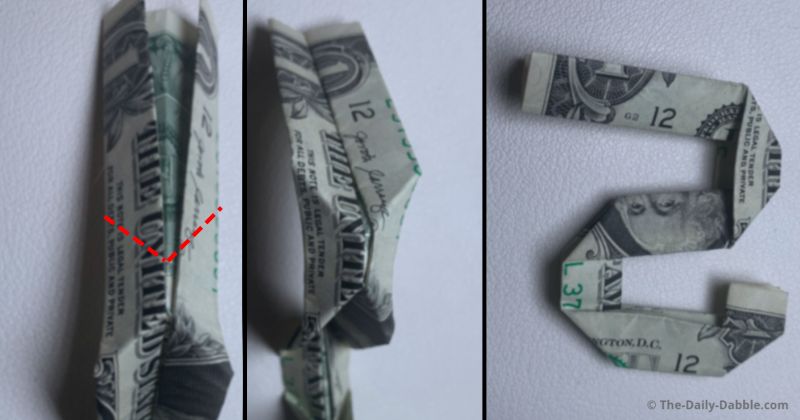
STEP 4: Make a pointed fold on the right tip
Make two creases pointed inward on the right edge of the bill.
This can be done by holding the inner part and pushing in from the right to shape them.
STEP 5: Make a pointed fold a bit left of the previous
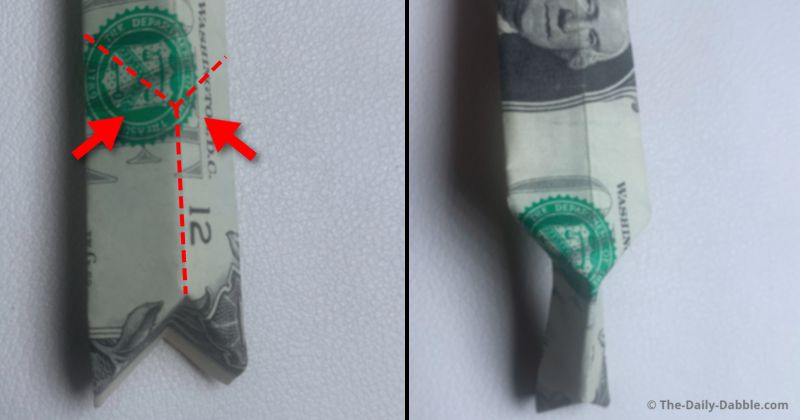
Make the same type of fold but with the creases pointed to the right.
Pinch the area between this area and the previous one, to form this fold.
STEP 6: Make another point and flatten
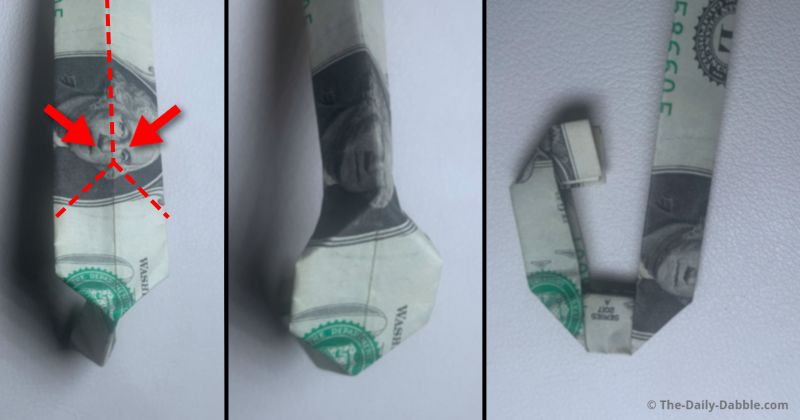
To the left of the last fold, make another two even creases pointed to the right.
Pinch the face and close the bill a bit to make these lines as shown.
Form the first half of the S by closing up the folds as seen in the last picture.
STEP 7: Make another two creases underneath
Open up the long end and form the creases shown.
These lines will point to the left when looking at the underside of the dollar.
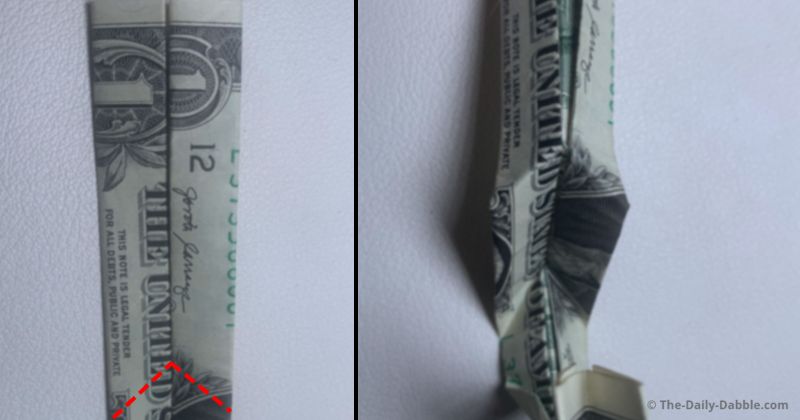
STEP 8: Fold pointed creases once again underneath
Just to the left of the previous fold, form two more creases pointed to the other.
You can close up the bill like shown to prepare for the last step.
STEP 9: Fold the last tip and flatten the letter
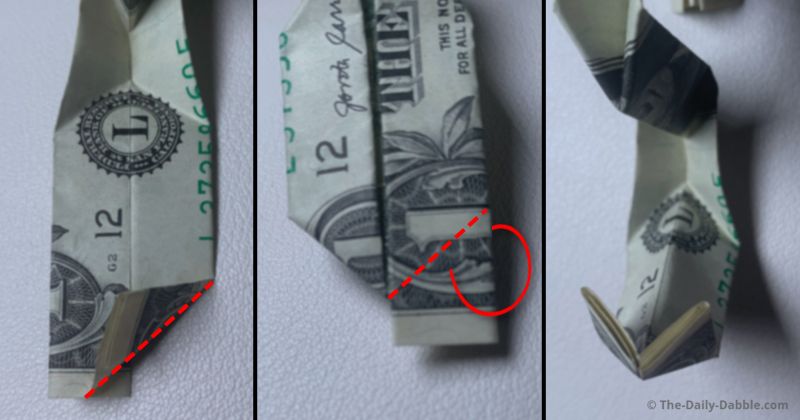
Fold the tips of the last unfolded edge to the face side.
Close the letter up and even edges and folds as needed to get it nice and straight.
To help flatten the bill you can put it under some heavy books for a while if needed.
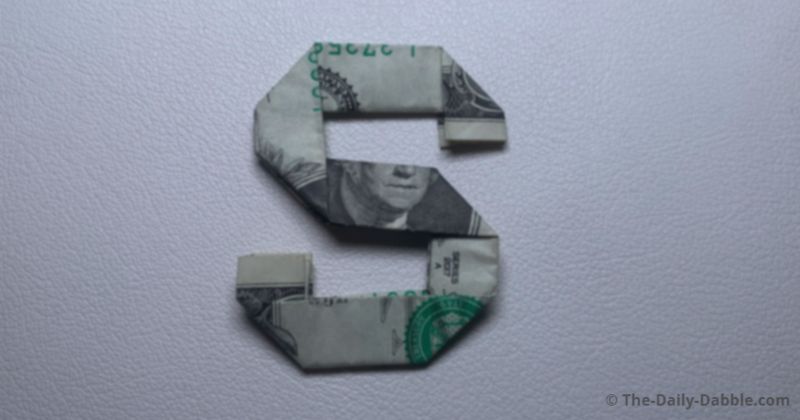
Now you know how to fold a money origami letter S!
PREVIOUS: Dollar Bill Origami Letter R
NEXT: Dollar Bill Origami Letter T
ALL: Money Origami Alphabet Letters
Happy Folding!