This dollar bill origami letter Z tutorial has clear instructions to help you make it quickly.
It’s not the most common letter, but it’s easy to fold and can be a fun addition to a gift.
Be sure to check out all our money origami tutorials to see what else you can fold!
Let’s get started!
STEP 1: Fold the bill in half lengthwise
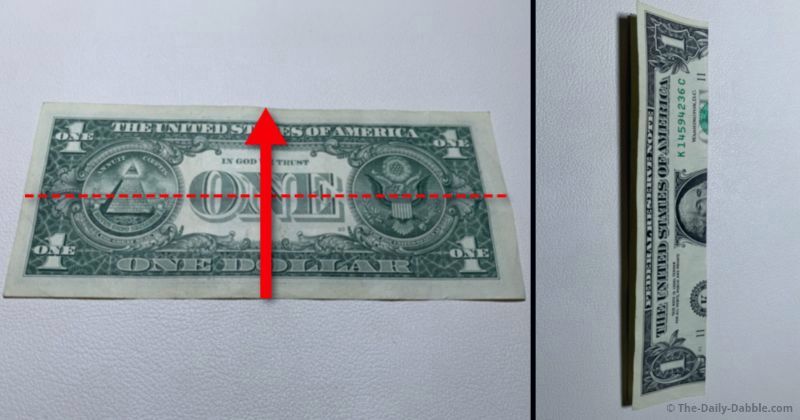
Beginning on the back of the dollar, make a lengthwise fold in half.
Flatten the folded edges well to make the crease visible and then unfold it.
STEP 2: Fold twice on the lower half
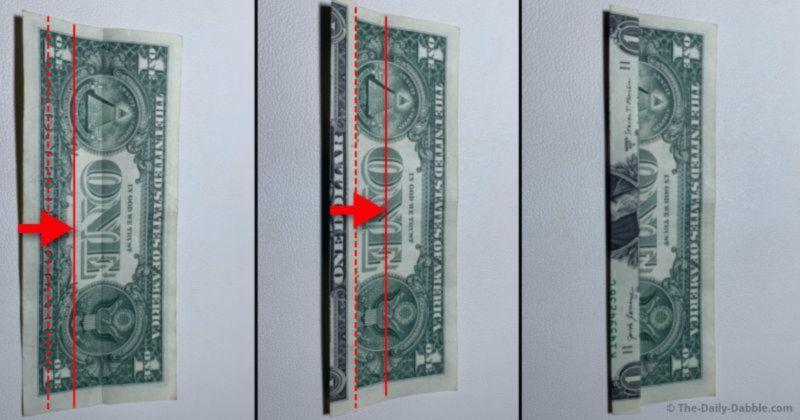
Bring the bottom edge to the solid line shown in the left picture.
After rubbing the folded edge, fold it to the center crease made in the first step.
STEP 3: Do the same on the top half
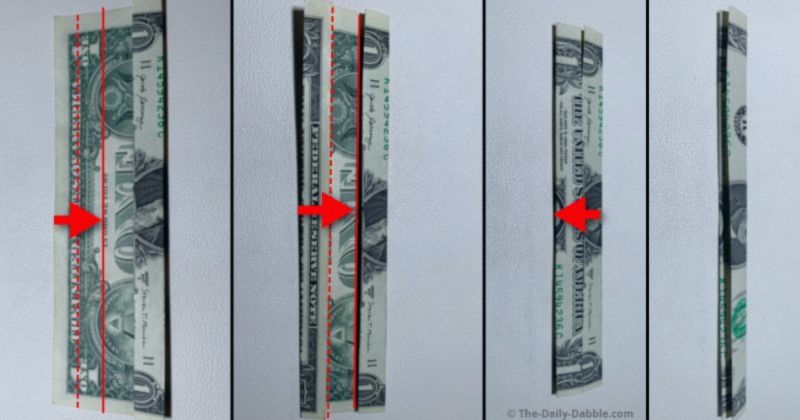
Just like before, fold twice evenly to to the center making sure to rub all the edges well.
Fold the bill into a skinny sixth piece to help flatten it temporarily, and then open it back to the face side for the next step.
STEP 4: Form a pointed crease on the right side
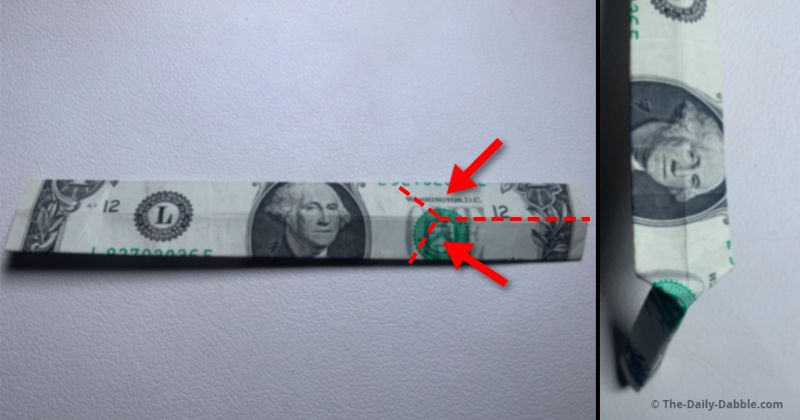
Start by holding the middle portion next to where the point will be formed.
Fold the right edge in half on the horizontal crease and push in to form this crease.
Flip the bill over for the next step.
STEP 5: Make one last pointed crease
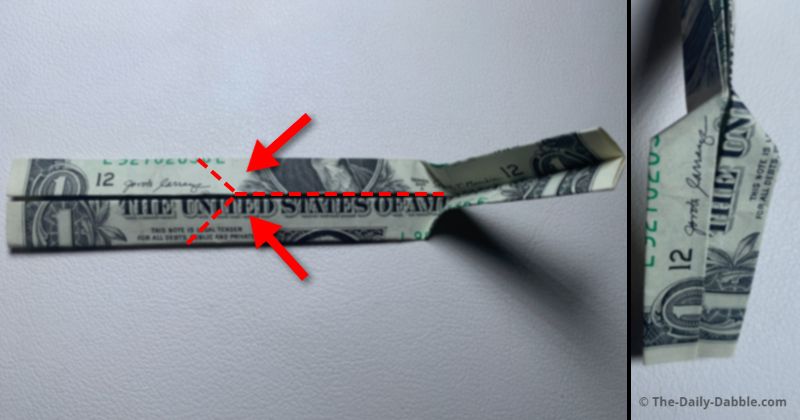
This crease will be made the same as the last but on the opposite side.
Hold the outer edge and fold the middle over to form the point.
STEP 6: Close and finish shaping the letter
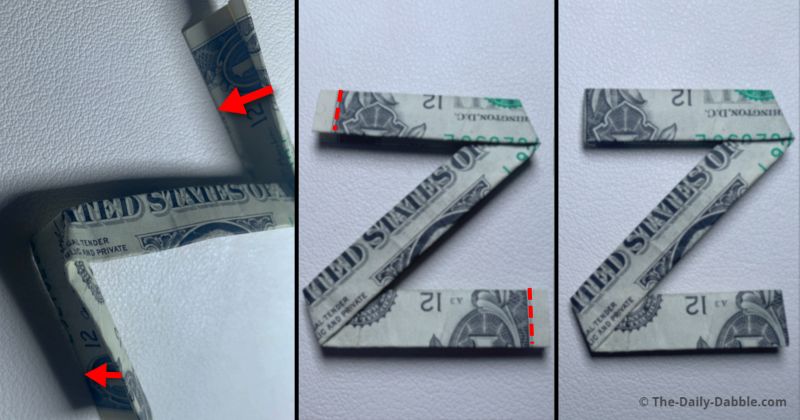
Pinch the ends closed and make some minor straightening adjustments as needed.
You can fold the outer tips over and under to slim the letter down according to your preference.
As always, putting the letter under something heavy for ten minutes or so can help it maintain shape.
Now you know how to make an easy origami letter Z!
PREVIOUS: Dollar Bill Origami Letter Y
NEXT: Dollar Bill Origami Letter A
ALL: Money Origami Alphabet Letters
Happy Folding!