
Learn how to make this dollar bill origami pyramid with this 13 step money origami guide.
Start learning the fun art of dollar origami today, and start giving more unique money gifts and tips.
Let’s Begin!
You may also like these other money origami guides:
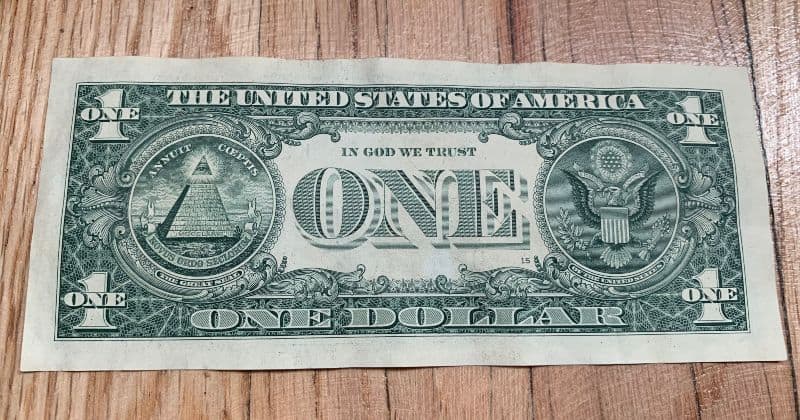
We will start on the backside of a fresh one-dollar bill.
If you want George Washington’s face outside, you start with the bill face down like this picture.
If you want the pyramid to be on the outside, start with the bill face up.
STEP 1: Fold it in half from left to right
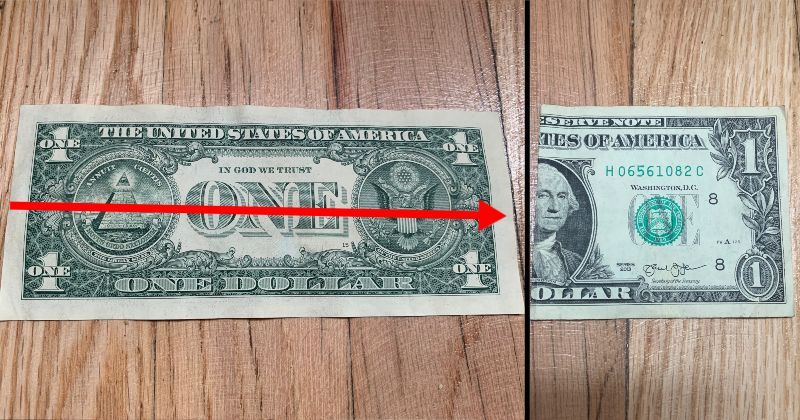
If you want the pyramid to be on the outside, start with the bill face up.
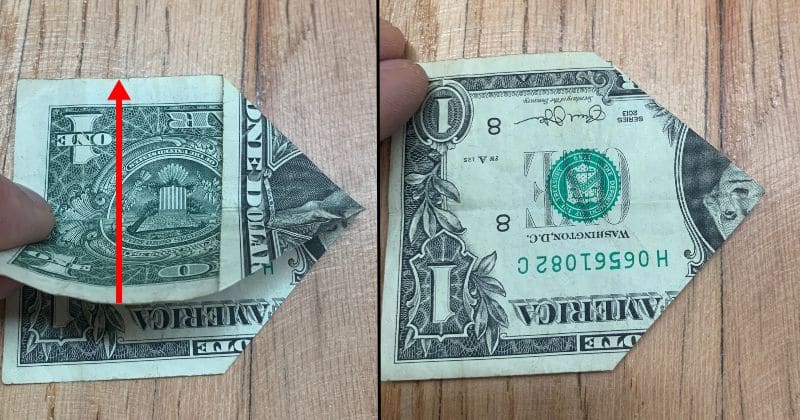
STEP 2: Fold it in half again bottom to top

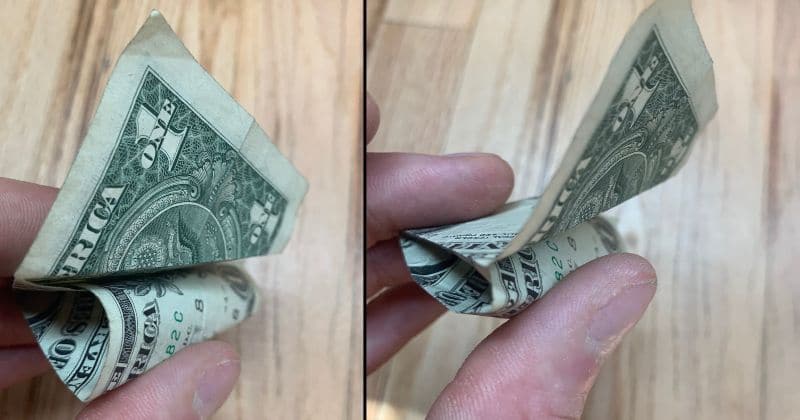
STEP 3: Squash fold the top layer on the right side
With the writing on the dollar bill facing up, grab the top flap and open it.
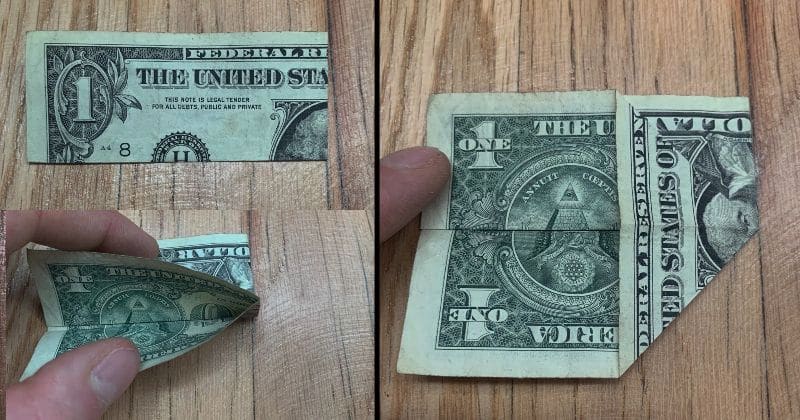
Then squash fold the right side to make a triangle like shown.
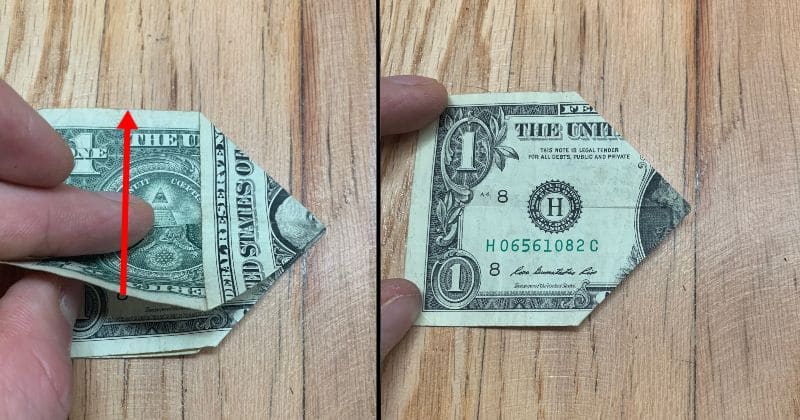
STEP 4: Flip the bill and make another squash fold the same way
With the words on the bill facing up again, pull the flap up and make the same style of squash fold on the right side.
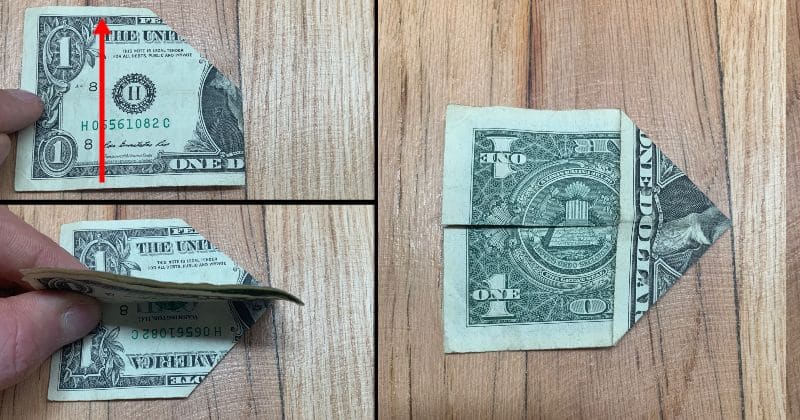
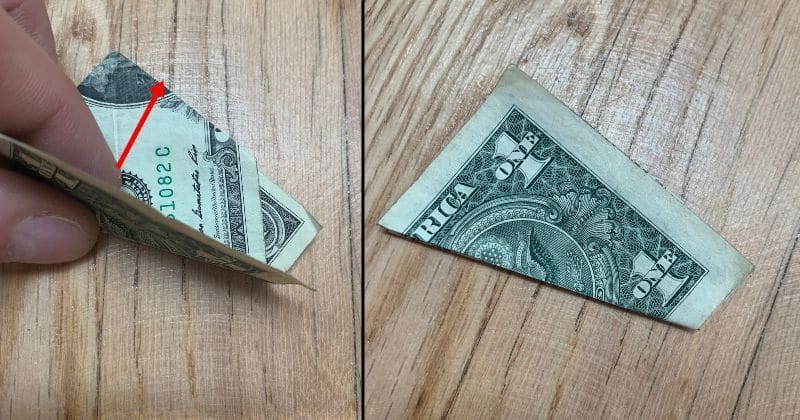
STEP 5: Fold the first bottom flap up to the top
STEP 6: Flip the bill over and fold the bottom flap up on this side as well
STEP 7: With the point up, fold the bottom to meet with the top right
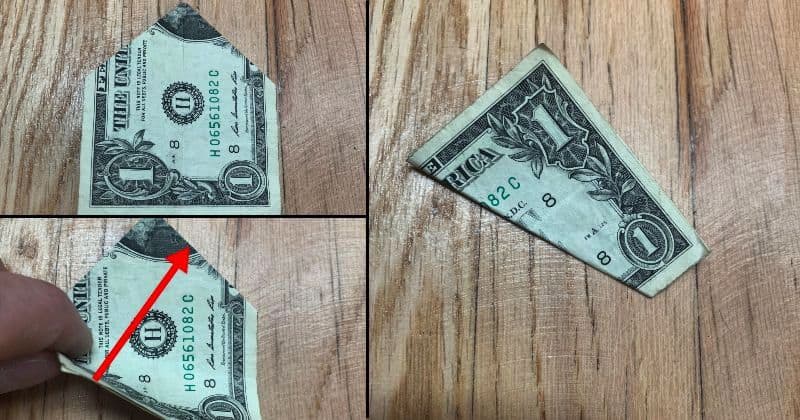
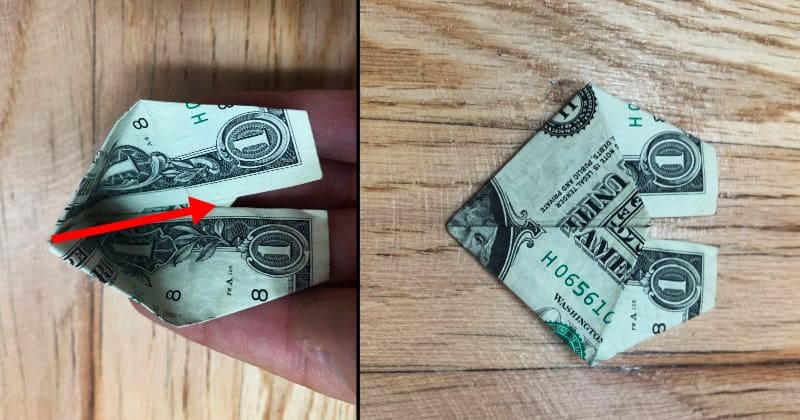
STEP 8: Open the fold you made and fold the bottom flap into the pocket
Take the left corner of the bottom flap and tuck it into the pocket over the top of the two middle folds.
STEP 9: With the point up, again fold the bottom to meet the top right
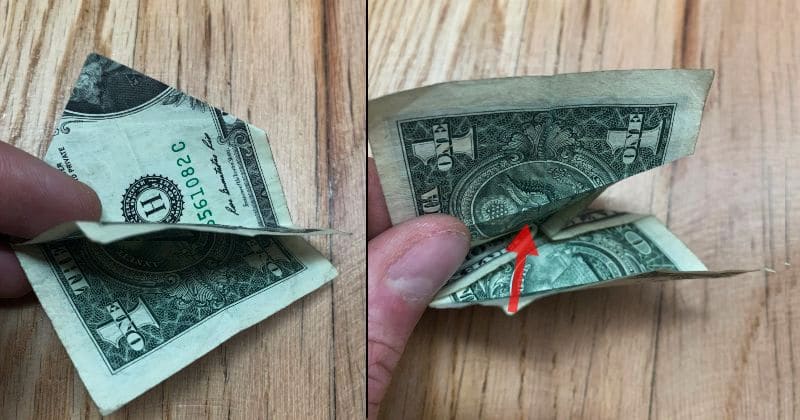
STEP 10: Fold the loose flap back over into the pocket and fold it closed

STEP 11: Open the pocket with the point on the left and squash fold it down
STEP 12: Fold the right, then the left flap up on top of it
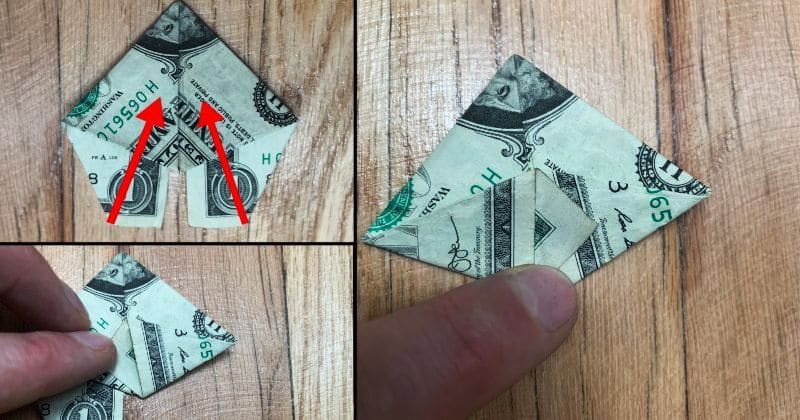
STEP 13: Open the pyramid up and tuck the left flap into the right one
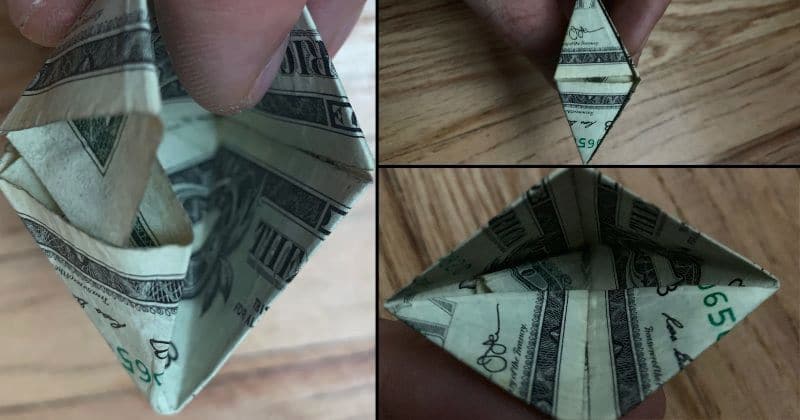
Tuck the connected flaps inside the pyramid.
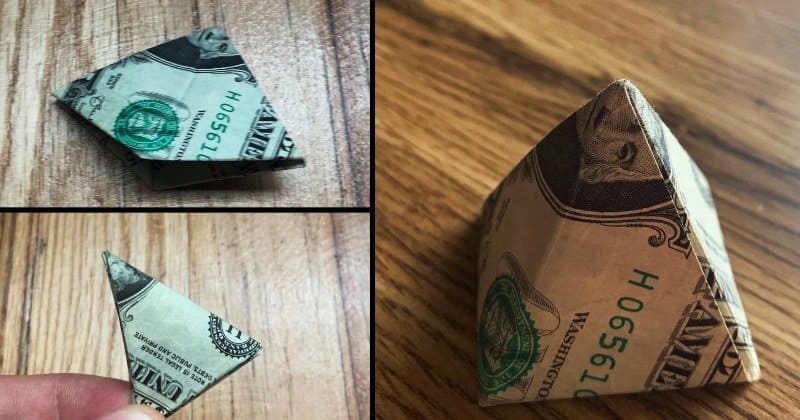
Now you have a foldable dollar bill origami pyramid ready to be shown off, gifted, or used for a tip!
You may also like these other money origami guides: