
Learn how to fold a dollar bill origami shirt with this step-by-step money origami guide.
This money shirt can be a quick way to give a creative tip or money gift.
This fold is not too bad for beginners and can be completed in 10-15 minutes or less.
We also have a tutorial for a dollar bill origami shirt with a tie that is a little more challenging.
Let’s get folding!
You may also like these other money origami clothing guides:
How To Fold a Dollar Into a Money Origami Shirt
We will start on the front side of a one-dollar bill.

STEP 1: Fold the bill in half lengthwise
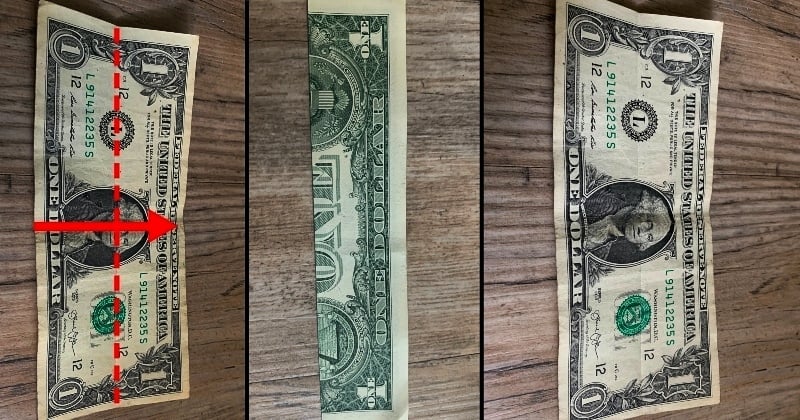
Fold the bill in half from bottom to top.
After creasing the fold well, unfold the bill.
STEP 2: Bring top and bottom to the center crease
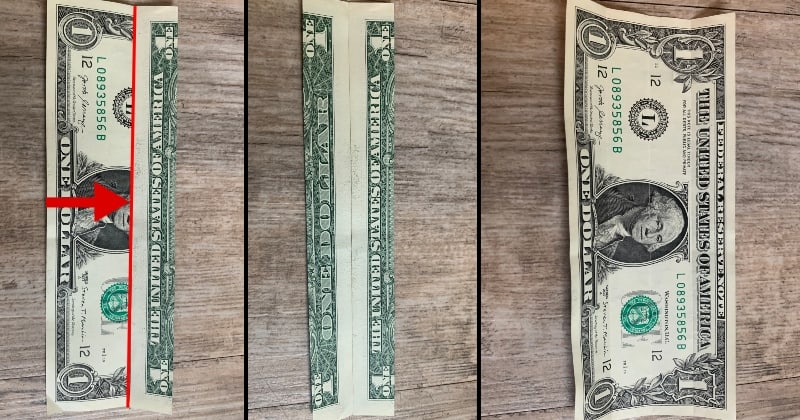
Fold both the top and bottom to meet the center crease.
Crease both of the edges and then unfold them.
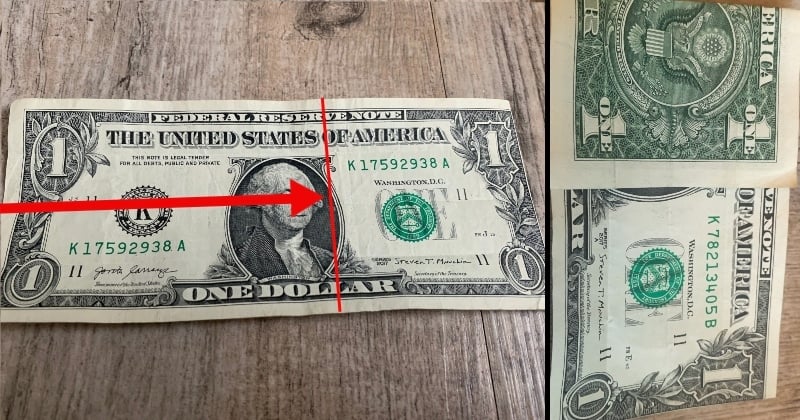
STEP 3: Fold the right white edge over

Use the dark borderline as a guide to fold the white edge over to the back.
This white edge is the collar of the shirt.
Once completed, go ahead and crease the fold.
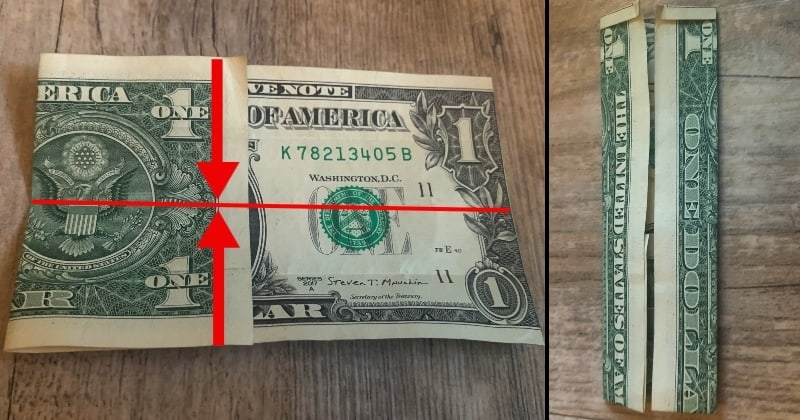
STEP 4: Fold the left side to meet the line shown
It doesn’t have to be perfect, but the picture is a good reference of where to fold.
If you go to about the “v” in “RESERVE,” you should be just fine.
Crease your fold once again.
STEP 5: Bring the top and bottom to the center
These folds should be relatively easy as you already have a crease made for these folds.
Crease the folds once you have made them.
STEP 6: Fold the collar to the backside
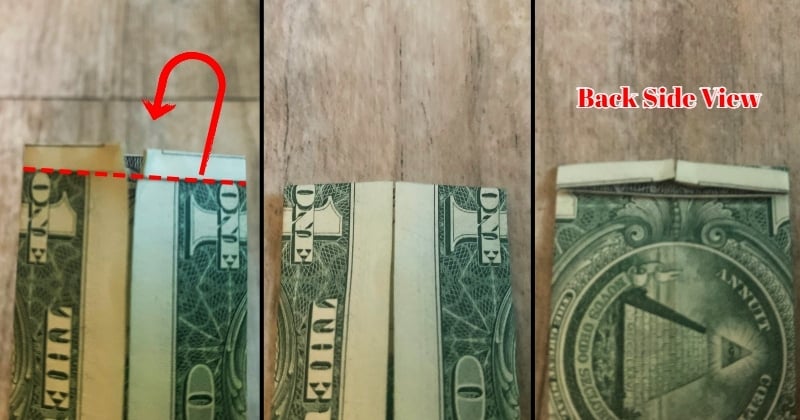
Make the fold right below the collar to bring it over to the backside.
Crease this fold as well.
STEP 7: Shape both sides of the collar
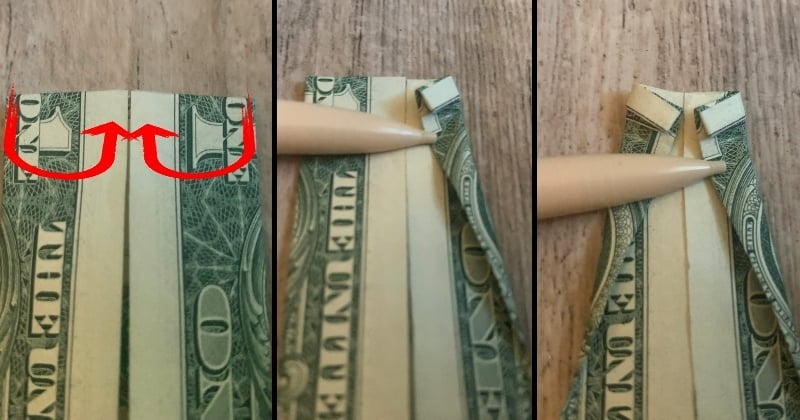
This step is the hardest as you have to eyeball the folds.
You can bend the corners back and forth until the bill gets a little more malleable.
Use the picture as a guide and get the sides of the collar as symmetrical as possible.
Don’t crease too hard in case you need to adjust these folds a little later.
STEP 8: Fold the sleeves symmetrically
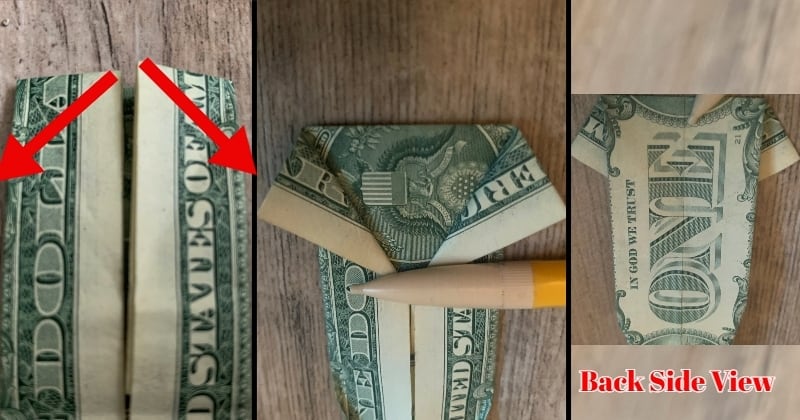
On the other end of the bill, make the sleeves in a similar manner to step 7.
Fold the sleeves to your preference and look at the backside to help make them even.
Once again, if you just take it slow and don’t crease hard, you will be able to adjust them later.
STEP 9: Fold the lower half under the collar
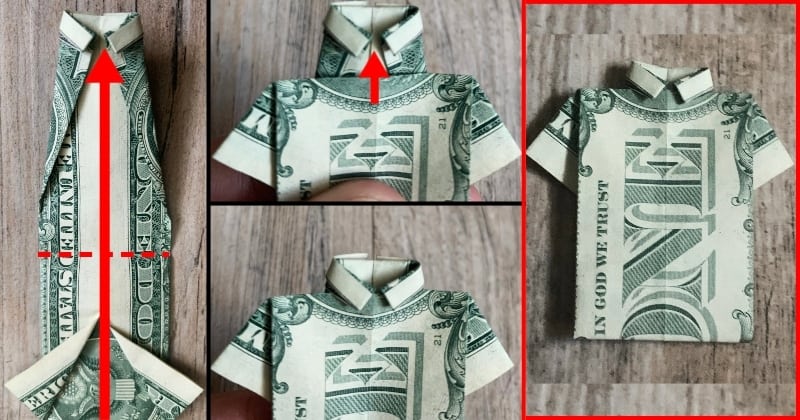
Fold the sleeves half up and under the collar to finish the shirt.
Make shaping adjustments as needed to get everything as even as possible.

Happy Folding!
Other excellent money origami guides: