
Make your own money origami sock with this detailed dollar folding tutorial.
This craft makes a great Christmas stocking stuffer or just a fun gift in general.
It will take about 5 minutes to complete this guide which is mostly a beginner-level project.
Let’s get started!
You may also like these other money origami clothing guides:
For this dollar sock, we will start on the back side of a one-dollar bill.
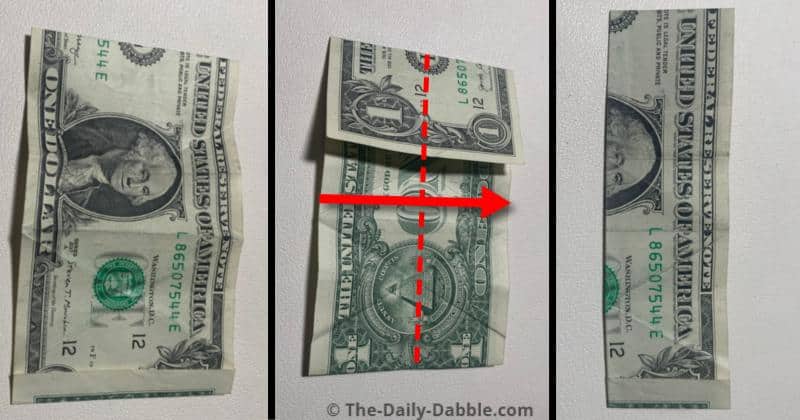
STEP 1: Start by folding it in half widthwise
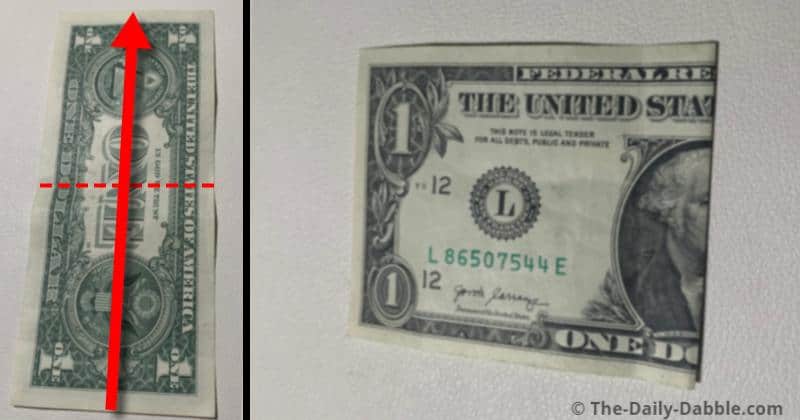
Fold the bill in half, make a nice crease, and then unfold it.
STEP 2: Fold the bottom to the crease and then the top
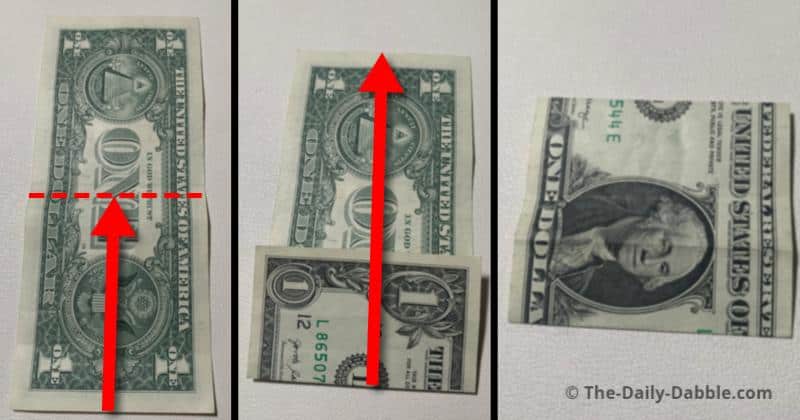
Fold the bottom to the middle line and crease the bottom.
Then bring that bottom to the top and crease the bottom again.
STEP 3: Flip it over and fold the top down a bit
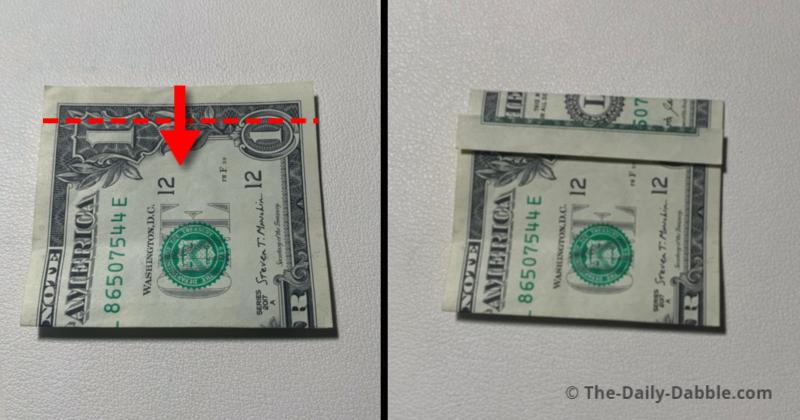
Bring the top of the upper layer down just a bit as shown.
This will be the top portion of the sock, or stocking, and could be adjusted later if needed.
STEP 4: Flip it over and make a diagonal fold
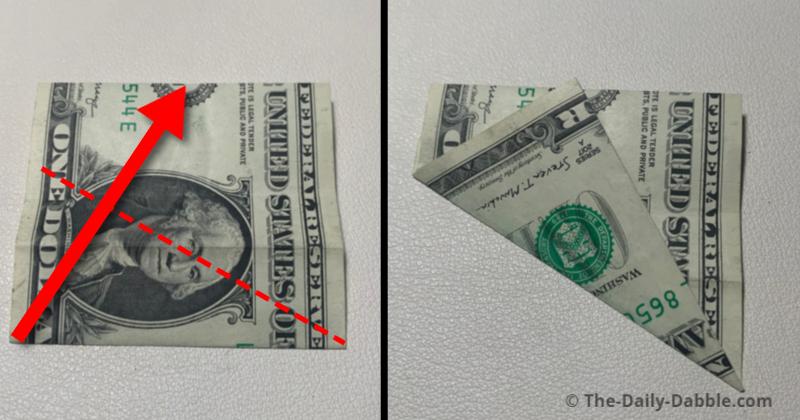
Fold the bottom left corner diagonally to meet the top center.
Be sure to rub the edge to make a good crease.
STEP 5: Repeat the step with the other corner
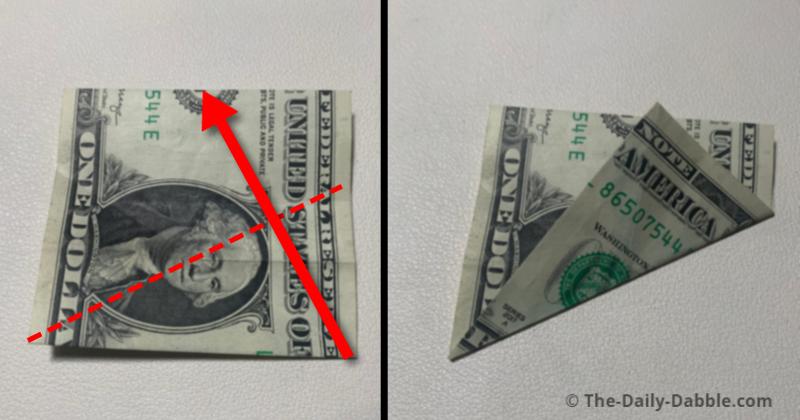
Unfold the previous step and fold the opposite bottom corner up just like the last.
Again, make sure to crease this edge very well.
STEP 6: Partially unfold and then fold in half lengthwise
Unfold the previous step, and then the back lower half of the bill as well.
Flip it over and then fold it in half lengthwise.
Unfold the bill after the crease is made.
STEP 7: Use the creases to push the bill together
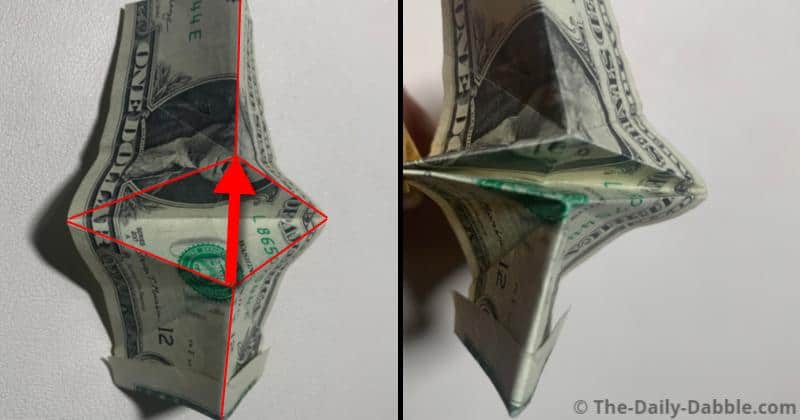
Use the crease made in steps 4-6 to make this fold.
As you start to fold the bill in half, push the center of the diamond portion down.
Lastly, push the formed points together.
STEP 8: Make the sock shape by flattening it
Once you get the points together, push the sides inward evenly.
This will flatten the bill into the general sock shape.
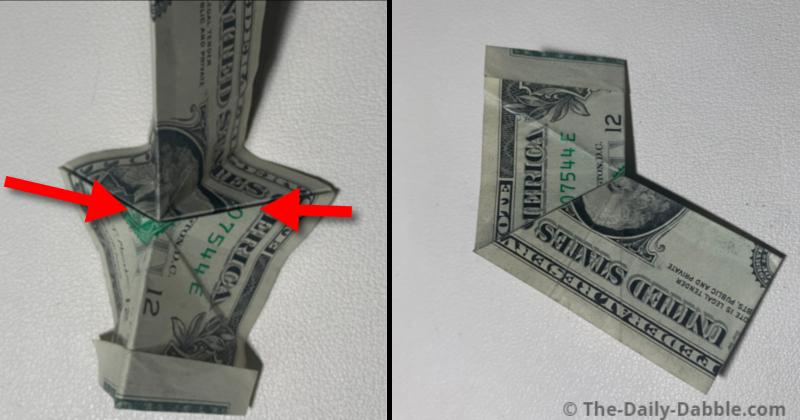
STEP 9: Fold the front bottom edges over
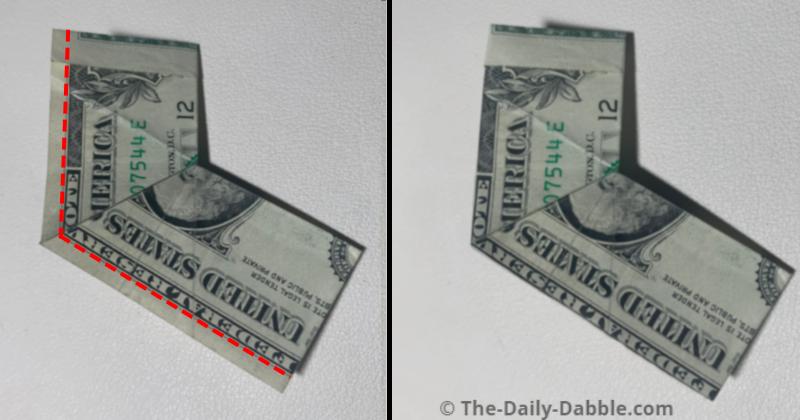
Used the black border as a guide to evenly fold the edges over the backside.
This will hold the sock together.
STEP 10: Finish shaping the sock
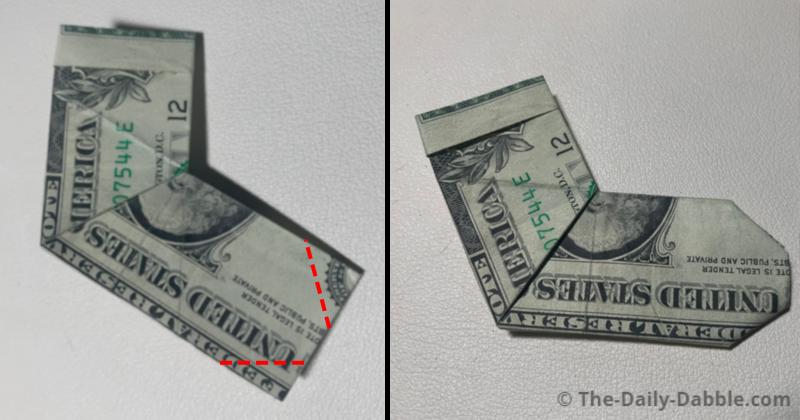
Shape the toe end of the sock by making two diagonal folds.
Now the money sock is done!
If you liked this guide and are looking for something else to fold, I recommend the dollar bill shirt and tie!
Happy Folding!