
Follow this guide to fold an easy origami butterfly with our clear and beginner-friendly instructions.
This detailed fold is super simple and can be completed in under 3-5 minutes.
I think this is one of the better-looking simple origami designs and requires less than ten folds.
Let’s get started!
For this guide, I used basic square origami paper with the same color on both sides. However, you can also use dual-colored paper (different colors on each side) but note you’ll want to start with the colored side facing down on step one!
1. Fold the paper in half from point to point
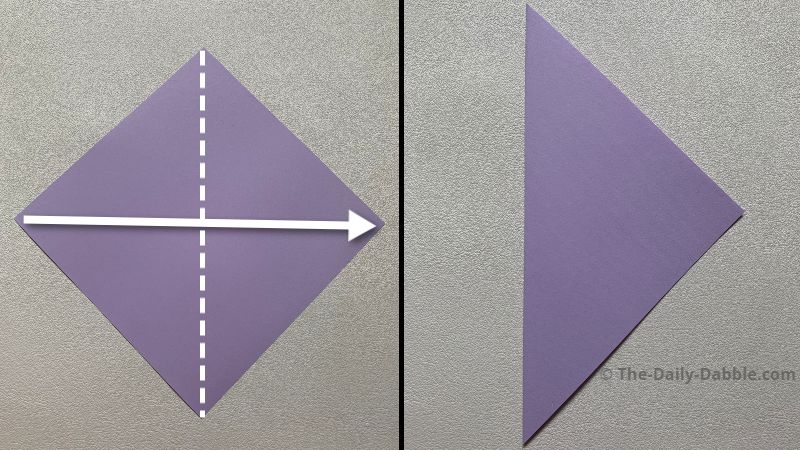
Once you have folded it in half, unfold it for the next step.
2. Fold it in half again
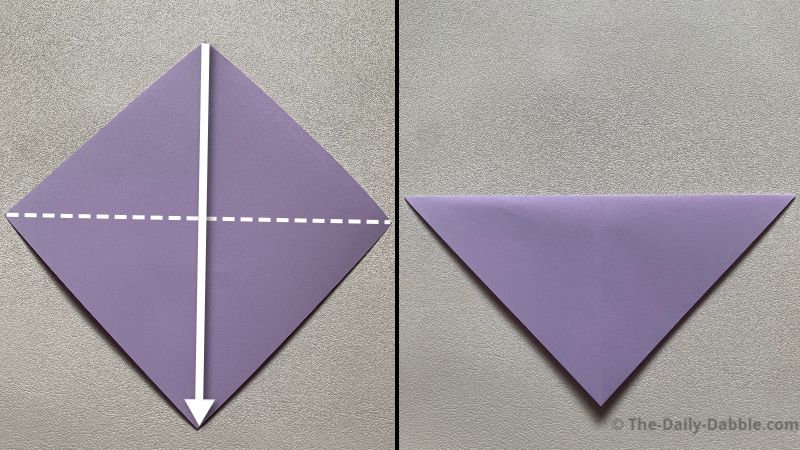
Fold the paper in half the opposite way from point to point.
After you have made the crease you can unfold it again.
3. Flip the paper over and fold it in half
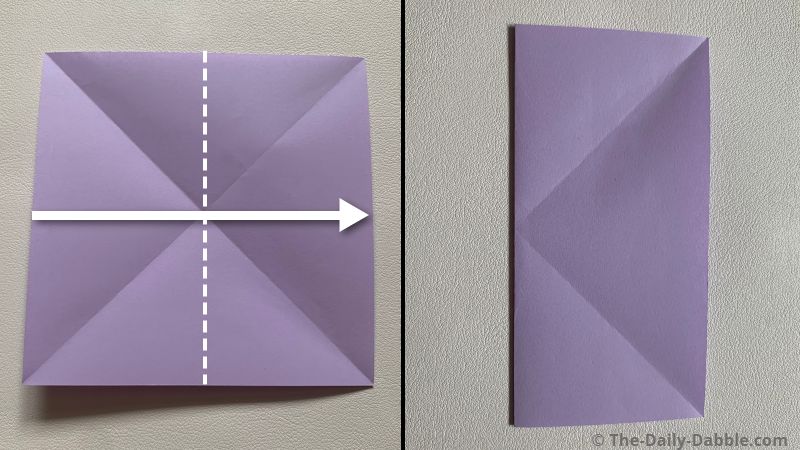
Next, flip the paper over and then fold it in half from end to end.
Unfold it again after you have creased the fold well.
4. Rotate the paper and fold in half again
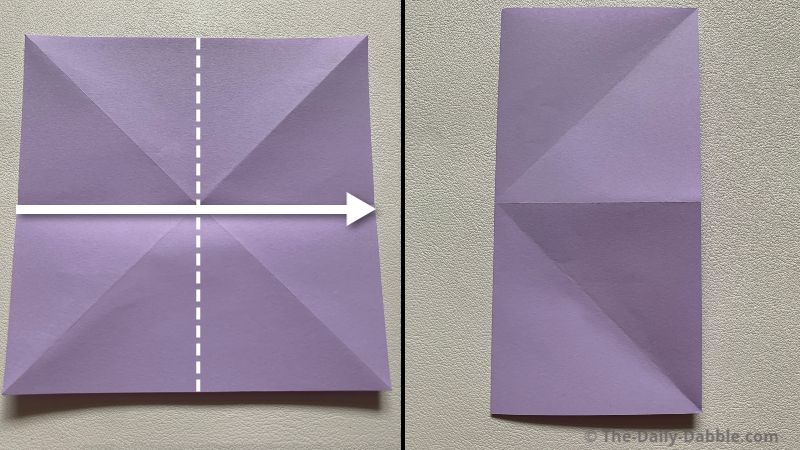
Rotate the paper and fold it in half again. Crease it well and unfold it.
5. Fold the paper into a flat triangle
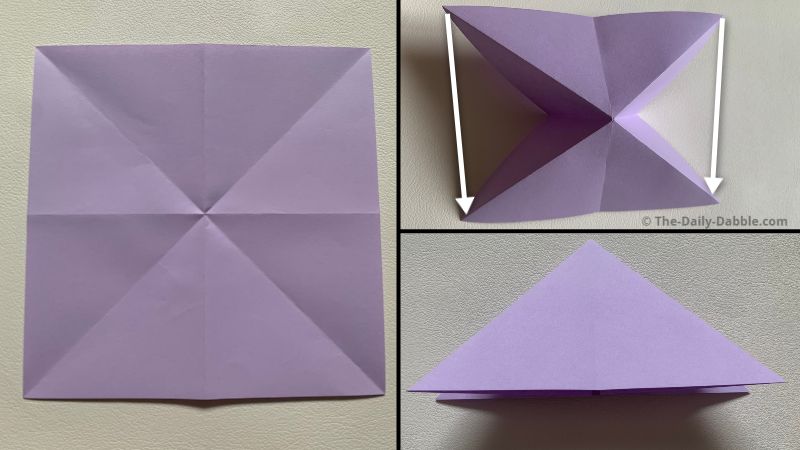
Push in the middle edges towards each other, and then do the same with the opposite edges to make a flat triangle.
Origami 101: At this stage, you have made the origami waterbomb base which is one of the main origami base folds! Learn more about origami bases here.
6. Fold one of the corners inward at a slight angle
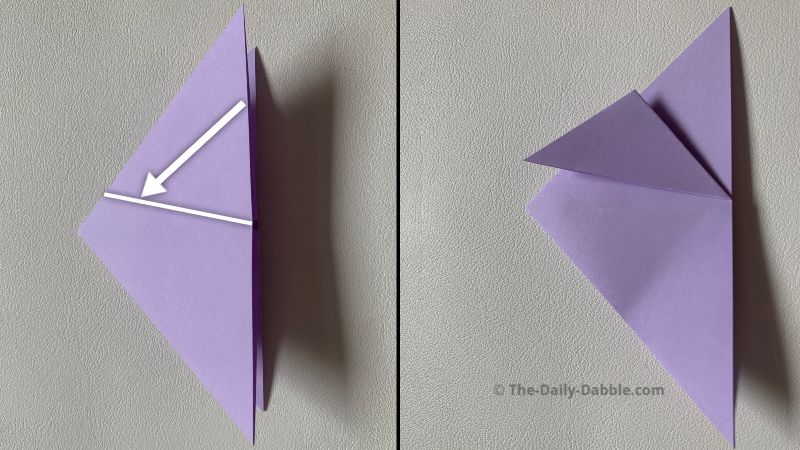
We are folding the bottom two corners of the triangle to make the bottom of the butterfly wings.
7. Mirror the last fold with the other bottom corner
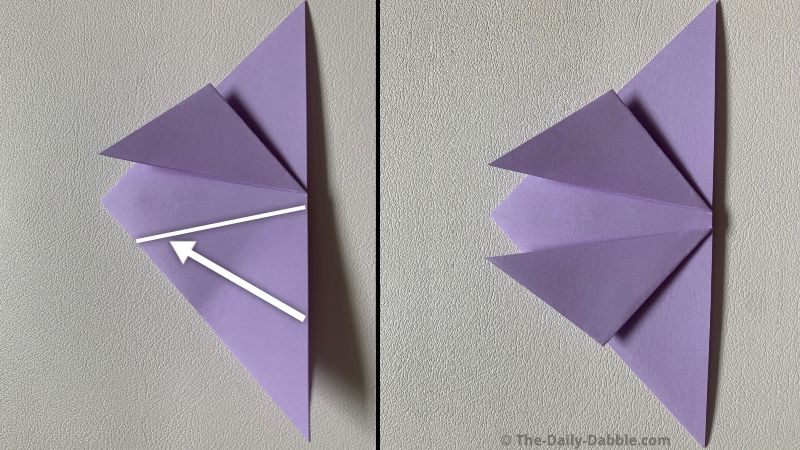
These folds don’t have to be perfect, rather just focus on making them as symmetrical as possible.
8. Bring the middle point underneath the butterfly
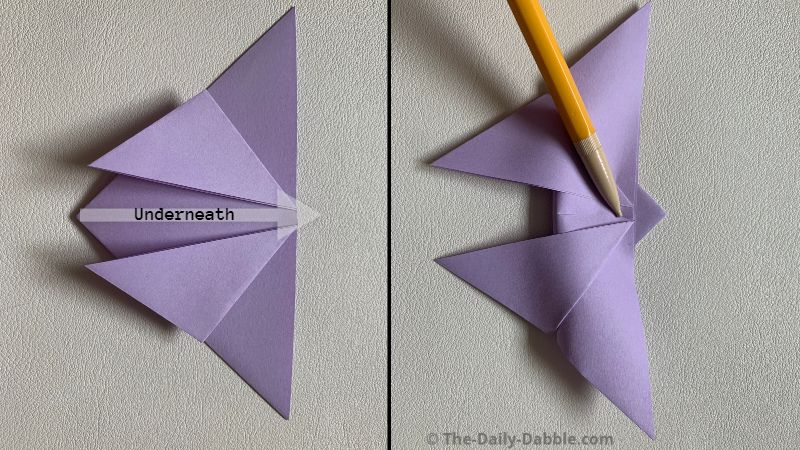
Don’t crease this fold yet, just bring it underneath so that it is sticking out on the other side.
9. Fold the tip down towards the center
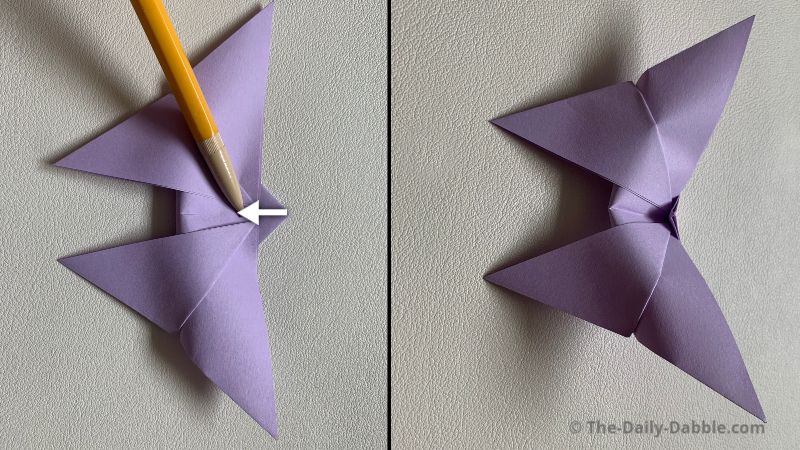
Before you finalize this fold by pressing down and creasing it hard, you can adjust the shape if you want.
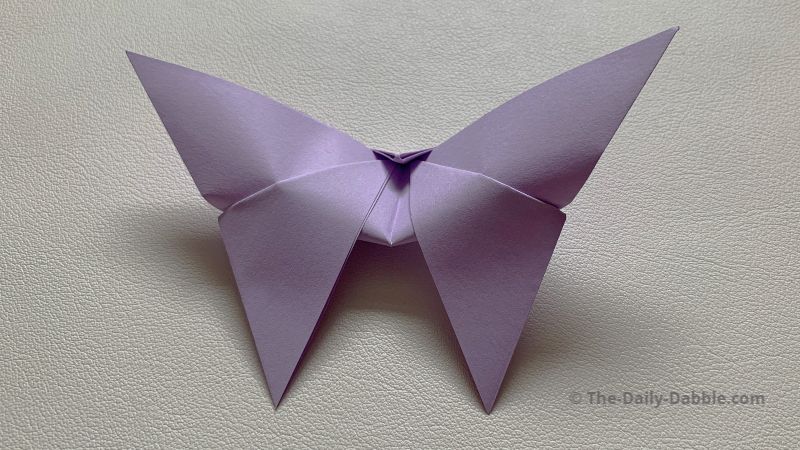
Now you have your own little paper butterfly!
I hope that you enjoyed this little guide and if you would like to learn how to fold other critters, consider taking a gander at our growing collection of origami insects tutorials here.
Also, be sure to check out our money origami butterfly guide if you want to see another one you can make with a one-dollar bill!
Thanks for following along and happy folding!