
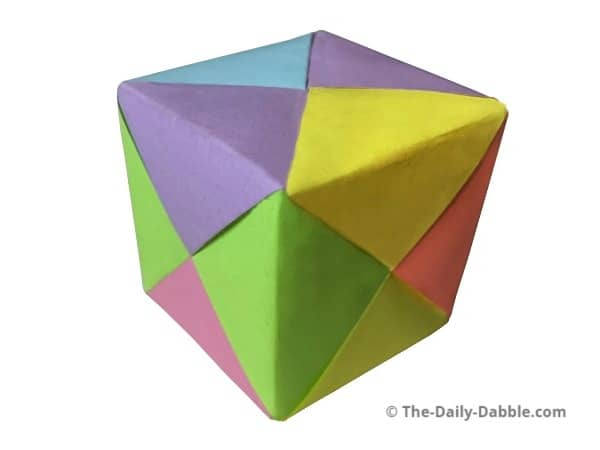
With these origami instructions, you can learn how to fold an easy origami cube!
This beginner project consists of folding six sheets of paper the same way and connecting them in a cube.
Folding each sheet will take 2-3 minutes, and assembling the cube will take another few minutes.
Gifting Idea: Before finishing the assembly in the last step, stick a gift inside for someone to find!
Let’s get folding!
In this guide, we use six different colored sheets of square origami paper with the same color on both sides.
If you are short on square paper, you can follow this quick guide to make printer paper square.
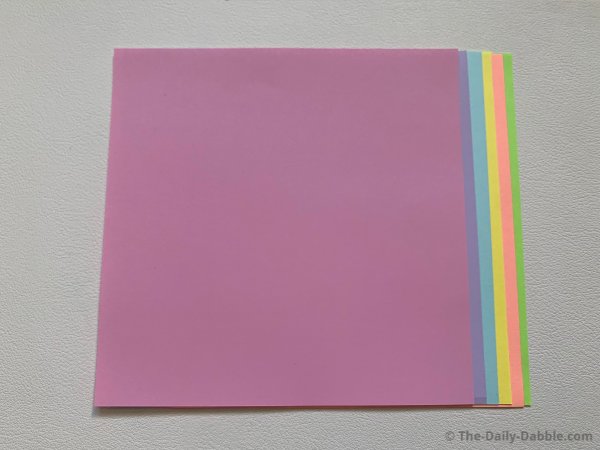
I used different colors for each sheet, but this is not necessary to complete the cube.
It just makes the assembly a bit easier to explain and understand.
1. Fold the paper directly in half
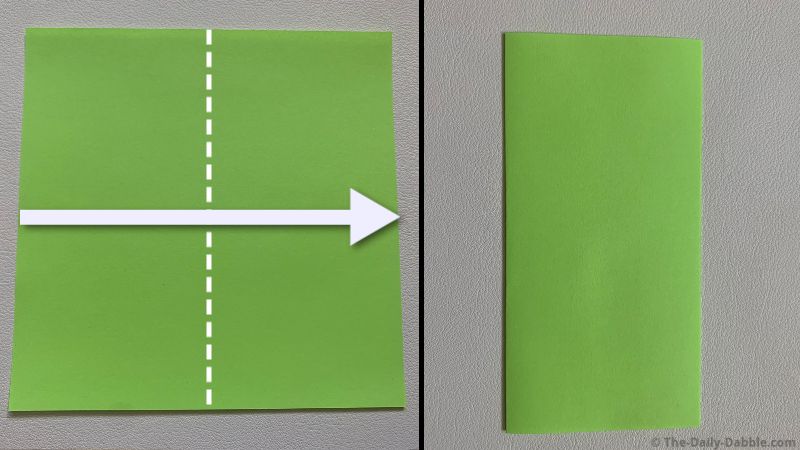
Fold the paper in half from the left to right edge and give it a good crease.
You can unfold this once you have completed the fold to get ready for the next step.
2. Bring both edges to the crease you just made
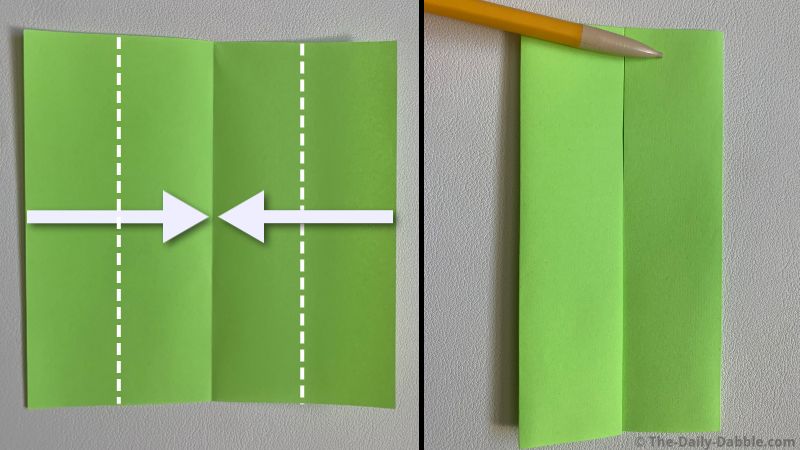
Fold both outer edges to meet on the center line and crease the edges.
3. Fold the paper in half from top to bottom
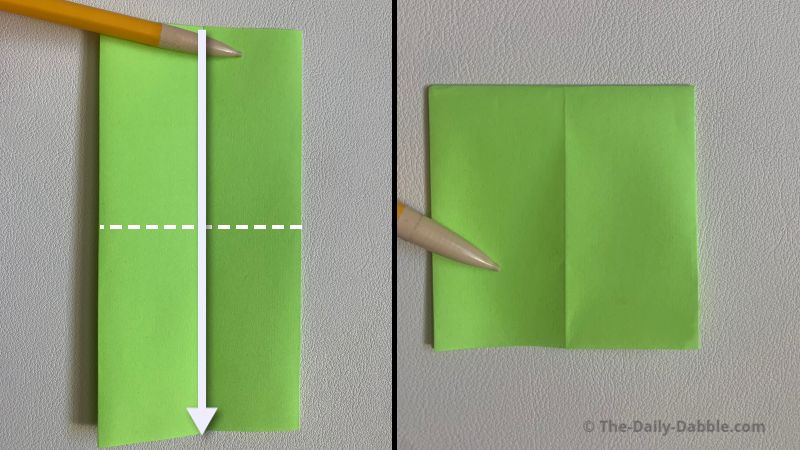
Bring the top edge to match the bottom and give the fold a good crease once again.
Unfold this step once you are done before moving to the next step.
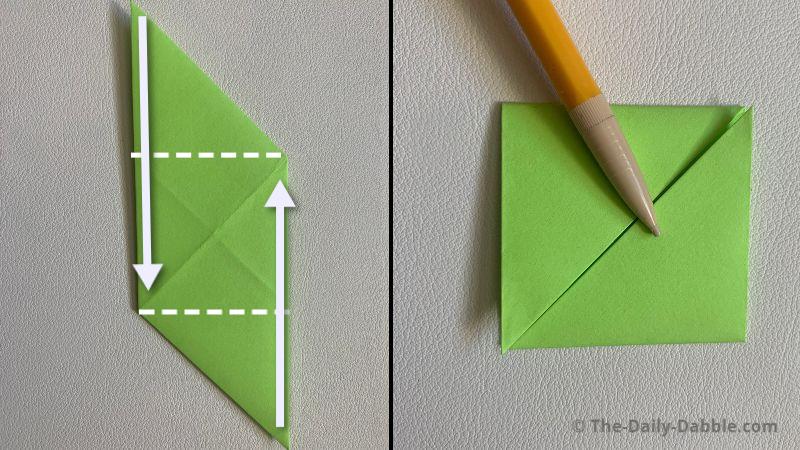
4. Make two diagonal folds opposite ways to the crease
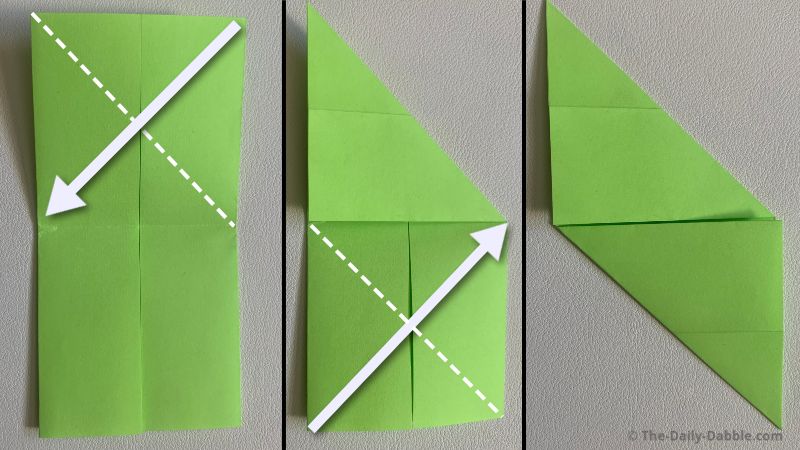
First, fold the top square in half from top right to bottom left.
Next, fold the bottom square in half from bottom left to top right.
5. After unfolding step 4, fold the small tips underneath
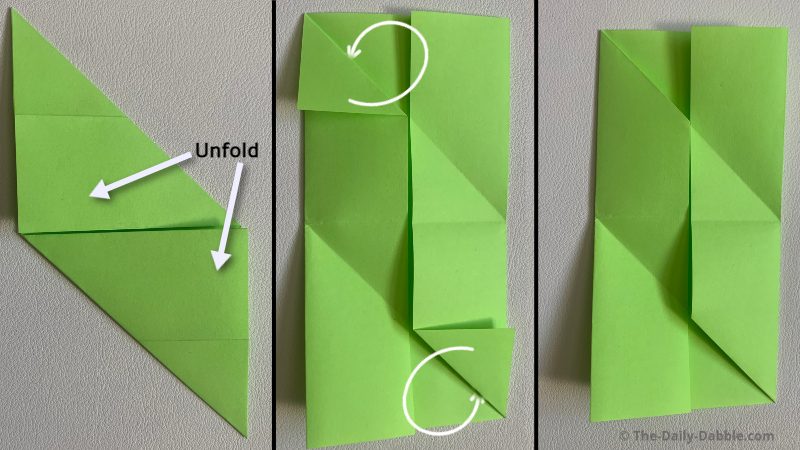
After unfolding the folds from step 4, tuck the triangle tips the opposite way underneath themselves.
6. Lift the left flap and fold the top right part underneath it
Unfold the left side of the paper and fold the top right back down in its original crease.
Then fold the left side back over the top of it.
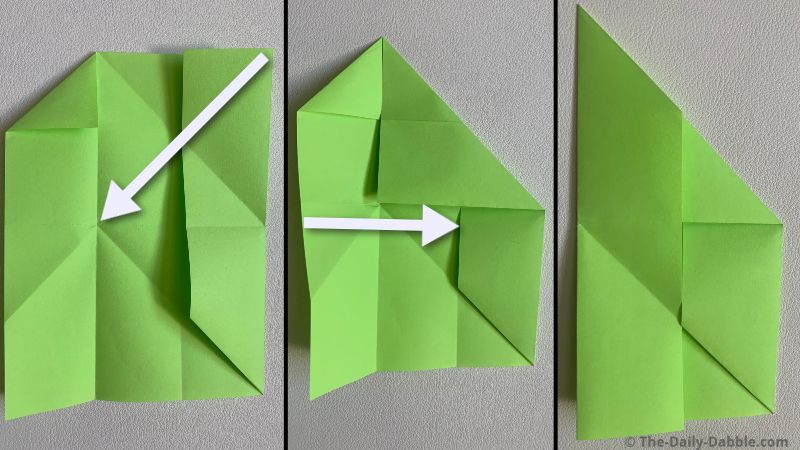
7. Fold the bottom left underneath the bottom right flap
Refold the bottom left corner on its crease line while tucking it under the right flap.
Flip the paper over after you have finished this step.
8. Fold the two triangles in half
Fold both of the little triangles in half evenly.
After pressing them down well, you can let them come back up, as shown in the next step.
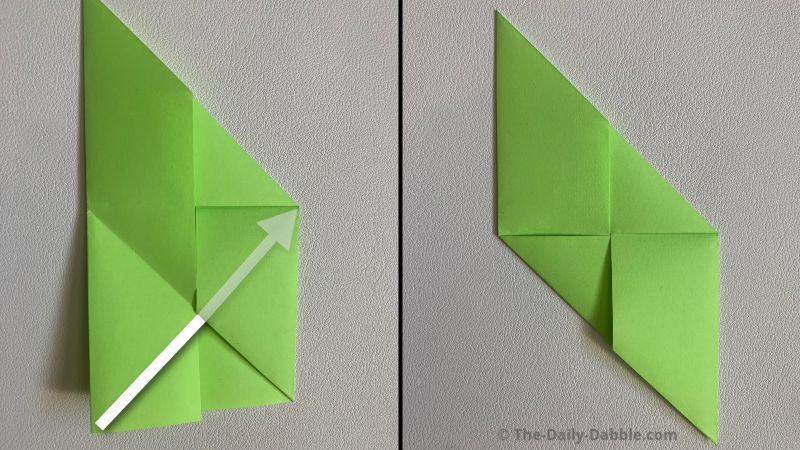
9. Repeat steps 1-8 to make five more
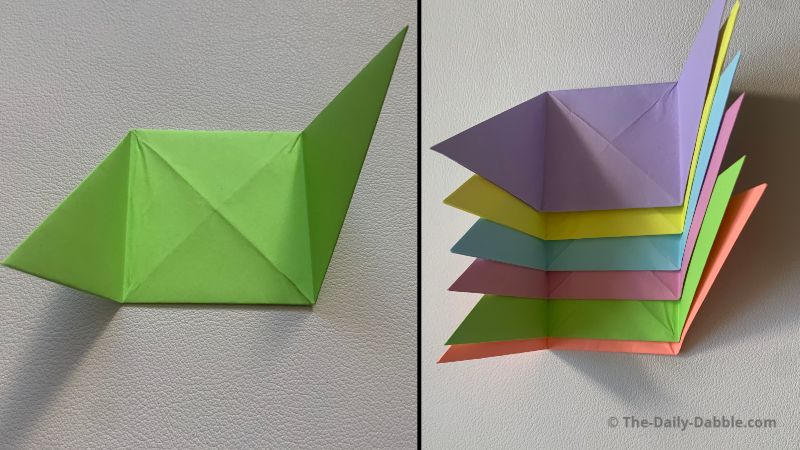
After you have a total of six sides, we will start the relatively simple assembly process.
10. ASSEMBLY: Start by putting one piece into another
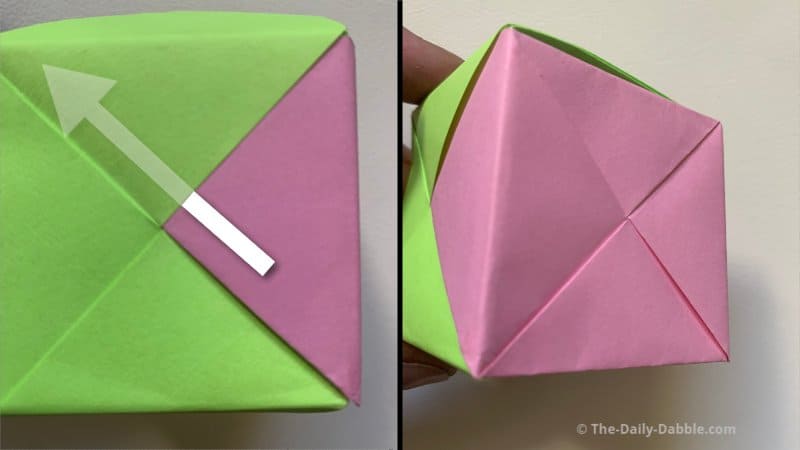
Slide the pink piece into the green from the right so that the points of the green piece are on the top and bottom.
The assembly isn’t that hard; you can probably figure it out by simply following one rule.
If you use all different colors, every side will only have three colors.
There will be two triangles of the same color, straight across from each other, and two more, both of different colors.
To make assembly easier, especially for those just using white paper, you can write the names of the colors or number the pieces with a pencil to help you keep track.
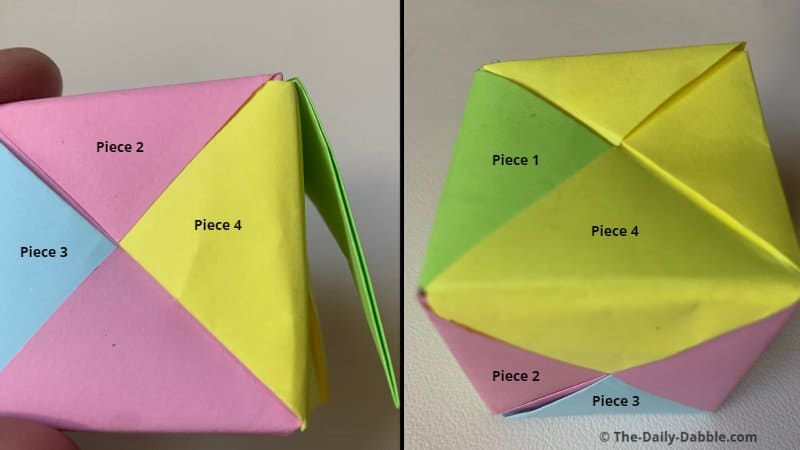
11. Connect piece 3 into 2 and piece 1 into 3
Here I put one edge of the blue piece in the same way, where the points of the pink piece are on top and bottom and not covered by the blue one.
You can then slide the bottom green point into the blue sleeve it is pointed at.
At this point, we have three pieces connected, all with one point still available to connect into the next pieces.
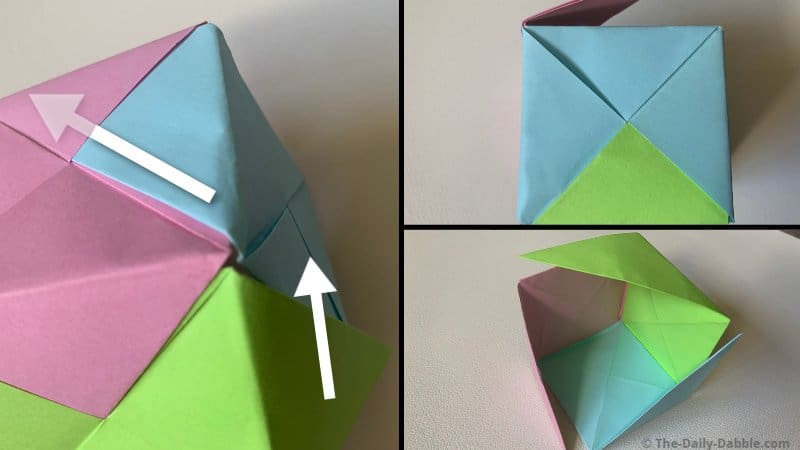
12. Insert piece 4 into 2 and piece 1 into 4
Connect piece 4 to piece 2 directly opposite of piece 3.
Connect it under the flap of piece 1 so that you can slide that edge into piece 4.
At this point, piece 1 has both of its points connected, and the rest have one free point.
13. Insert the 5th piece into 4 and piece 2 into 5
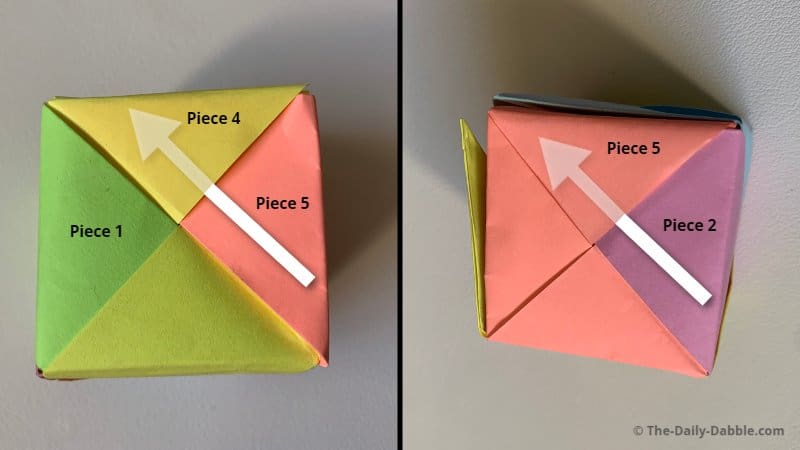
Here we insert piece 5 into 4 directly opposite of where piece one is connected.
Then we can connect piece 2 into piece 5.
Now, pieces 1 and 2 have both their points connected.
14. Insert piece 6 into 1 and 5, then fully connect the rest
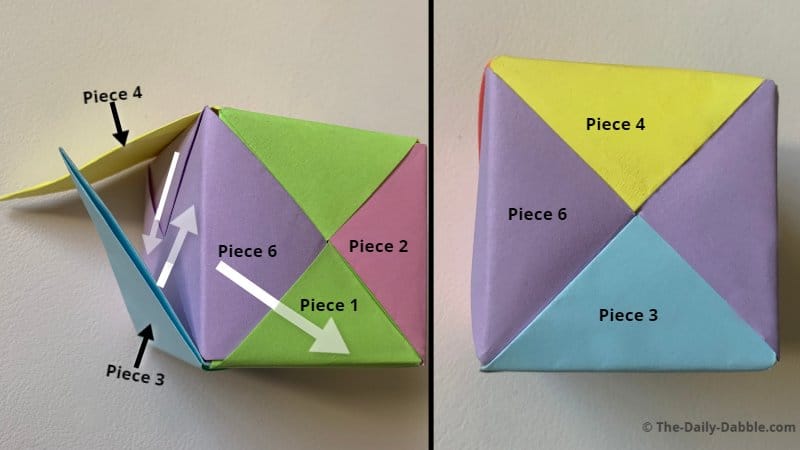
Insert one edge of piece six into piece 1 and the other in 5 without covering the flaps of 3 and 4.
Then finish the cube by connecting those flaps into piece 6.
Now we can push the corners together and make everything straight and even.
Check out our easy origami box instructions if you want another simple but fun folding project!
Happy Folding!