If you want a quick and easy origami house design, look no further. This little paper house is as easy as they come!
This step-by-step guide will teach you how to fold an origami house within about 3 minutes!
This traditional design is built upon the original origami organ base—with a slight modification at the end. Origami bases are essentially “starting points” that can be continued into other cool designs. For example, because this house is virtually the organ base, it can later be turned into other cool creations, such as the origami fox puppet!
Origami base folds are cool and manageable ways to learn and memorize designs. If you would like to learn more, check out our beginner’s guide to origami base folds here.
With that out of the way,
Let’s get folding!
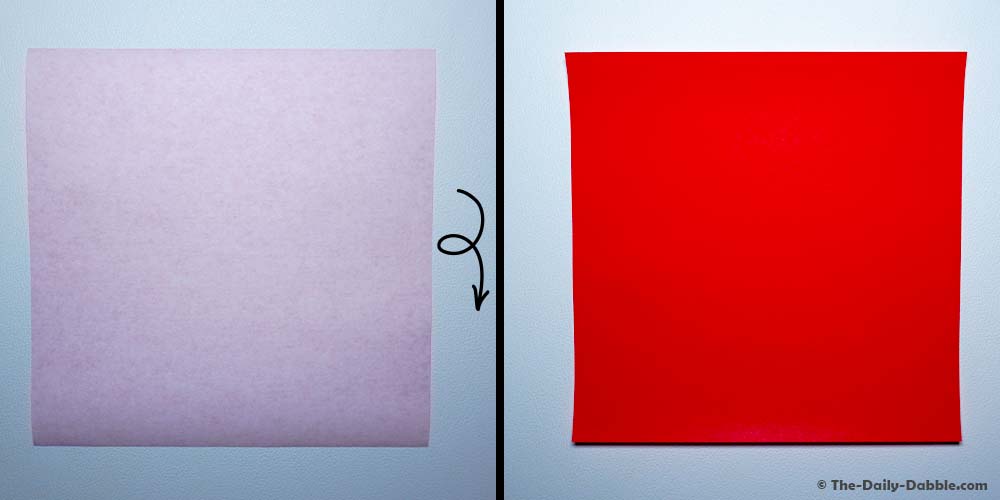
To make a paper house, you will need a single square piece of paper. You can use regular printer paper cut into a square; however, I recommend origami paper for better-looking folds, and that traditional origami feel!
In this tutorial, I’ll be using a multi-color 6 x 6 sheet of origami paper, but you can use single-colored paper as well.
1. Determine your desired color scheme
If you use multi-color paper with a different color on each side, you’ll need to decide the color you want for each part of your house.
Whichever color is facing up on step one will determine the color of the house’s walls, while the color facing down will specify the color of the house’s roof. I’ll also be starting with the red color up so that my will have red walls and a white roof!
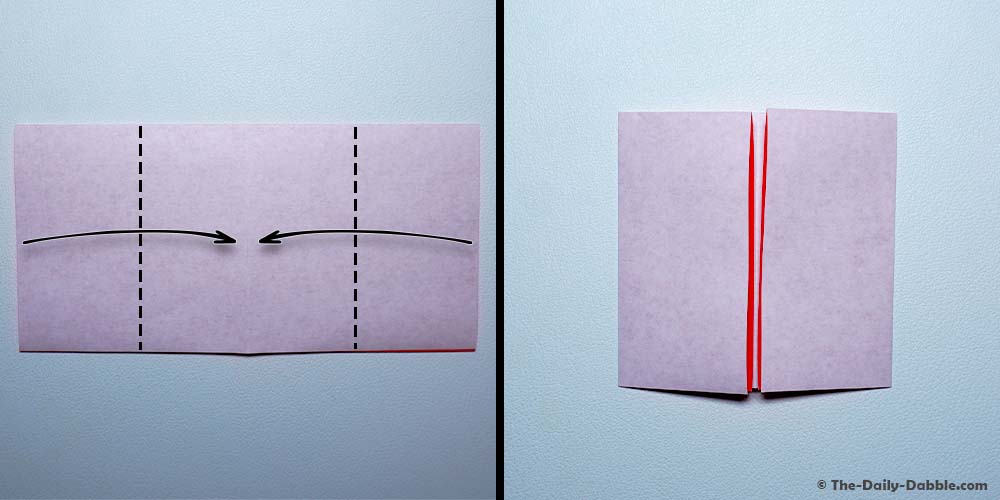
2. Fold in half vertically, then unfold
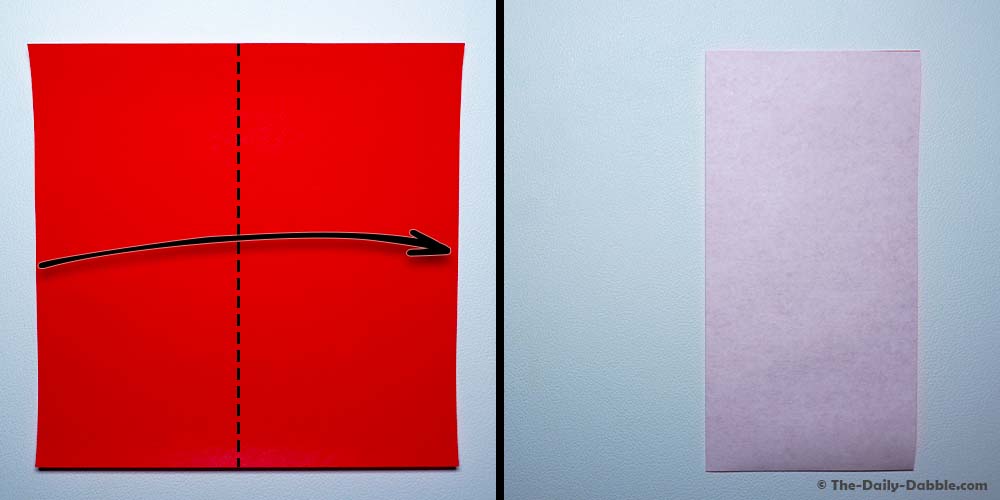
Begin by folding your paper in half vertically, bringing the left edge to the right. Crease well and unfold.
3. Fold in half horizontally, top to bottom
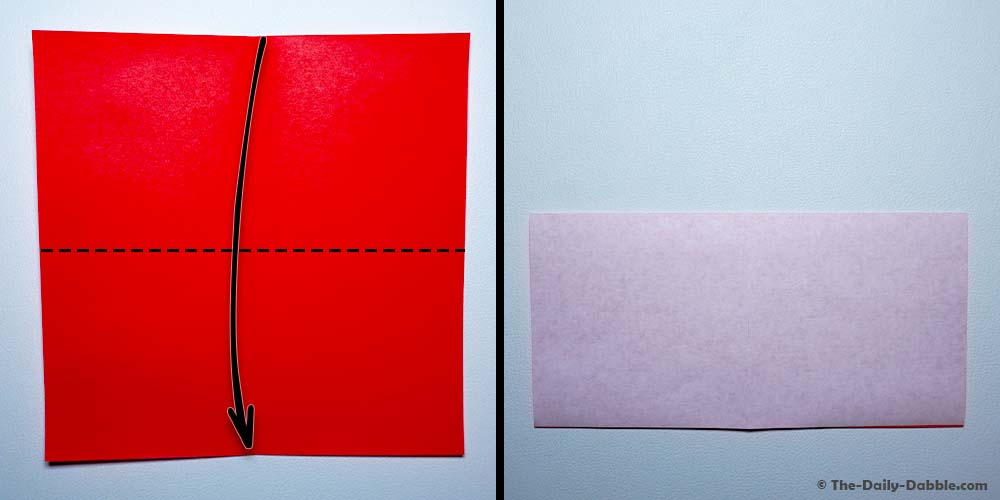
Next, fold your paper in half horizontally, bringing the top edge to the bottom.
4. Fold left and right edge to the center crease
Grab the right edge, fold it to the center crease, and repeat with the left edge. Flatten everything down well.
5. Fold the top-center corners down diagonally, then unfold
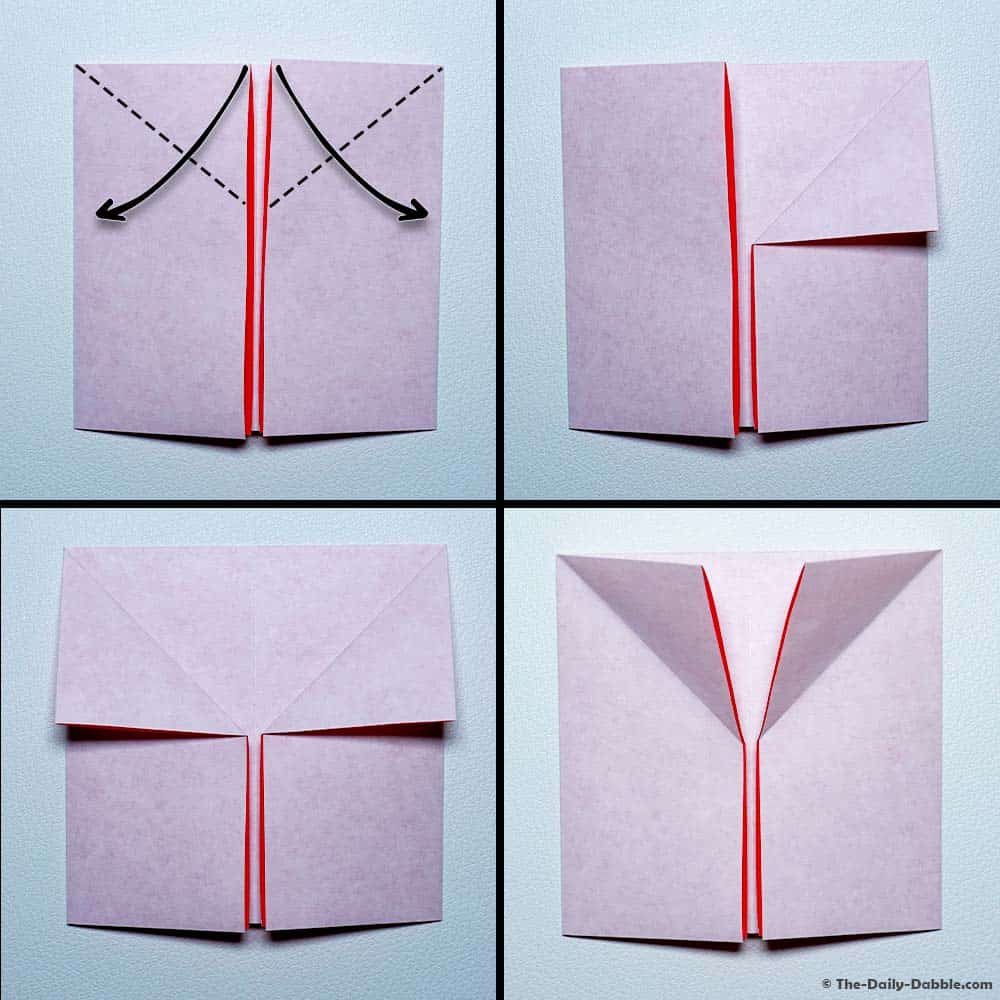
Grab the upper-center corners and fold them diagonally—down and outward. Crease them well and then unfold them.
6. Open and squash fold the left section
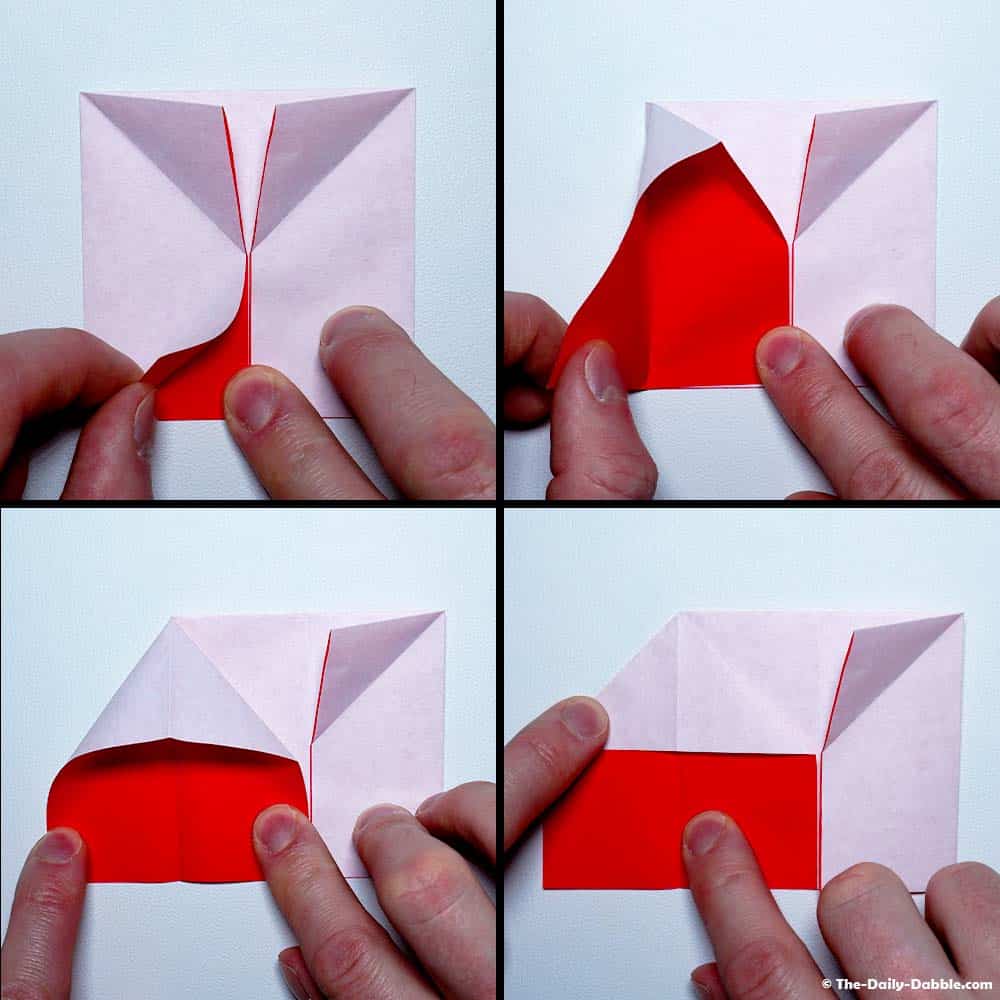
Grab the top layer of the left flap while holding down the second flap. Pull the flap over to the left while using the creases as a guide, squash fold the top section into a triangle.
7. Open and squash fold the right section
Repeat the previous step on the right side and flatten everything down nicely.
If you can stop at this point if you want to leave your house two-dimensional, but if you want to give it a more realistic touch, continue to the next step.
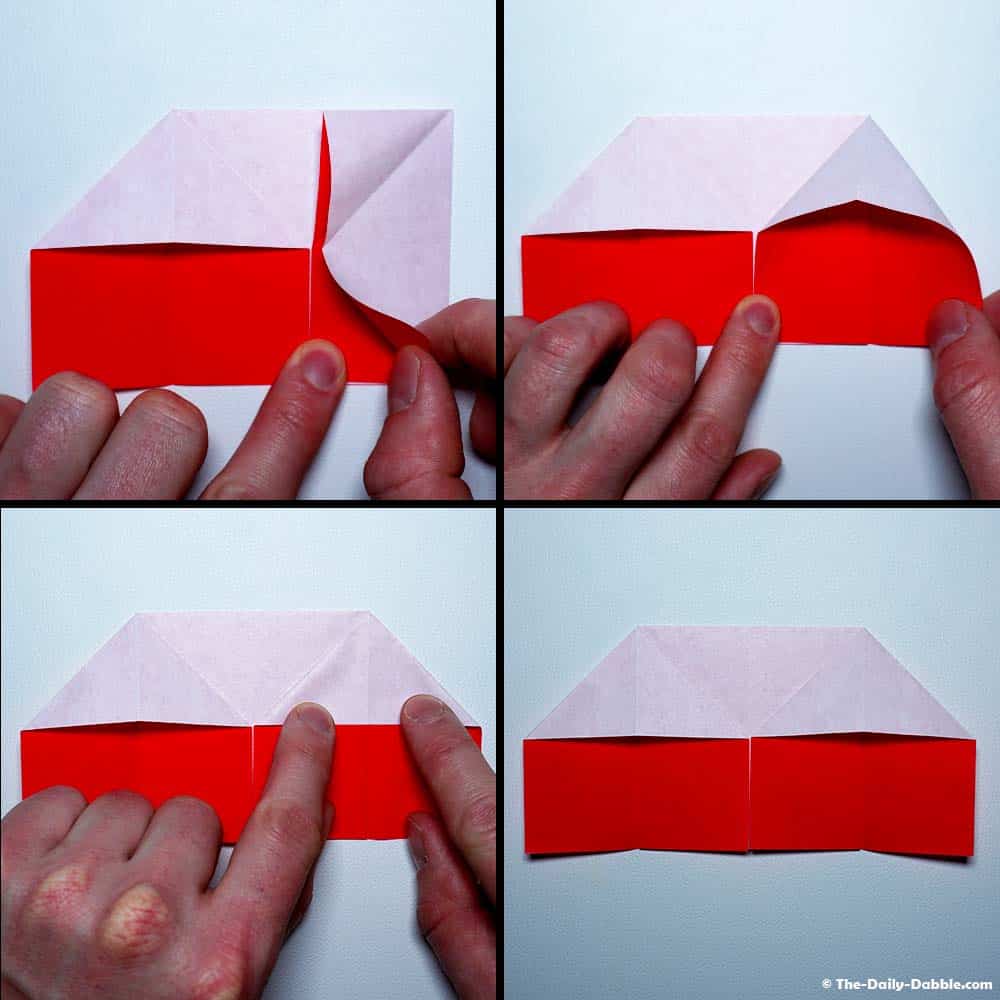
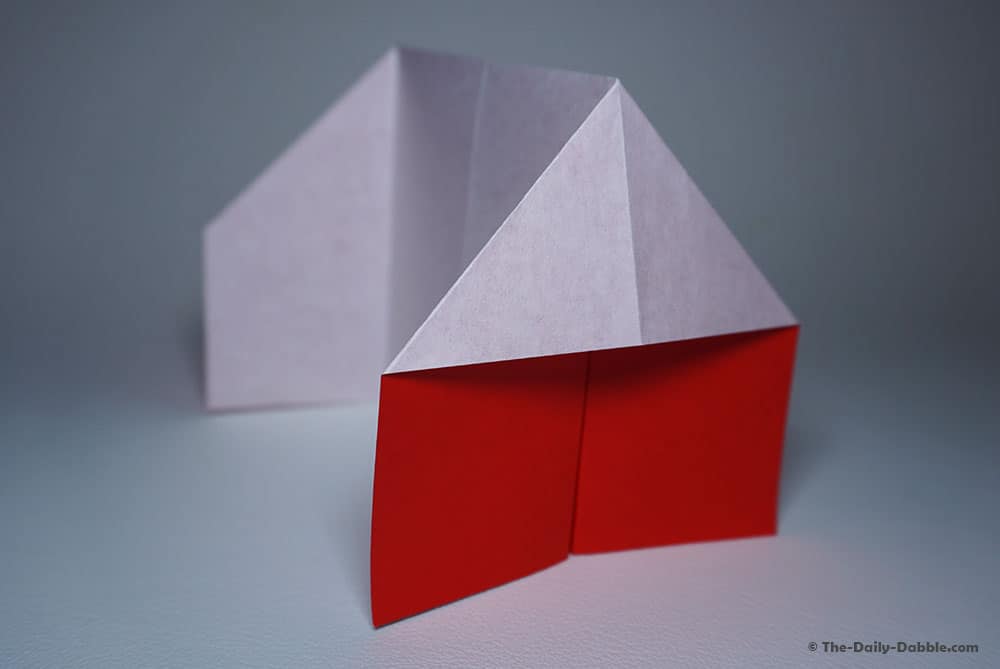
8. Rotate the left and right section
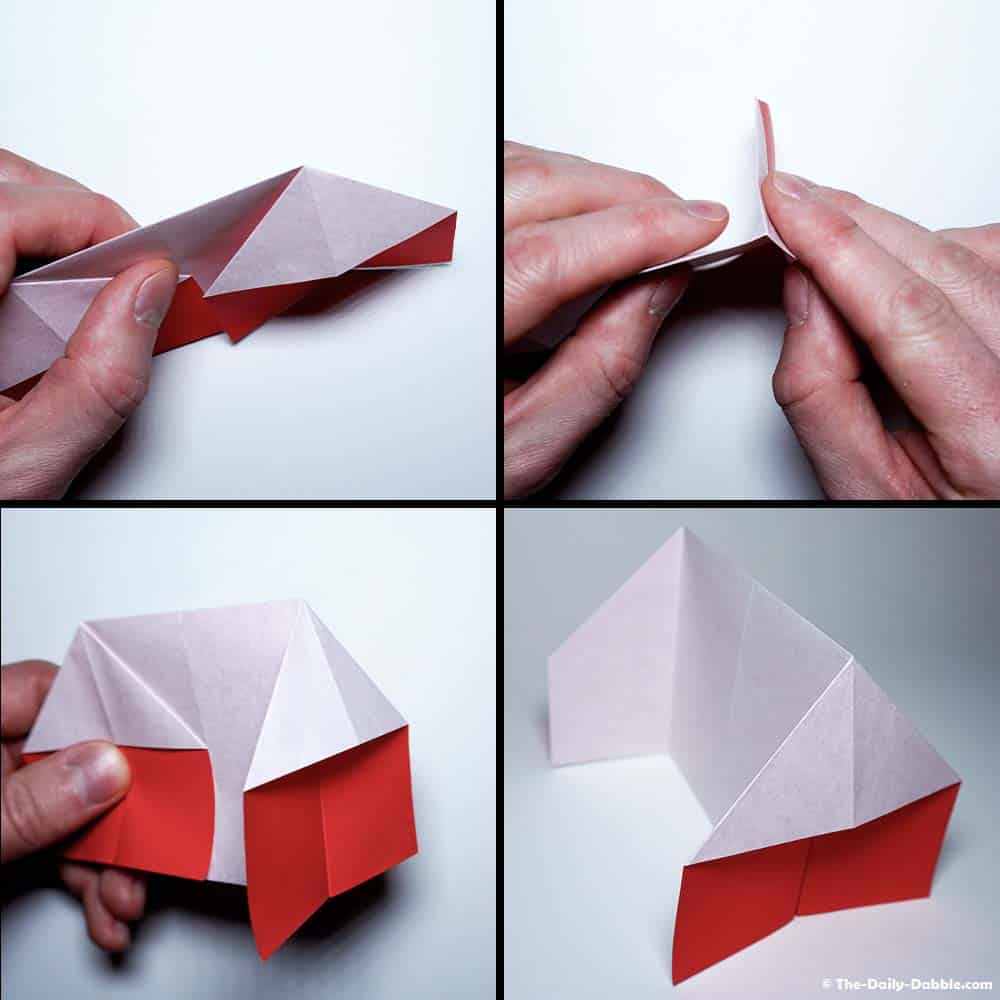
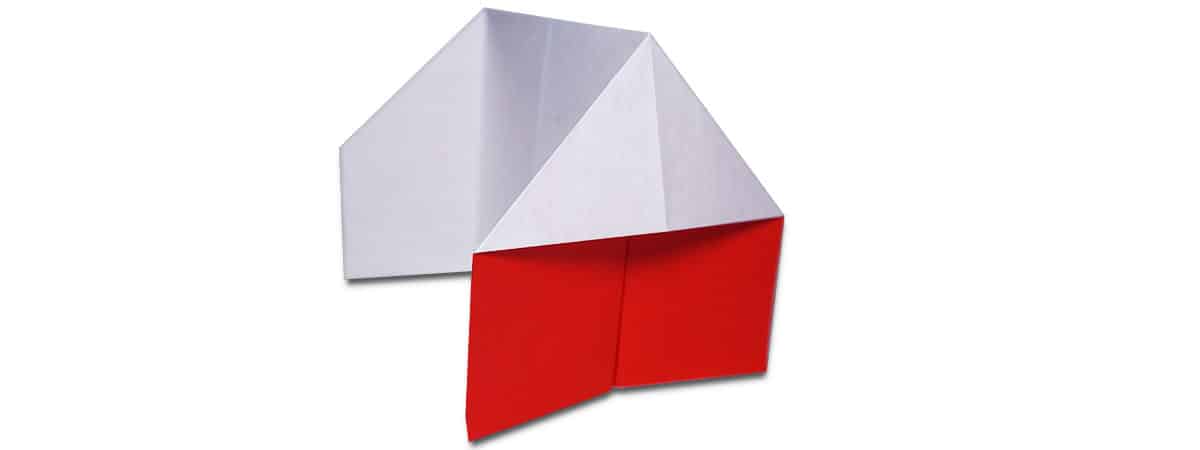
Let’s finish up the house by making it 3D. Grab the left and right sections and rotate them outward.
There you have it, a quick and straightforward origami house. You can now set your home up and decorate it for the world to see!
I hope you enjoyed folding this little origami homestead and if you would like some more incredible origami designs to dabble in, please visit our easy origami tutorials to what you can fold!
You might also like the easy origami heart if you liked the house! We also have a cool guide on folding a house using a dollar bill for a cool tip or money gifting idea!
Thanks for following along, and happy folding!