
Did you know you can make a paper balloon that actually holds water?
This guide covers each step for making an origami balloon in around five minutes.
Also known as the “water bomb,” this foldable balloon design is inflatable and holds water for a time.
You can find more origami toy ideas in our growing collection of easy paper-folding tutorials.
Let’s make an origami balloon, AKA Water Bomb!
To fold the origami balloon, you just need one square piece of paper is all that is required.
If you don’t have a square sheet, you can always just cut standard paper into a square.
In this guide, I use square origami paper that is light green on both sides.
STEP 1. Fold the paper in half diagonally
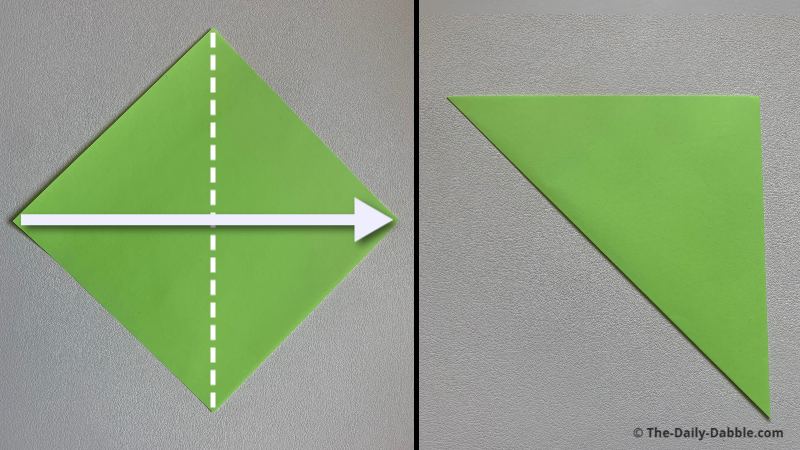
We will be folding the origami waterbomb base in the first four steps.
Fold the paper in half from point to point and then unfold it again.
STEP 2. Fold it in half from the other points
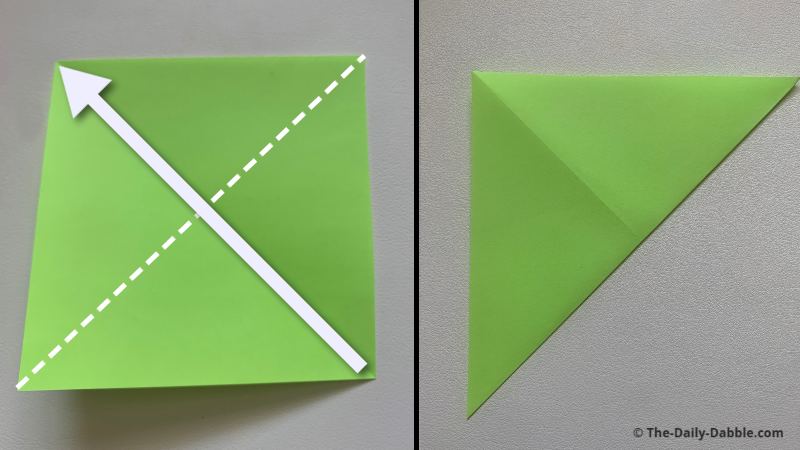
The paper can now be divided in fourths by the creases.
Open up the fold after rubbing the edges to make a crease.
STEP 3. Fold the paper in half from one edge to another
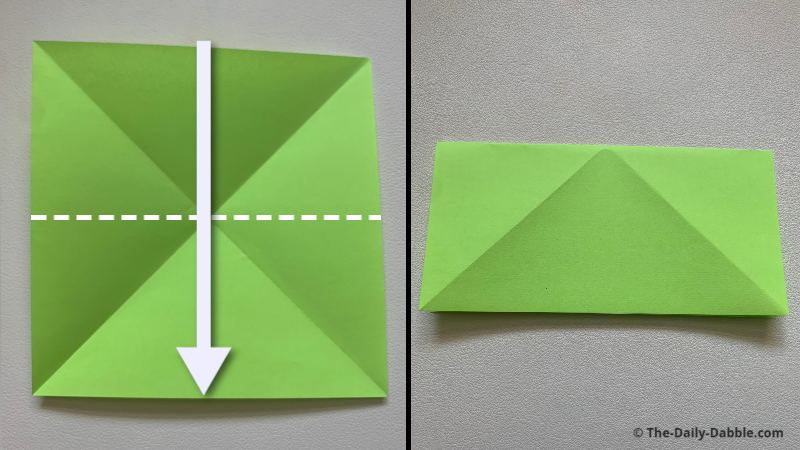
Fold the paper in half normally, from edge to edge, once and unfold again.
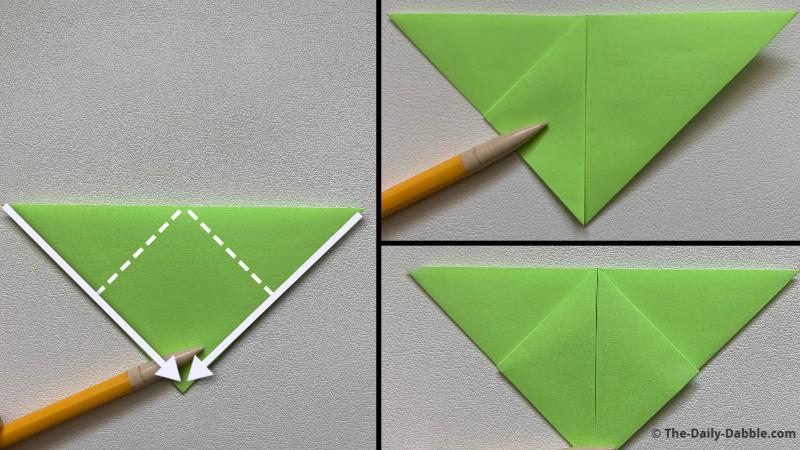
STEP 4. Push in the middle sides and flatten into a triangle
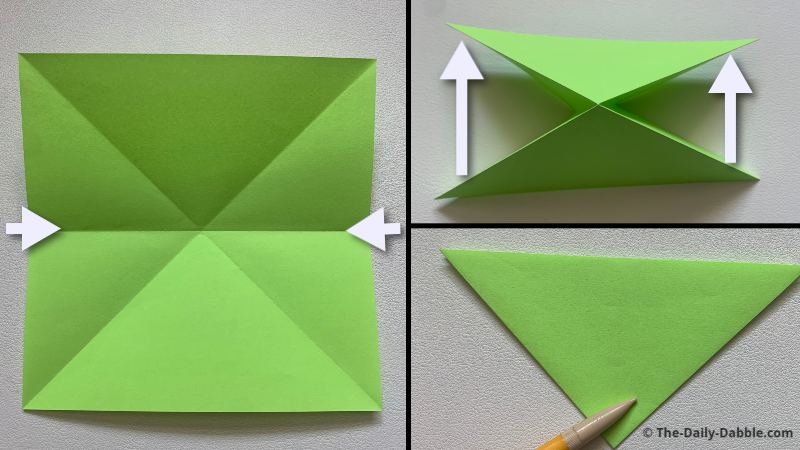
Push the middle sides inward, on the edges where the horizontal crease was just made.
Then you can press the triangle together and then down flat.
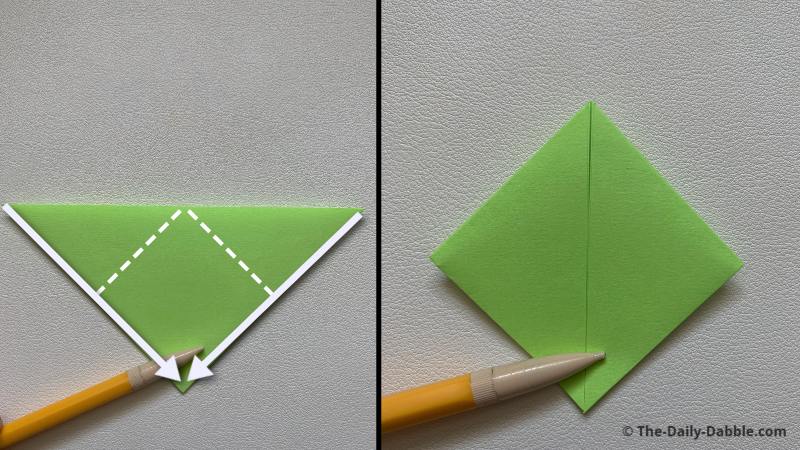
STEP 5. Bring both top points down to meet the bottom
Fold the two upper flap points evenly down to the bottom point.
STEP 6. Flip over and repeat on the other sides
After flipping the project over, fold the top points down just as you did on the other side.
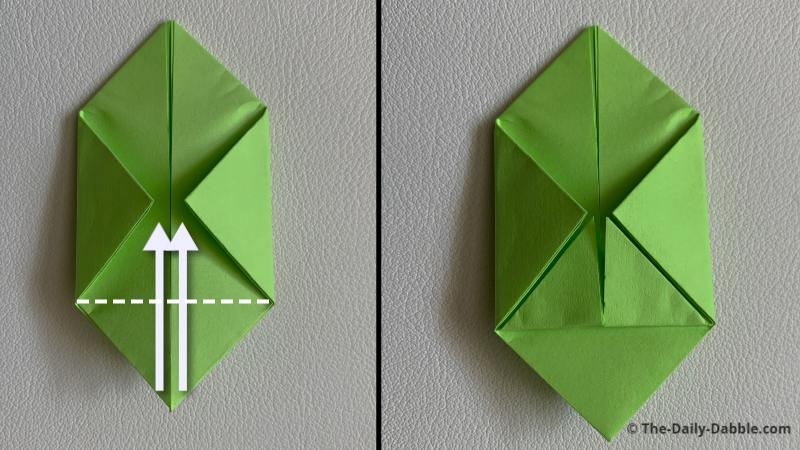
STEP 7. Bring the middle points to the vertical centerline
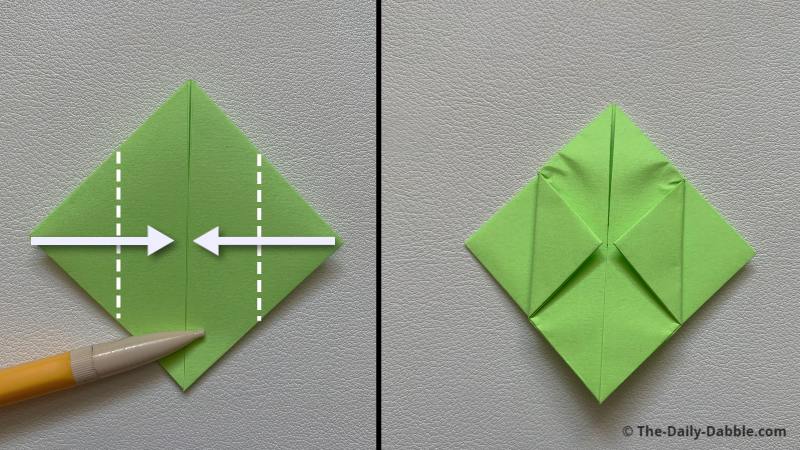
With the open flap tips on the bottom and the centerline vertical, fold both outer edges into the middle.
STEP 8. Flip over and repeat the step on the other side
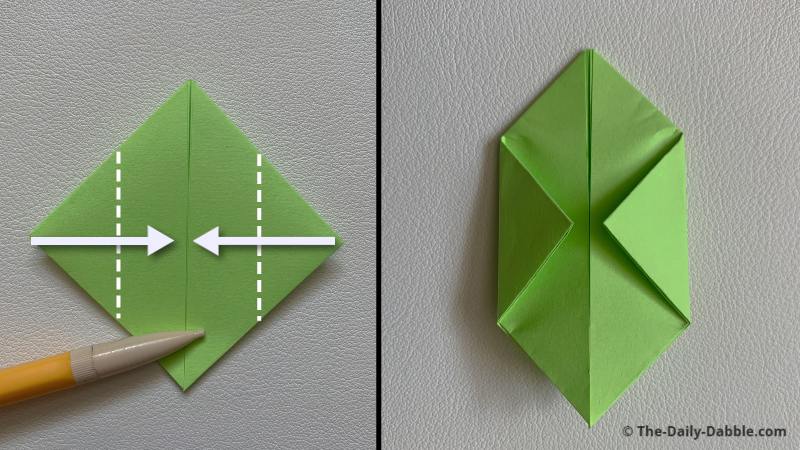
Bring the outer middle tips in to touch the vertical centerline again on the opposite side.
STEP 9. Fold the upper flaps of the bottom part up evenly
Fold the top flaps of the open side of the flaps up evenly.
STEP 10. Fold the flaps again diagonally over the other flaps
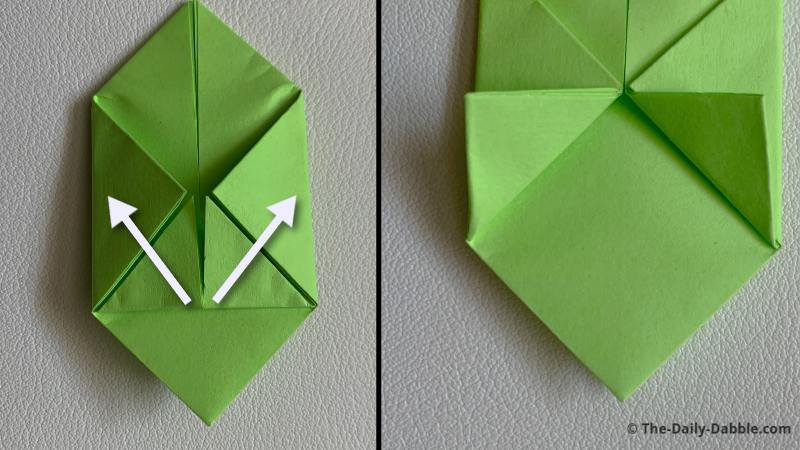
Fold the same flaps separately and diagonally over the middle flaps.
STEP 11. Unfold the flap points and insert them into the others
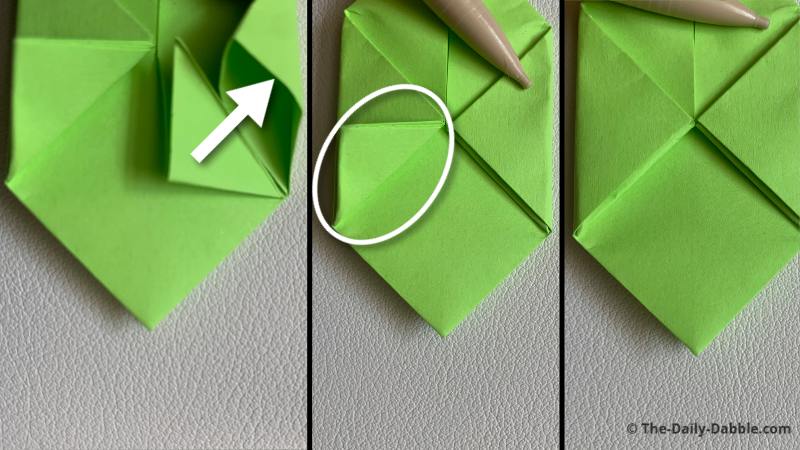
After unfolding the last two steps of the flap-folds, insert the bottom tips into the middle ones.
Using a pen or pencil to push the tips in may help.
STEP 12. Repeat steps 9-11 on the other side
Flip over and repeat steps 9-11 on that side the same way.
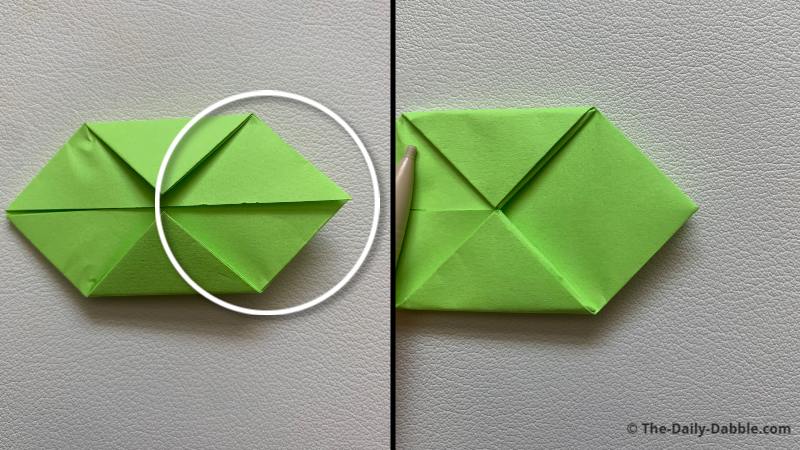
We are now ready to blow up this origami balloon.
STEP 13. Open up the origami balloon and blow in the hole to inflate

Open up the water balloon into the plus shape, as shown on the left.
It may help to stretch the airway hole with a pen or pencil before inflating it.
People put water in these and throw them, but remember the paper can be hard and sharp.
It also won’t hold water for very long as it is, of course, made of paper.
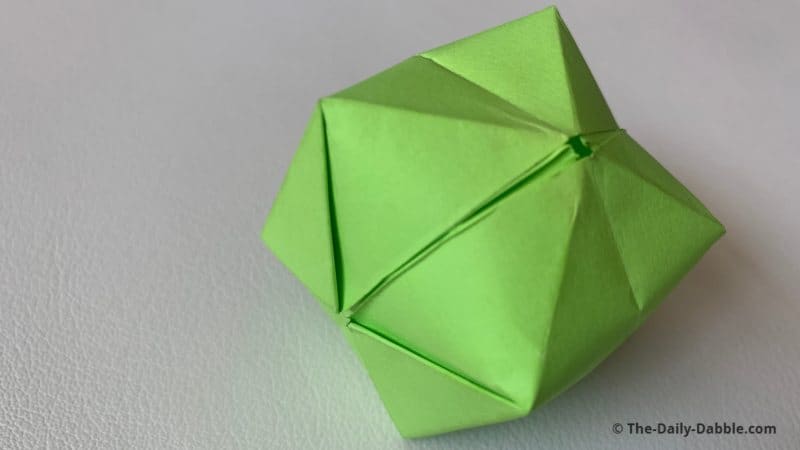
Now you know how to make an origami water bomb!
If you want to fold another similar origami project, check out our origami inflatable heart folding instructions.
Happy Folding!