
The bird base is a traditional origami design that can be used as a starting point for many other origami creations—such as the infamous paper crane!
This versatile fold consists of only 11 steps and starts with the origami square base.
To fold this base, you will need a single square sheet of paper; however, origami paper works the best and will provide you with cleaner creases.
If you use a multi-color sheet, you will want to begin the fold with the white side facing down and the colored side facing up.
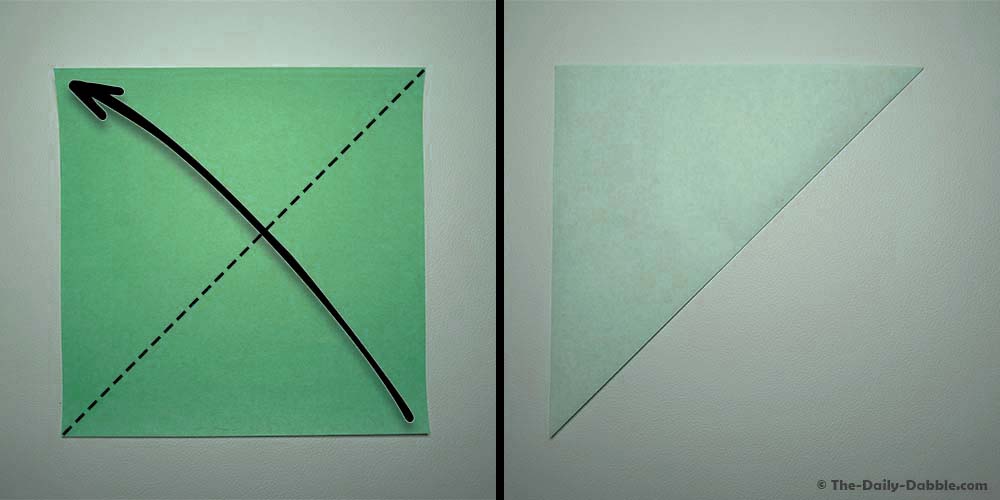
Step 1: Fold the paper in half diagonally, then unfold
We will start by creating the square base.
Fold the paper in half diagonally by pulling the right corner over to the left. Crease and unfold.
Step 2: Fold the paper in half diagonally in the other direction, then unfold
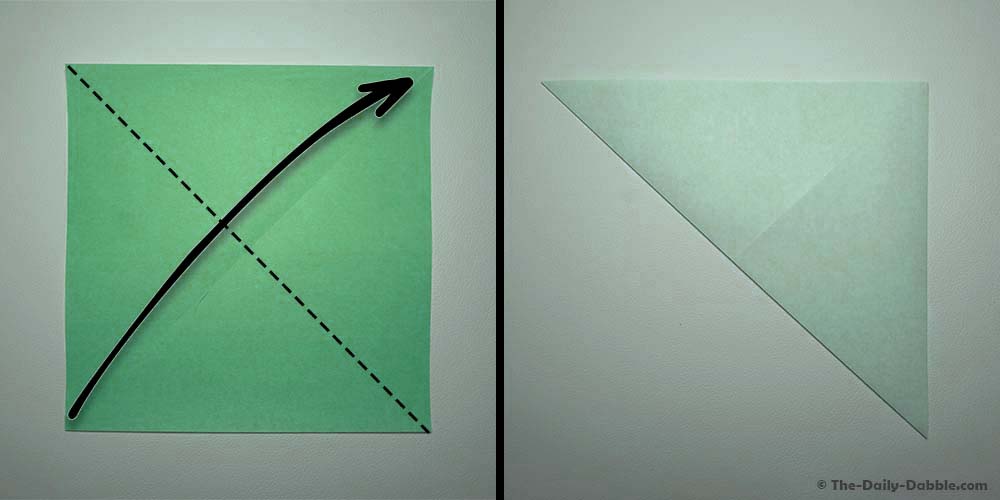
Fold the paper in half diagonally in the opposite direction by pulling the right corner over to the left. Crease and unfold.
Step 3: Flip the paper over and fold in half vertically, then unfold
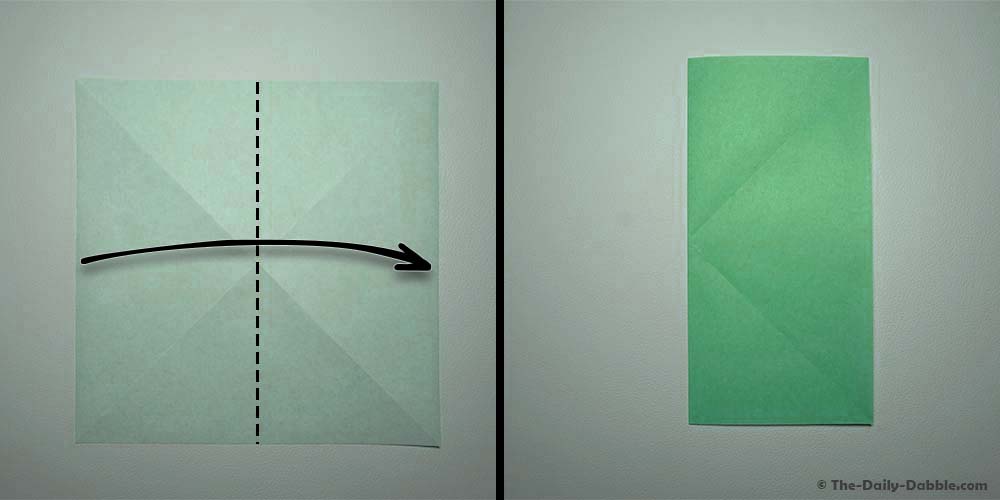
Flip your paper over so the color side is down, and then fold in half vertically, bringing the left side over to the right. Crease and then unfold.
Step 4: Fold in half horizontally, then unfold
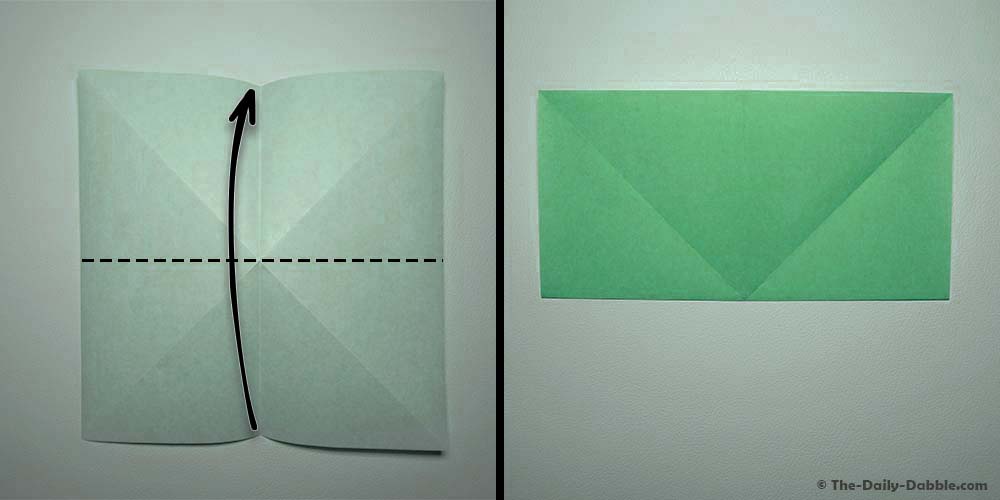
Fold the paper in half horizontally. Once again, crease and unfold.
Step 5: Pull corners inward
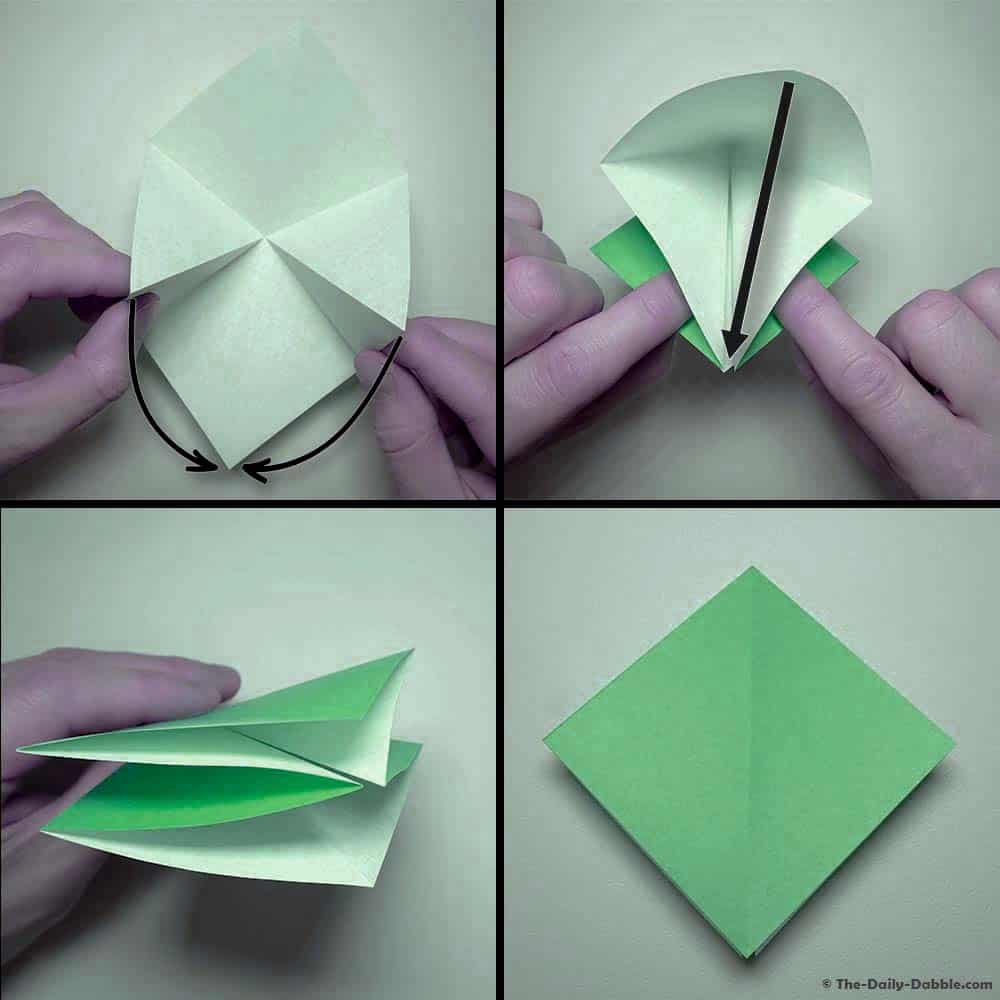
Rotate the paper so that two corners face upward and downward (like a diamond).
Grab the left and right corners and fold them down to the bottom corner. Then fold the top corner down to meet the others.
The result will be a smaller square called the origami square base. However, let’s continue and turn this into the bird base!
Step 6: Fold the bottom edges to the center crease
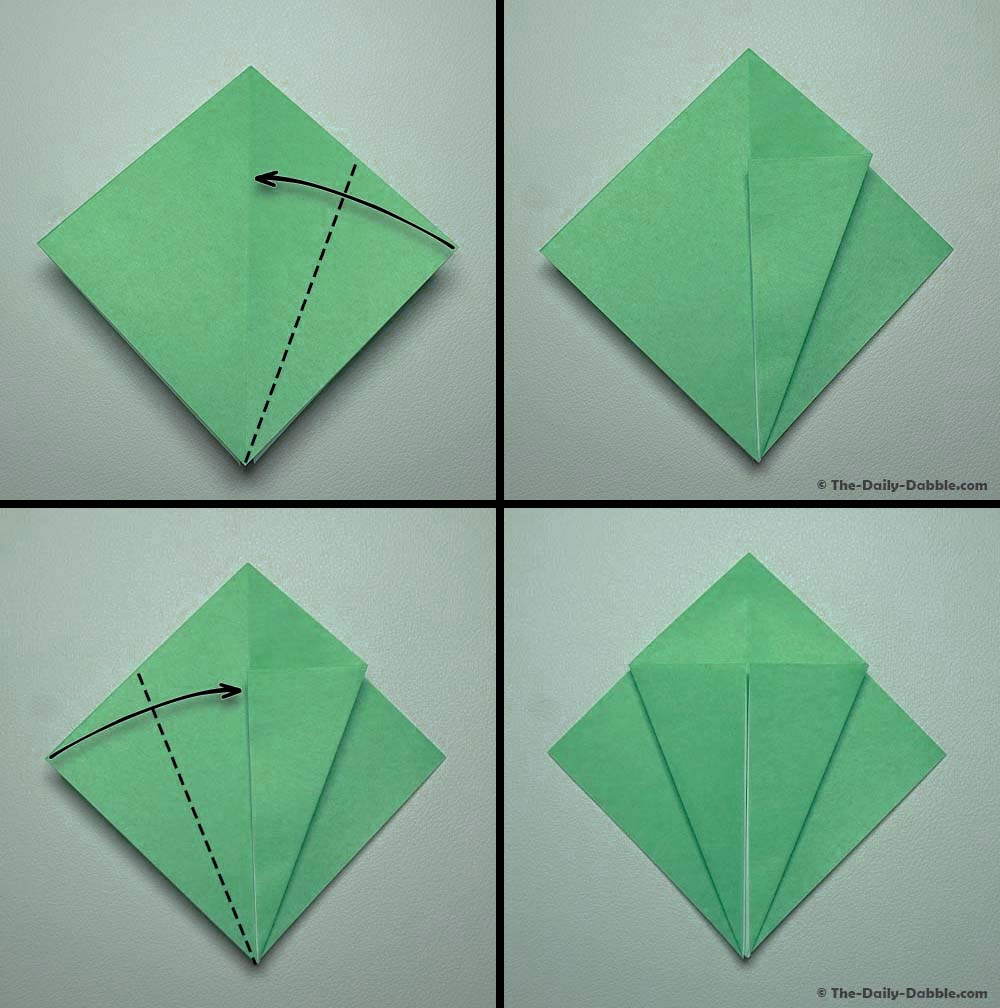
With the flaps facing towards you, fold the first layer of the bottom left and right edges inward to the center crease.
To get cleaners folds, begin creasing at the thinnest section while aligning the broader areas.
Step 7: Fold the top point down
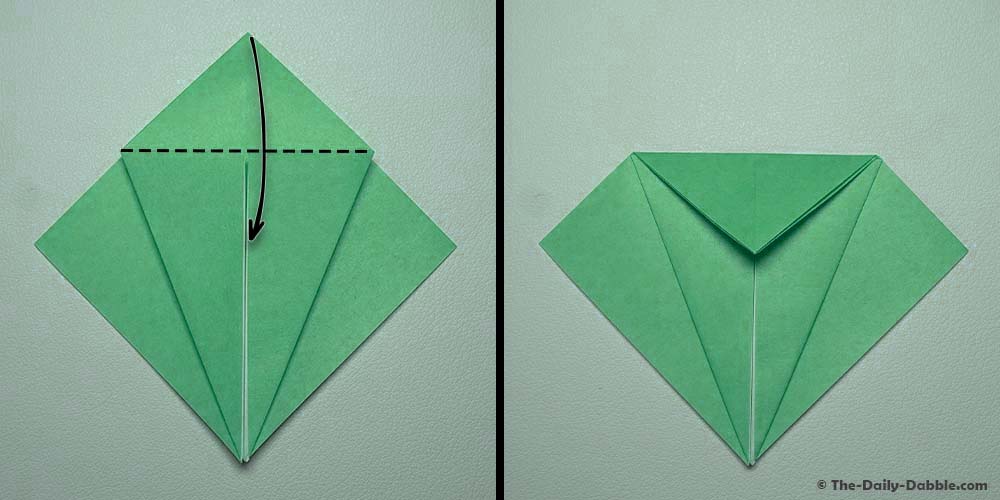
Fold the top corner down as far as possible and crease. The crease should be right above the lower flaps.
Step 8: Unfold the last three folds
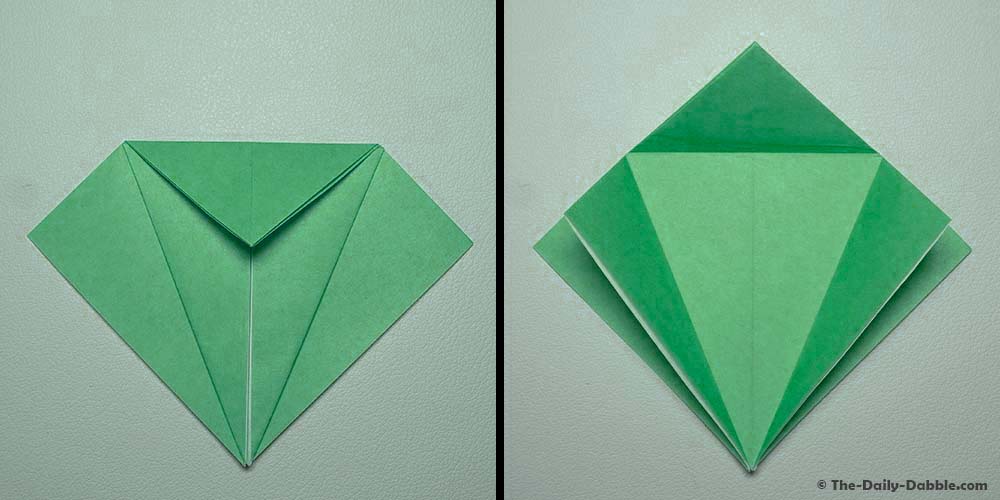
Undo all your hard work and unfold the previous three folds.
Step 9: Lift the top flap and fold up
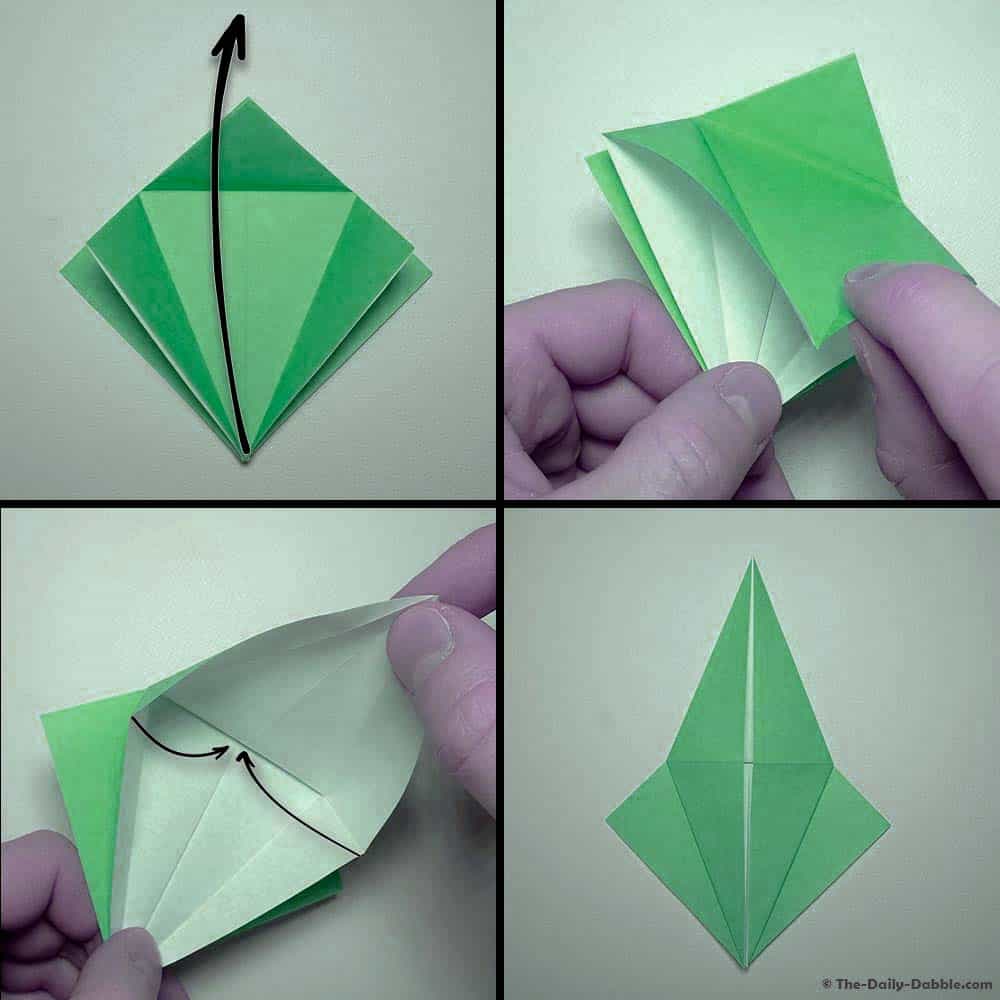
Grab the bottom corner of the top flap and pull it upward, bending the paper at the upper crease.
Pull the left and right edge inward and smush them to the center crease.
Step 10: Flip the paper and repeat
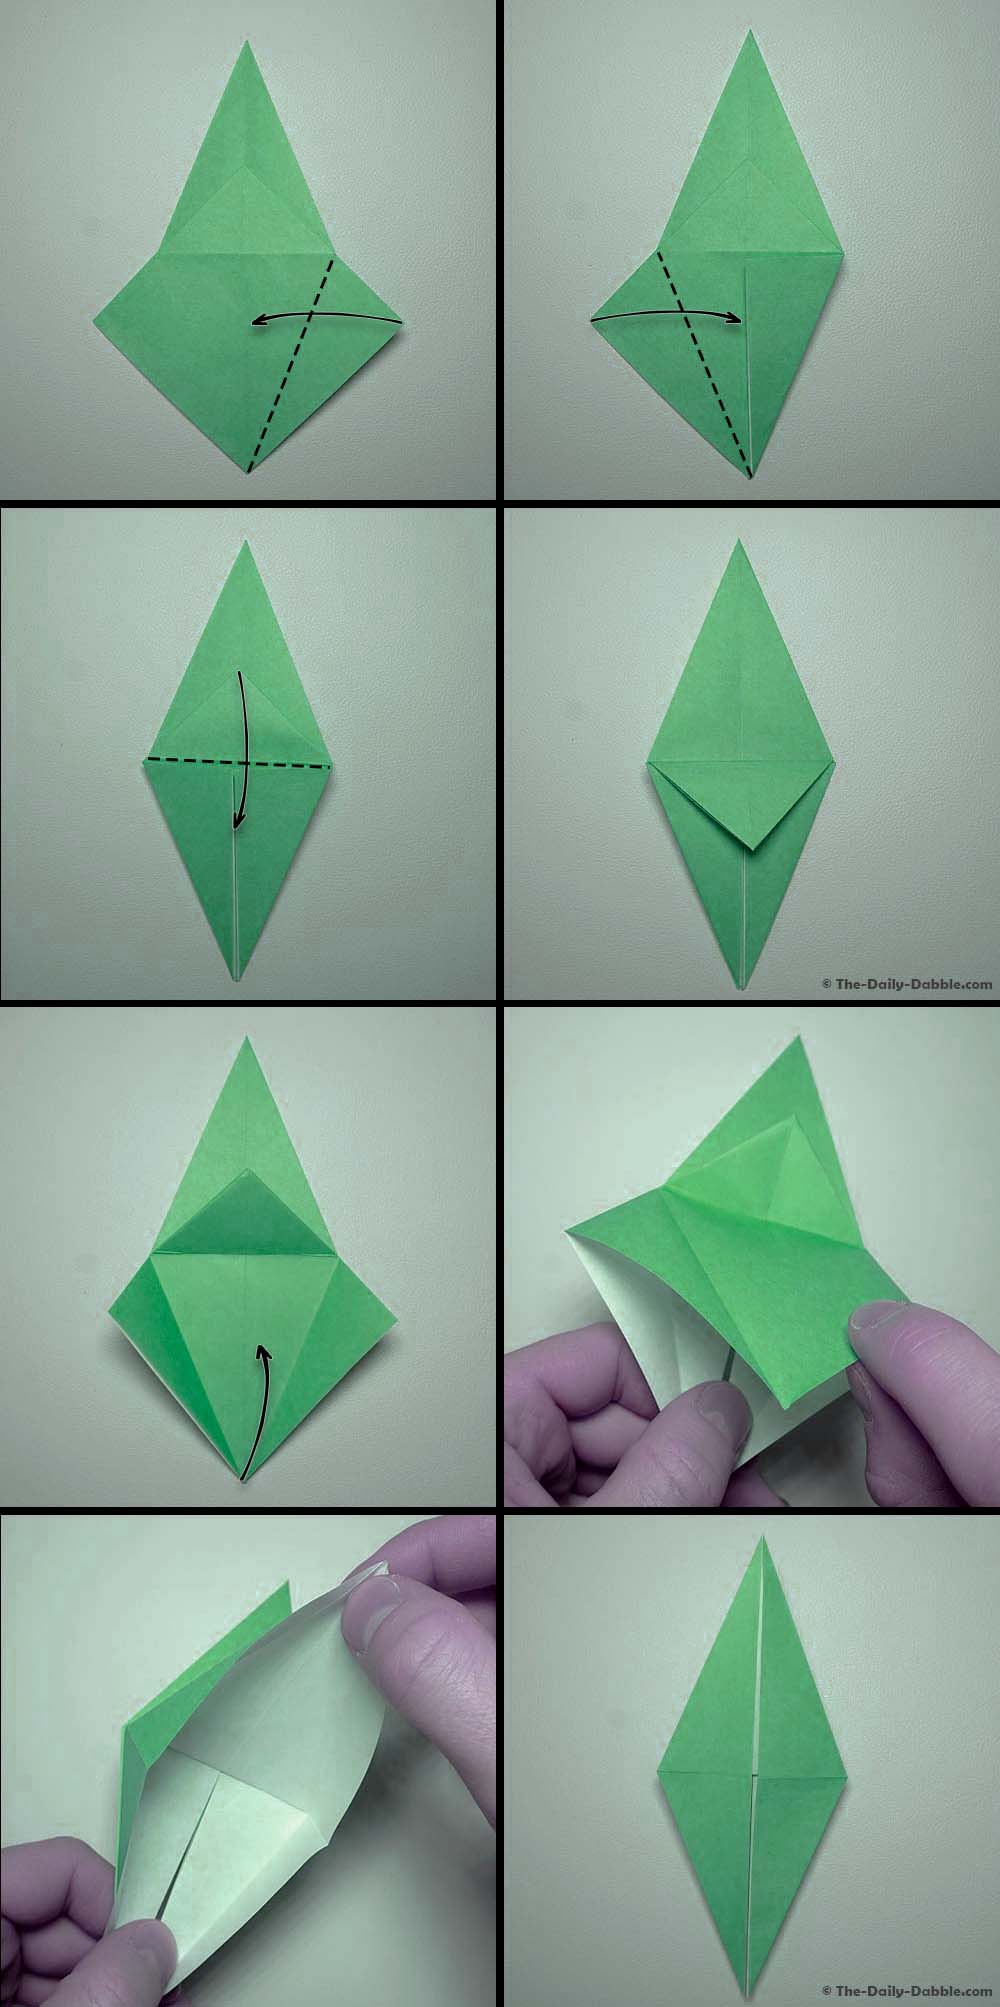
Flip the paper over and repeat the previous steps.
Begin by folding in the bottom-left and bottom-right edges and then the top edge down, reversing the crease.
Once again, unfold all your hard work. Next, push the flap up and smush the edges to the center.
Flatten everything down well, and there you have it, the origami bird base!
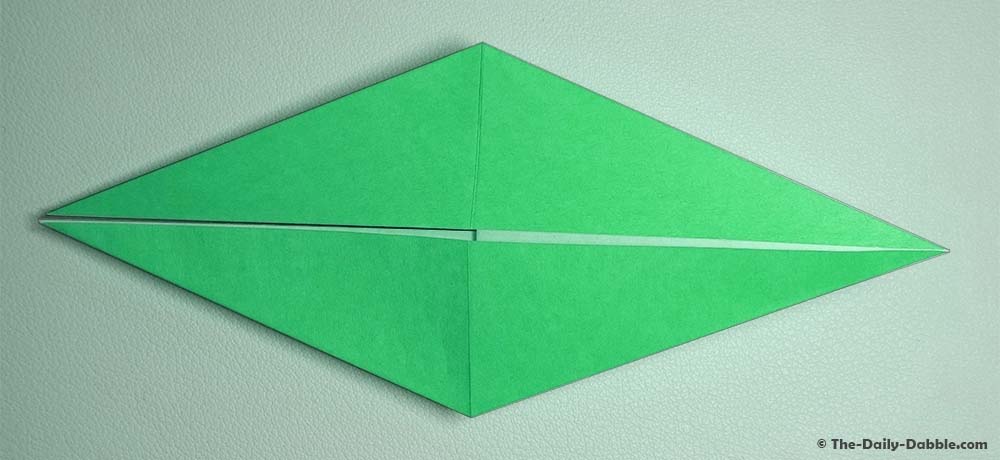
The Bird Base: Continued Folding
Now that you have learned to fold the bird base, it’s time to turn this simple diamond-shaped paper into an origami masterpiece!
Below is our collection of origami guides that can be folded using this particular base.
You can click the images below to visit each step-by-step guide!
Origami Crane
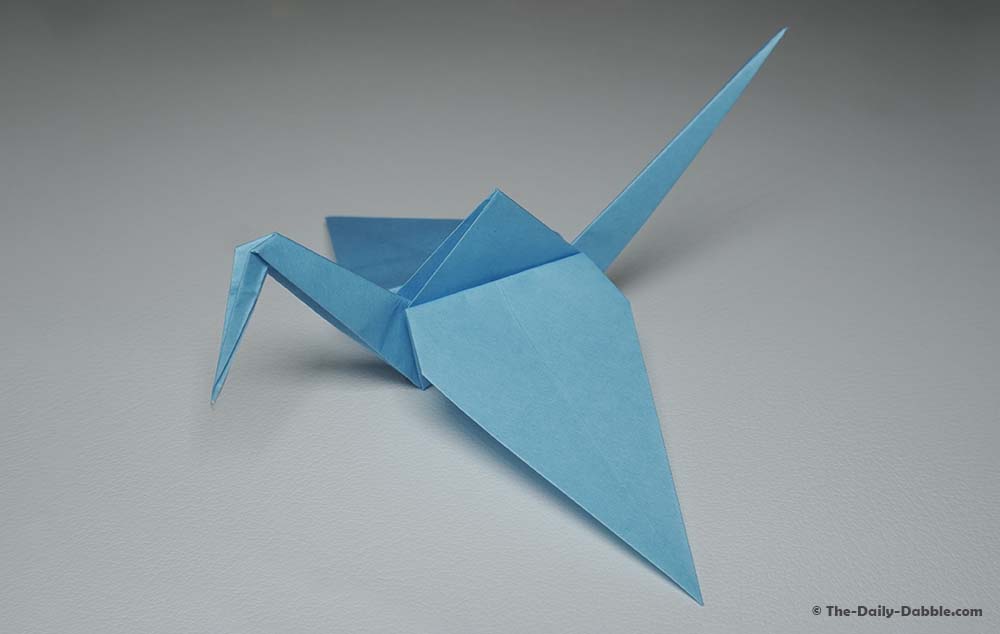
First up is the origami classic—the crane! This little guy can be made with an additional nine steps and is a perfect beginner craft! You can view our origami crane guide here.
Closing Thoughts
Origami bases are a fun and easy way to memorize all your favorite folds.
If you would like to learn how to fold more origami bases, check out our beginner’s guide to origami base folds. Or, if you’re looking for some cool things to fold, check out our growing collection of origami designs here.
Happy folding!