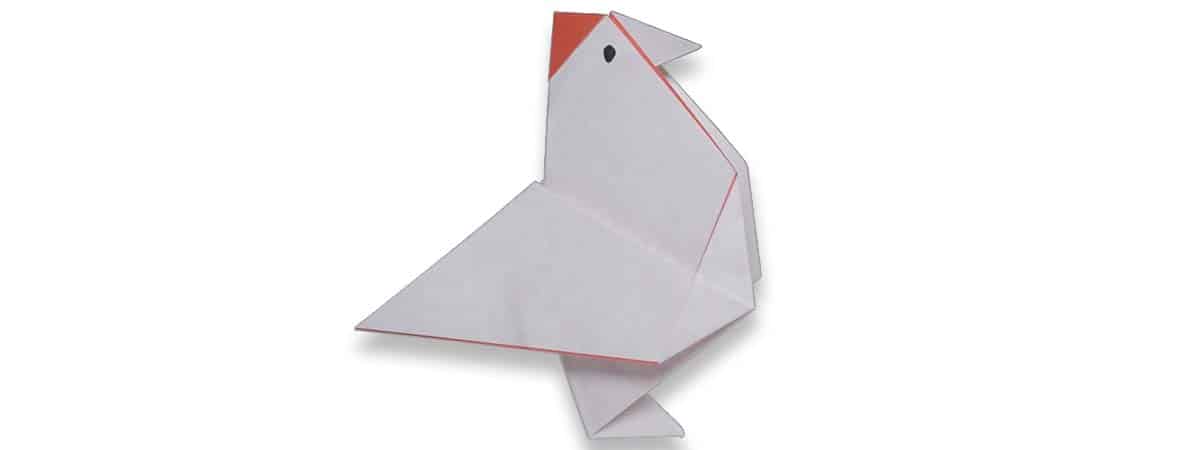
In this guide, we are going to learn how to fold a traditional origami chicken using a single piece of origami paper.
This easy origami creation has a few more steps but can be folded within 5-7 minutes.
Let’s get folding!
In this guide, I’ll be using a multicolor piece of origami paper, with color on one side and white on the other.
If you don’t have any on square paper, here’s how to make a regular paper square.
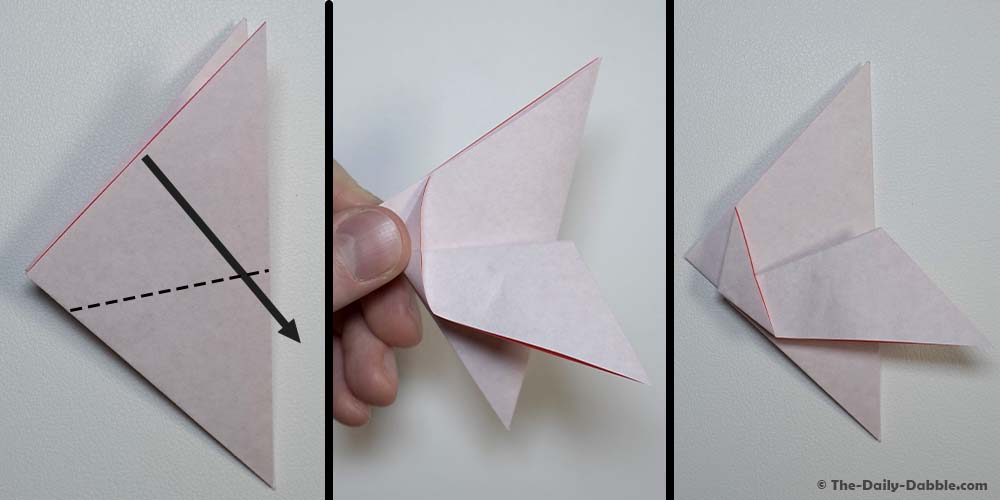
1. Fold the paper in half diagonally
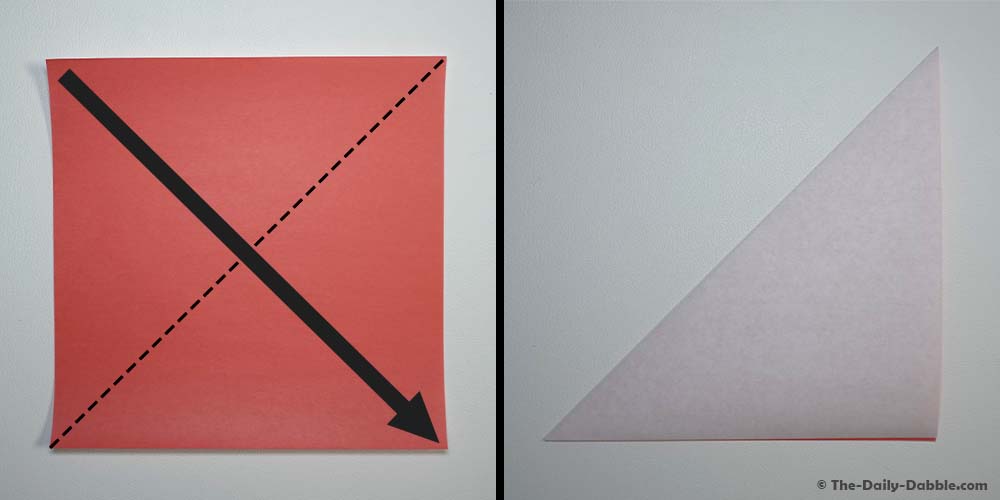
Starting color side up, fold your paper in half diagonally. The color down will represent the chicken’s primary color, while the color up will dictate its head color.
1. Fold the bottom corners to the top
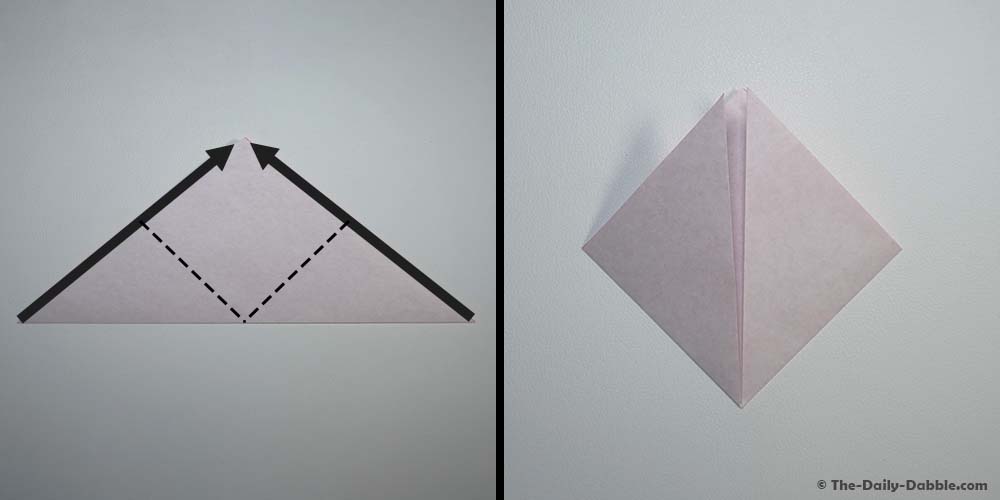
Next, rotate your triangle so that the long end is down, and then fold the two bottom corners to the top point.
Origami 101: At this point, you have folded the origami helmet base which is one of the main origami base folds!
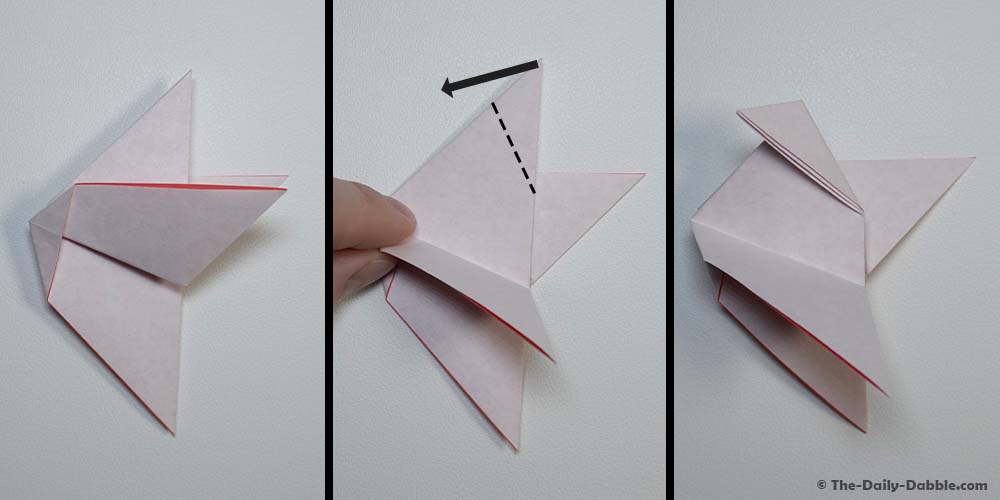
3. Flip paper around and fold in half
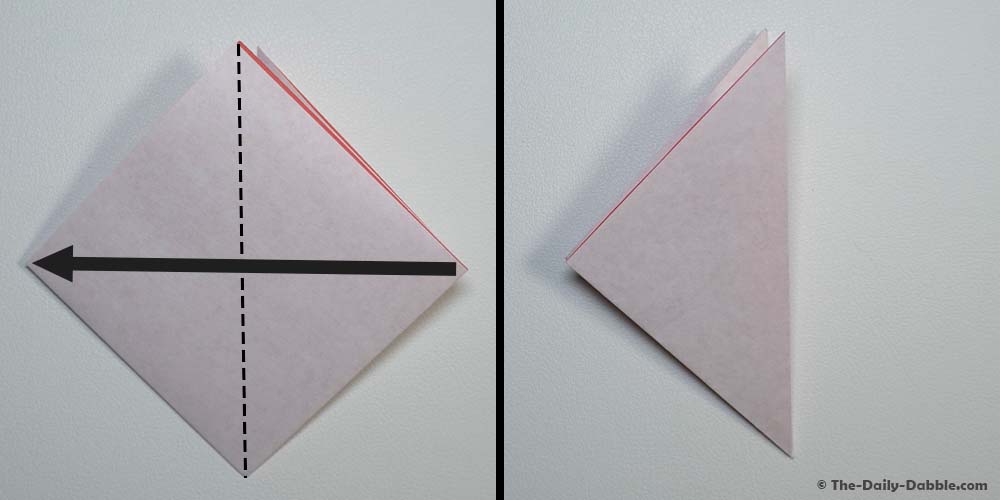
Flip your paper around so that your flaps are on the backside and then fold the paper in half vertically.
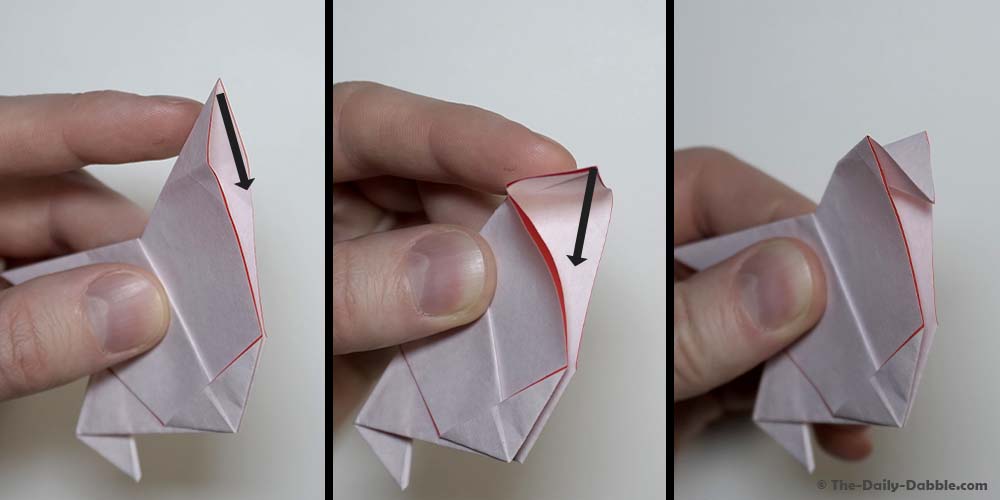
4. Fold the first wing
With your triangle paper pointing left, fold the first upper flap down and to the right. While pulling the wing down, smush the left side of the fold (at arrow) down flat to create a tiny triangle.
This step can be a bit of a hassle, but do your best to make the fold as clean as possible
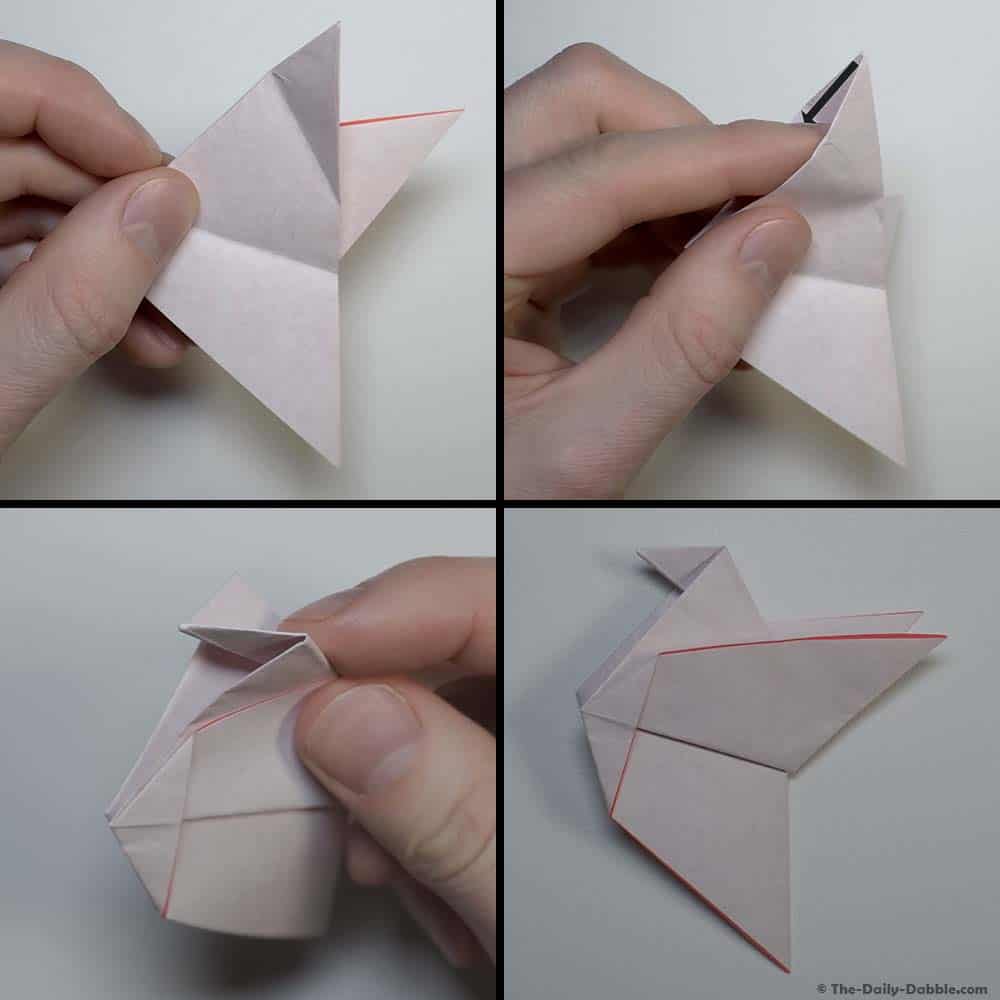
5. Flip the paper over and fold the second wing

Next, flip over your paper and fold down the second wing just like the first.
This side should be easier as you can use the crease from the other side as a guide.
6. Create crease for feet
Alright, time to make the chicken’s feet! Rotate your fold over so that the wings are pointing up and to the right, such as in the image above.
Next, fold up the wing so that it is out of the way and then fold the bottom edge over to make the feet and crease. Then unfold.
7. Reverse fold the chicken’s feet
Now that we have our crease to guide us, create an inside reverse fold by pushing the top point down between both sides of the paper.
8. Create a crease for the head
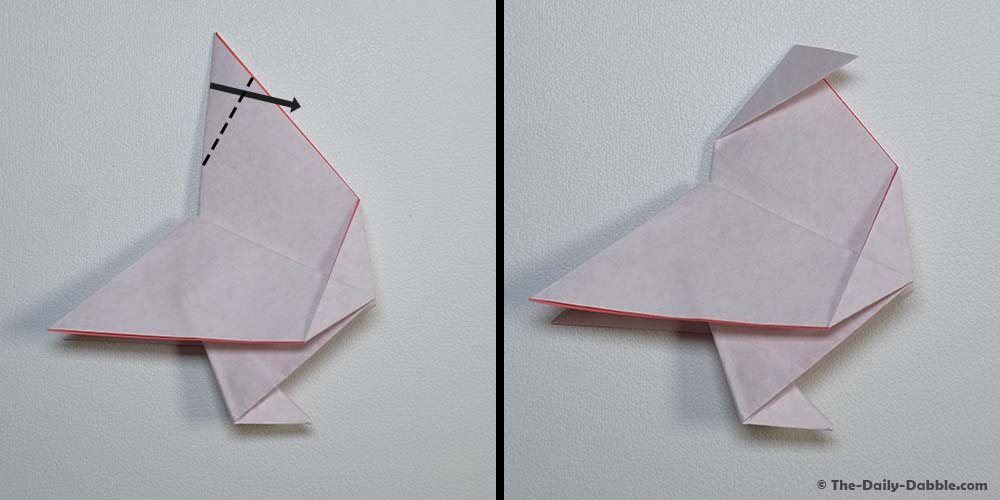
Next, we’re going to work on folding the head of the chicken. Begin by flipping over your paper so that the feet are on the bottom and pointing to the right.
Similar to folding the feet, create a crease for the head by folding the top point down and to the right. Then unfold.
9. Reverse fold the beak
Now that we have our crease to guide us, create an inside reverse fold by pushing the top point down between both sides of the paper.
10. Fold back the top layer of the head to expose the colored paper
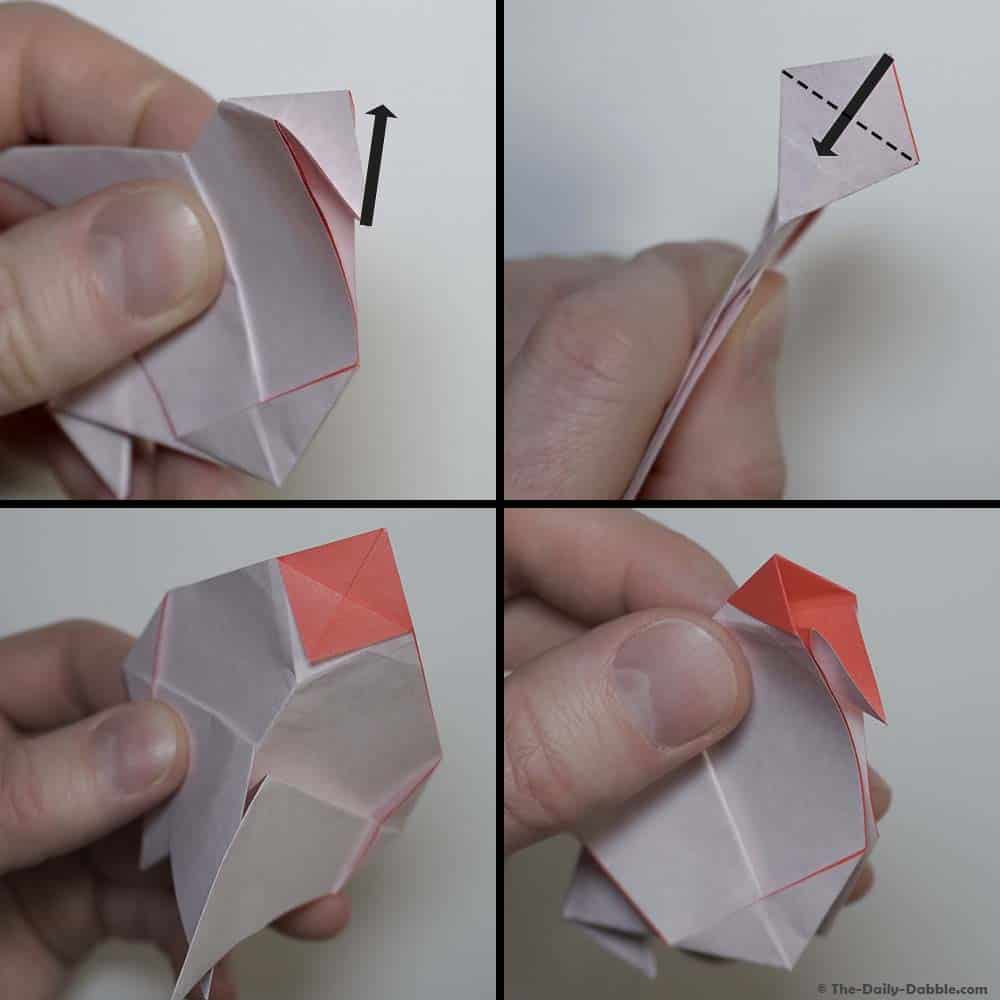
To finish off our chicken, slightly unfold the beak and then fold back the top layer to expose the colored paper for the head of the chicken.
Flip it around and set your chicken down on its feet. There you have it, a traditional origami chicken!
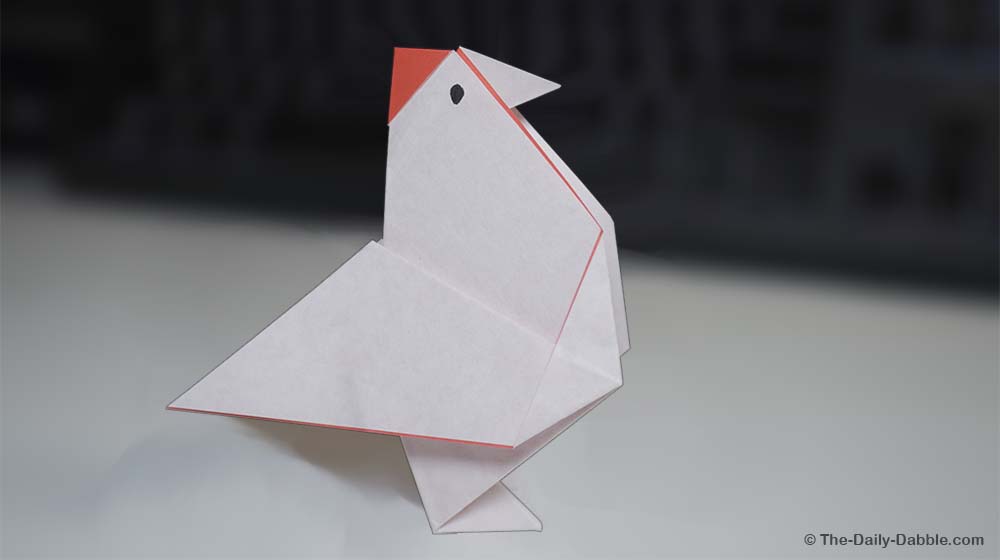
I hope you enjoyed folding this little chicken and if you liked this, consider checking the other origami bird designs. We have tons of easy-to-follow traditional designs from nifty little fox to a pretty butterfly—most of which can be folded within minutes!
Thanks for reading and happy folding!