
Origami birds are among the most remarkable things to fold from a piece of paper. Maybe even more incredible than paper airplanes?
In this step-by-step guide, I will show you how to fold a traditional origami crow using a single piece of paper.
While this fold contains slightly more steps than most beginner origami creations, it is still very easy and takes about 5 to 7 minutes to complete!
Let’s get folding!
For this paper crow, you will need a single sheet of square paper—origami paper works best.
I’ll be a single-color 6 x 6 sheet of black origami paper. However, you can also use multi-color paper or cut printer paper into a square.
1. Fold the paper in half diagonally, then unfold
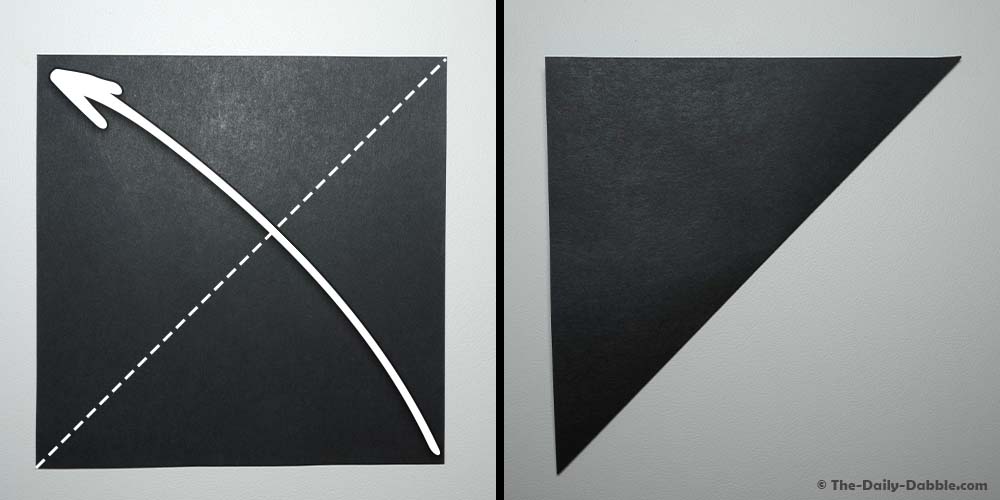
We are going to begin by folding the bird base. Origami bases are essentially starting points that can be used to create other origami creations.
Begin by folding the paper in half diagonally—bringing the bottom right corner to the top left corner. Crease well and unfold.
2. Fold the paper in half diagonally in the opposite direction, then unfold
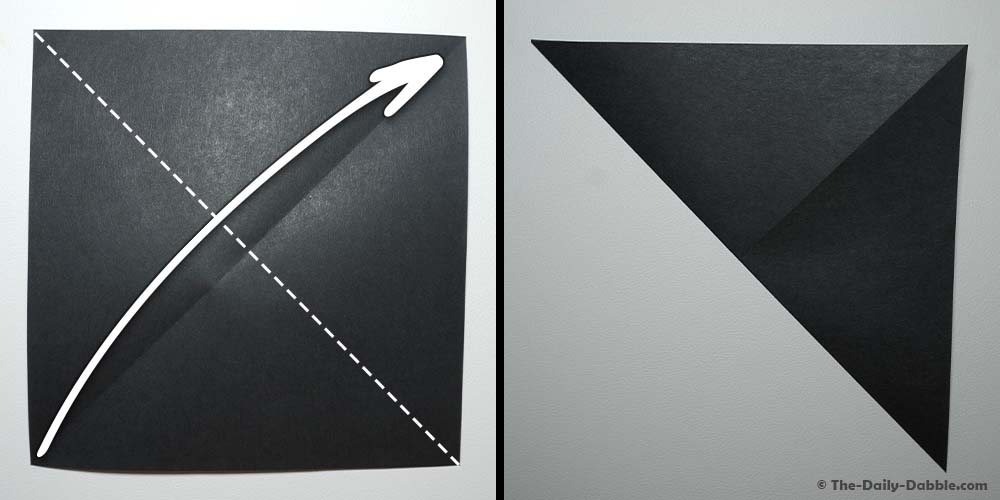
Next, fold the paper in half diagonally in the opposite direction—bringing the bottom left corner to the top right corner. Crease well and unfold.
3. Flip the paper over and fold in half horizontally, then unfold
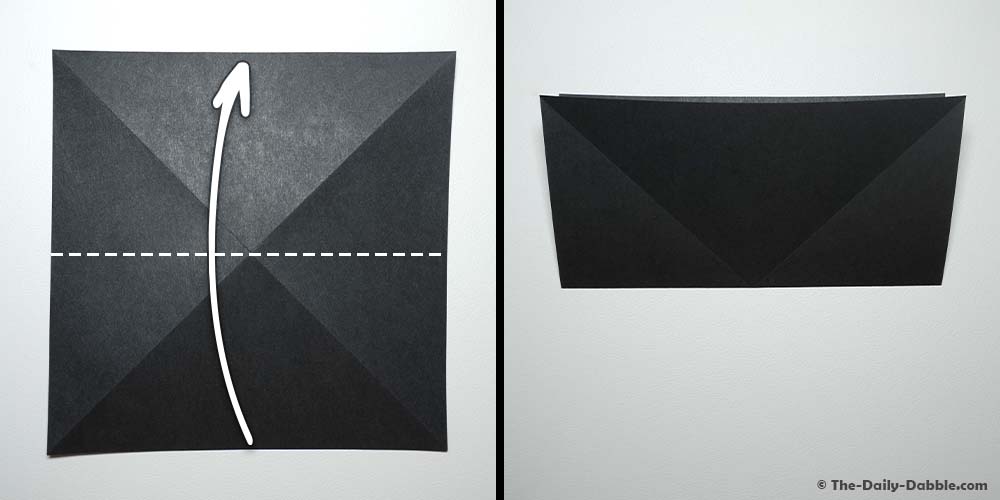
Flip the paper over and fold the sheet in half horizontally—bringing the bottom edge to the top edge. Crease well and then unfold.
4. Fold in half vertically, then unfold

Fold the paper in half vertically, then crease and unfold.
5. Pull the corners inward
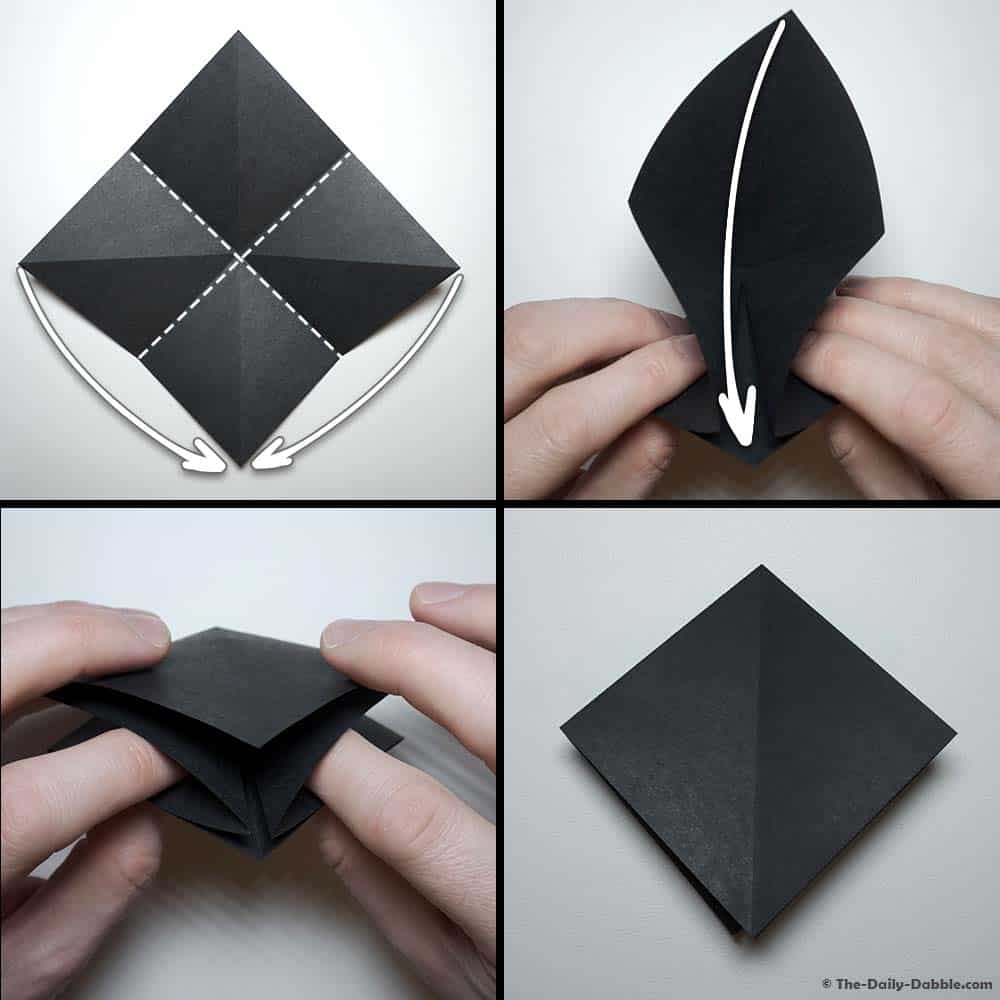
Rotate the paper so that two corners face upward and downward (like a diamond).
Grab the left and right corners and fold them down to the bottom corner. Then fold the top corner down to meet the others.
The result will be a smaller square called the origami square base—which can be used as a starting point to fold other cool origami creations.
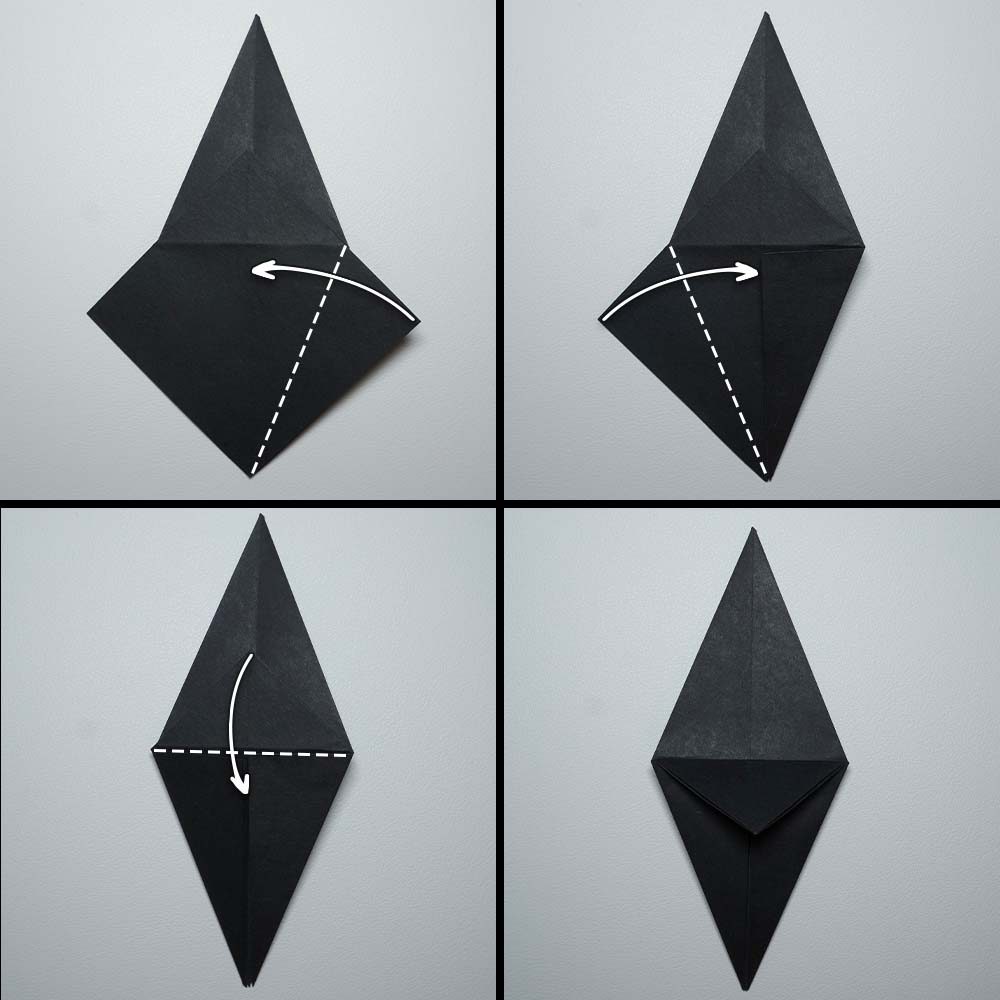
6. Fold the bottom edges to the center crease
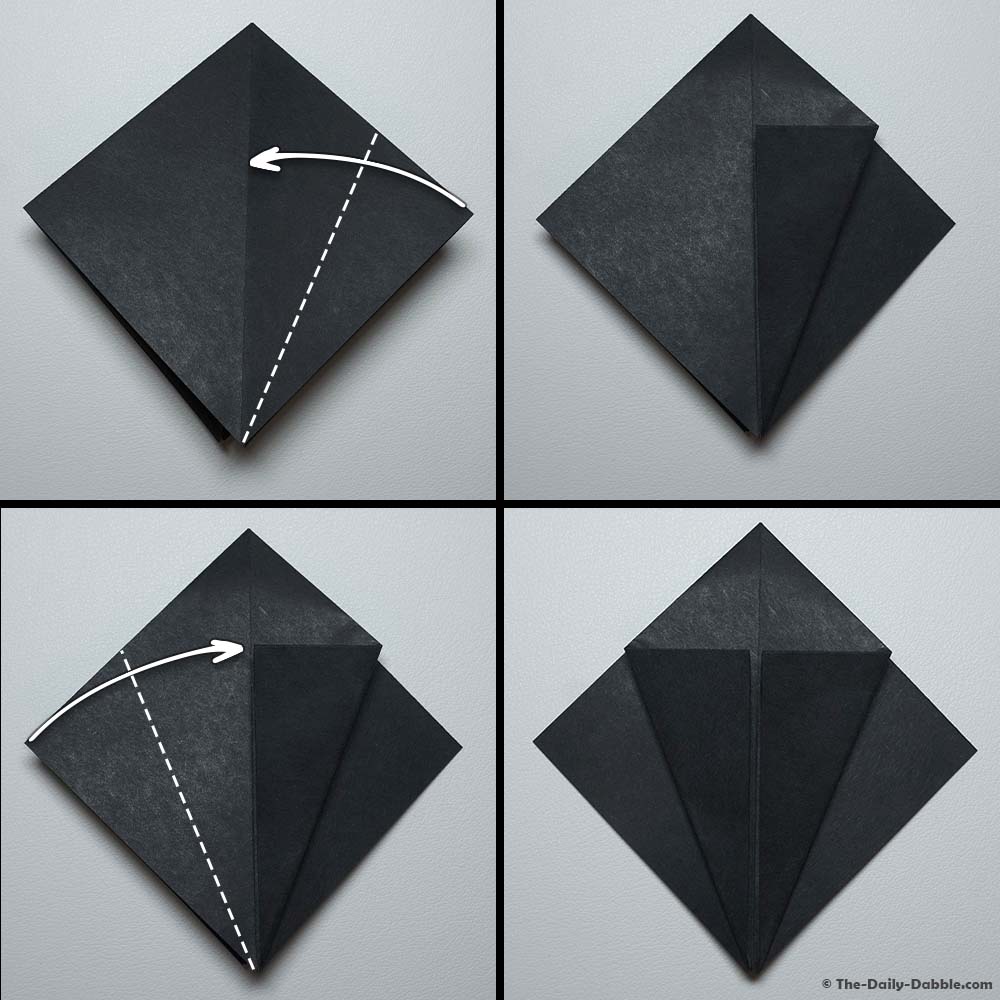
With the flaps facing towards you, fold the first layer of the bottom left and right edges inward to the center crease.
To get cleaners folds, begin creasing at the thinnest section while aligning the wider sections.
7. Fold the top point down
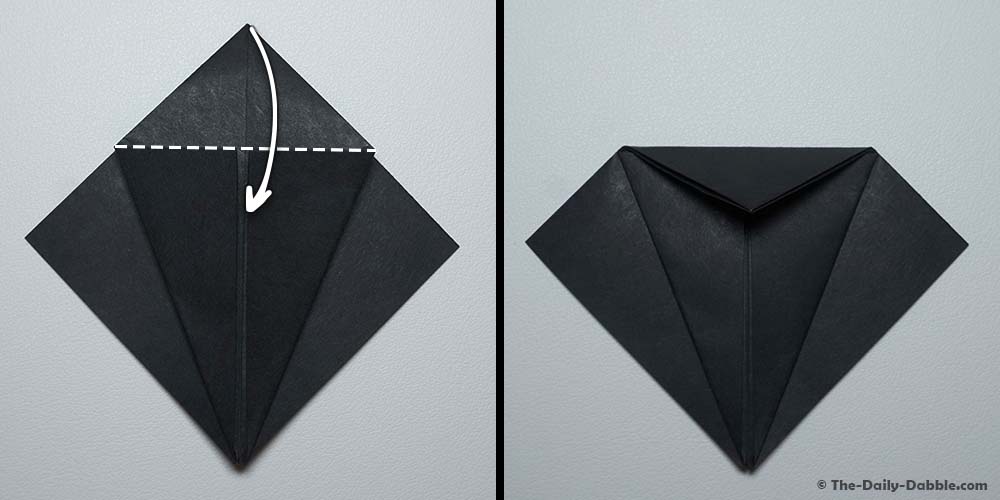
Fold the top corner down as far as possible and crease. The crease should be right above the lower flaps.
8. Unfold the last three folds
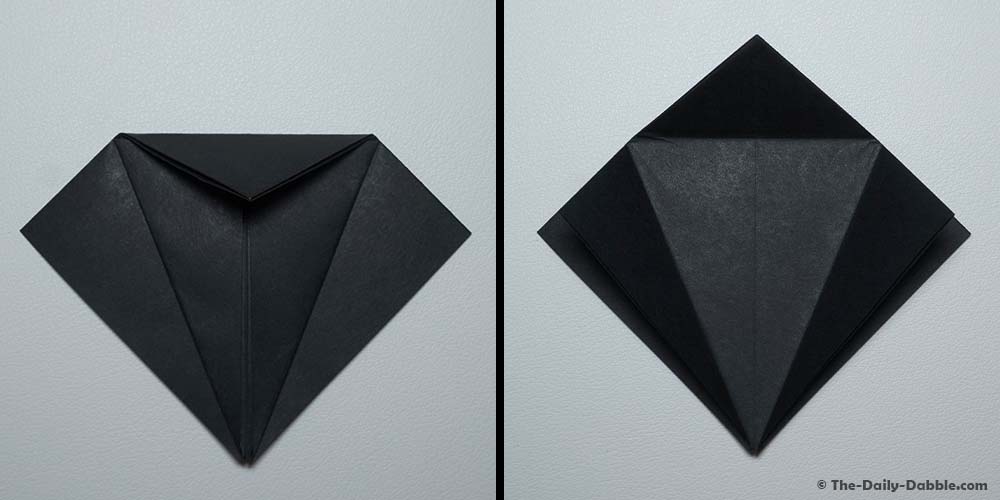
Next, unfold the previous three folds.
9. Lift the top flap and fold up
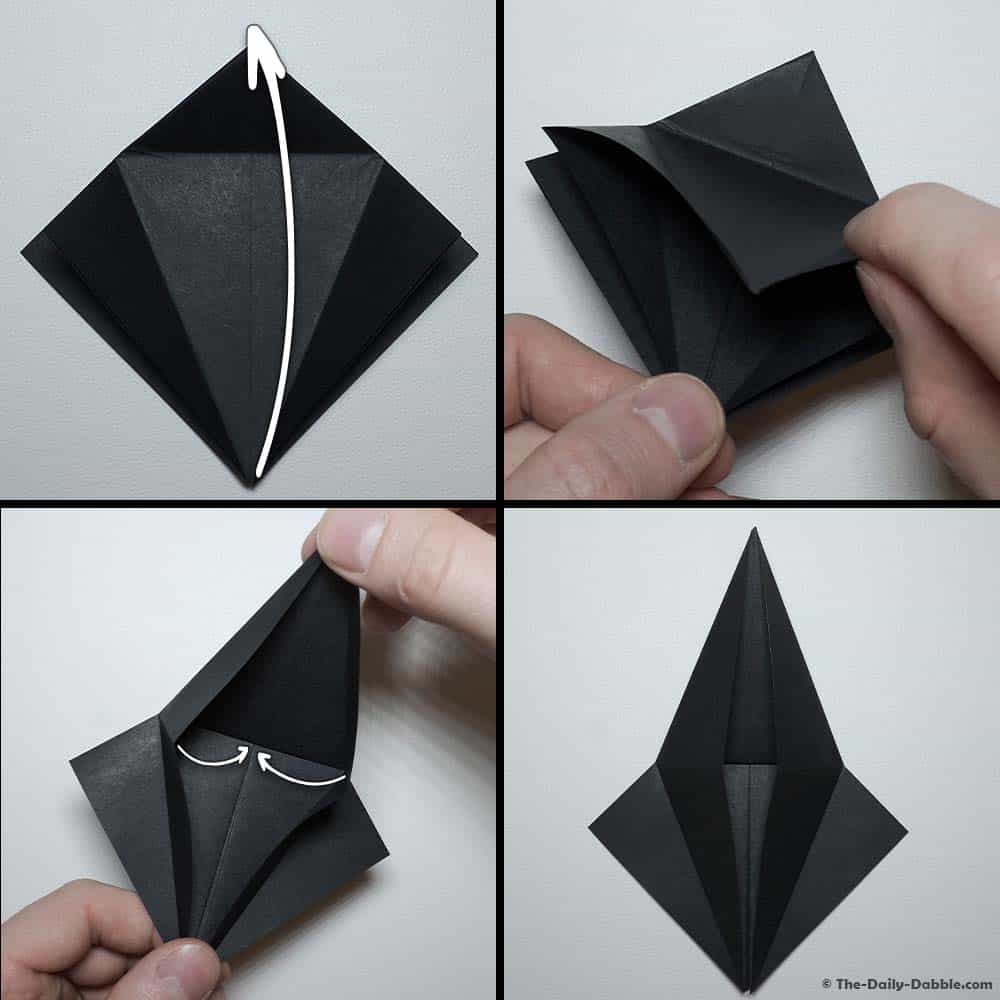
Grab the bottom corner of the top flap and pull it upward, bending the paper at the upper crease.
Pull the left and right edge inward and smush them to the center crease.
10. Flip the paper and repeat
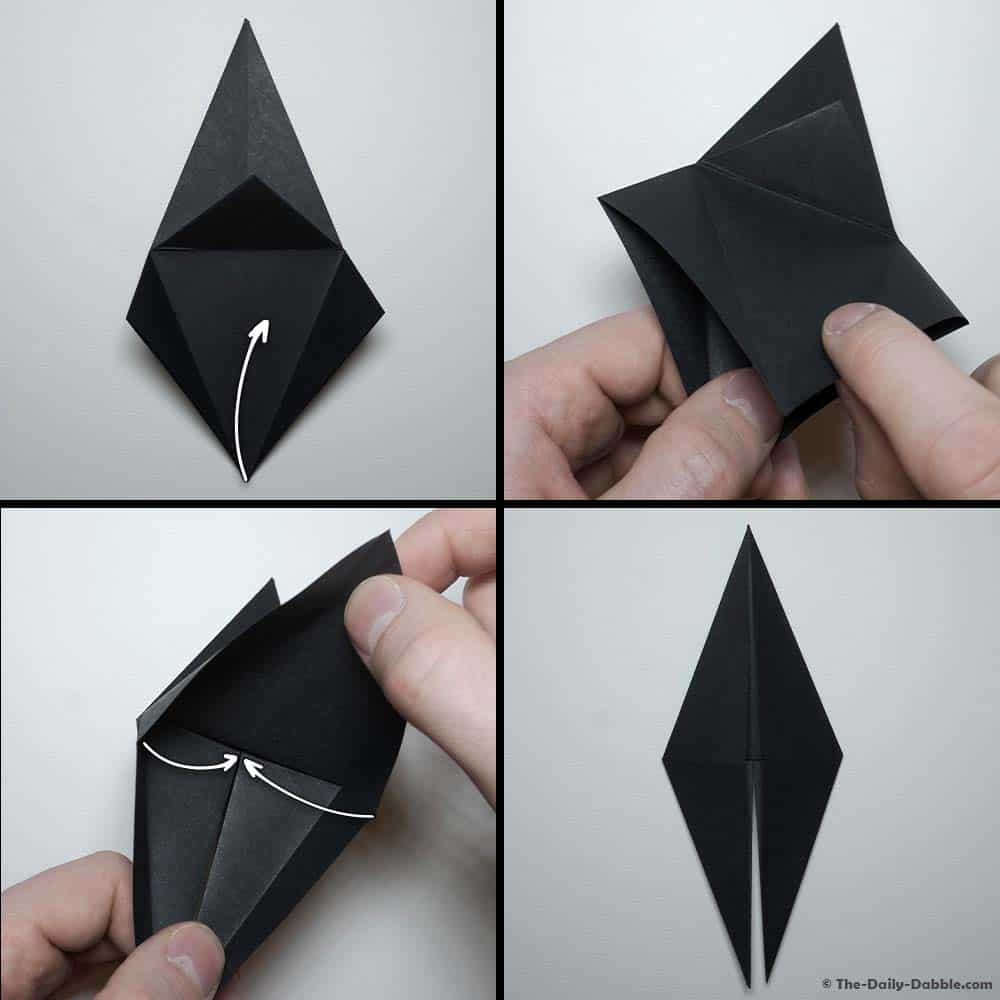
Flip the paper over and repeat the previous steps.
Begin by folding in the bottom-left and bottom-right edges and then the top edge down, reversing the crease.
Once again, unfold all your hard work. Next, push the flap up and smush the edges to the center.
At this point, you have just folded the bird base—which is an excellent base that can be used to fold things like the crane.
11. Fold the bottom points upward

Next, we’re going to create the crow’s feet. Fold the bottom two points upward to the center crease.
12. Fold the right point down and outward
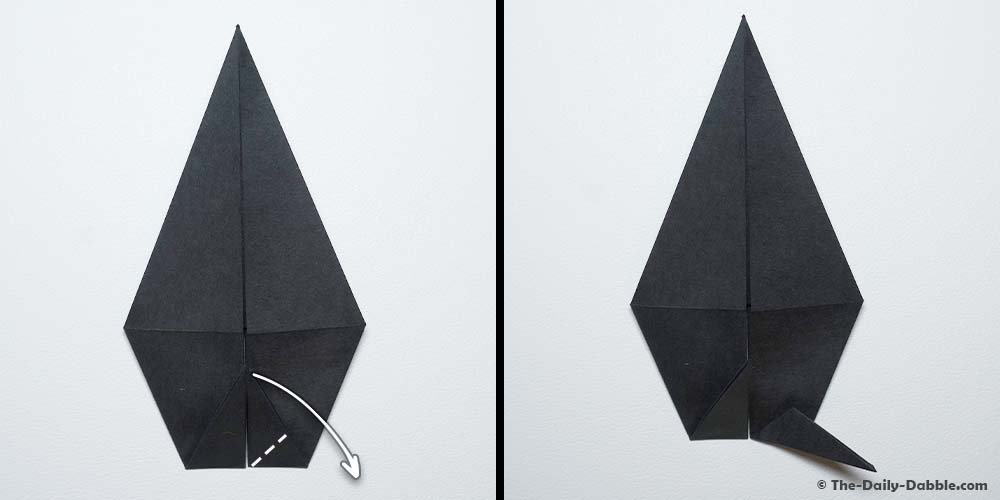
Take the right flap that you just folded upward and fold it down to the right so that it lines up with the bottom.
13. Fold the left point down and outward
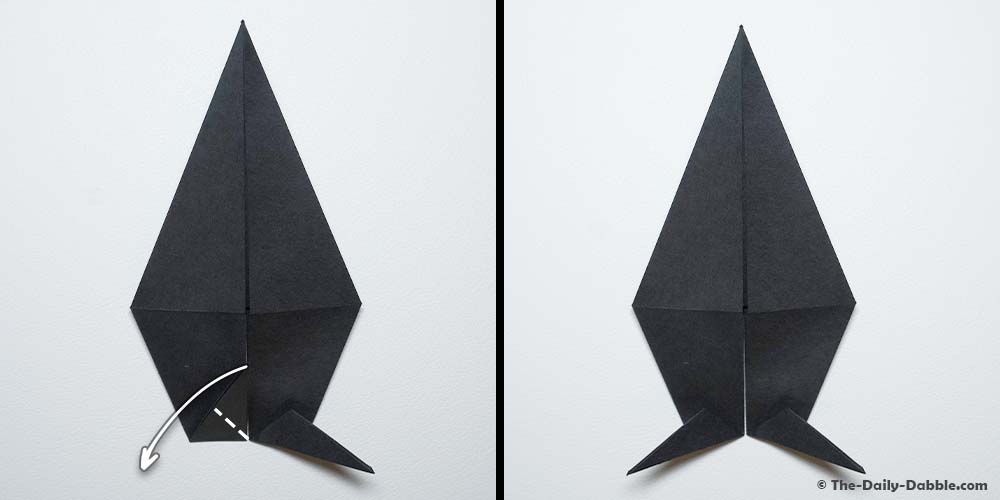
Now take the left flap and fold it down and to the left so that it lines up with the bottom.
14. Open the right flap and squash fold
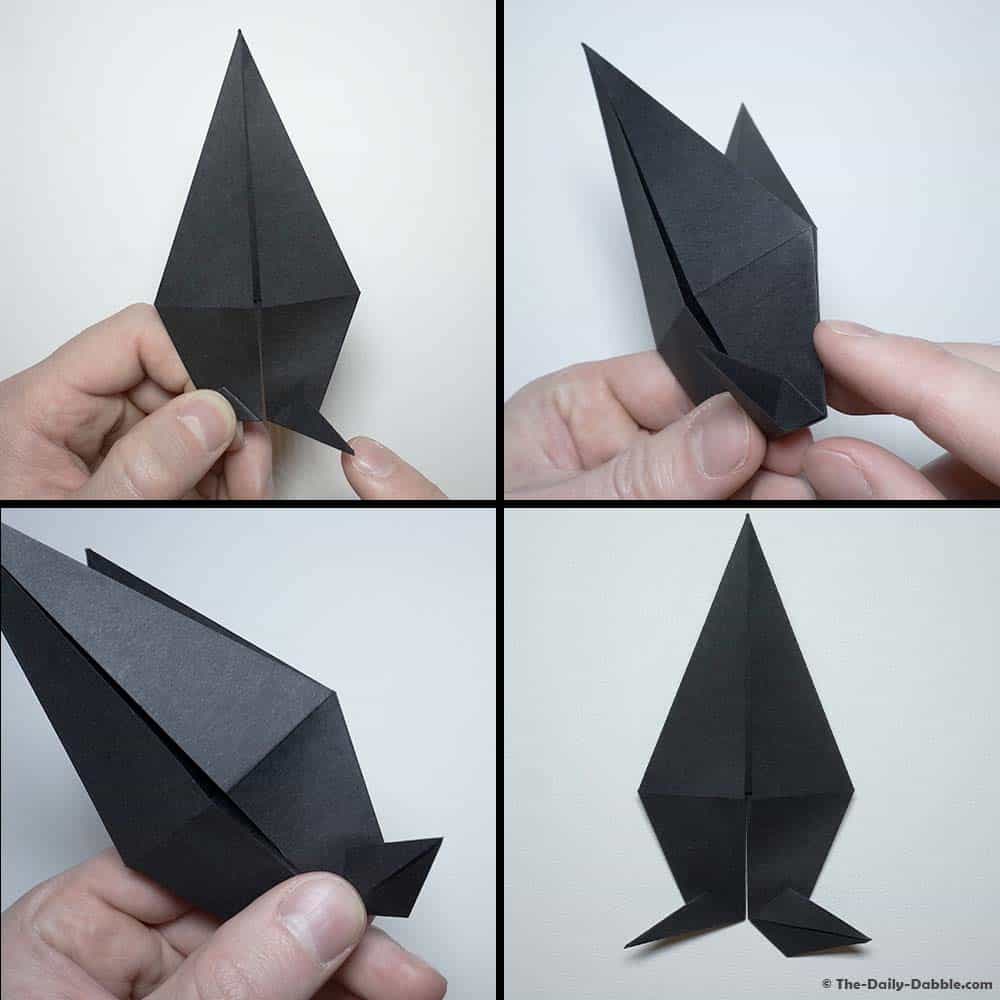
Here comes the tricky part. Unfold the right flap and open it up. Then squash fold it down using the creases as a guide.
15. Open the left flap and squash fold
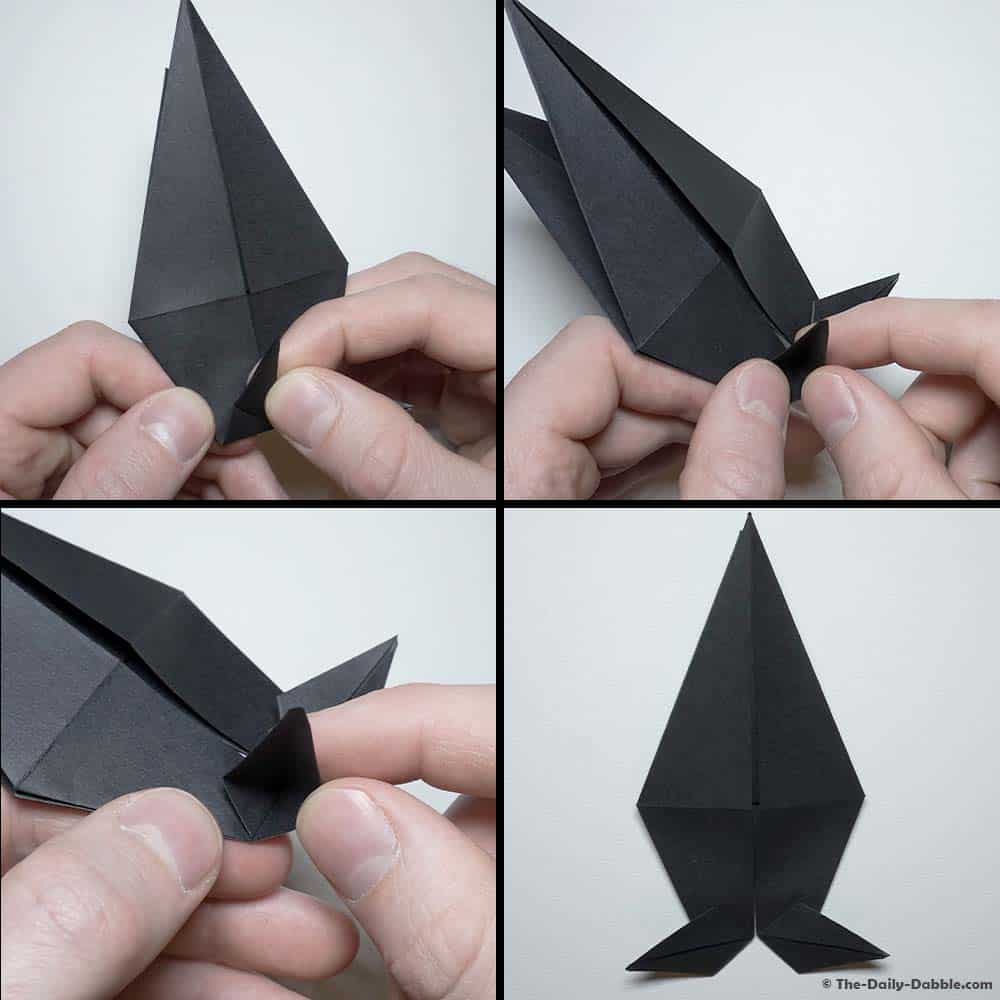
Repeat the previous step on the left foot. Unfold the left flap and open it up. Then squash fold it down using the creases as a guide.
16. Fold the left and right flaps in half downward
Next, fold the bottom flaps in half horizontally, following the center crease on each flap. Do this on both the left and right flap.
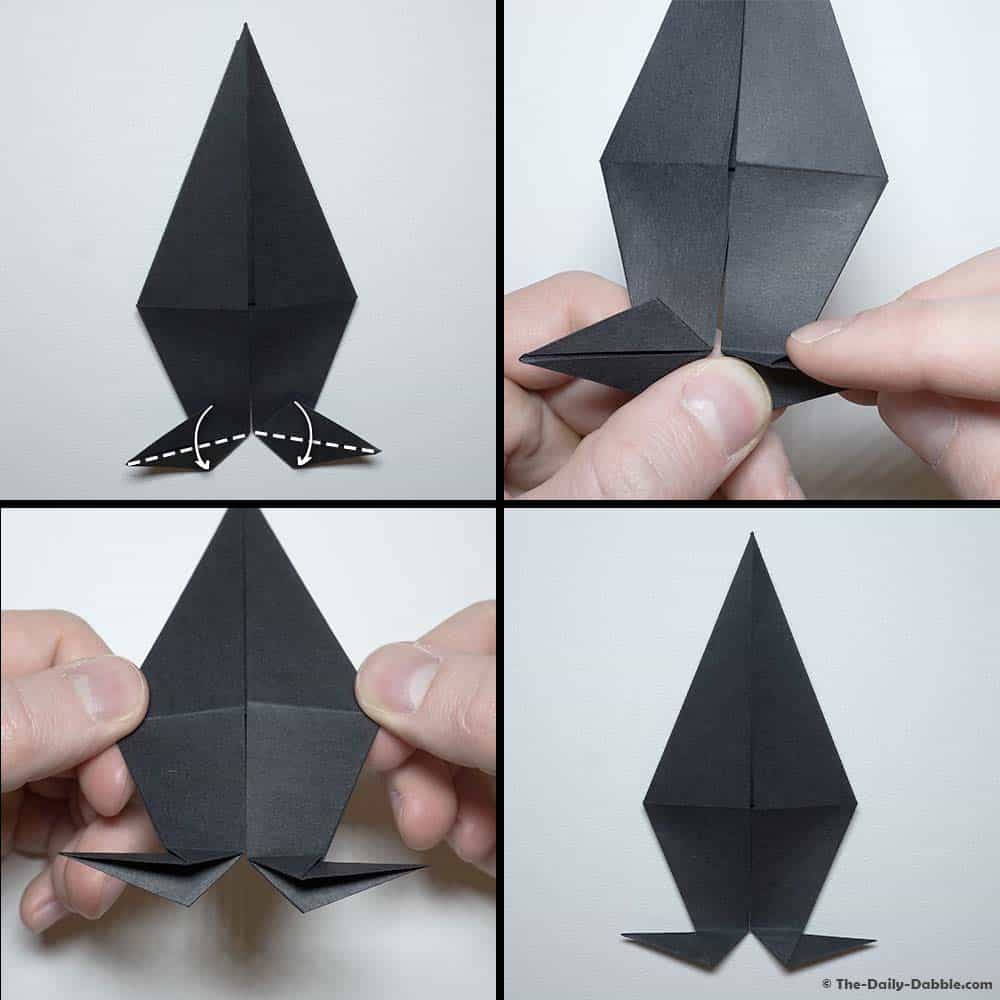
17. Fold the top flap down
Fold the top layer down so that it covers the feet of the crow.
18. Flip the paper over and fold in half
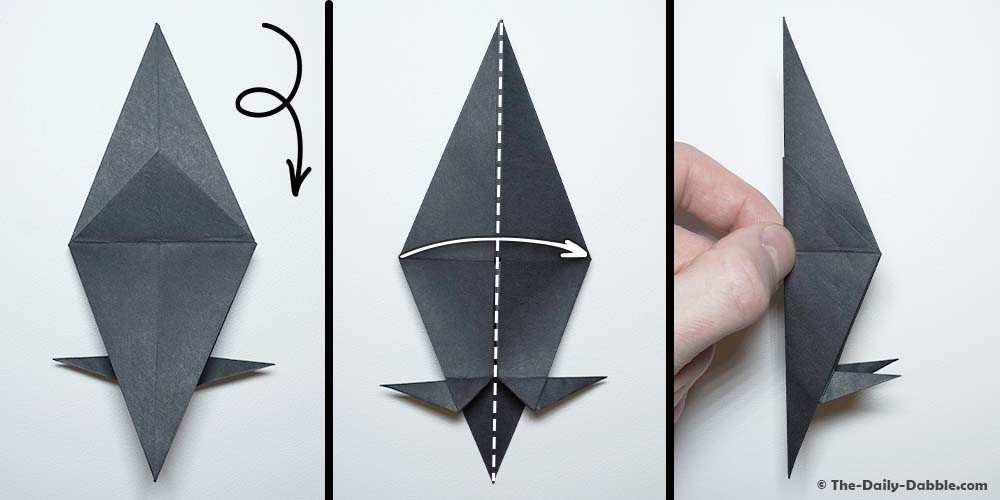
Next, flip the paper over and fold it in half vertically. At this point, take a moment to flatten everything down nicely.
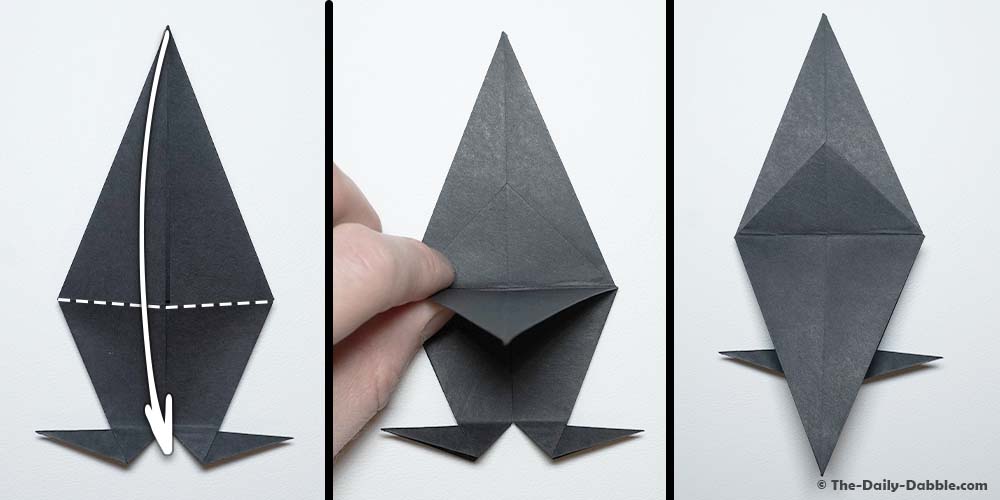
19. Fold down the top point to shape the head
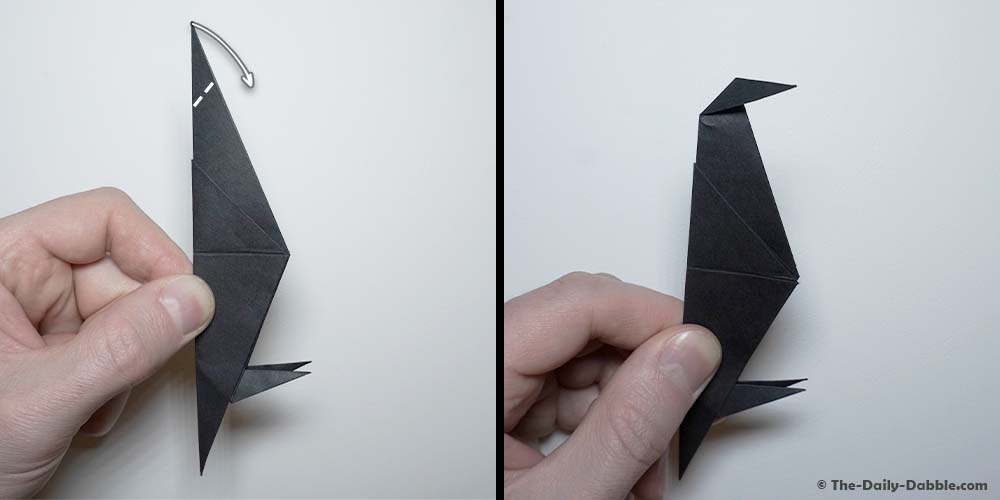
Now it is time to make the head of the crow. Begin by folding the top point down so that it points in the same direction as the feet. You can make the crow’s head bigger or smaller by adjusting the depth of this fold.
20. Unfold, then inside reverse fold the head
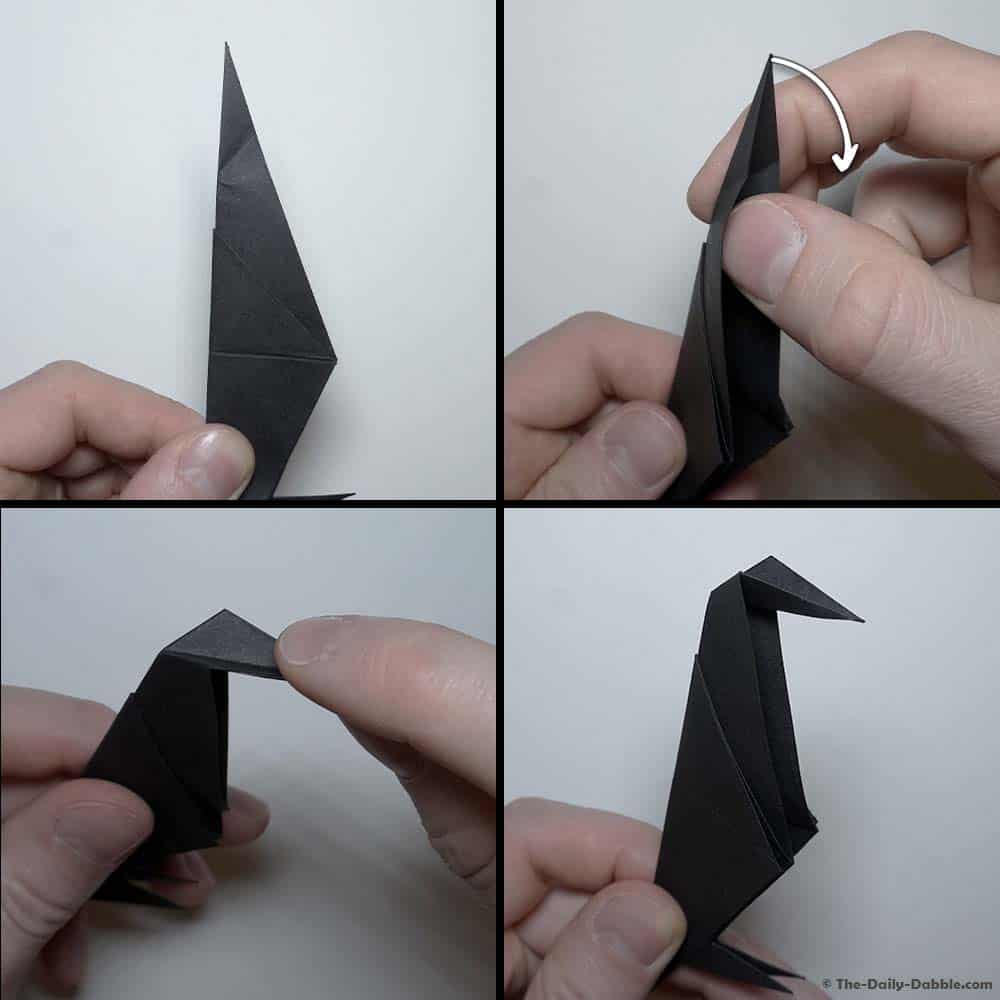
Unfold the previous fold and then inside reverse fold the crease you just made.
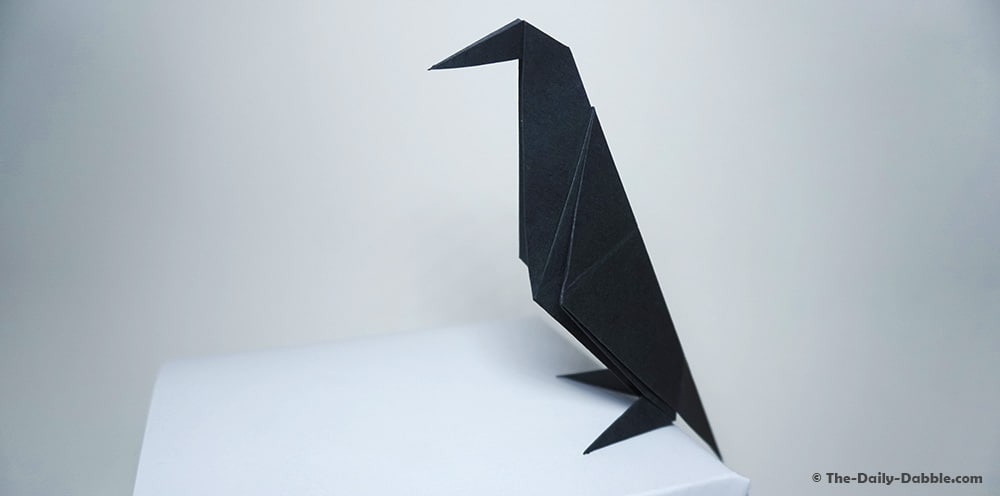
Flatten everything down well, and there you have it, an origami crow!
This little paper bird can sit upright on the edge of a table or desk.
If you liked this little origami crow, you might also like the origami chicken!
There is a ton more origami to fold out there, so consider checking out our entire collection of origami bird guides—which includes a variety of other extraordinary flying creatures to make from paper!
Thanks for reading, and happy folding!