
If you want to make magnificent paper steed, you came to the right place!
In this guide, I will show you step-by-step how to fold a traditional origami horse using a single piece of paper.
This fold is rated as easy and takes about 5 minutes to complete, and is also one of the rare traditional designs that require scissors!
Let’s get folding!
To make a paper horse, you will need a single square piece of paper. You can use regular printer paper cut into a square; however, I recommend origami paper for better-looking folds, and that traditional origami feel!
In this tutorial, I’ll be using a multi-color 6 x 6 sheet of origami paper, but you can use single-colored paper as well.
1. Flip the paper, so the colored side is up
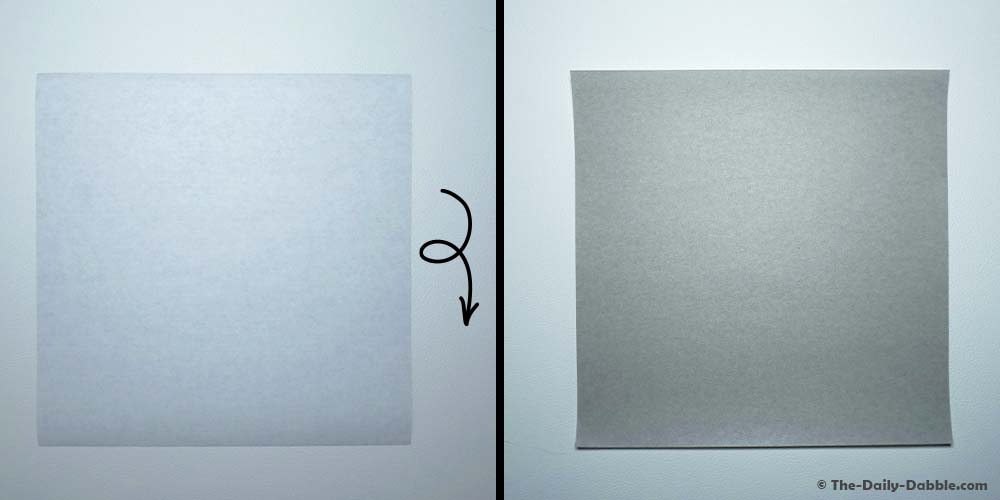
To begin the origami horse, flip the paper so that the color side is up and the white side is down. Whichever color is facing up on this step will dictate the color of your horse.
If you are using a single-colored sheet of paper, you can skip this step.
2. Fold in half diagonally, then unfold
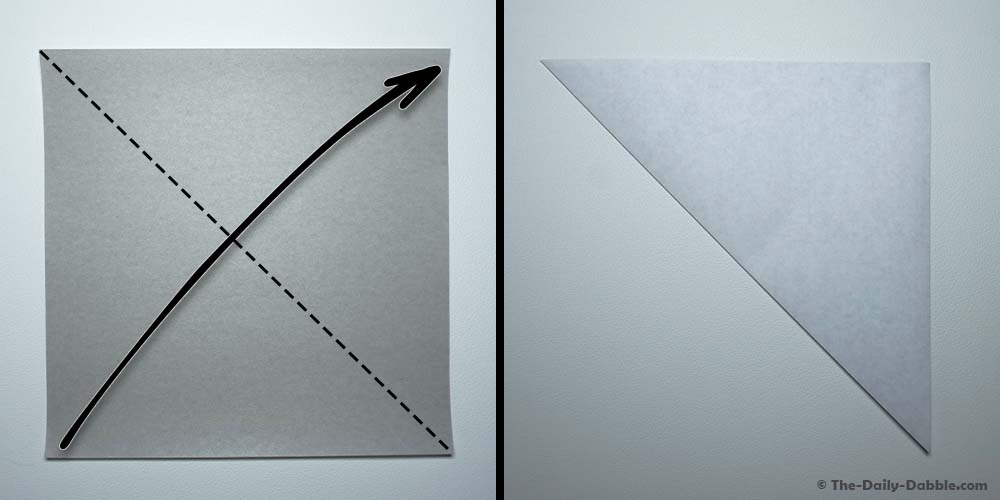
Fold the paper in half diagonally, bringing the bottom left corner to the top right corner. Crease and unfold.
3. Fold the paper in half diagonally in the opposite direction, then unfold
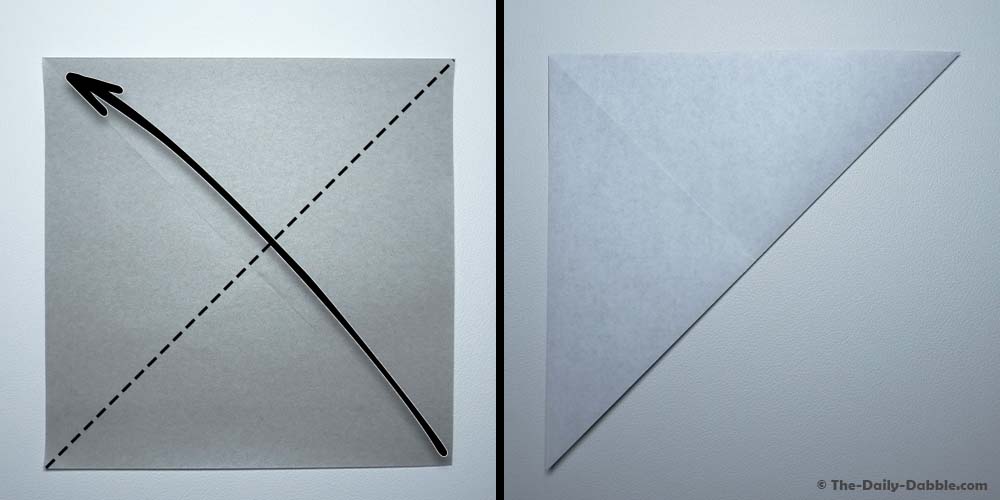
Fold the paper in half diagonally in the opposite direction, bringing the bottom right corner to the top left corner. Crease and unfold.
4. Flip the paper over and fold in half vertically, then unfold
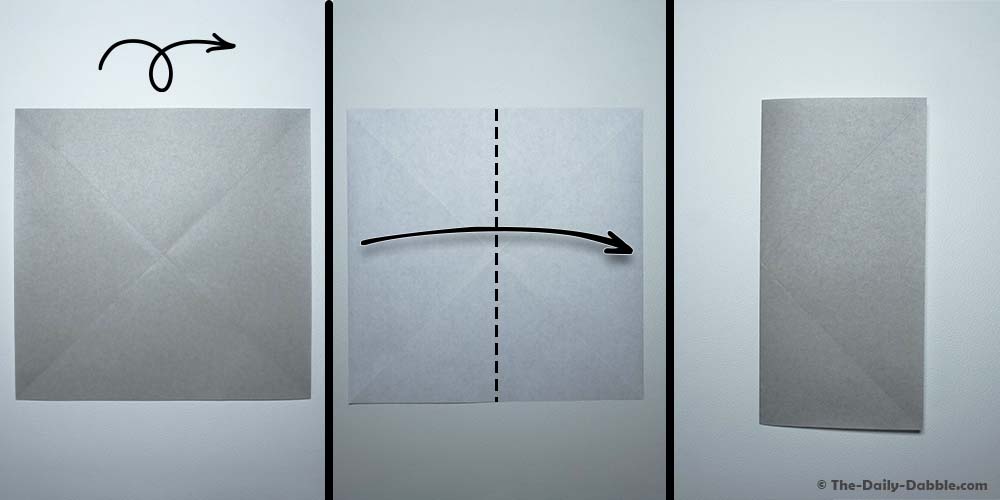
Next, flip the paper over so that the white side is facing up and fold it in half vertically, bringing the left edge over to the right. Crease and unfold.
5. Fold the paper in half horizontally, then unfold
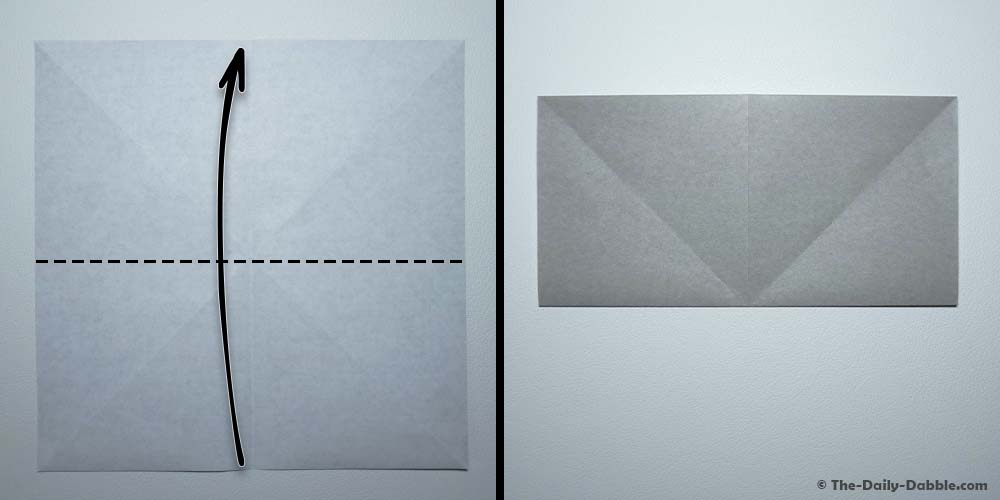
Fold the paper in half horizontally, bringing the bottom edge up to the top. Crease and unfold.
6. Fold all four corners into each other
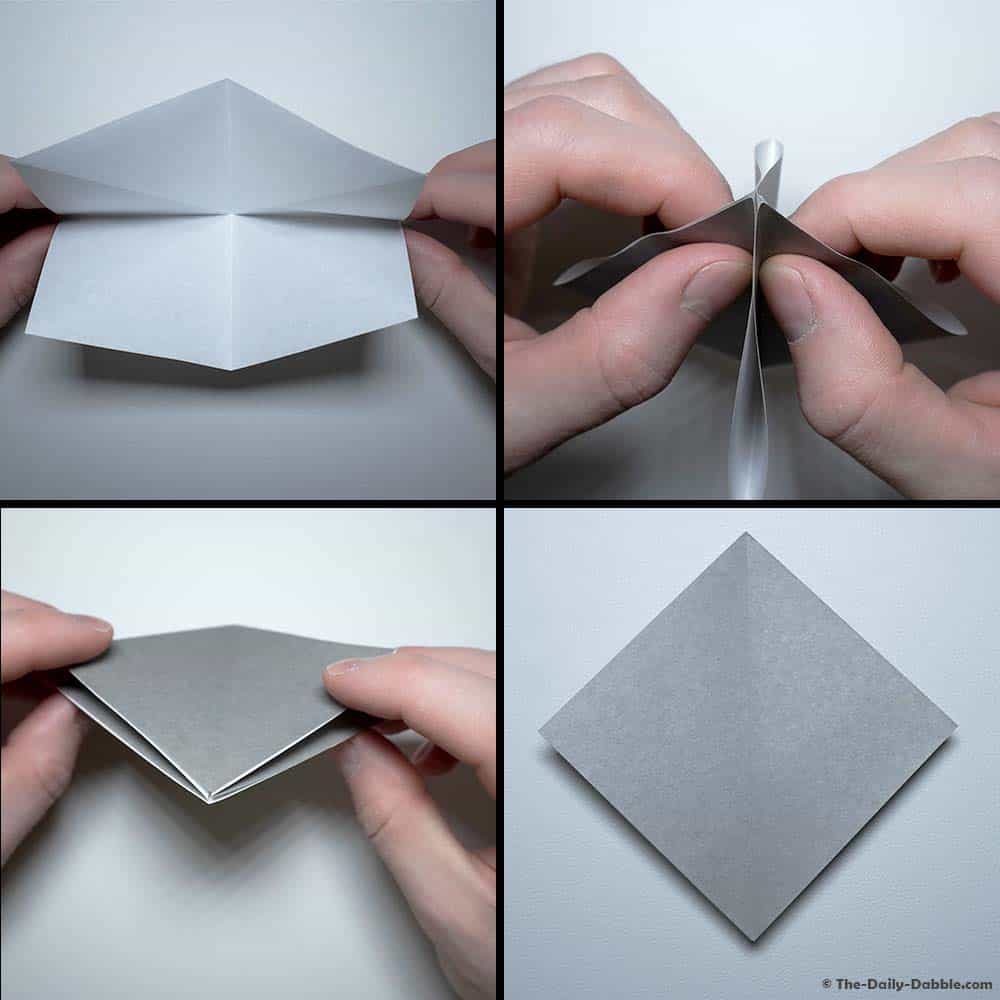
Fold all four corners into each other and flatten everything down to create a smaller square.
Crease everything well before moving on.
Origami 101: At this point, you have folded what is referred to as the square base. Origami bases are basically starting points that can be continued into other creations. The square base can be folded into a variety of things including the horse or paper crane. To learn more about origami bases check out our guide: The 12 Traditional Origami Base Folds!
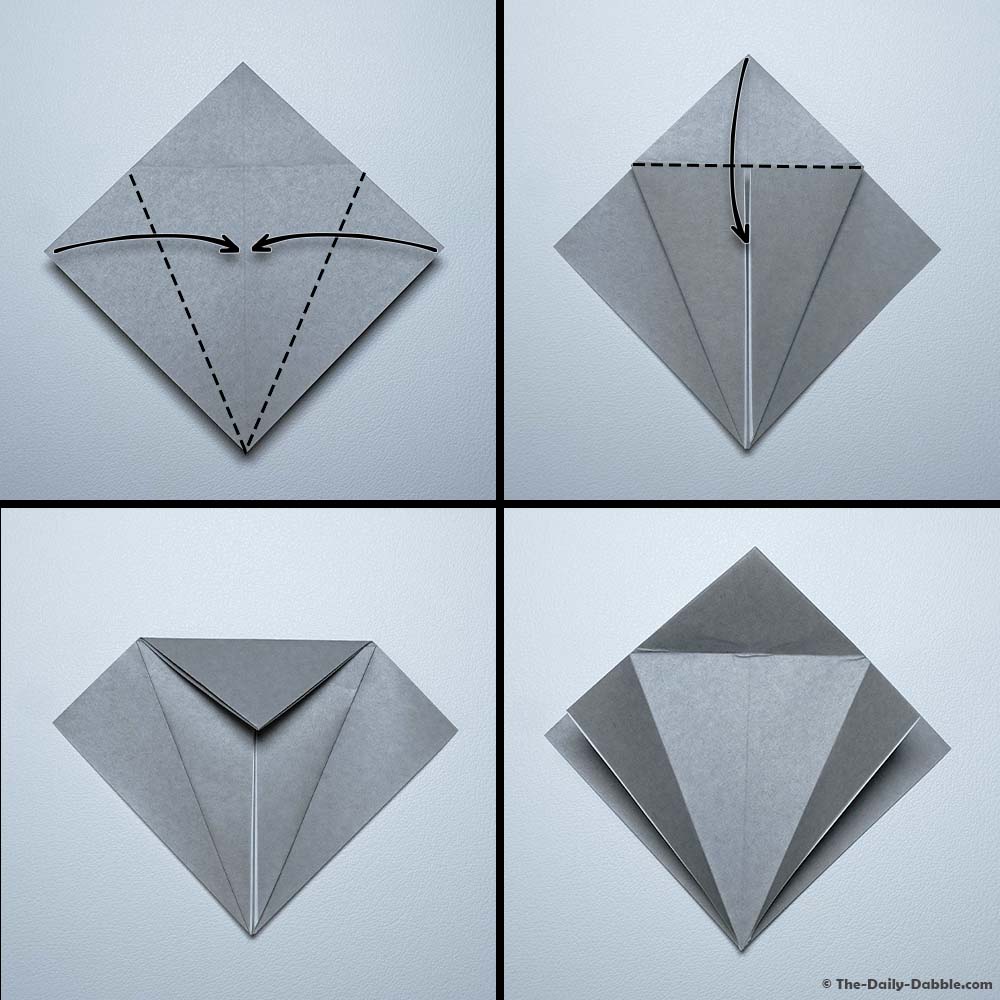
7. Fold the left and right flaps to the center
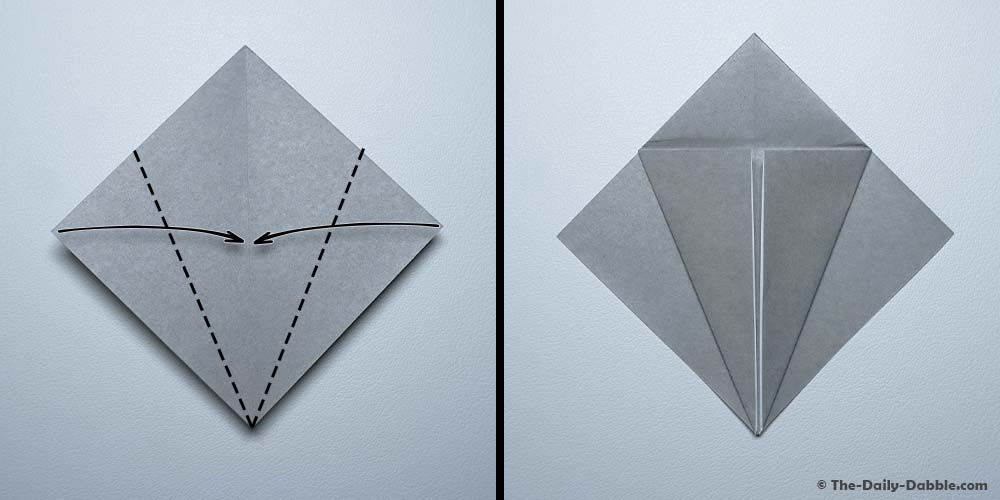
Next, take the upper flap of the bottom-right edge and fold it to the center crease. Then repeat with the left edge.
8. Fold the top down
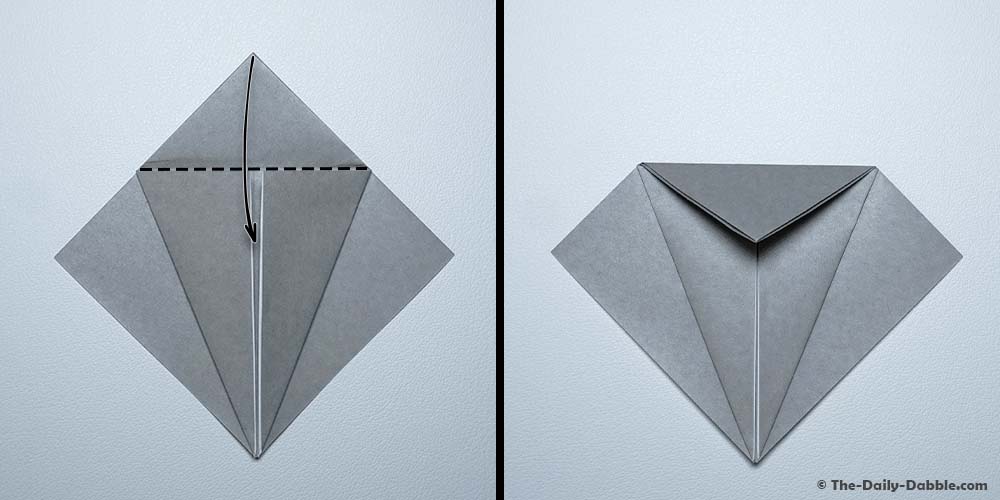
Fold the top corner down and crease along the top of the lower flaps.
9. Unfold the last three folds
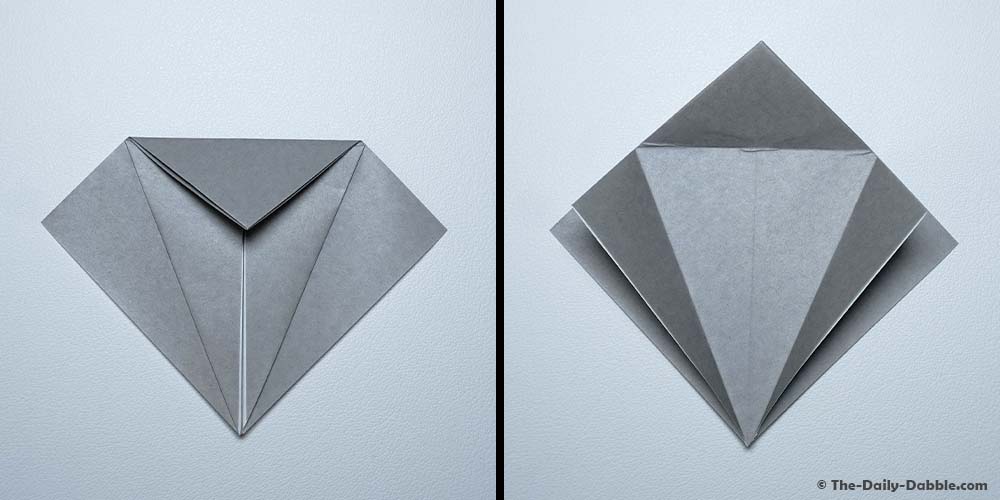
Undo all your hard work by unfolding the previous three folds.
10. Flip the paper and repeat
Next, flip the paper over and repeat the previous three folds on the other side. Fold the lower-left and lower-right edges to the center crease and then fold the top corner down.
Crease well and once again unfold.
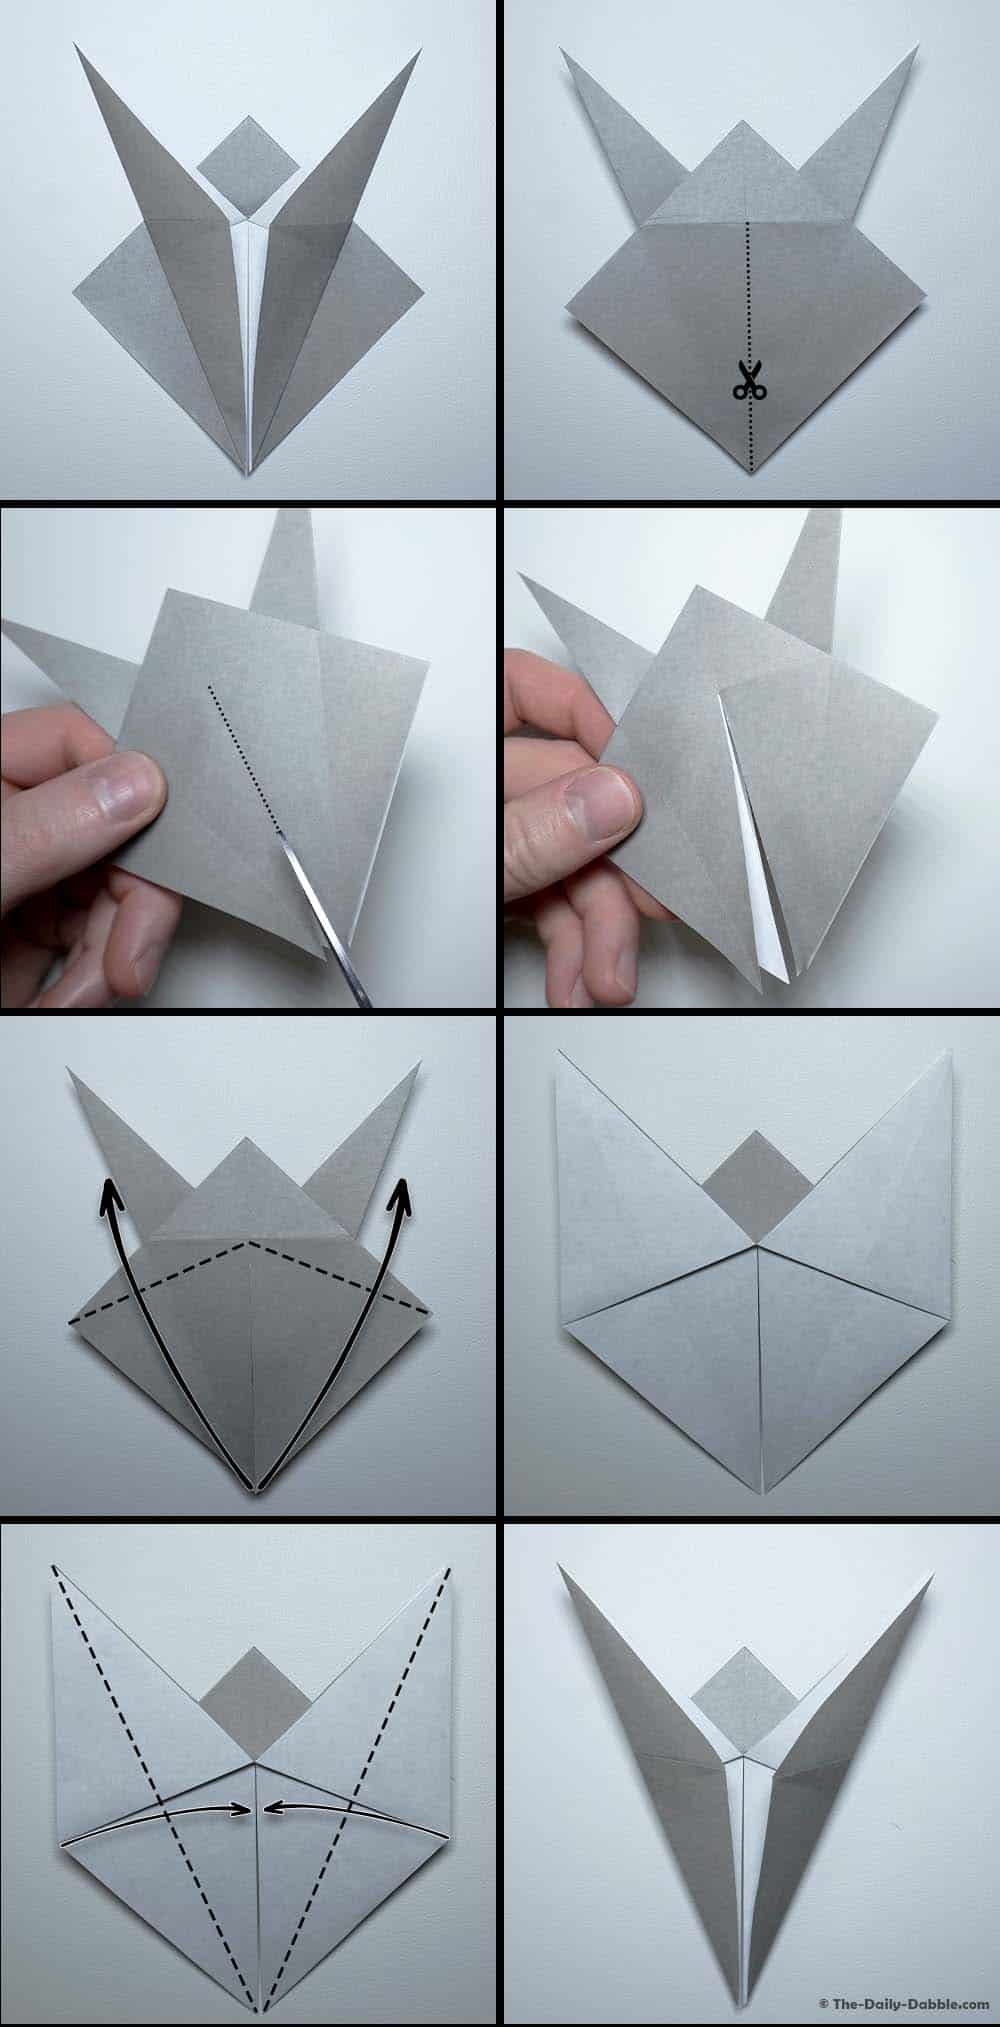
11. Cut the top layer down the centerline

Using scissors, cut the top layer of the paper following the crease. However, don’t cut past the upper triangle.
12. Fold the cut flaps up and outward
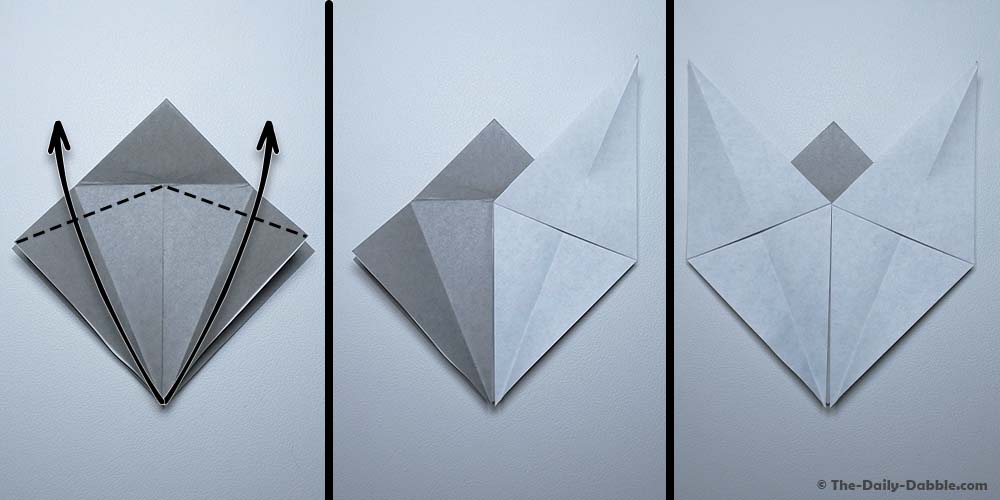
Next, grab the right flap that you just cut and fold it up and outward as far as possible. Repeat this with the left flap.
13. Following the crease, fold the left and right sections in half
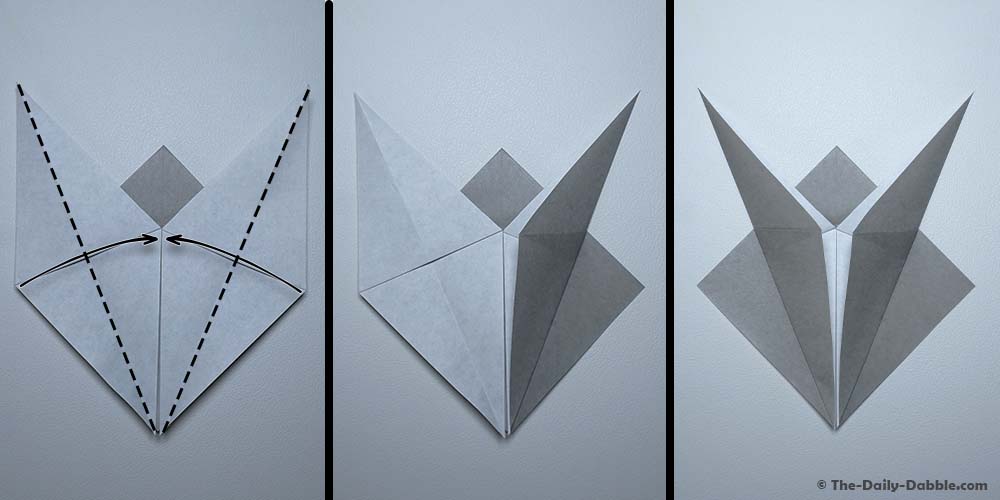
Take the right section that you just created and fold it in half vertically by bringing the right edge to the center crease. Repeat this with the left edge.
Take a moment to flatten down and crease everything well.
14. Flip the paper over and repeat steps 11 through 13 on the other side.
Now we need to cut and fold the other side to match. Flip the paper over and once again cut the upper flap following the centerline—ensure not to cut past the upper triangle.
Fold the left and right flaps up and outward and then fold them in half towards the center crease.
Flatten down and crease everything well.
15. Crease the head
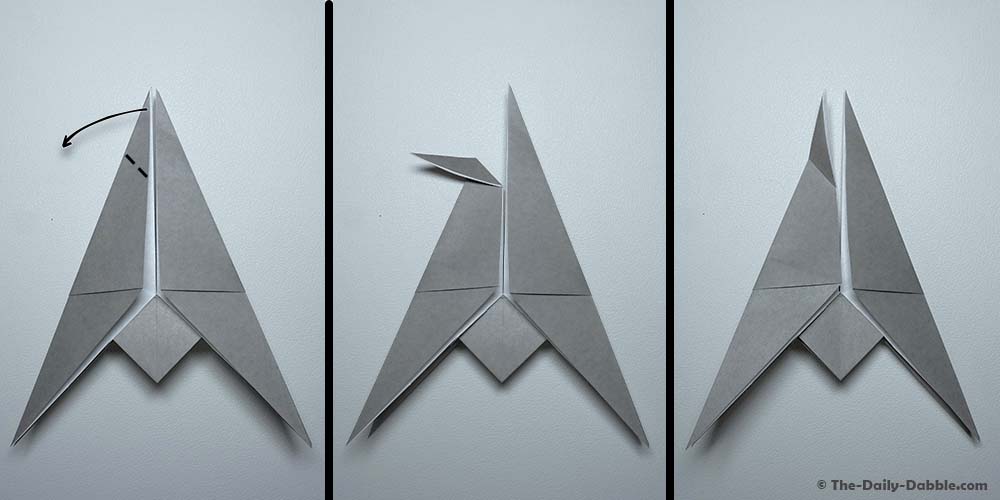
Rotate the paper around so that the large pointed end is facing away from you.
To make the origami horse’s head, begin by folding the top left point down and outward. You can change the shape and angle of the horse’s head by adjusting this fold. Crease well and then unfold.
16. Inside reverse fold the head
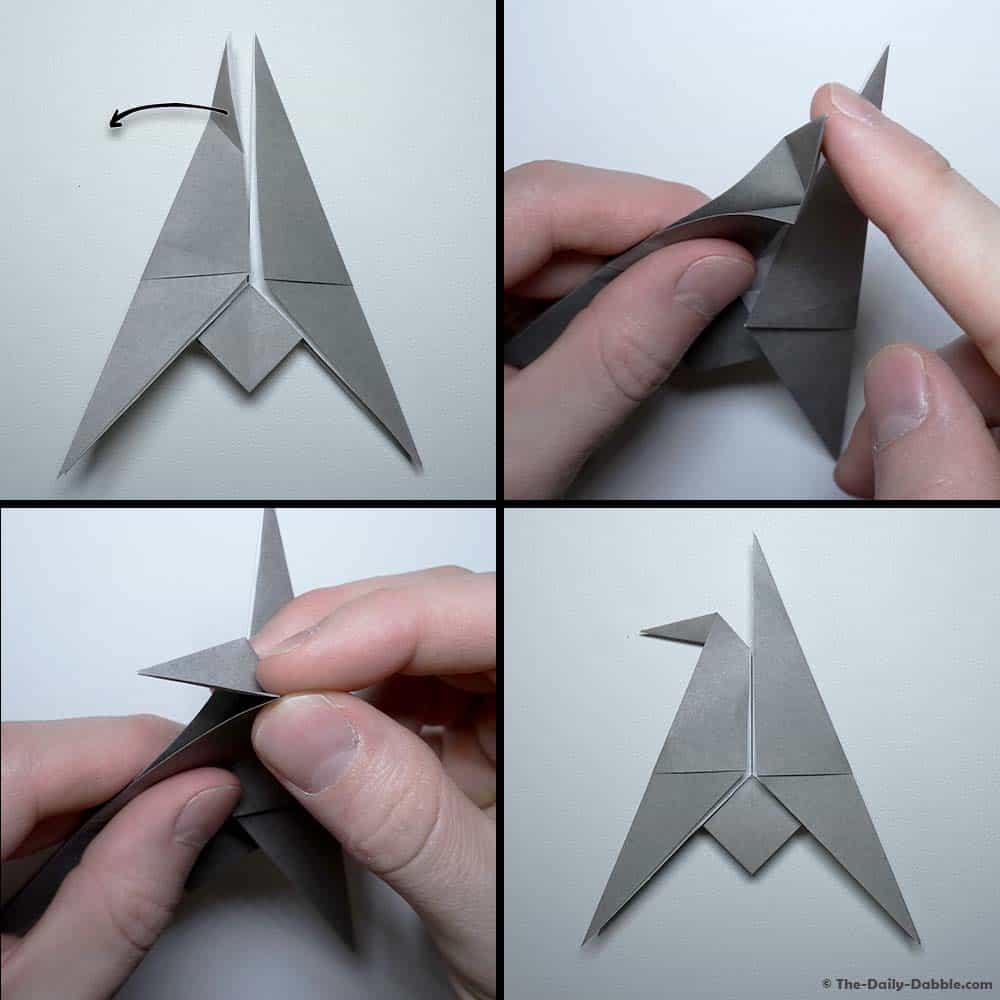
Next, open up the paper and inside reverse fold the head, following the crease that you just made, then flatten it down well.
17. Crease the tail
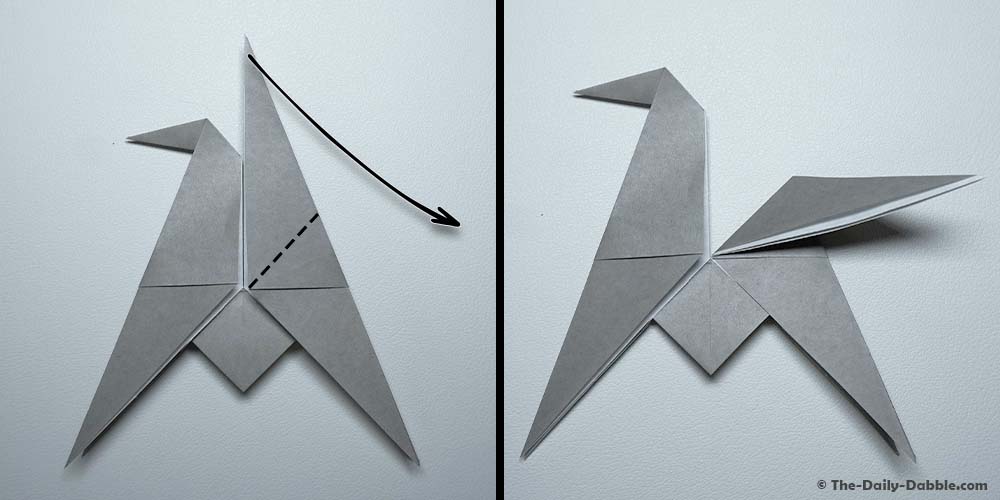
To make the tail, fold the top right point down and outward. Like the head, you can change the shape and angle by adjusting this fold. Crease well and then unfold.
18. Inside reverse fold the tail
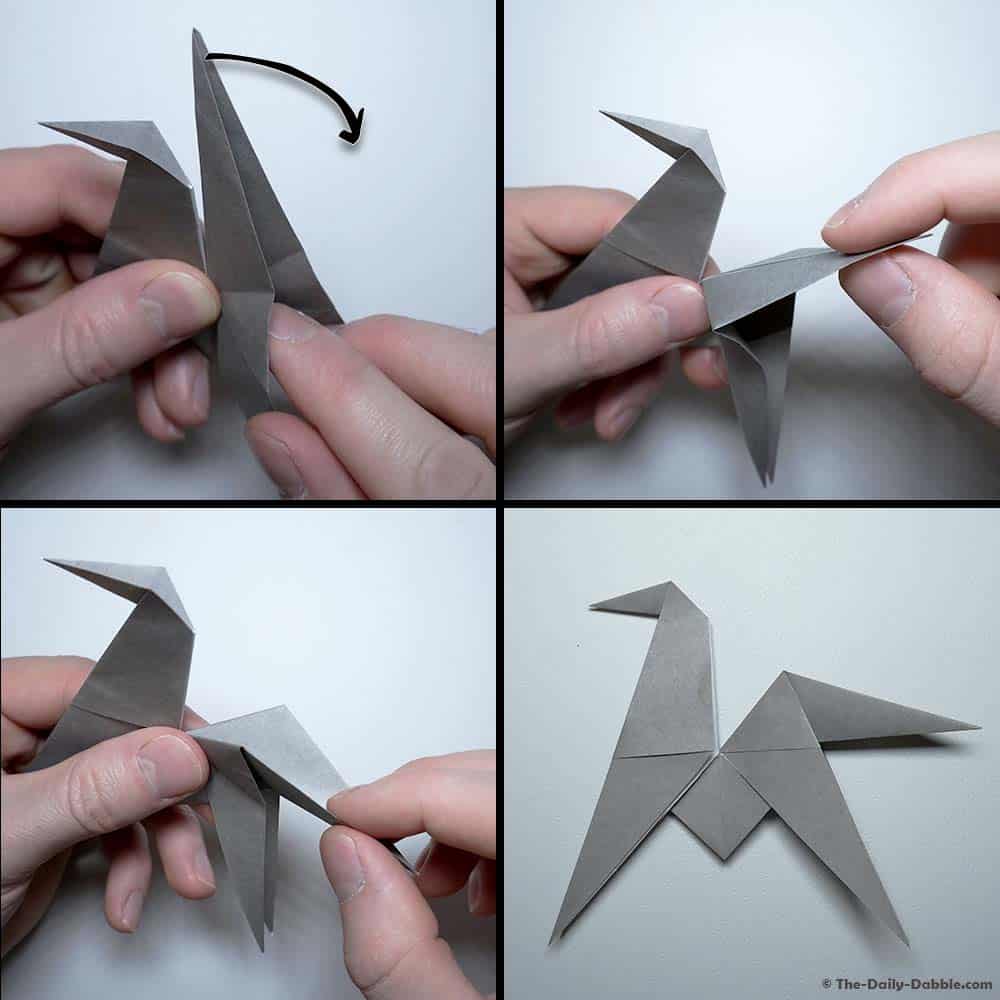
Open up the paper and inside reverse fold the tail, following the crease you just made.
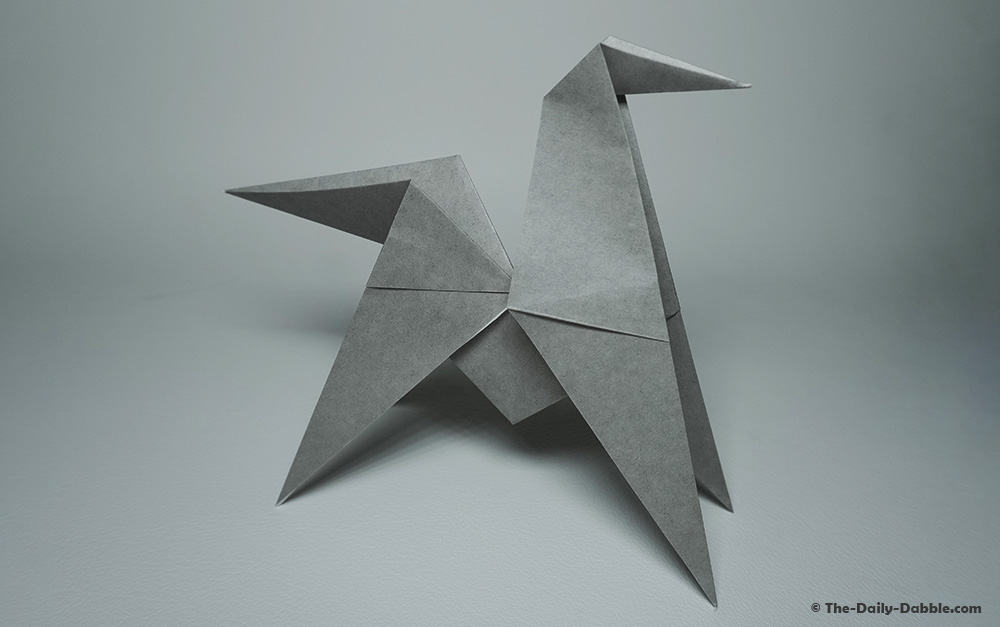
Flatten everything down, and there you have it, a traditional origami horse!
You can slightly pull it open and stand your horse up on a desk or table!
You might also enjoy folding the origami rabbit if you liked this origami horse!
I hope you found this guide helpful and if you would like more origami tutorials, consider checking out our growing collection of origami designs.
Thanks for visiting, and happy folding!