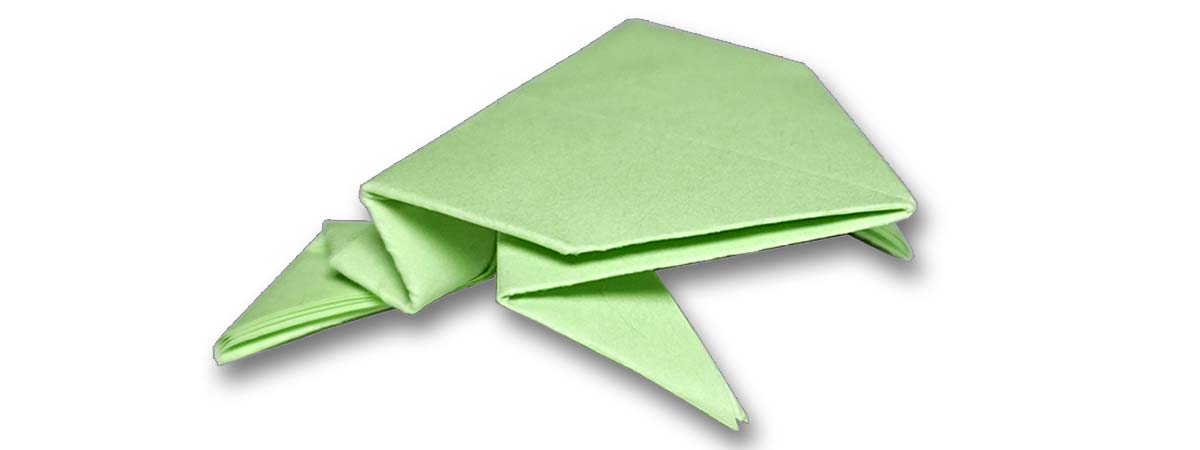
In this short and easy origami guide, I’m going to show you how to fold a traditional origami jumping frog using a single sheet of origami paper.
Simply push down on the back of the frog and watch them leap! These leaping amphibians can be crafted in an assortment of colors and are the perfect activity for keeping any kid busy!
This fold is considered easy and depending on your experience takes about 5 to 7 minutes to fold.
You can also fold this frog from a dollar bill with our money origami frog instructions!
Let’s get folding!
In this guide, we used basic square origami paper with the same color on both sides, but the multi-colored paper is fine.
Note that if you do use multicolor paper, whichever color is facing down when you start will dictate the color of your frog.
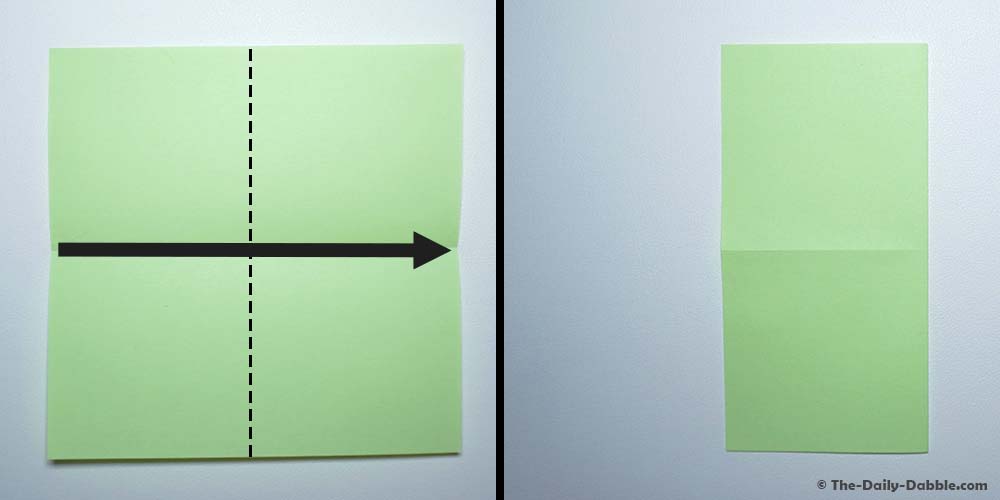
1. Color side up, fold the paper in half horizontally then unfold

Begin by folding the paper in half horizontally, bringing the bottom edge up to the top. Make a crease and unfold the paper.
If you’re using multicolor paper, you can choose which color you want your frog to be. Whichever color is facing down when you start will dictate the color of your frog.
For example, if you have a sheet with red on one side and white on the other, if you start with the red side down the jumping frog will be red.
2. Fold the paper in half vertically
Next, fold the paper in half vertically, bringing the left edge over to the right edge.
3. Fold the paper in half vertically again and unfold
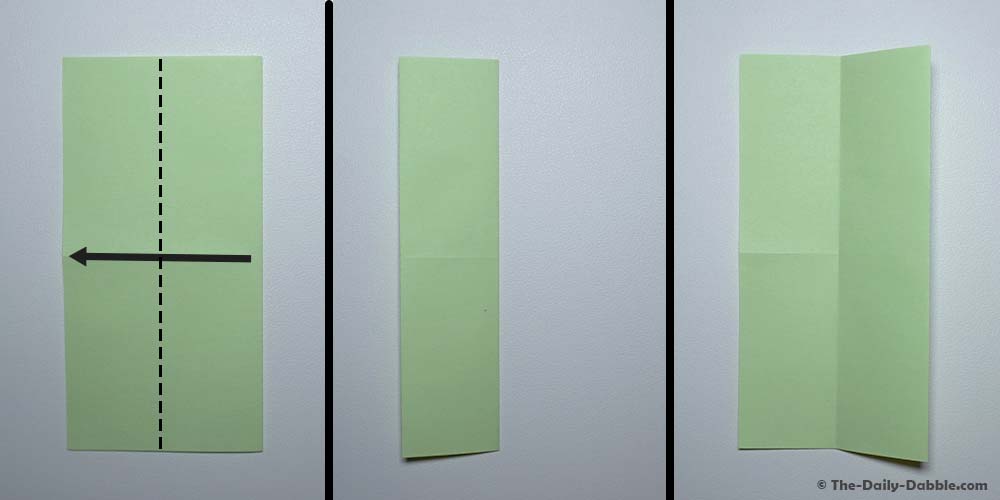
Once more, fold the paper in half vertically, bringing the right edge over to the left edge. Make a crease and unfold.
4. Fold the top right corner to the left edge and unfold
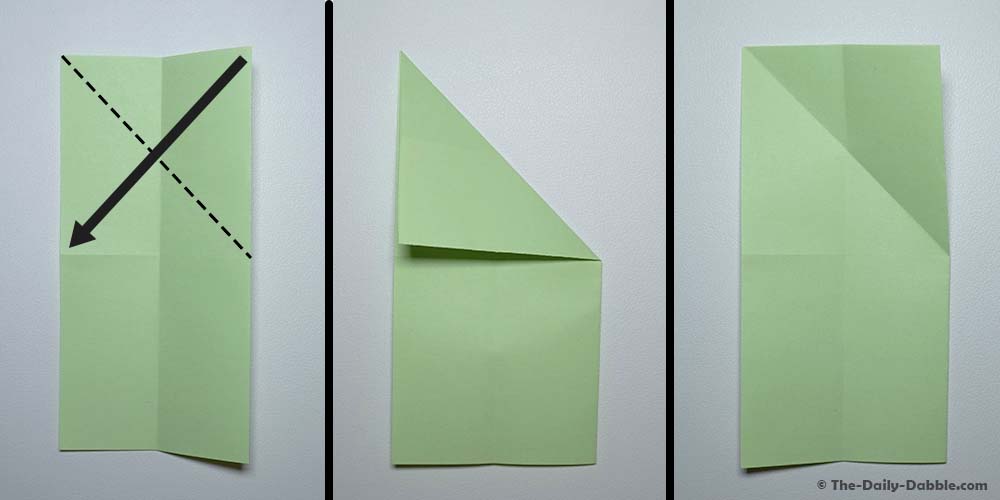
Next, fold the top right corner over so it aligns with the left edge. Make a crease and then unfold.
5. Fold the top left corner to the left edge and unfold

Now fold the top left corner over so it aligns with the right edge. Make a crease and then unfold leaving behind a crossed-crease.
6. Flip the paper over and fold the top down, then unfold
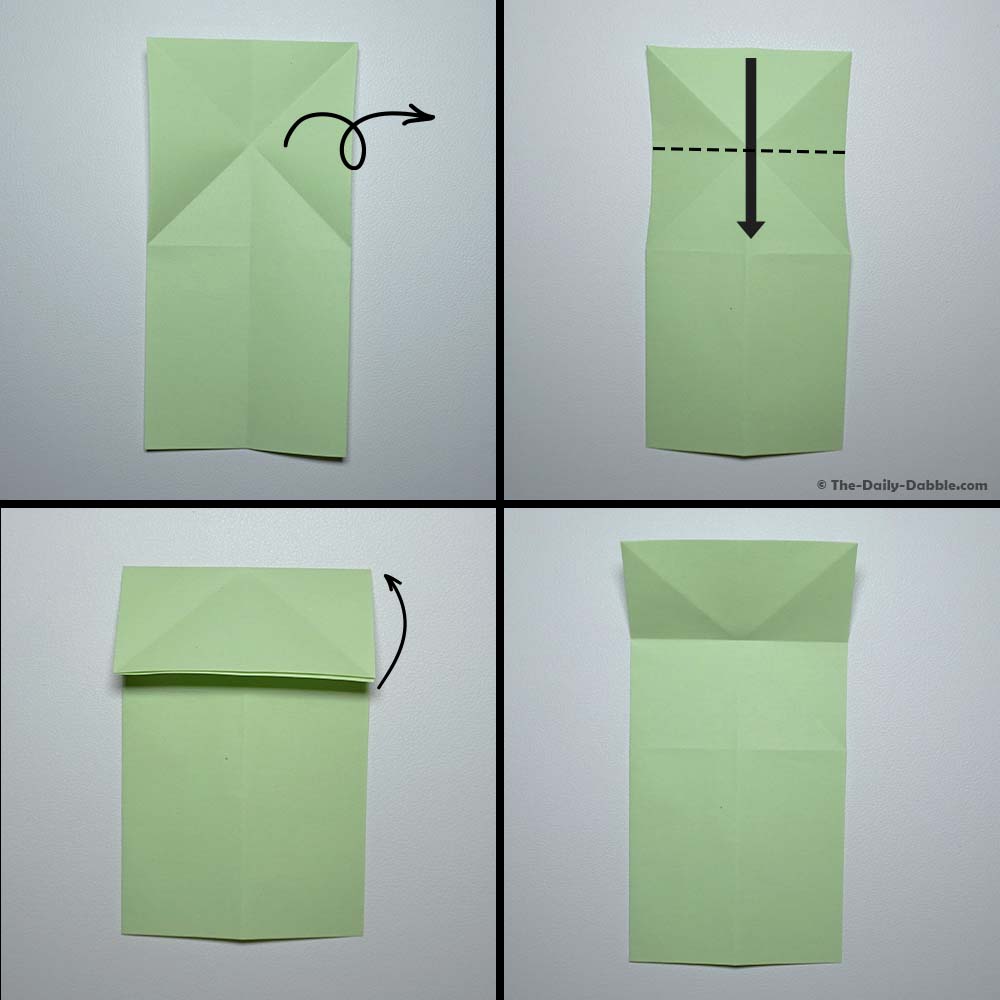
Flip your paper over and fold the top edge down to the bottom of the crossed crease. Make a crease and then unfold.
7. Flip the paper over and fold the edges down to the center to make a triangle
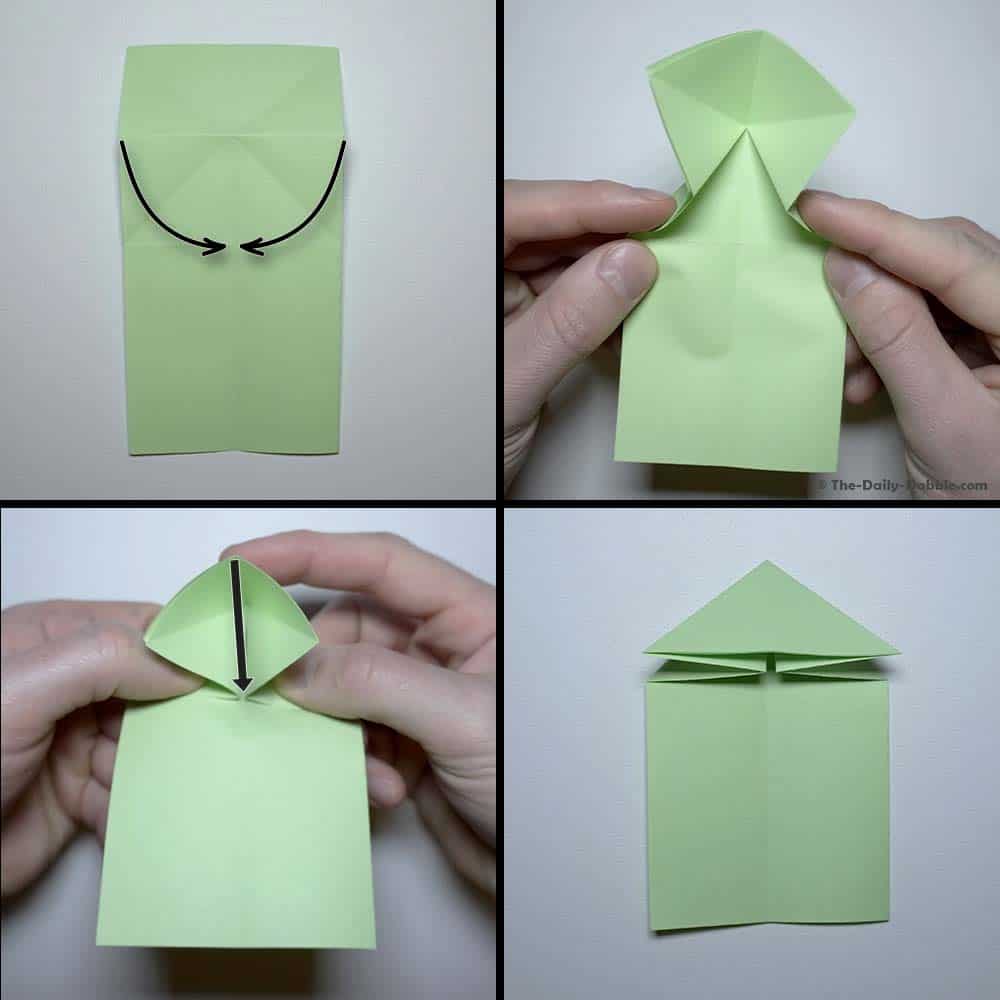
Here comes the tricky part. Flip your paper over once more and looking at your paper, you should have creases that form a square on the upper half of the paper.
Gently fold the left and right edges in towards the center of the paper and flatten the paper into a triangle shape.
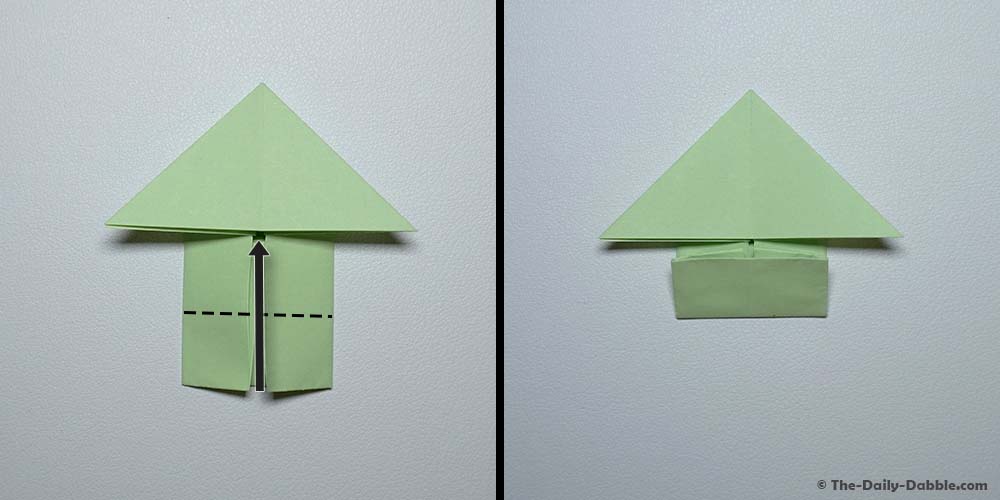
8. Fold the bottom edge up to the center
Next, fold the bottom edge up to the center of the paper, directly below the triangle.
9. Vertically fold the right and left edges to the center crease
Fold the left and right edges over and align them with the vertical crease. Ensure that the edges are tucked underneath the upper triangle.
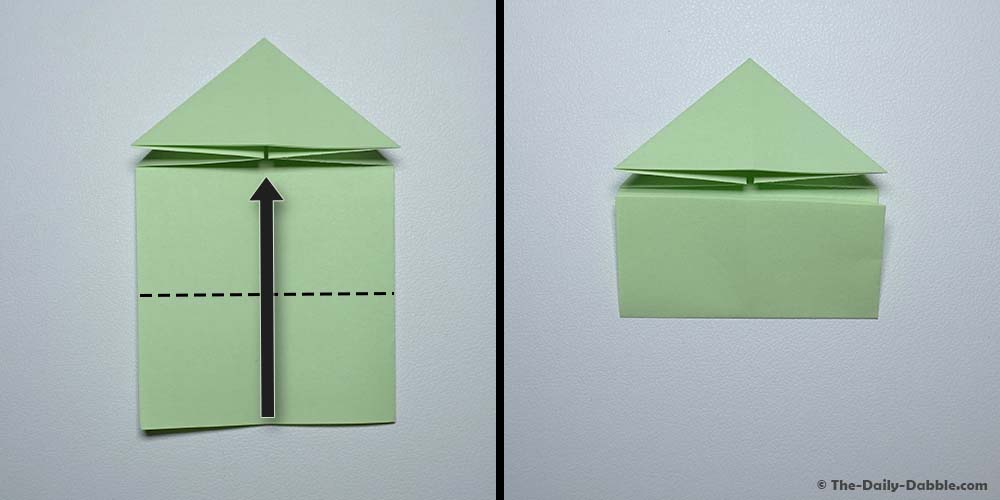
10. Fold the bottom edge up again
Once again, fold the bottom edge up to meet the bottom of the triangle.
11. Fold the top corners of the lower fap down
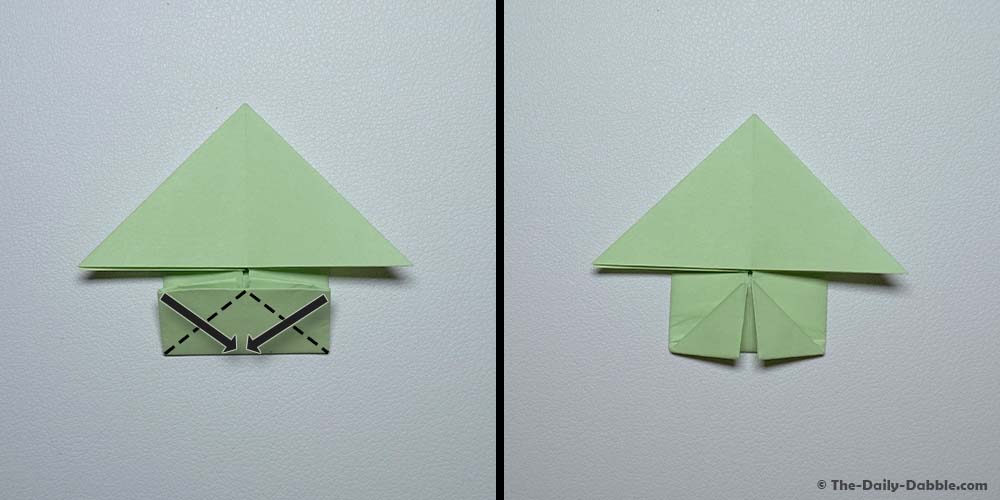
Next, fold the upper corners of the lower flap down and align them with the center vertical crease.
If you are using a smaller piece of paper, this part can start to get difficult.
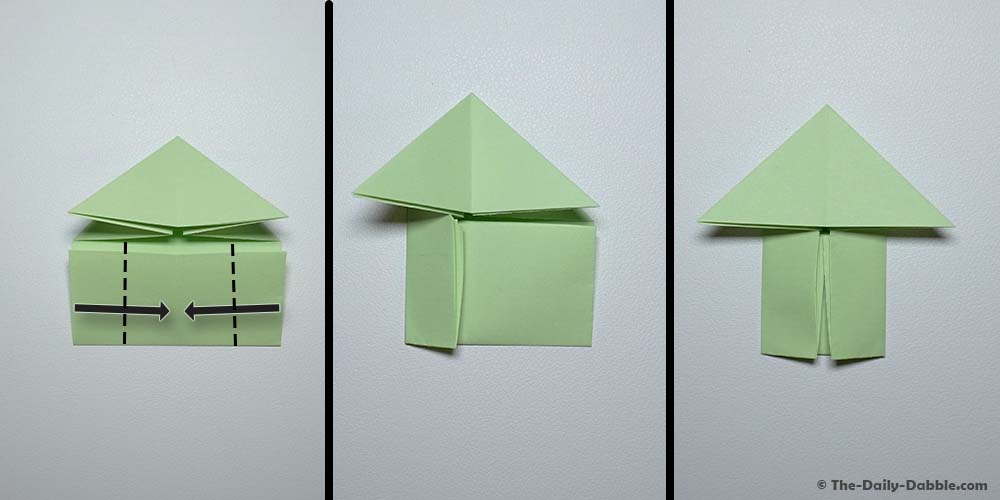
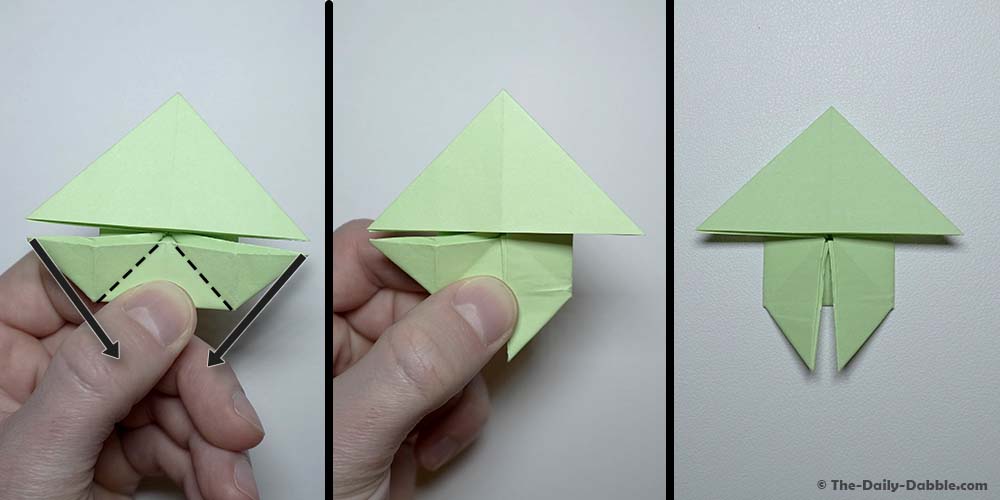
12. Unfold the last two steps
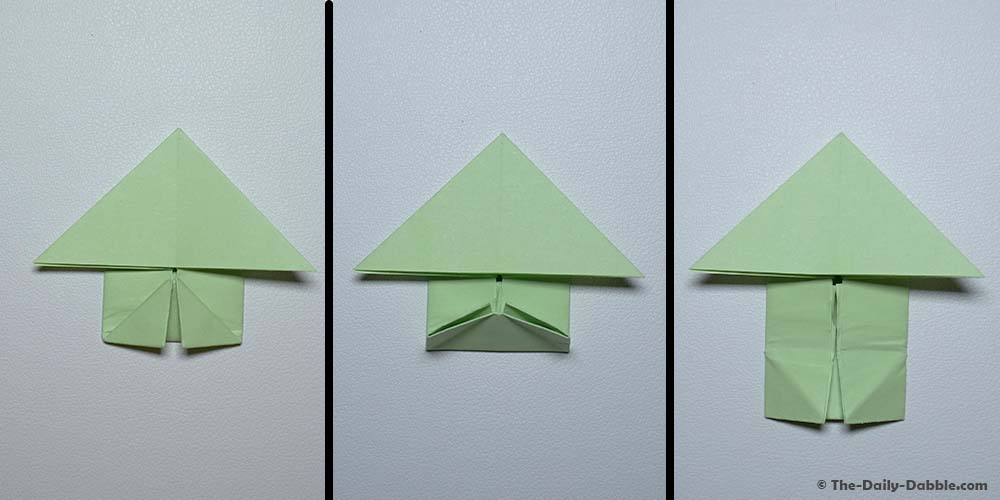
Unfold the previous two steps by first unfolding the two corners and then the bottom flap once.
13. Fold bottom corners up and out, then push bottom edge up and flatten
Alright, this is the hardest step. Begin by pulling the bottom left and right corner upward and out. Then take the bottom edge and pull it up to the base of the triangle. Smoosh the fold to create a boat-like shape.
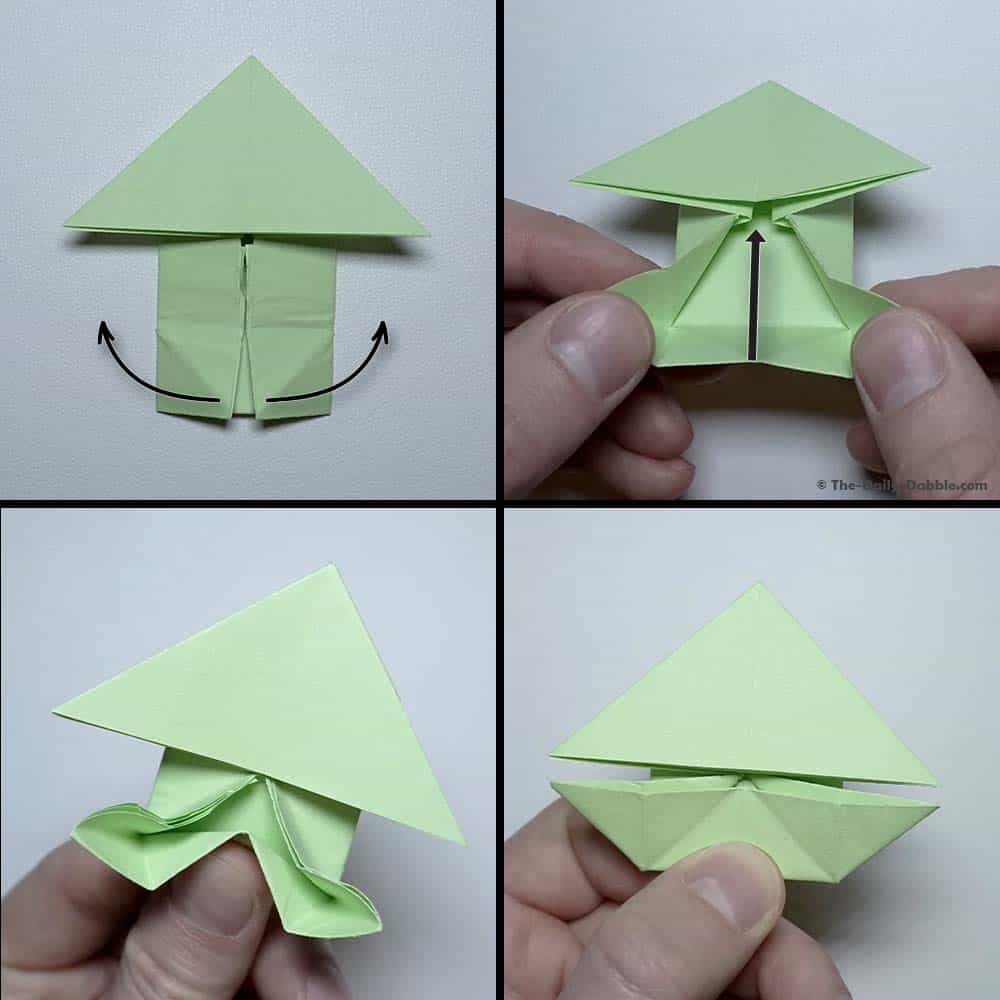
14. Fold the left and right points downward
Next, take the left and right points on the lower boat-shaped section and fold them downward.
15. Fold bottom flaps outward
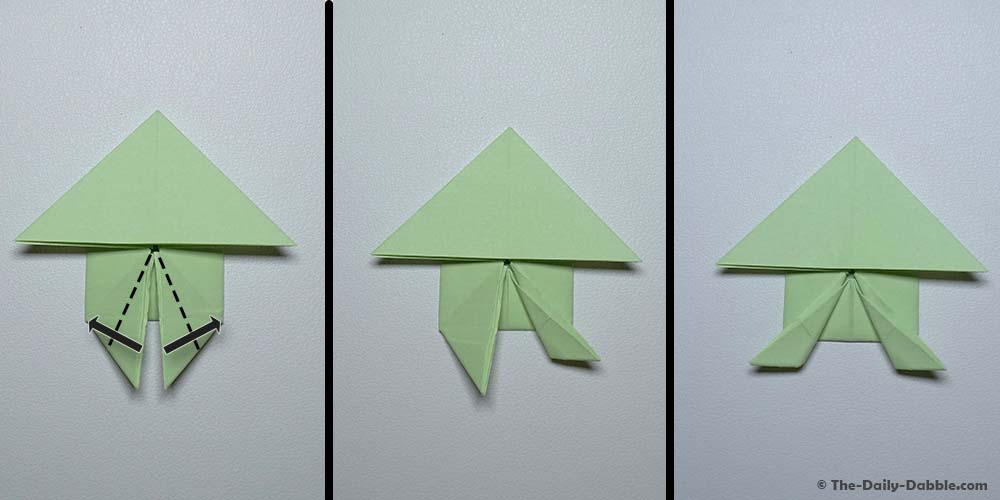
To craft the leaping frog’s back legs, fold the bottom flaps up so that they point outwards.
16. Fold the top flaps upward
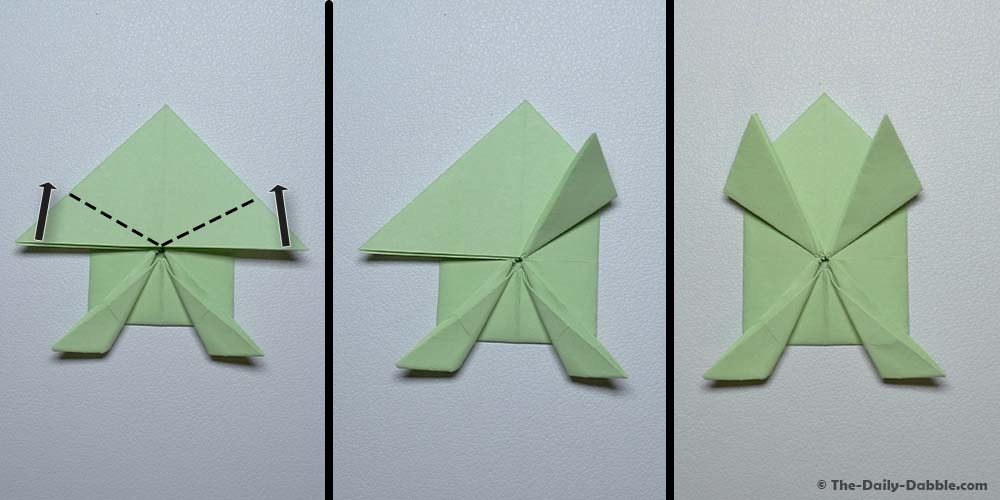
To make the legs of the frog, fold the bottom points of the upper triangle section upward.
17. Fold the frog in half vertically
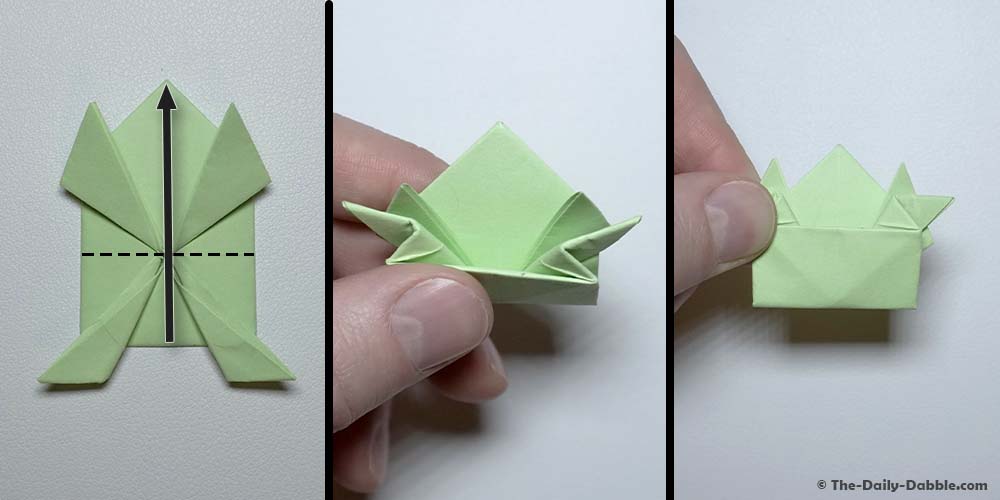
Using the crease we made in previous steps, take the bottom of the frog and fold it up.
18. Fold the bottom flap back
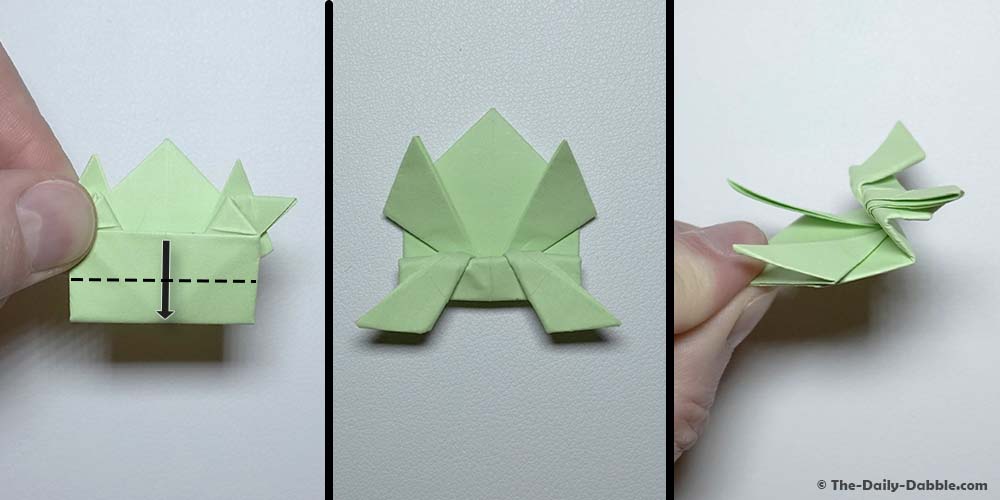
It’s time to make the frog springy! Fold the bottom flap in half backward and crease well.
Flip it over and there you have it, an origami jumping frog!
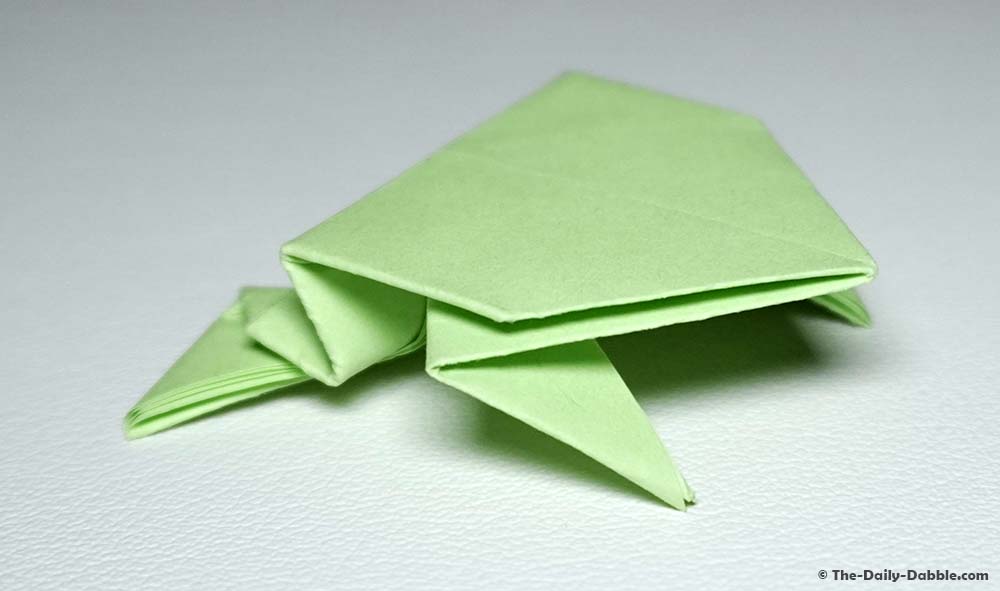
To make this little guy jump, use your finger to compress the back of the frog. Slowly slide your finger off the back to send him flying through the air!
The jumping frog is a classic favorite that will put a smile on anyone’s face!
I hope that you found this tutorial helpful and if you enjoyed this style of guide, consider checking out our full collection of origami guides!
If you liked the frog, I highly recommend checking out the origami butterfly next.
Thanks for reading and happy folding!