
In this short and easy origami guide, I’m going to show you how to fold a traditional origami ladybug using a single sheet of origami paper.
This is part of our origami insect collection and is simple to fold; only taking 3 to 5 minutes to complete.
Let’s get folding!
In this guide, we used basic square origami paper with the same color on both sides, but the multi-colored paper is fine too.
Note that if you use multicolor paper, whichever color is up when you start will dictate the color of your ladybug.
1. Fold the paper in half diagonally
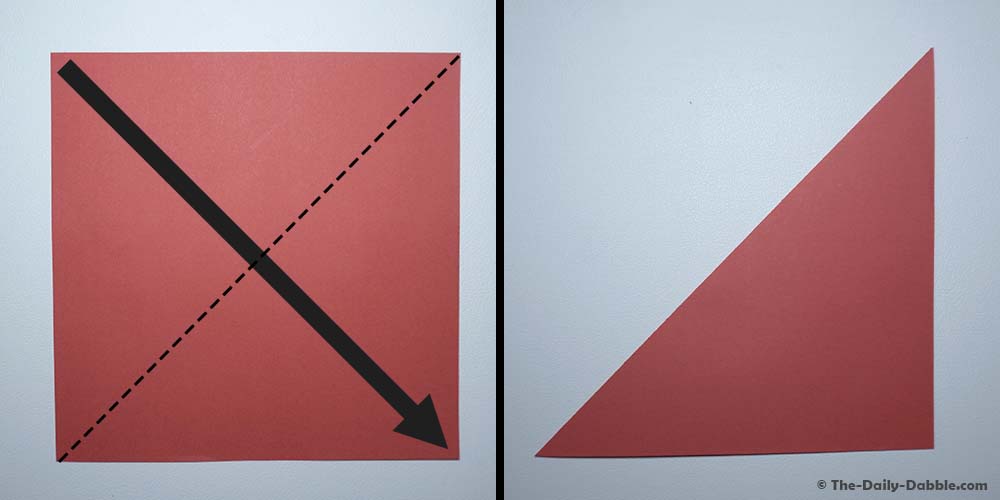
Begin by folding the paper in half diagonally by bringing the top left corner to the bottom right corner—creating a triangle.
2. Fold the triangle in half and unfold
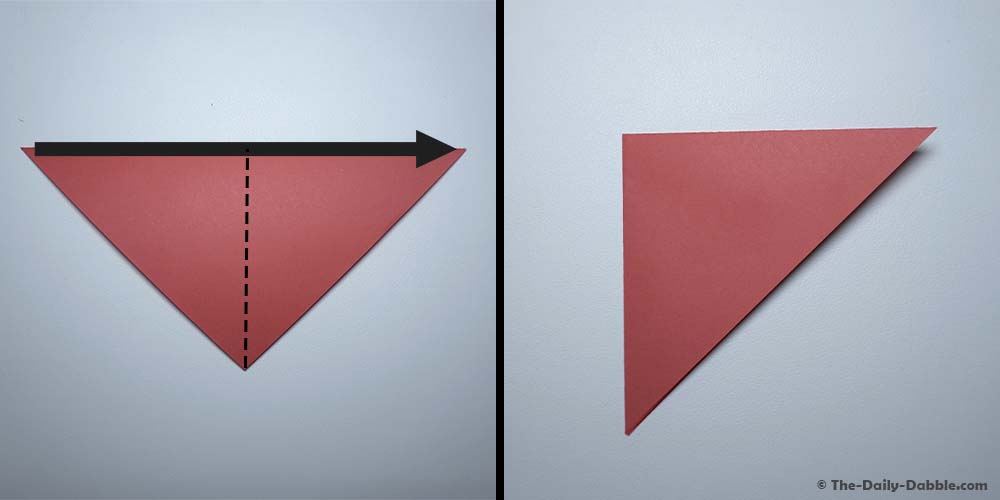
Next, fold the triangle in half from left to right. Create a crease and then unfold.
3. Fold the left and right corners up
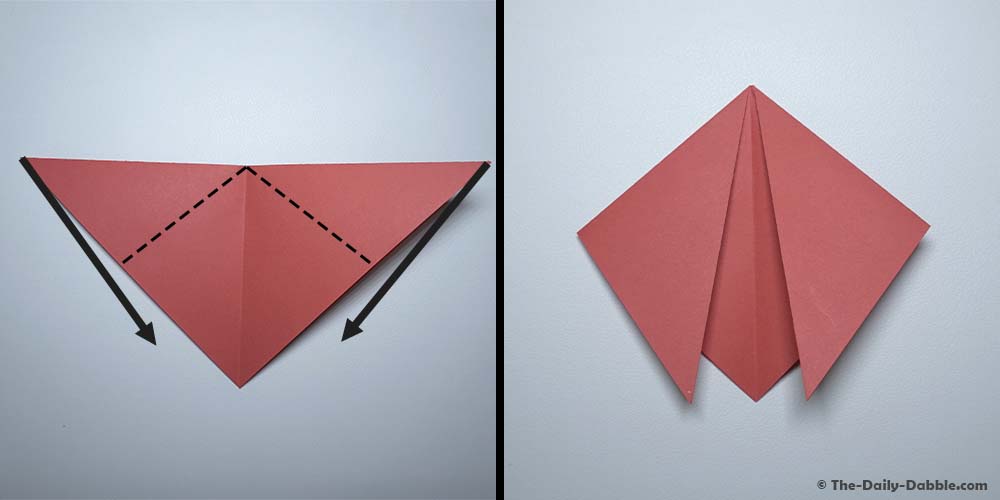
Fold the left and right corners of the triangle up about an inch off the top point.
You can adjust the width of your ladybug’s wings here. If you fold closer to the top point, you’ll make the wings look closed. However, if you fold further away from the top point, the wings will appear as if the bug is flying.
4. Flip the paper over and fold the top corner down
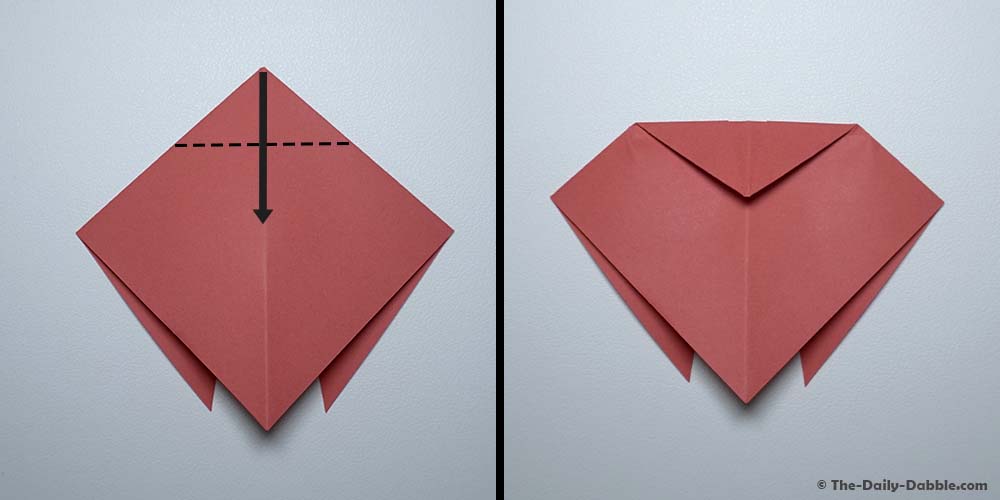
Flip the paper over, and with the flaps pointing down, fold the top point down to the center of the paper (between the left and right corners).
5. Fold the top flap back up
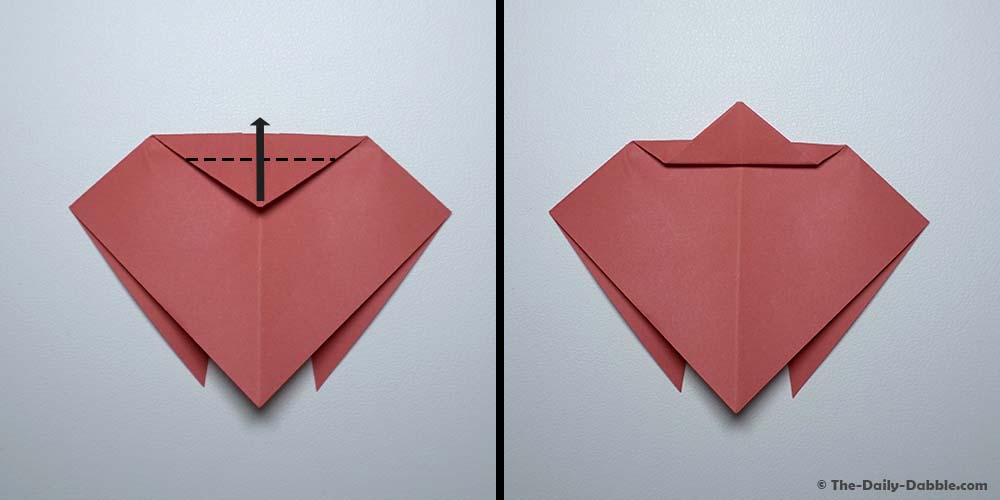
Next, take the flap you just folded down and fold a section of it back up.
6. Fold the left and right corners in
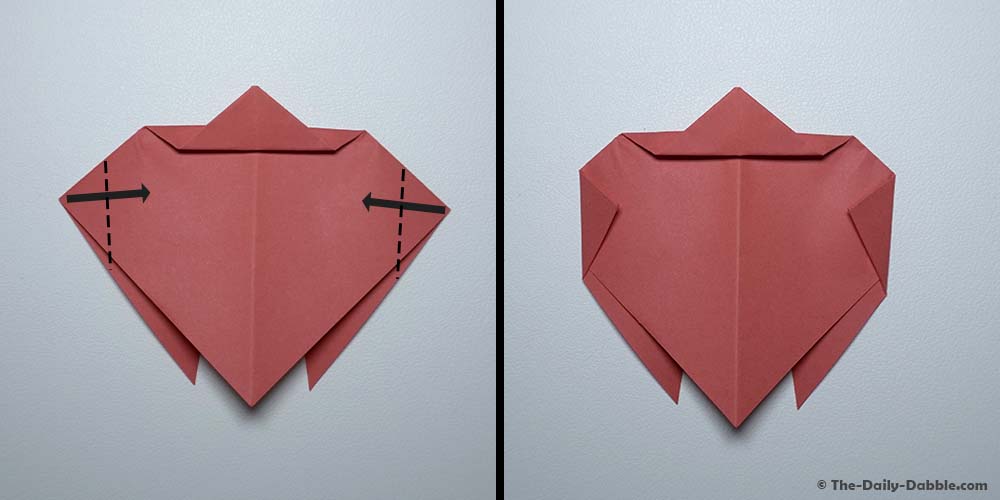
Now it’s time to round off our ladybug. Fold the left and right corners inward towards the center.
You can adjust this how you want to make different shaped ladybugs.
7. Flip it over and decorate it
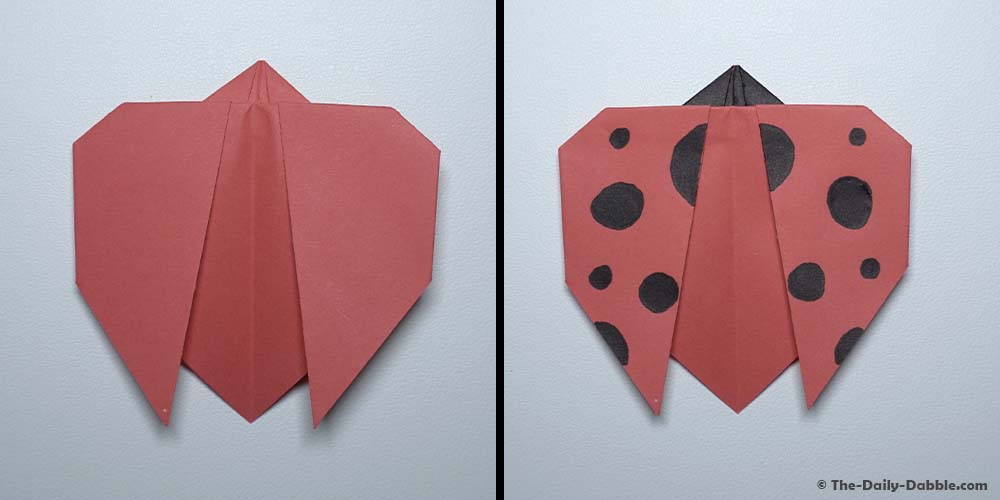
To finish off our ladybug, grab a marker and decorate it by giving her spots and coloring her head and spine.
And there you have it, a traditional origami ladybug!
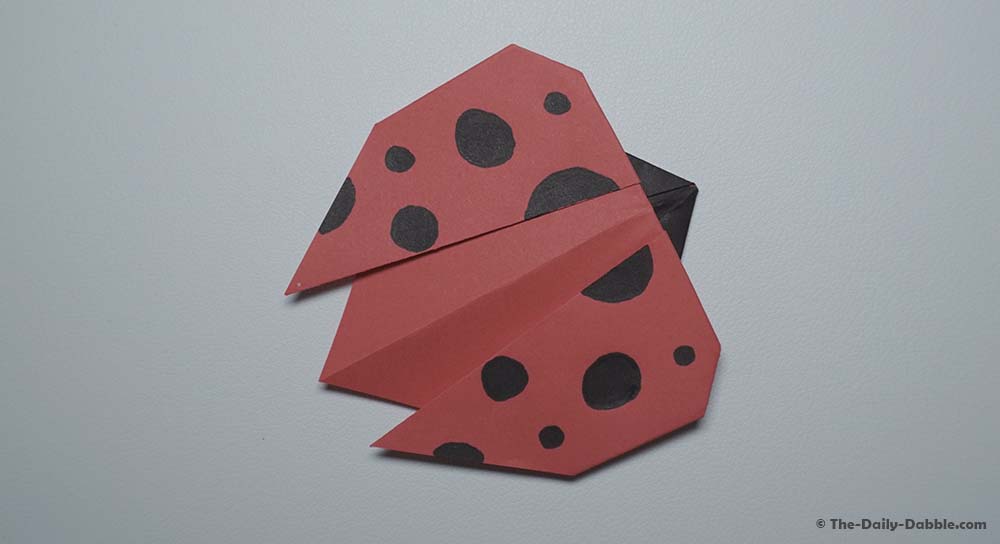
I hope you liked this little origami bug and if you enjoyed this style of guide, consider checking out our complete collection of origami guides! We have many more bugs to fold—such as my favorite, the origami cicada!
Thanks for reading, and happy folding!