
In this guide, I will cover exactly how to make an origami lily flower step-by-step.
Lillies smell great, look incredible, and are considered to be a symbol of purity and luck.
The folds are pretty easy for this project, but there are 23 steps, so it will take about 10 minutes to fold.
This is one of the many origami flower designs we have that are great for gifting and decorations.
Let’s get folding!
I used a single pink sheet of square origami paper for this lily flower.
If you don’t have a piece of square paper, you can always make a regular paper into a square.
1. Fold the paper in half twice from the edges
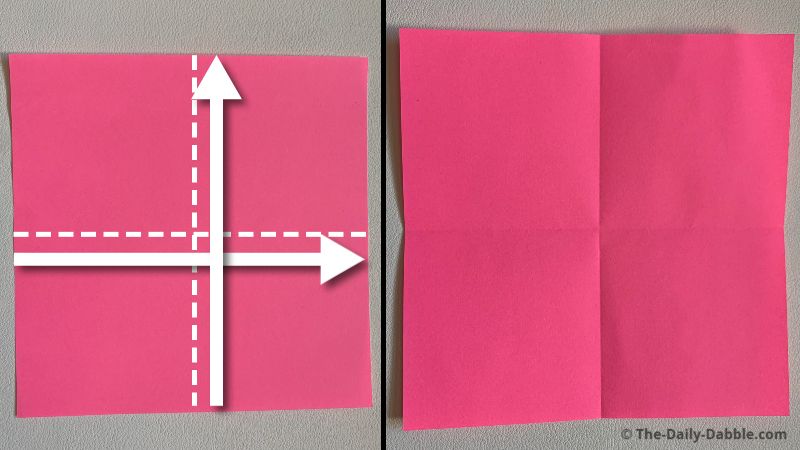
Fold the paper in half from one edge to another, unfold it, and then repeat by folding from the opposite edges.
After unfolding the second time, you should have two creases going the opposite ways, as shown.
2. Fold the paper in half twice from the points
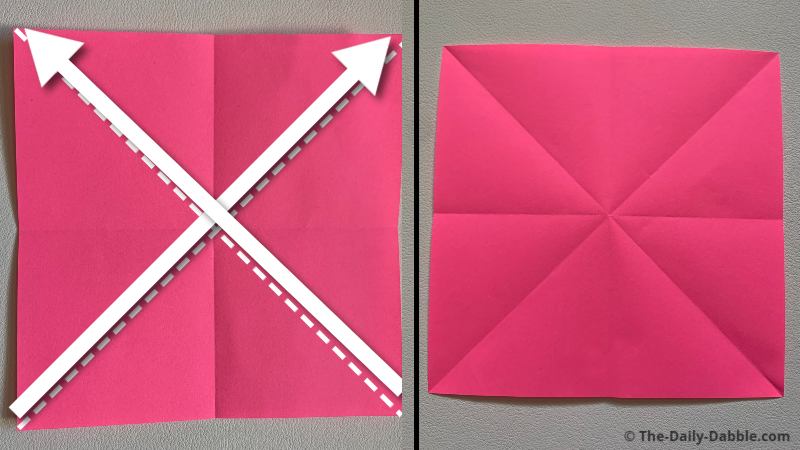
Fold the paper in half from one point to another, unfold it, and then halve it again from the other points.
After unfolding, you should now have four even creases across the paper.
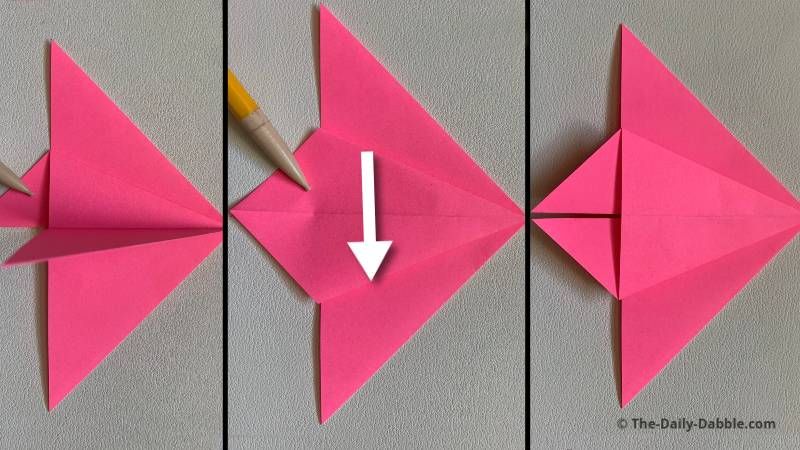
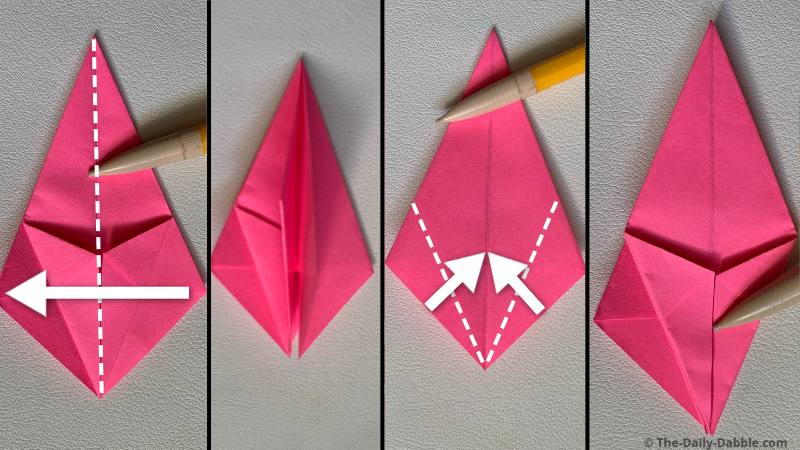
3. Push two sides in and flatten it into a triangle
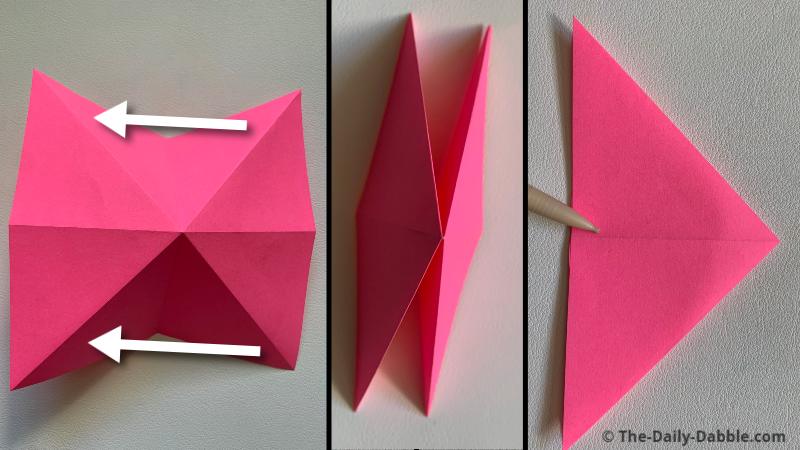
Push two center edges inward and flatten the paper down into a triangle.
Origami 101: At this point, you have folded what is called to origami waterbomb base. Origami bases are basic starting points that can be made into many other designs. This base, for example, can be folded into other projects like the origami balloon. To learn more about these origami bases check out our guide: The 12 Traditional Origami Base Folds!
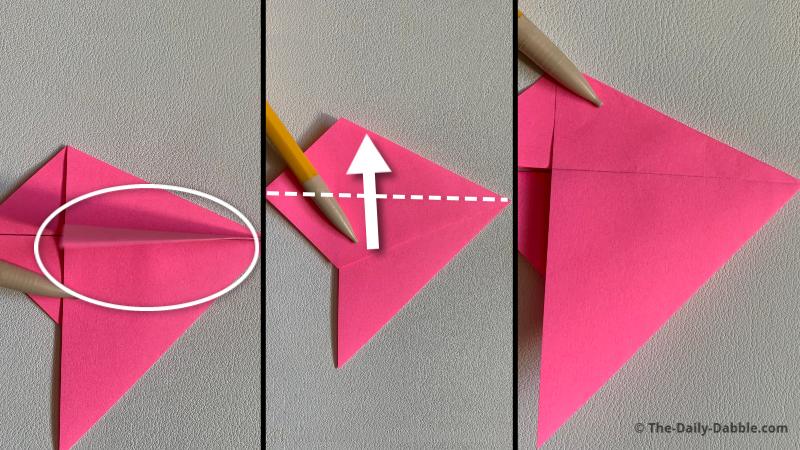
4. Squash fold down the left upper flap and then fold it over
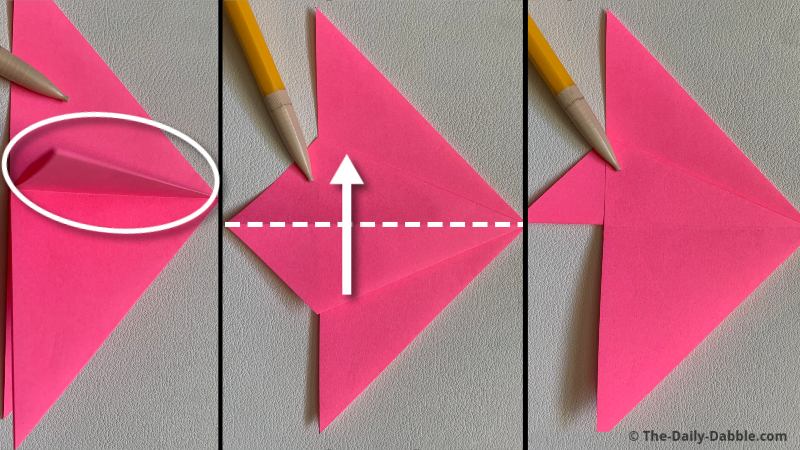
Take the left upper flap and fold it down flat as evenly as possible.
Next, fold the right edge over to the left side.
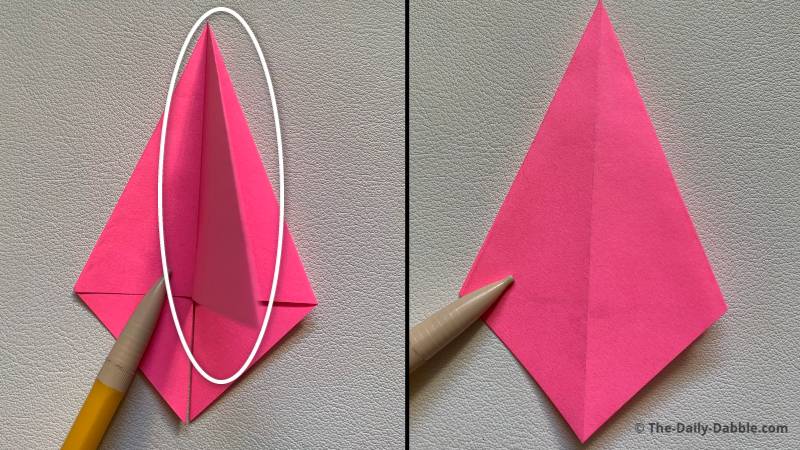
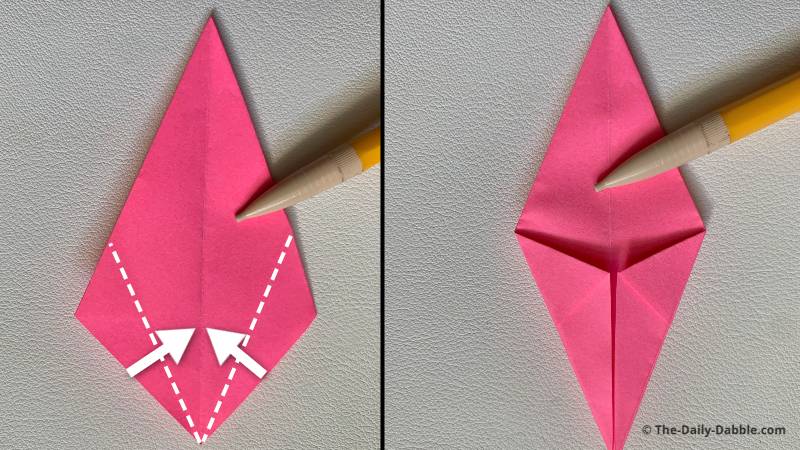
5. Repeat a similar process on the upper right flap
Take the right upper flap and fold it straight down flat too.
Next, fold the left edge of it and fold that over to the right side.
6. Flip it over and repeat step 4 on this left flap
Flip the paper over and repeat the same folds you did in step 4 with the left flap.
We will be folding the right flap slightly differently in the next step.
7. Fold this right flap down and flat evenly
Squash the last flap down flat as even as possible.
8. Fold the lower edges to the center crease
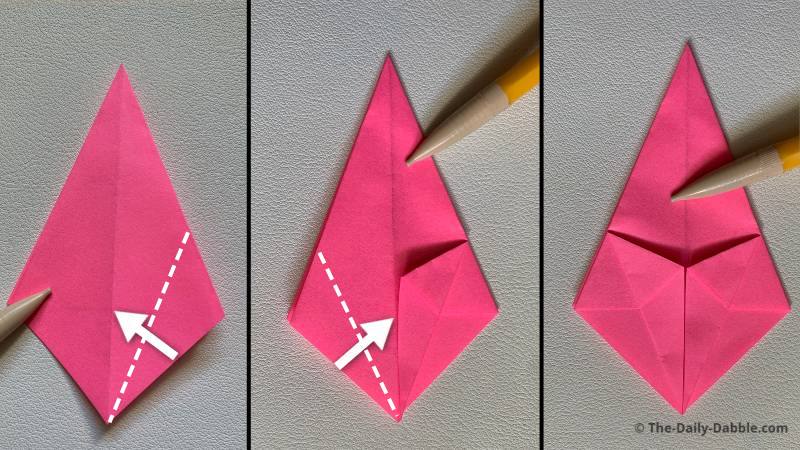
Bring the lower edges evenly to the vertical centerline and crease them well.
9. Flip it over and repeat the process

Fold the lower edges to the center again on this side.
10. Fold the right flaps over to the left and fold the edges again
Bring the right flap over and repeat the same bottom edge folds.
11. Flip this over again, and repeat the same folds
There will be one last unfolded flap to fold the bottom edges to the centerline.
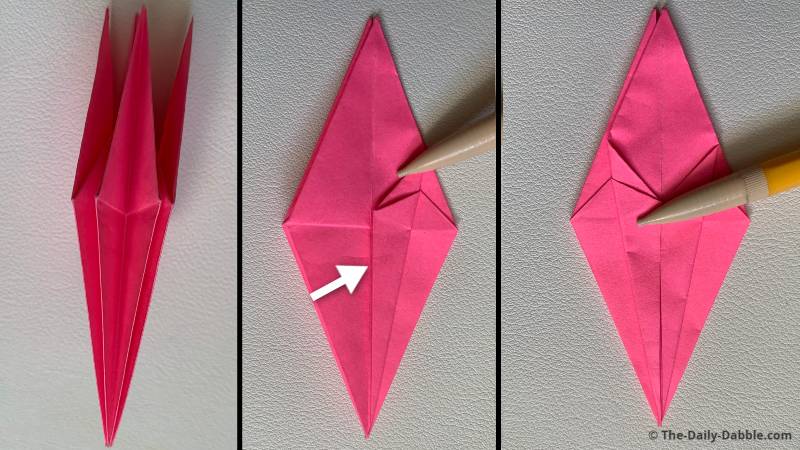
12. Flip it on its side and make a fold on the middle flap
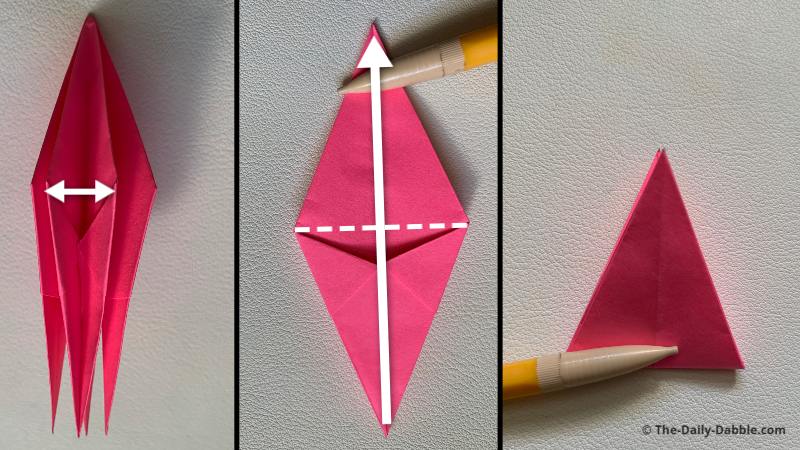
After step 11, what you have should look similar to the first picture on the left.
Flatten it down flat again, and then fold the points to meet to make a little triangle.
Unfold this last part once the crease is made.
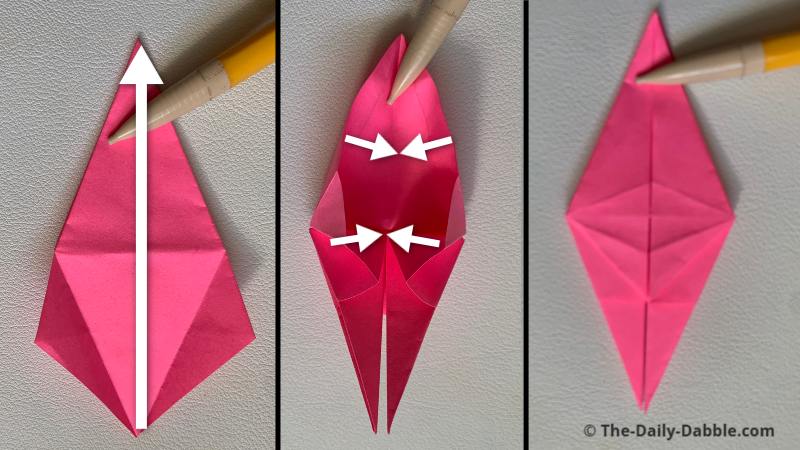
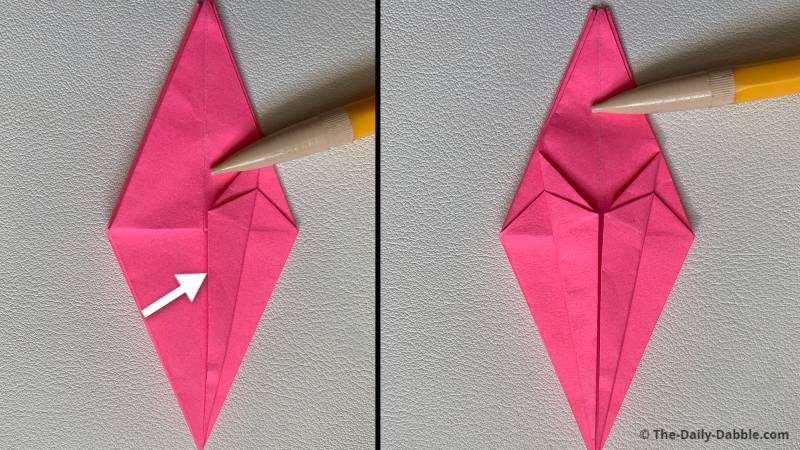
13. Open the end with flaps and fold it flat to the other side
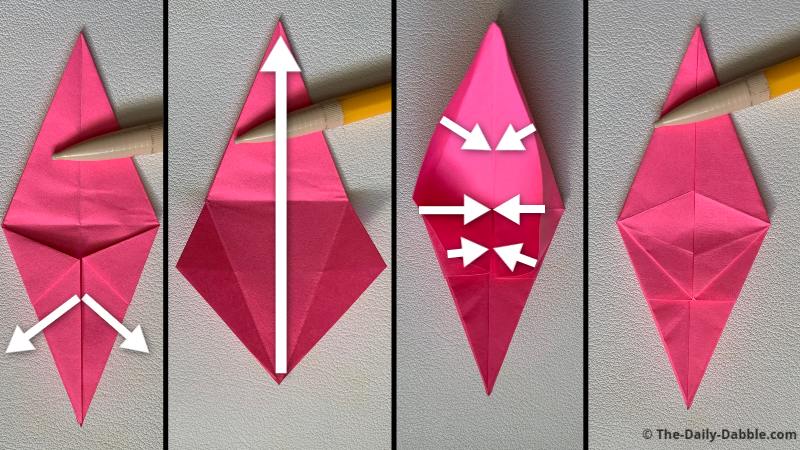
Open up the flap completely and fold its point to the opposite one,
Then bring the edges down and to the center evenly.
You will be doing this same fold style in the next three steps.
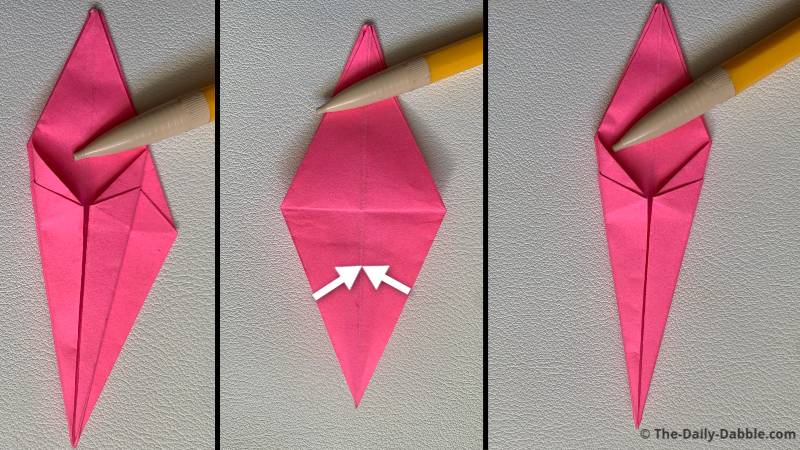
14. Flip the paper over and repeat the same fold
Flip the paper directly over to the opposite side after step 13 and repeat the same folds.
15. On the flap just to the left, repeat the same fold
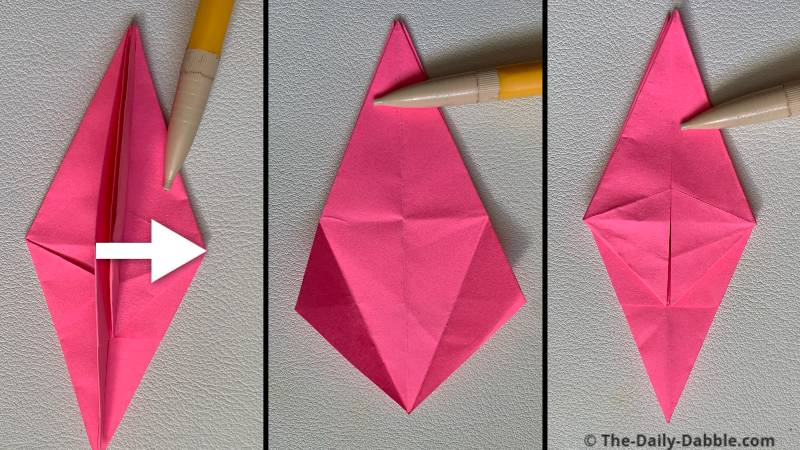
Bring the left flap over to the section where there are more lower flaps to unfold.
Unfold the flap entirely and fold it just like the previous steps.
16. Flip it over and repeat the same fold again
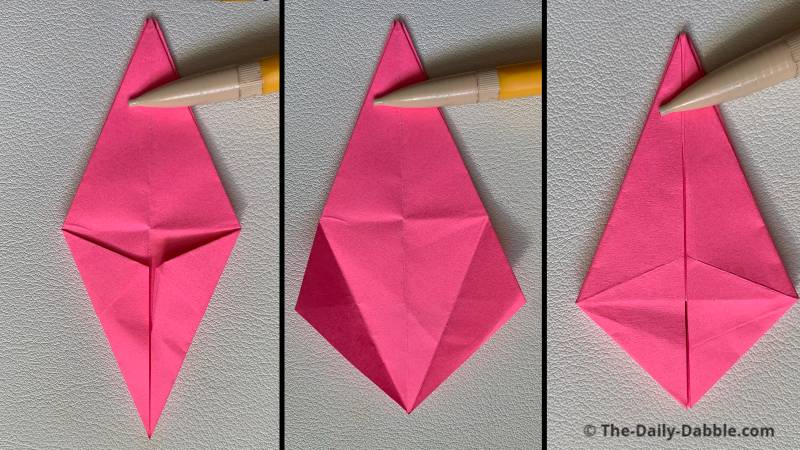
Repeat the same unfolding process and then back down flat one last time.
I rotated the paper before completing the next step so that the long point was down.
17. Fold the top flap up, then flip over and repeat

Bring the top flap down, using the crease it already has.
Flip it over and do the same thing on the other side.
18. Bring the two right flaps over and then fold up the tip
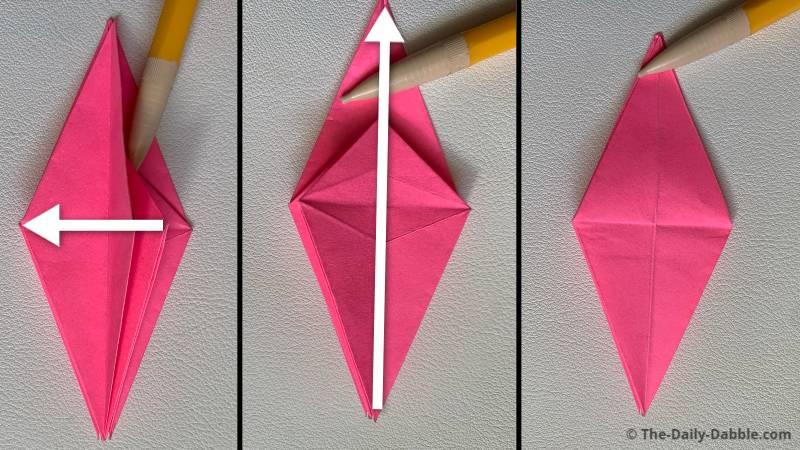
Go two flaps over and repeat the step of folding the tip upwards.
19. Fold the last point upwards

Find the last unfolded point and fold it upwards like the last three.
20. Fold the lower edges of one side to the center
The flower should now be symmetrical, as shown in the first picture on the left.
Make sure it’s flat like the middle picture and fold the lower edges to the center.
In the following steps, we will repeat these same folds three more times on the other three sides.
21. Flip over and repeat the lower edge folds
Flip the paper over and fold the lower edges the same way as in the previous step.
22. Repeat the folds on the other two sides
Complete the same steps on the other two different sides.
Now the folds are done, all that is left is the shaping.
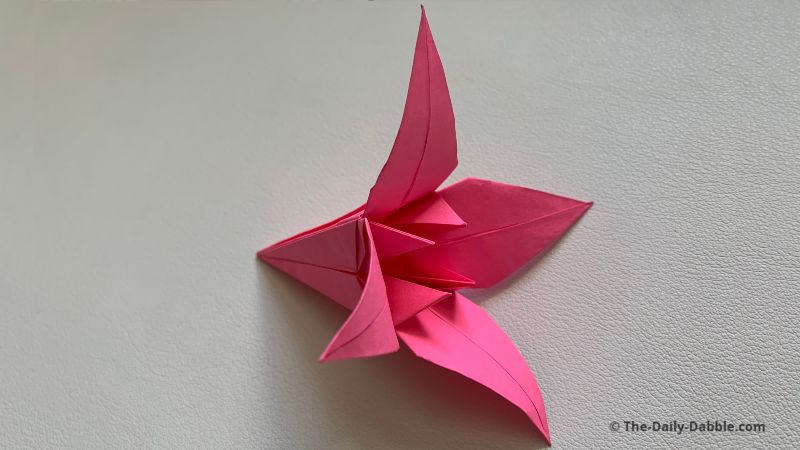
23. Open up the lily and shape the petals
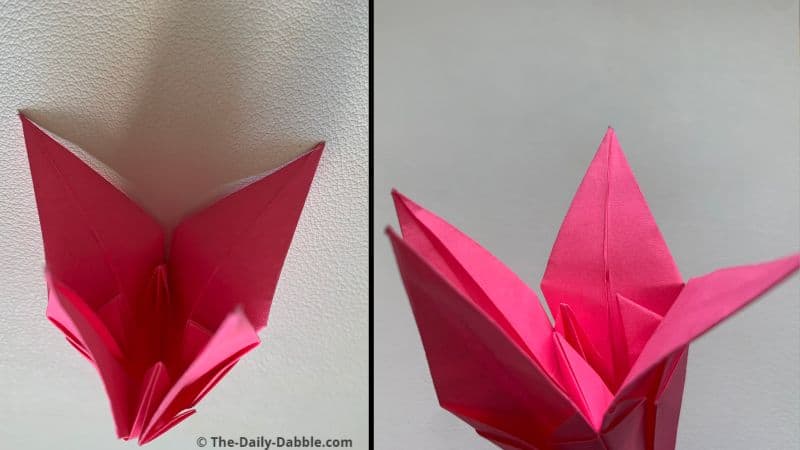
Open up the lily and slowly curve the petals outward to shape them evenly.
Now you know how to fold a fabulous paper lily!
If you liked this instruction guide, we have other similar origami designs like the easy origami tulip and the origami leaf that you may enjoy!
Happy Folding!