
In this step-by-step tutorial, you will learn how to fold the traditional origami Pajarita. This is a very beginner-friendly fold and takes about five minutes to complete.
This easy origami pajarita is a very old and unique design that is considered one of the first models to come out of Spain rather than Asia.
Pajarita, meaning “little bird,” is a very simple and almost abstract origami bird, but nonetheless is just as significant in the craft of origami as the paper crane!
Let’s get folding!
To make a paper pajarita, you will need a single square piece of paper. You can use regular printer paper cut into a square; however, I recommend origami paper for better-looking folds, and that traditional origami feel!
In this tutorial, I’ll be using a multi-color 6 x 6 sheet of origami paper, but you can use single-colored paper as well.
1. Start color-side up
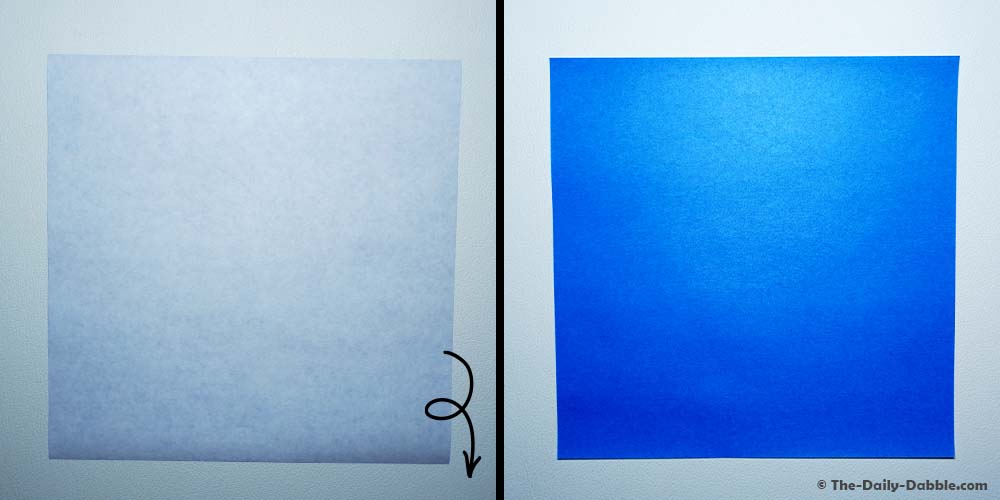
Begin your pajarita with the colored side of your paper facing up. If you use single-colored paper, you don’t have to worry about this step.
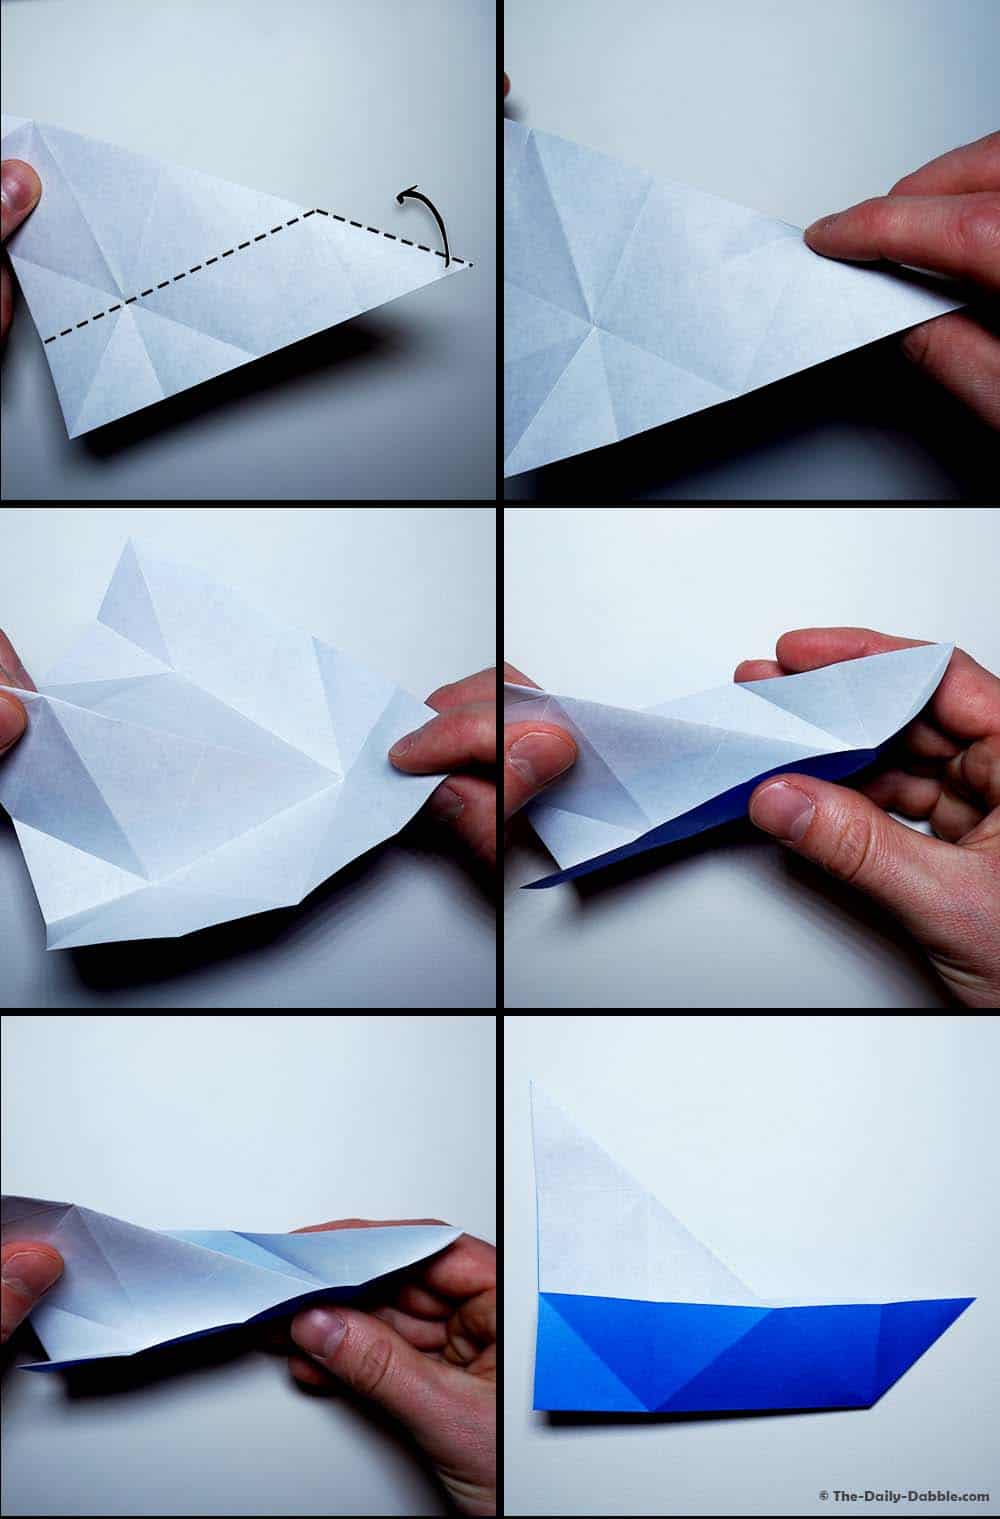
2. Fold in half diagonally, then unfold
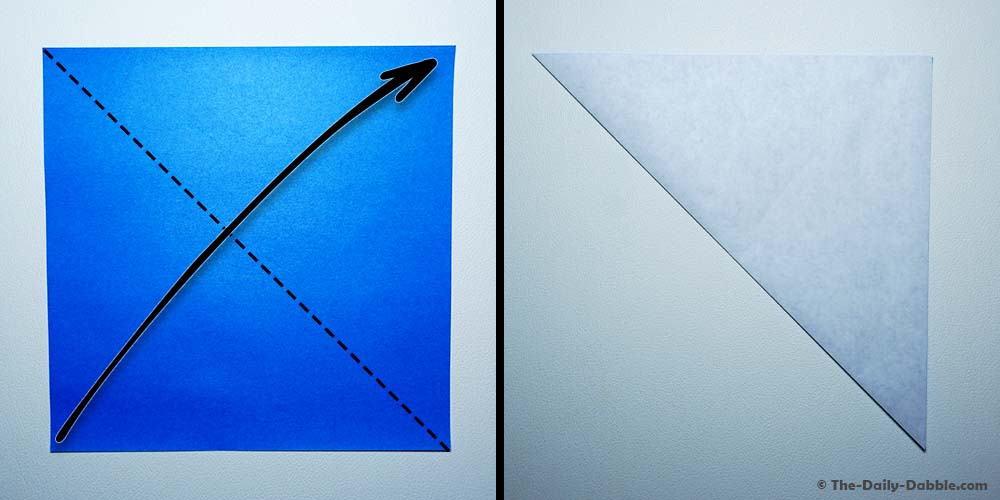
Fold the paper in half diagonally, bringing the bottom-left corner over to the top-right corner. Crease well and unfold.
3. Fold in half diagonally in the opposite direction, then unfold
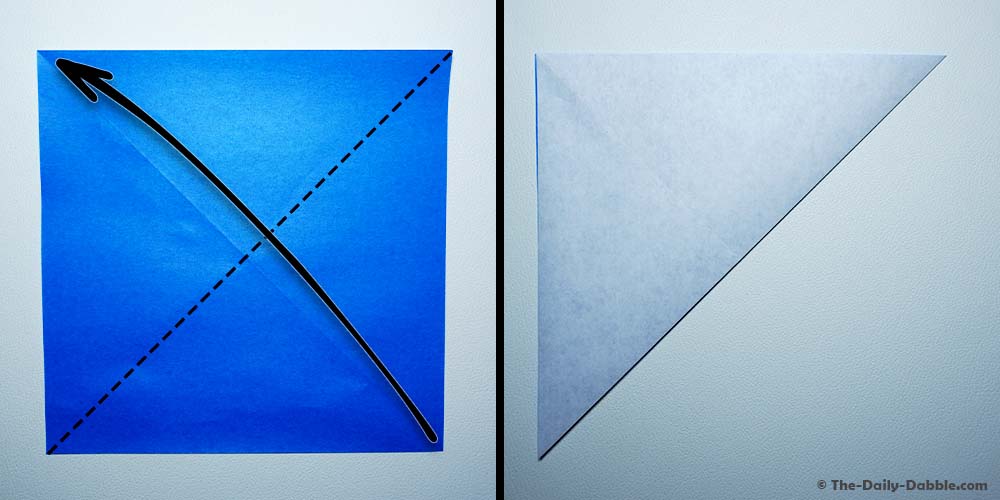
Fold the paper in half diagonally in the opposite direction of the last step, bringing the bottom-right corner over to the top-left corner. Crease well and unfold.
4. Flip the paper over
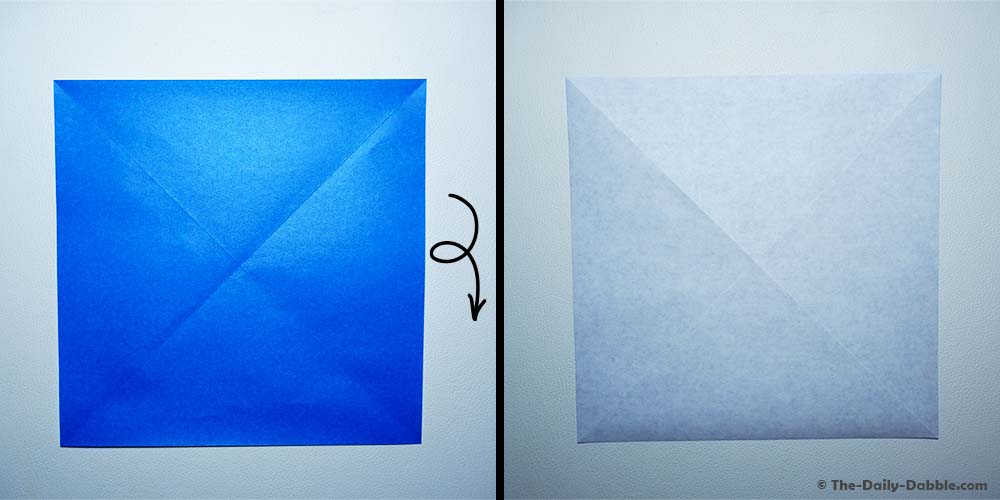
Flip the paper over so that the colored side is facing down.
5. Fold the corners to the center
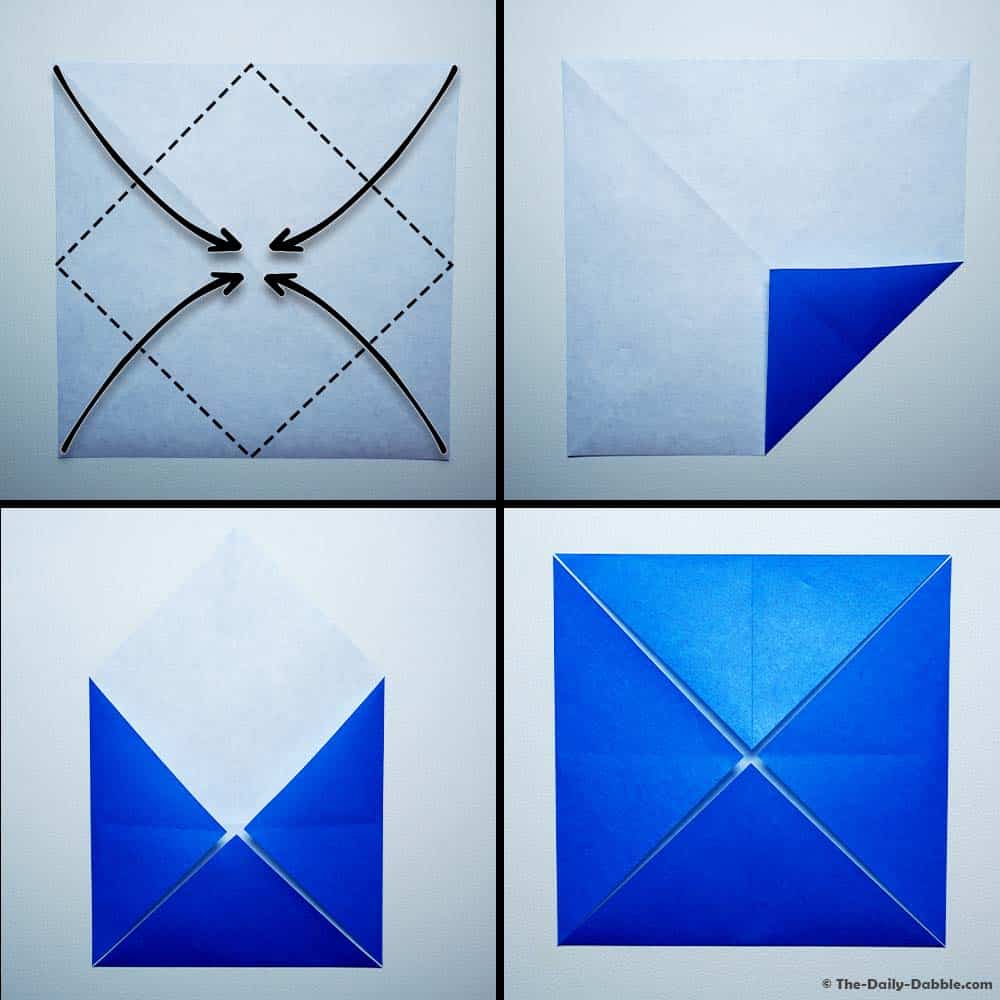
Next, fold all four corners to the center. Use the creases from the previous folds as guides and crease well.
Origami 101: At this point, you have folded the blintz base. Origami bases are common designs used as starting points for many paper creations. To learn more about base folds, check out our beginner’s guide to origami bases here.
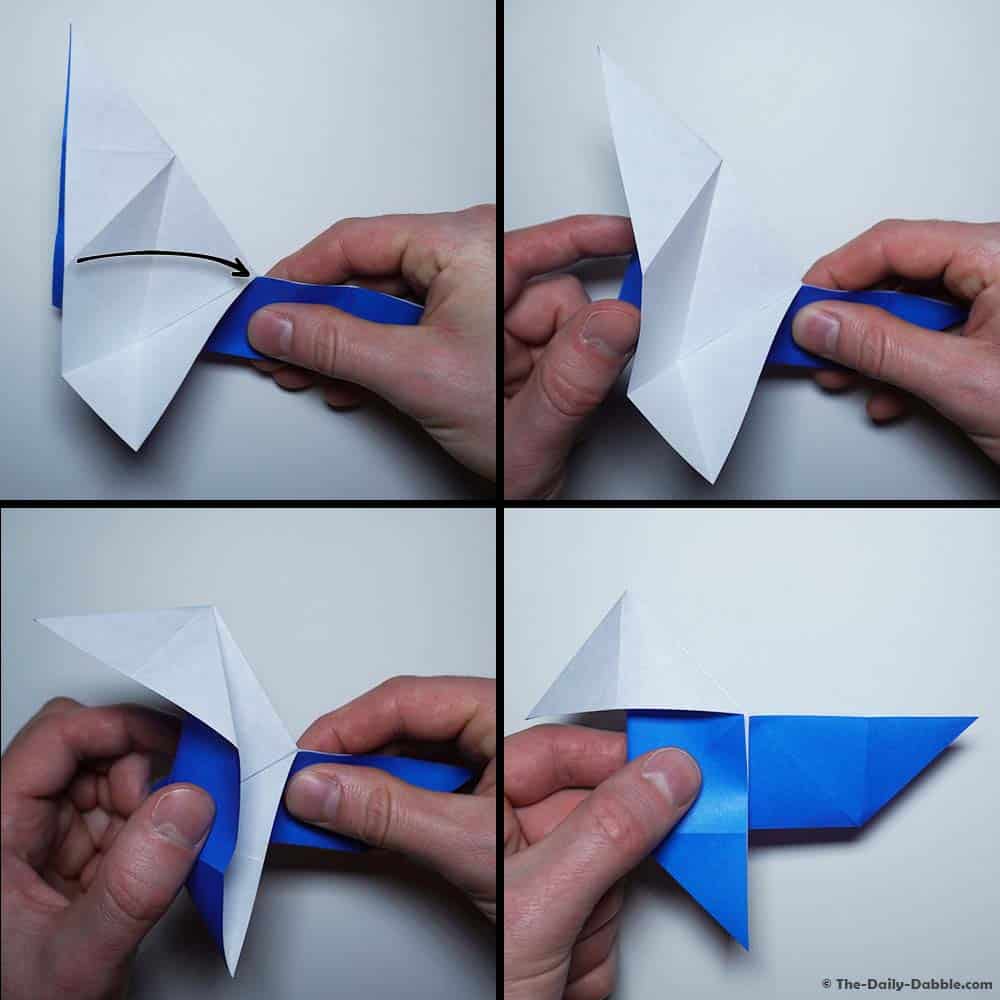
6. Flip the paper over and fold the corners to the center again
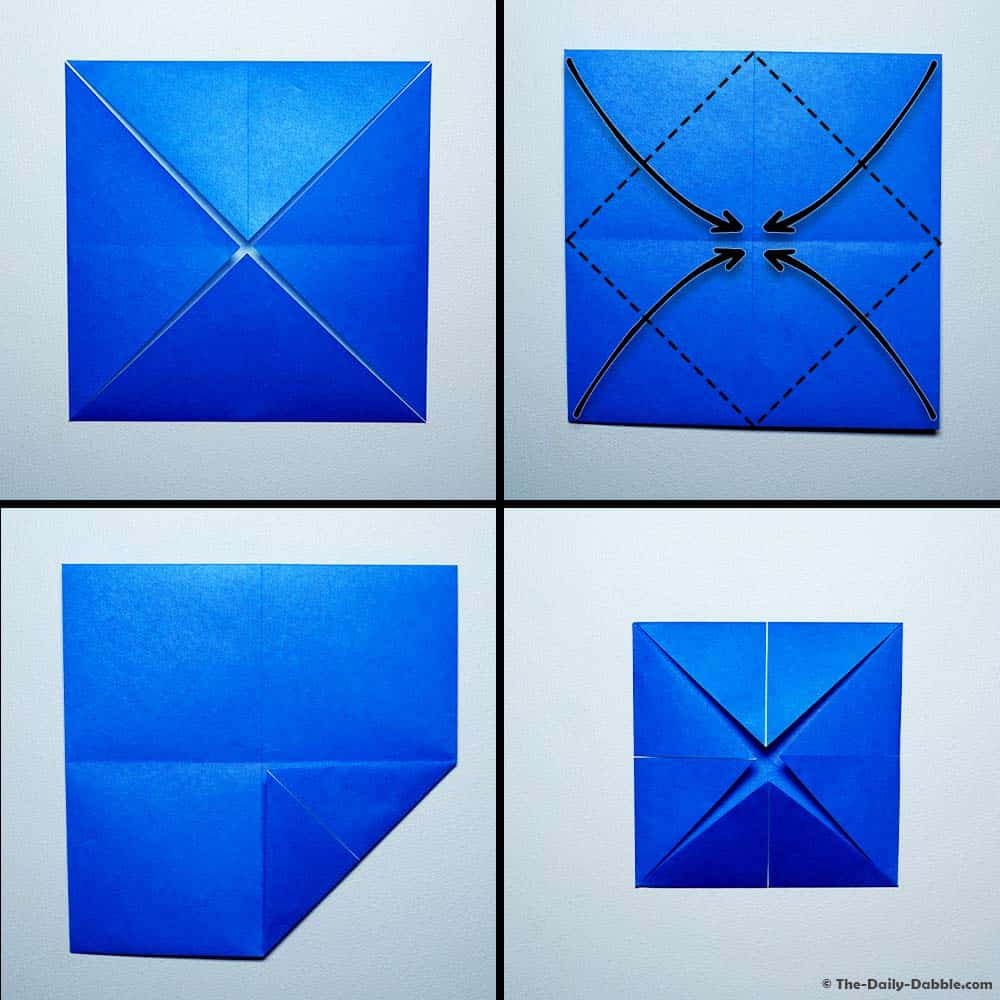
Once again, flip the paper over and fold all four corners to the center.
This is called the double-blintz base.
7. Unfold everything
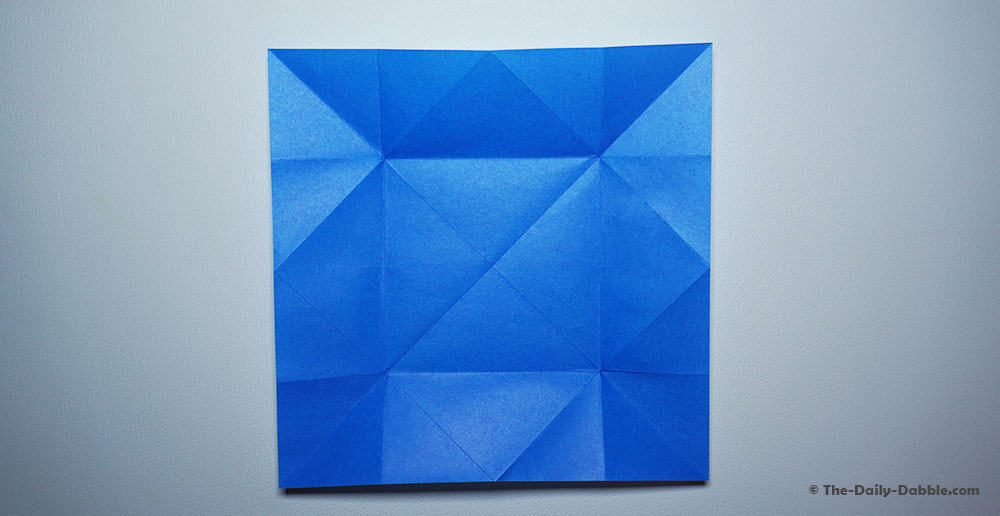
Next, unfold all your hard work.
8. Fold in half diagonally
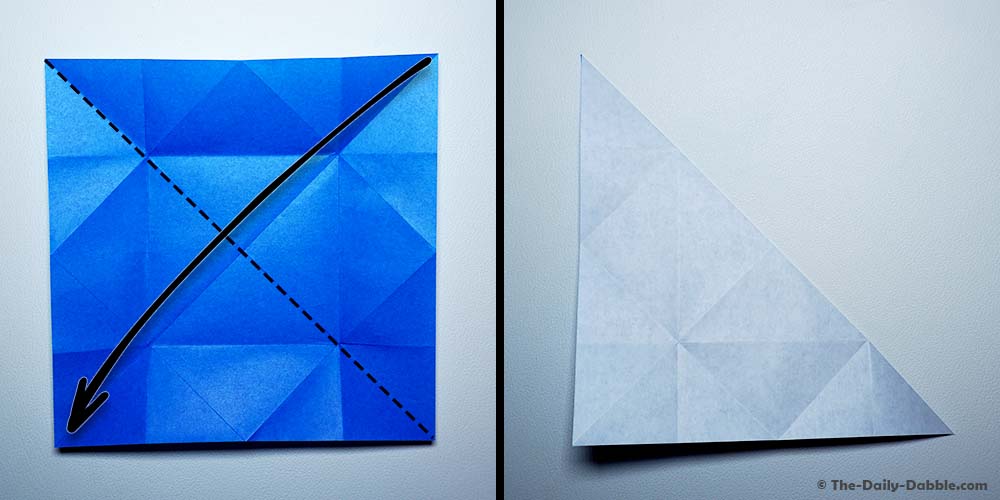
With the colored side facing up, fold the paper in half diagonally.
9. Reverse fold the tail
Here comes the tricky part, but fear not, we are almost done!
Open up the paper slightly and pull the bottom-right corner upward to reverse the fold.
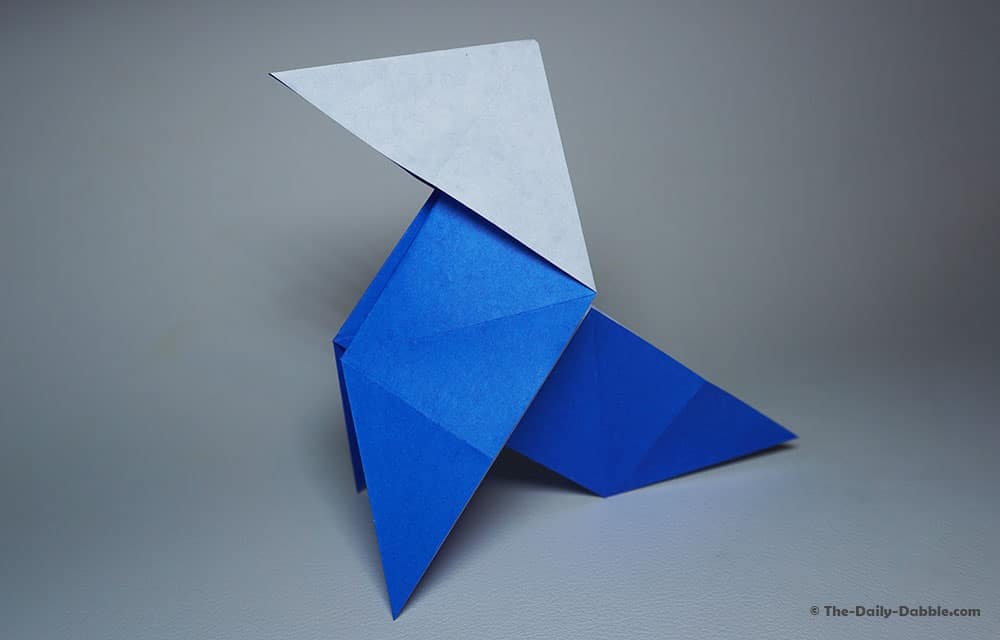
10. Fold the left section back
While holding the tail, fold the left section back. This will form the triangular head, and the legs should also pop downward.
Flatten everything down well, and there you have it, the traditional origami pajarita.
You can now stand your model up on a desk or table for the world to admire!
If you liked folding this little pajarita, you might enjoy folding the origami dove.
However, if you would like to fold some other extraordinary flying creatures, consider checking out our collection of origami bird guides.
Also, be sure to drop by our main origami page to see all of our easy origami guides!
Thanks for following along, and happy folding!