
With this guide, you can learn how to make an easy origami penguin with step-by-step instructions.
This simple design is not too hard for beginners and can be folded in about 5 minutes.
Let’s get folding!
In this tutorial, I use a multi-colored sheet of origami paper that is black on one side and white on the other.
If you don’t have a square sheet or black paper, you can always just cut a regular sheet into a square and then color one side black.
You can also make it a little fancier by cutting a little triangle piece of yellow or orange paper to cover the beak at the end.
Start the folds on the black side if you want the penguin to be primarily black with a white belly.
1. Fold the paper in half from point to point

Fold the paper directly in half from one point to another and then unfold.
2. Fold the bottom point up to the center
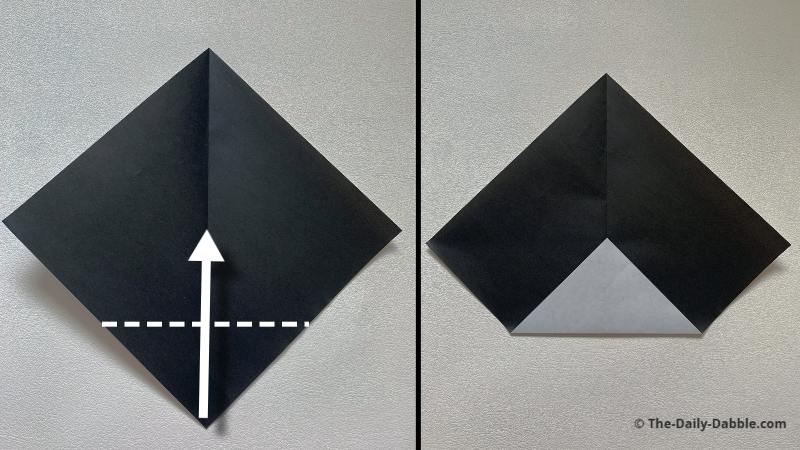
Bring the lower middle point to the center of the square.
3. Fold it in half evenly from left to right
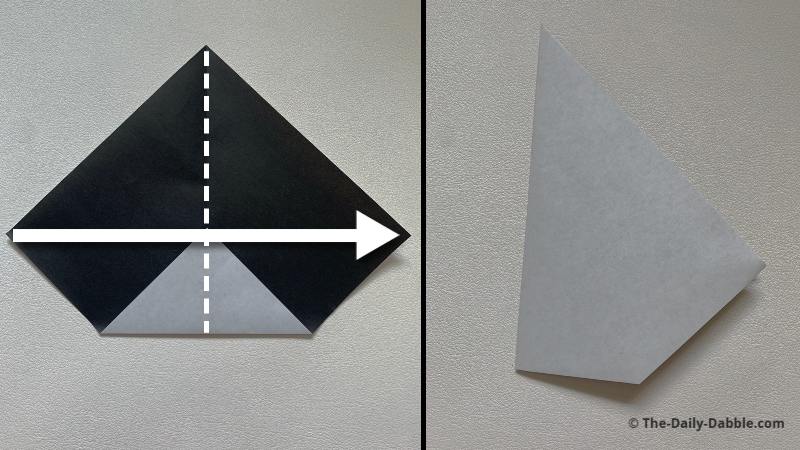
Bring one side to match the other, to fold it straight in half.
4. Fold one flap over about 3/4 the way
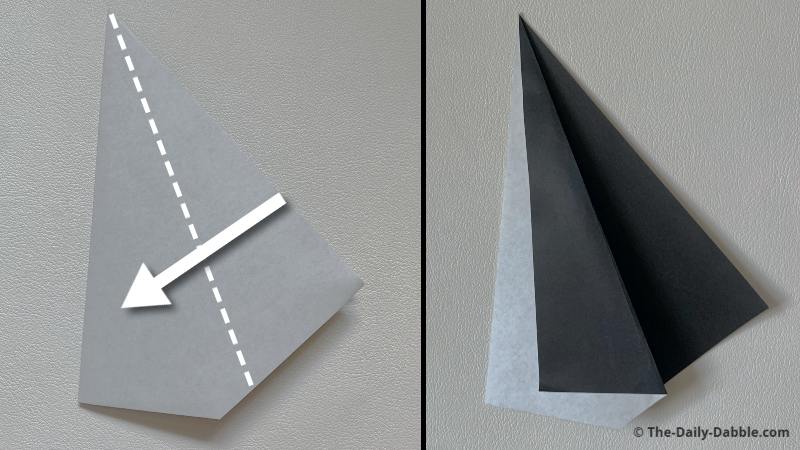
Fold one flap part of the way over as shown while leaving some white showing.
5. Repeat the process on the other side
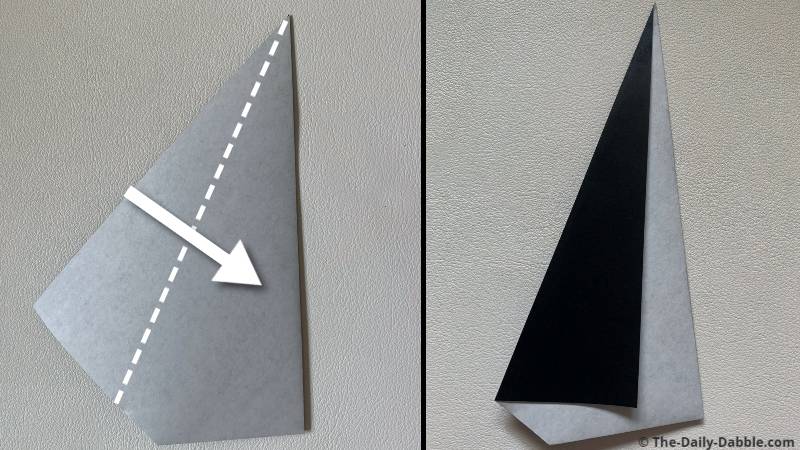
After flipping the paper, evenly match this side by making the same fold.
6. Fold one of the back tips towards the front
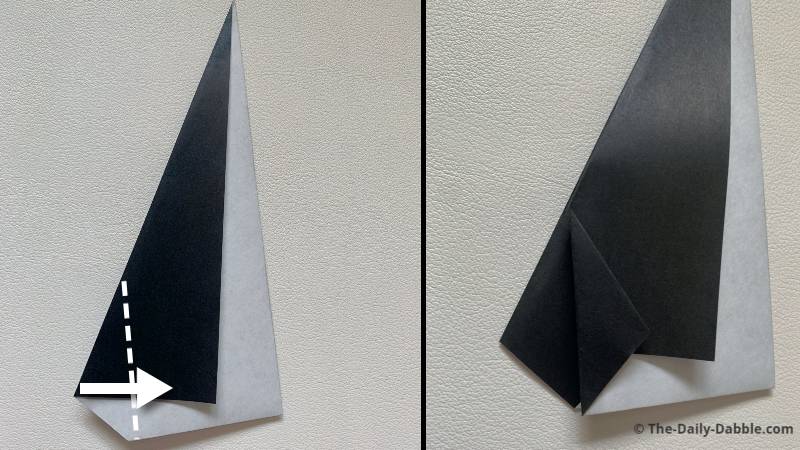
Fold the back front flap forward at a slight angle.
You can use the picture as a guide, but it doesn’t have to be exact.
7. Match the fold on the other side, then unfold
On the other side, evenly match the fold and then unfold both folds you just made.
You will use the creases just made in the next steps.
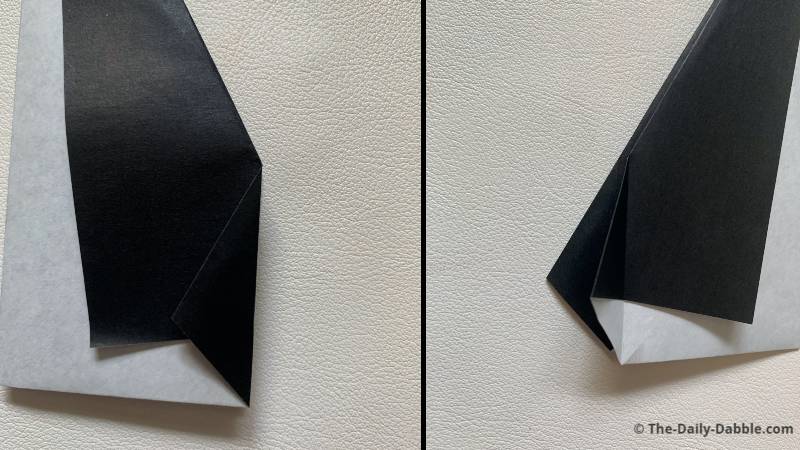
8. Open up the flap and then squash fold it down
Open one wing flap completely and start by squashing flat the fold made in step 7.
Next, fold down the pointed part at an angle as shown.
This step doesn’t have to be exactly as the picture but rather just where you want the wing to end up.
9. Repeat the step on the other side to match
Open up the flap on the other side and repeat the same fold to mirror the other side.
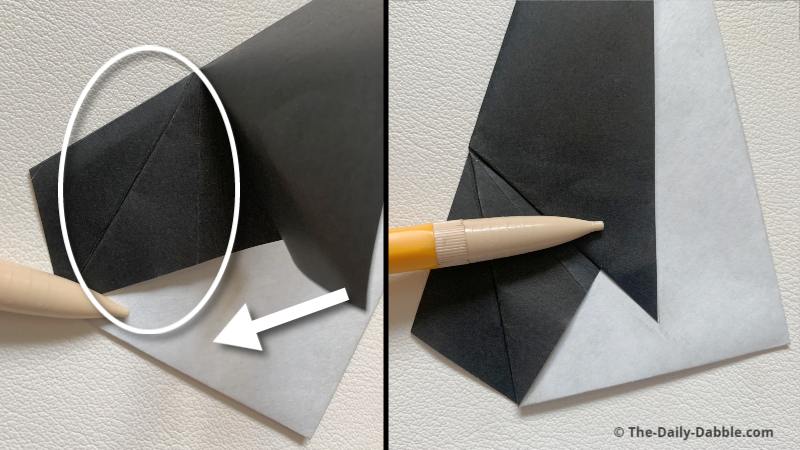
10. Fold the top point over at an angle and then unfold
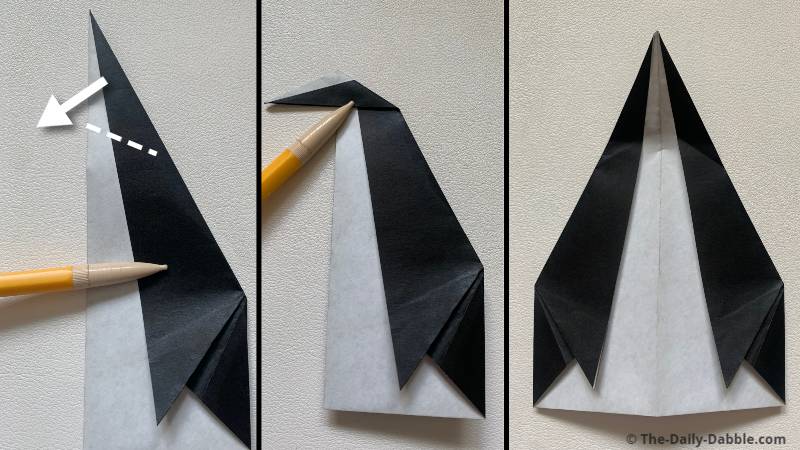
Bring the head over on either side at an angle, and open the penguin up.
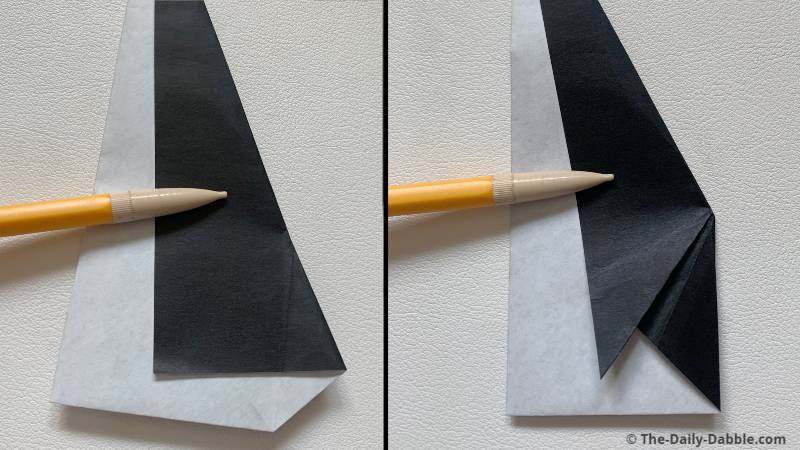
11. Make two folds to shape the head and beak
Fold the top point down on its crease and then fold a portion of it back up.
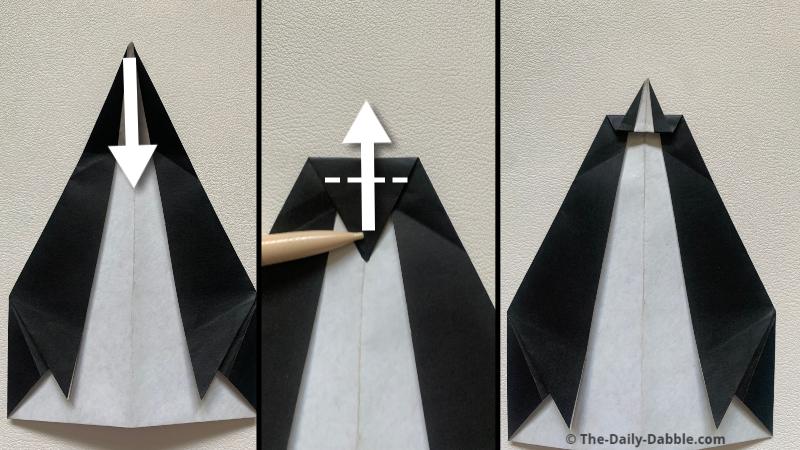
12. Close the penguin and finish shaping the beak
When closing the penguin, hold on to the beak to make sure it stays straight.
You can hold the head and pull on the beak to bring it to shape the beak how you want.
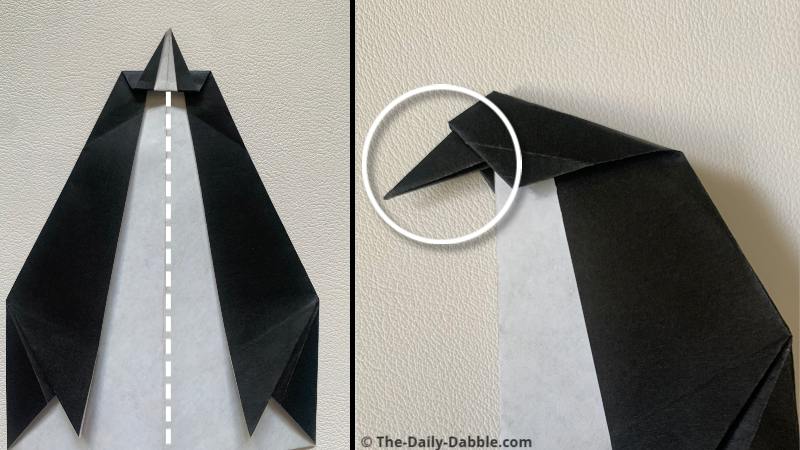
13. Fold over part of the belly and push it inside
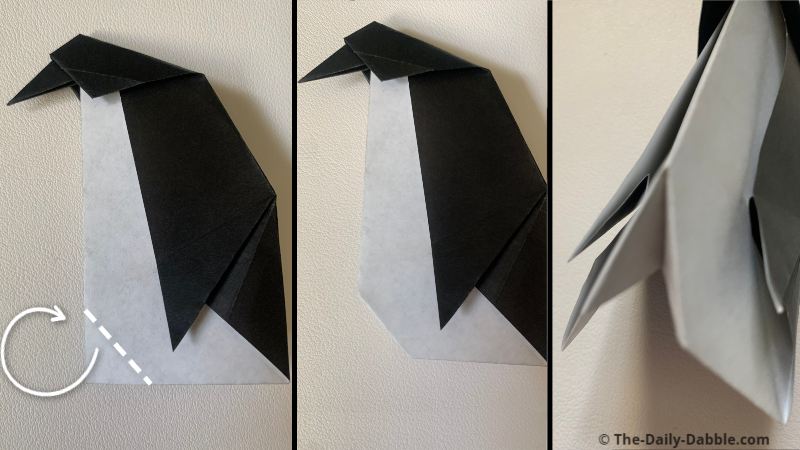
Now you know how to make your own little origami penguin!
If you want to add a little more style, you can cut off a corner of a yellow piece of paper and slide it in over the beak.

If you want to learn how to fold more awesome origami, I recommend checking out the origami crow and traditional origami crane instructions!
Happy Folding!