
These folding instructions show exactly how to fold an easy origami sailboat.
This boat can sit flat or stand upright by using the bottom point upon completion.
You can fold the design in just a few minutes which makes it a fun and easy project for kids!
We also have instructions for a dollar bill origami sailboat if you want to learn to fold this with money as well.
Let’s Make an Origami Sailboat! [INSTRUCTIONS]
In this folding tutorial, I use a multi-color 6 x 6 sheet of origami paper that is blue on one side and white on the other.
To make the boat blue and the sails white, I started on the colored side.
If you need a square piece of paper, you can cut a regular printer sheet into a square.
1. Fold the paper in half diagonally and then unfold
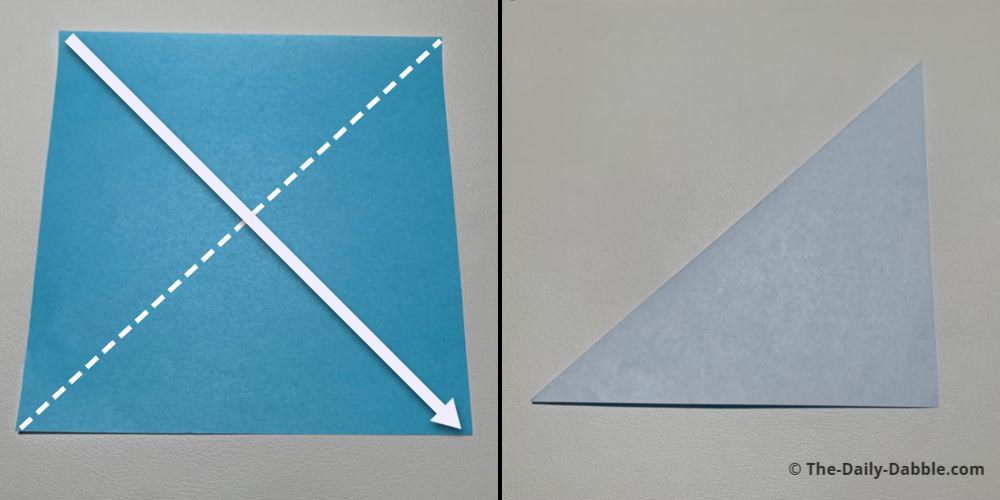
Divide the paper in half by folding it over from one corner to another.
Once you have made a crease, unfold the paper to the opposite side to prepare for the next step.
2. Fold the paper in half from edge to edge
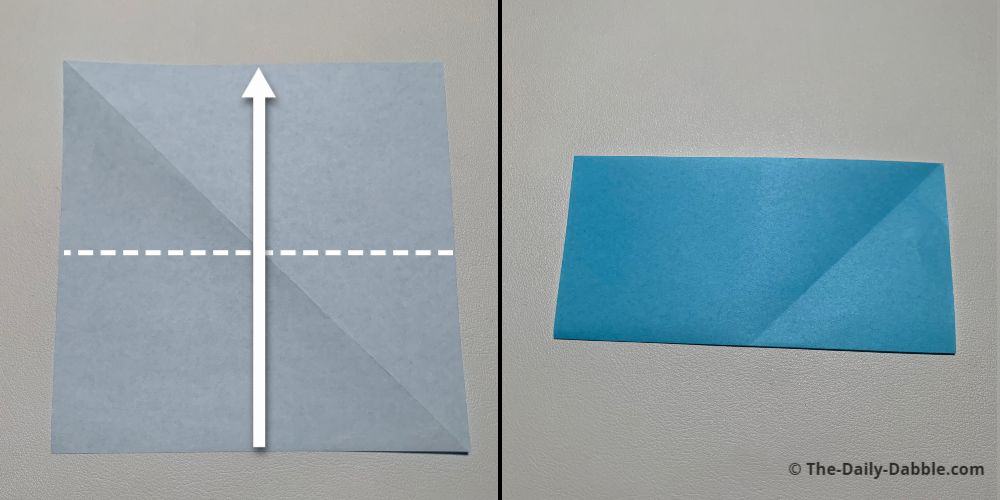
On the opposite side of the first step, fold the paper directly in half from edge to edge.
Unfold the paper after this crease is made.
3. Fold the paper in half from the opposite edges
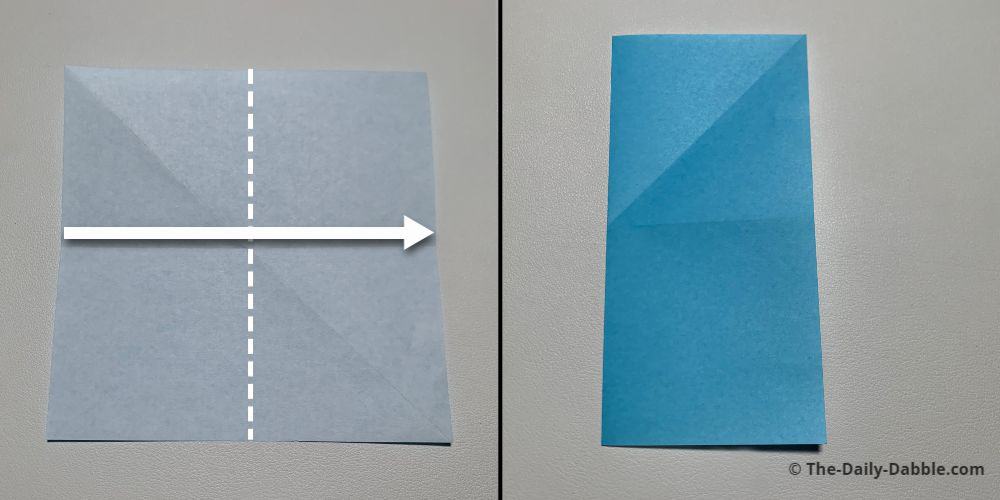
On the same side as step three, fold the paper from the opposite edges as the previous step.
After unfolding this fold, you should have three crease lines: one diagonal and two straight ones from opposite edges.
4. Fold squares with no crease to the center
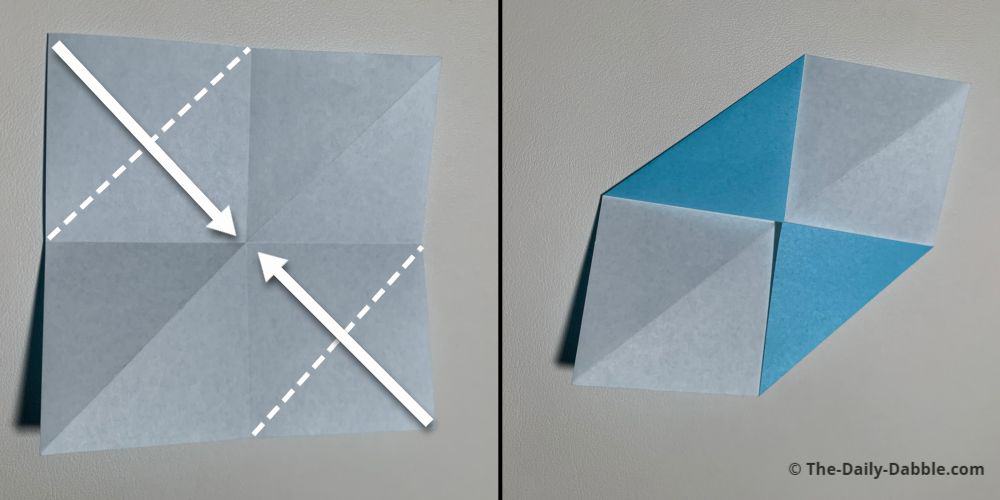
Bring the two corners of the paper that don’t have a crease evenly to the center.
5. Fold the whole paper in half lengthwise
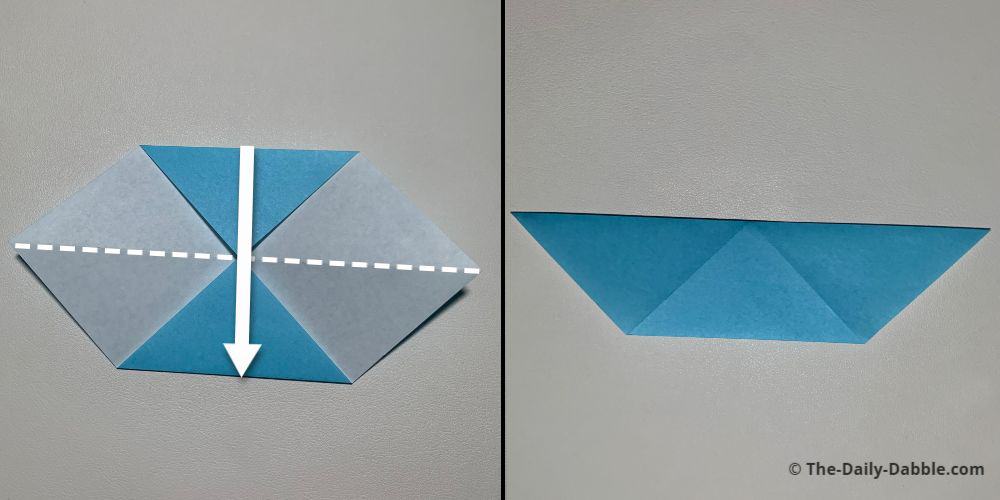
On the same side, fold the top edge to the bottom over the corners folded in the previous step.
6. Reverse fold the left half to the inside
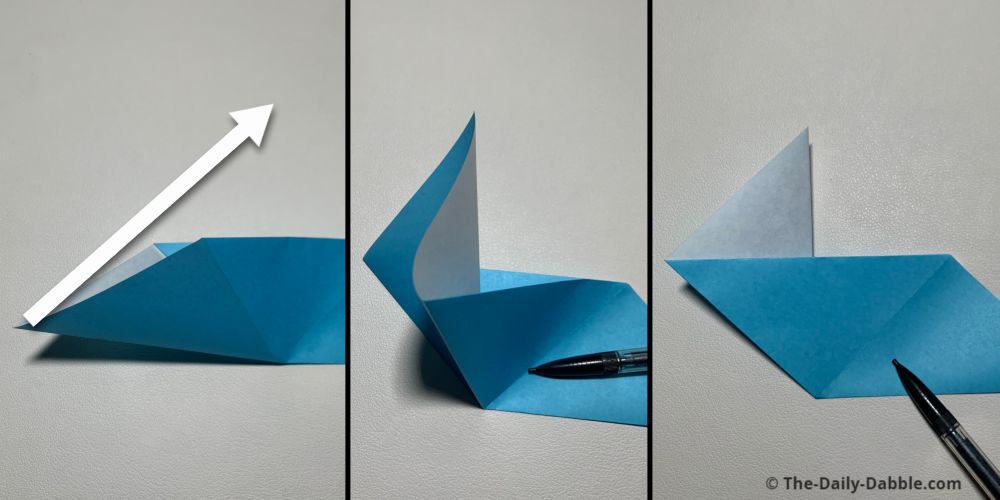
A reverse fold turns part of the paper either inside out or outside in.
With the open side facing up, bring the left side point in and diagonally towards the middle.
Line it up evenly in half on the triangle portion and press it all down flat.
7. Repeat the same step on the right side
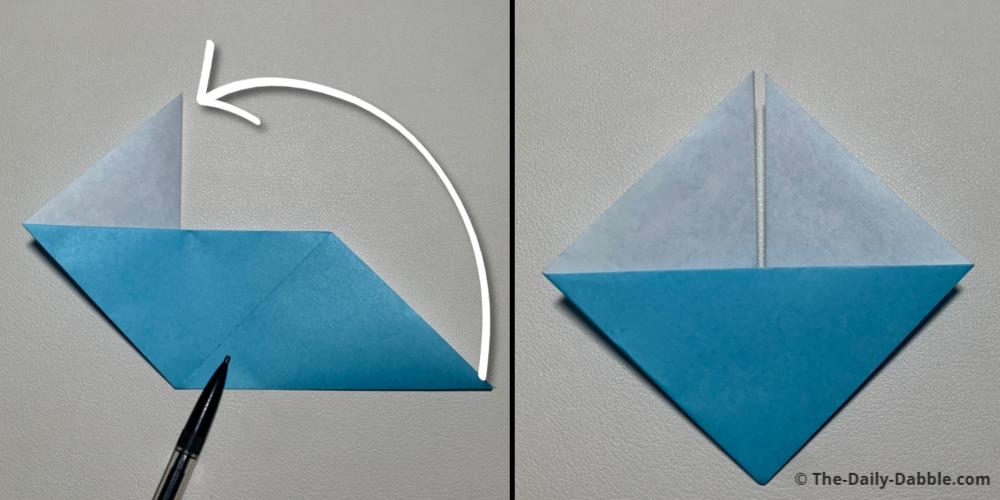
Use another inside reverse fold on the right side to evenly match the left side.
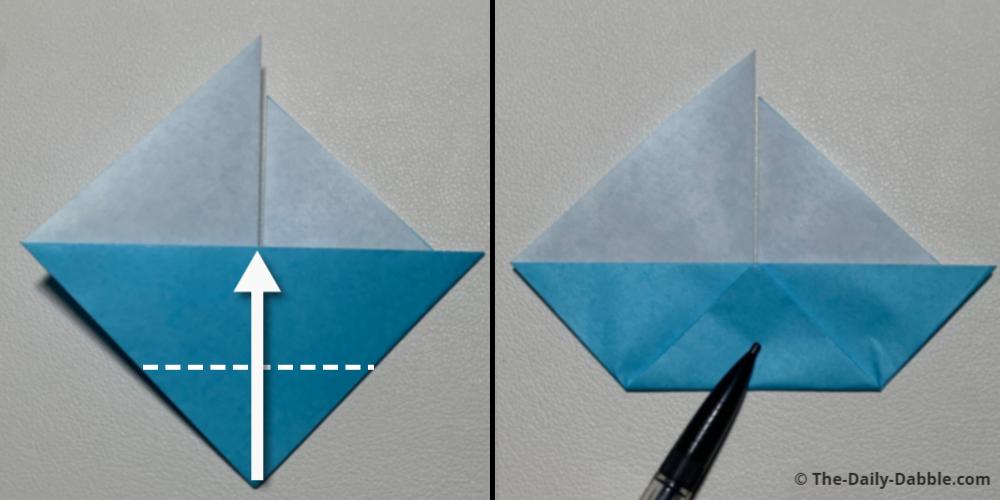
8. Move the left side down and then back up over a small section
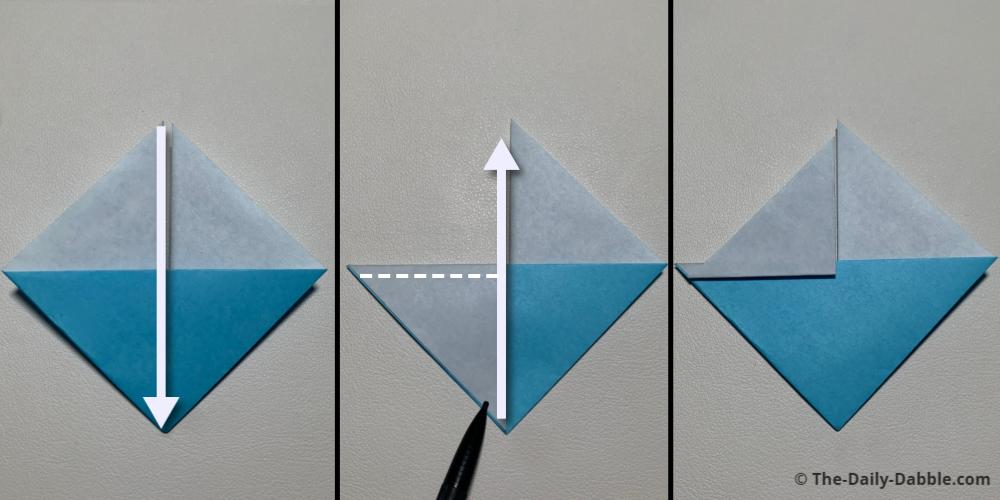
Bring the left sail down to the bottom and then fold it back over a small even area of itself.
This fold is shaping this sail to be shorter than the other.
9. Flip it over and bring the bottom to the top of the boat portion
After flipping it over, bring the bottom point to meet the top of the boat portion.
You can flip it over and stop if you like this look or move on to shape the other sail in the next steps.
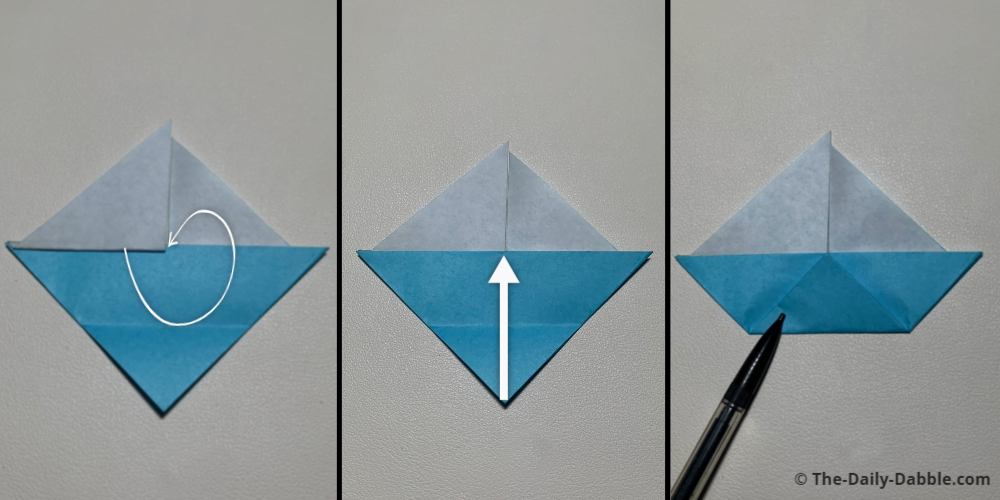
10. Shape the longer sail similar to the short one

Start by unfolding the bottom point and then bringing the long sail down to the bottom.
Bring the point back up to fold it over a smaller section of itself.
It will need to be a section big enough to tuck into the boat but smaller than the first sail to be taller.
11. Tuck the sail in, fold the bottom back up, and flip it over
Finish up by tucking in the bottom of the sail and folding the bottom point back on its original crease.
Once you flip the boat over, it is finished!
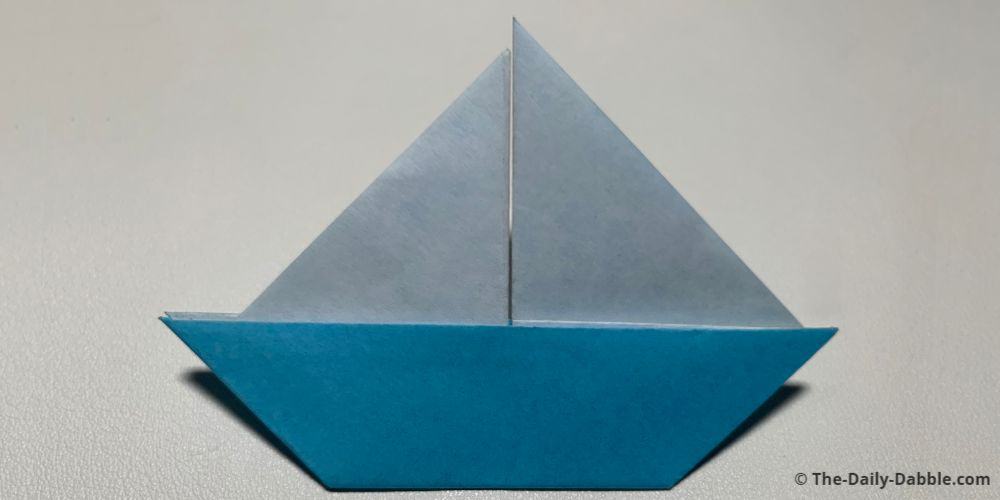
The tiny point on the back of the boat can be used to make the boat stand up for desk decoration!
Now you know how to make an origami sail boat!
If you like this boat and want another to fold, check out the traditional origami boat guide.
Happy Folding!