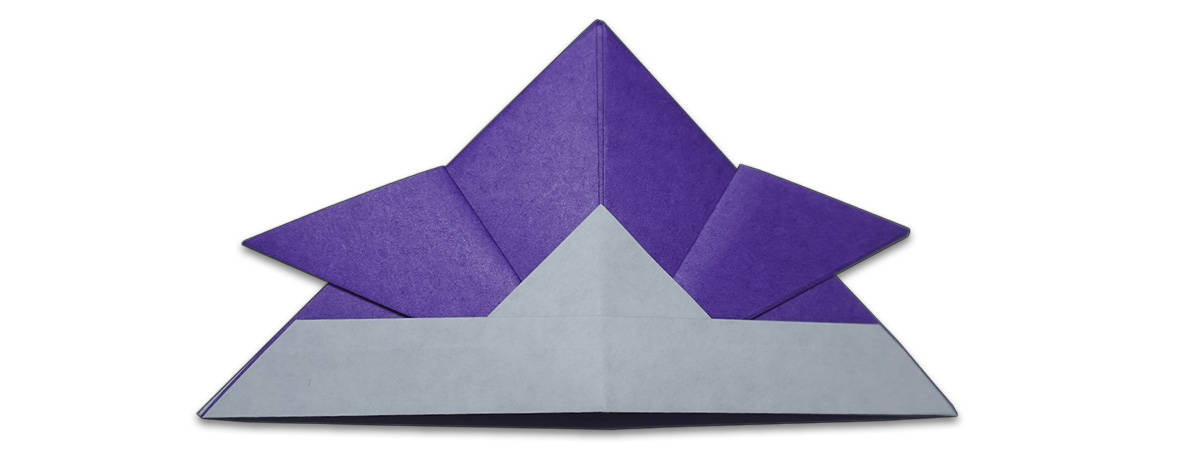
Whether you need to give your kitten a combat helmet for the next battle, or you just like folding cool things with paper, the origami samurai helmet is a classic design.
In this step-by-step guide, I will show you how to fold an origami samurai hat using a single piece of paper.
This cool design is very easy and takes about 3 to 5 minutes. Once you are finished you can find more easy origami ideas in our collection of tutorials.
Let’s get folding!
To make a paper samurai hat, you will need a single square piece of paper. You can use regular printer paper cut into a square; however, I recommend origami paper for the best-looking creases.
In this tutorial, I’ll be using a multi-color 6 x 6 sheet of origami paper, but you can use single-colored paper as well.
1. Start colored side down
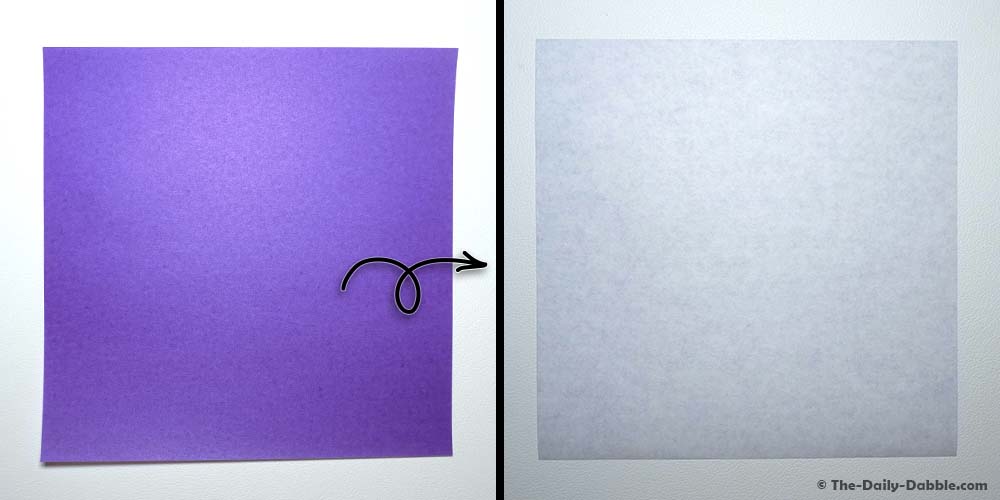
If you are using multi-color paper, you’ll want to start with the desired color of your helmet facing down. In my example, I am using purple and white paper. I want the primary color of my helmet to be purple and the rim to be white, so I’ll start with the purple side facing down.
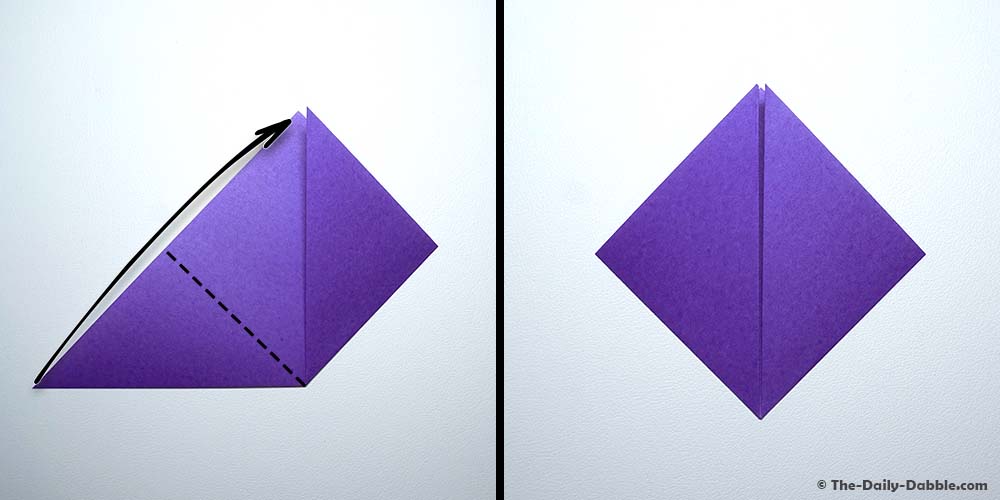
2. Fold in half diagonally
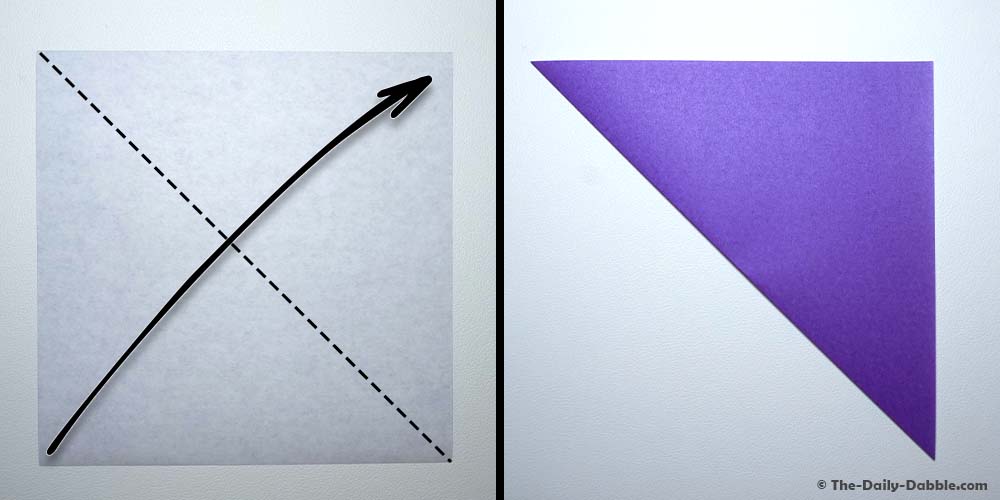
Begin by folding the paper in half diagonally—bringing the bottom-left corner to the top-right corner. Crease well.
3. Fold the right corner to the top corner
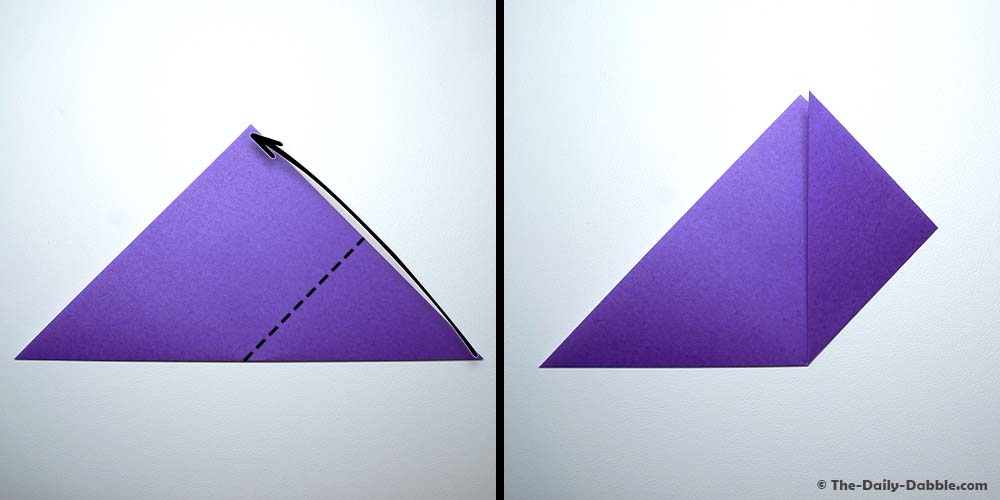
Rotate the paper so that the flat side is pointing towards you. Then fold the right corner up to the top corner and crease.
4. Fold the left corner to the top corner
Like the previous step, fold the left corner to the top corner and crease!
At this point, you have folded what is called the helmet base. Origami bases are essentially like starting positions from which many other origami creations can be folded. Learn more about origami bases here and how they can help you memorize origami designs.
5. Fold the right flap down
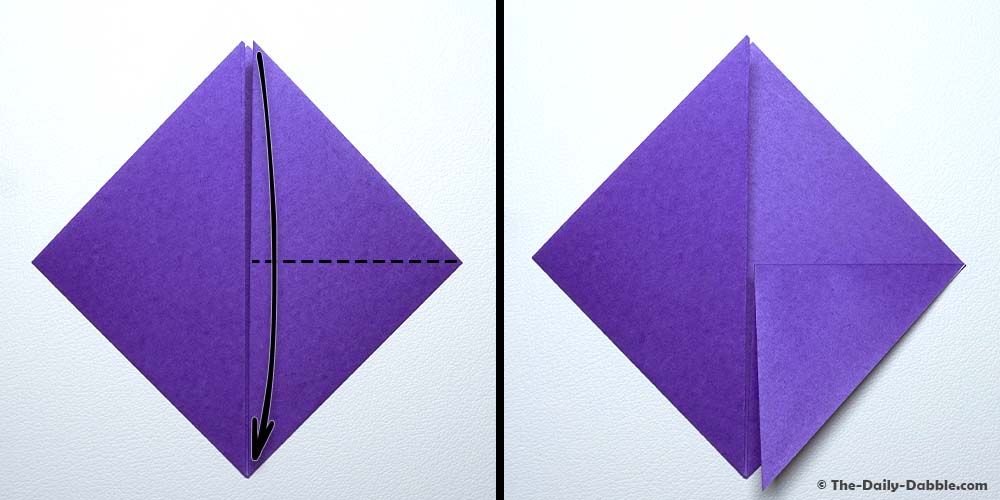
Next, fold the right flap down to the bottom corner and crease.
6. Fold the left flap down
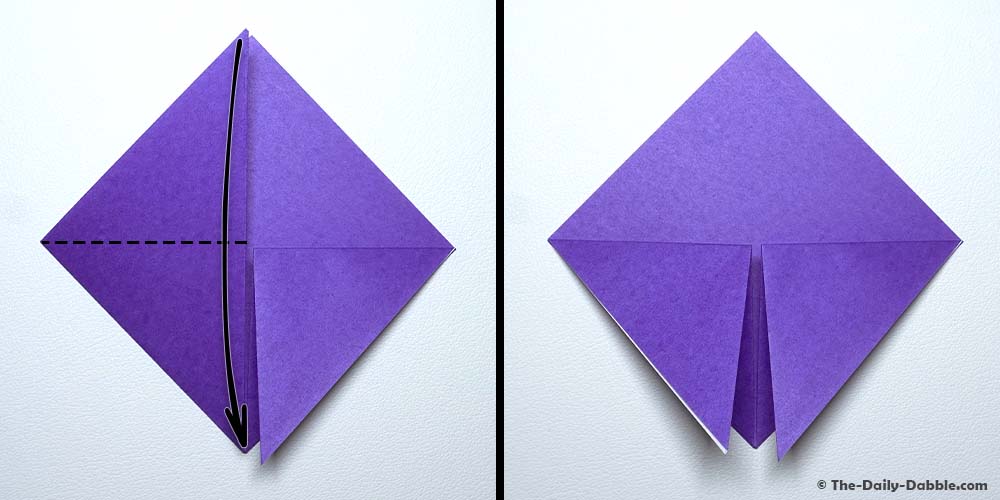
Like the previous step, fold the left flap down to the bottom corner and crease well.
7. Rotate the paper and fold the flaps down and outward
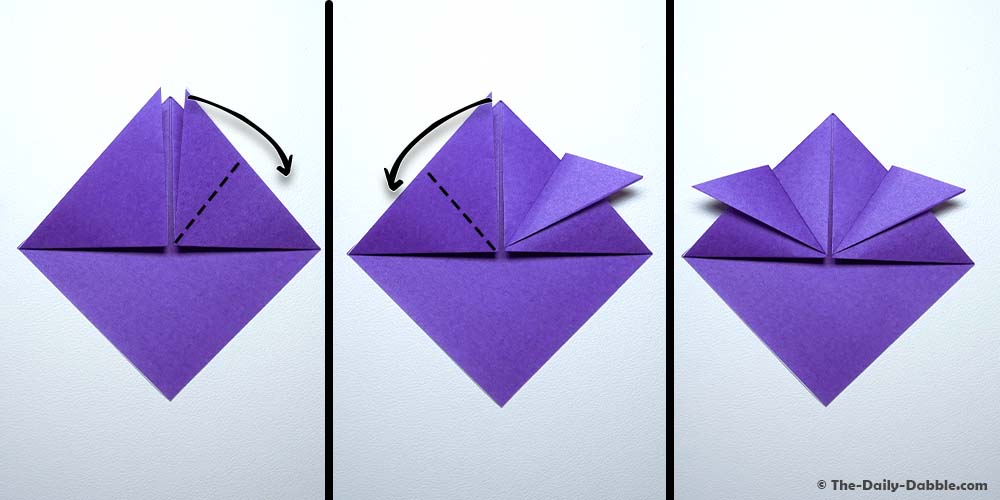
Rotate your paper so that the top flaps are pointing upward. Then, grab the right flap and fold it down and outward. Repeat on the left flap and crease everything well.
8. Fold the first bottom flap up
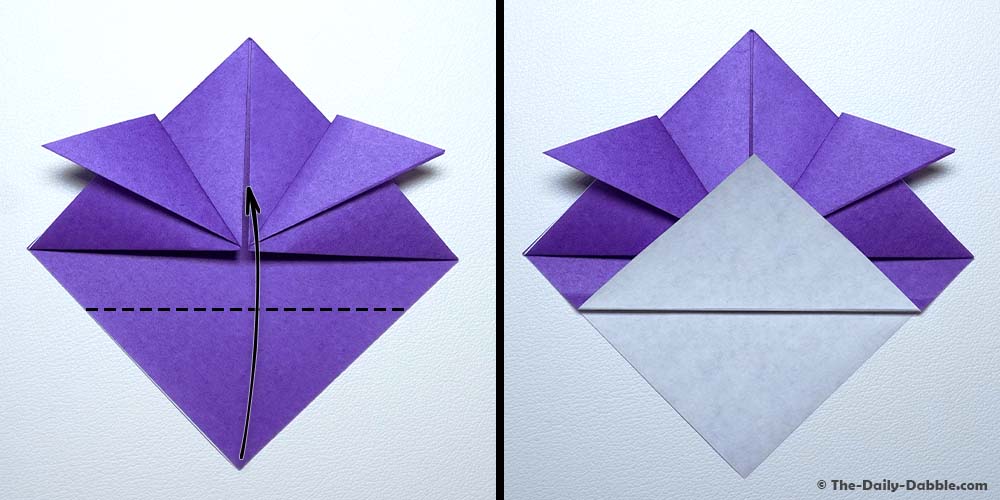
Next, fold the first bottom about 3/4 of the way up the paper.
9. Fold the previous flap back down

Take the flap that you just folded and fold it back down, making your crease at the centerline of the paper—or just below the upper flaps.
10. Fold the entire bottom flap upward and crease
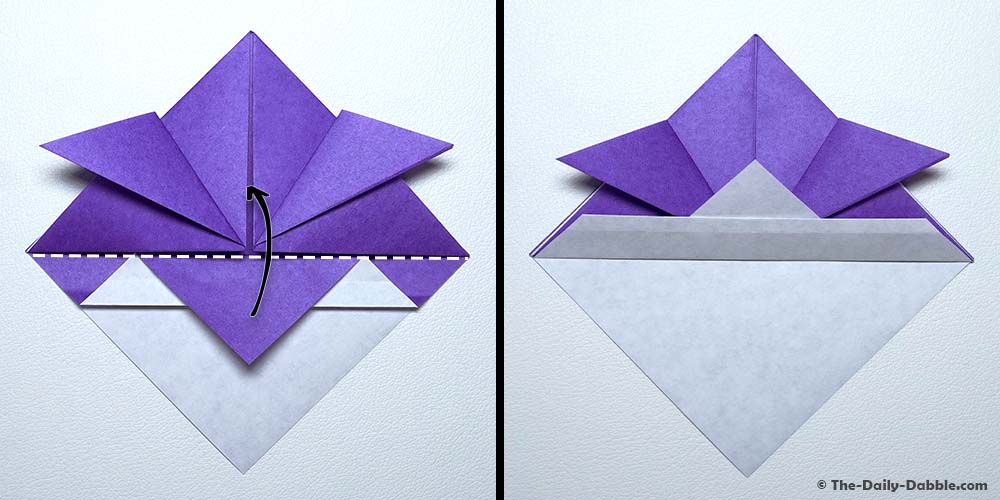
Next, take the flap you’ve made your previous few folds on and fold it upward following the centerline crease.
11. Tuck the bottom flap in
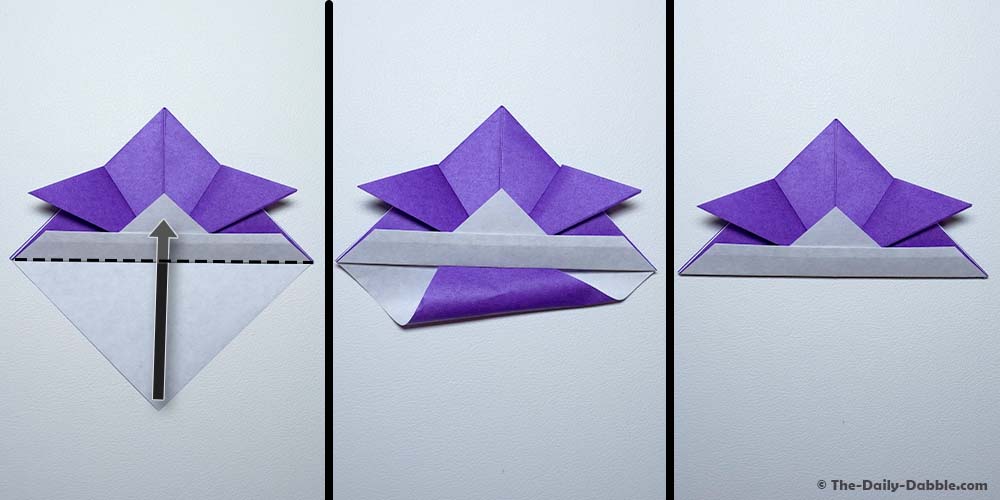
Here comes the tricky part of this design. Take the bottom flap and tuck it between the two layers of paper. Work it in and crease well.
Now flatten everything down and pull the two layers of paper apart to round out the helmet.
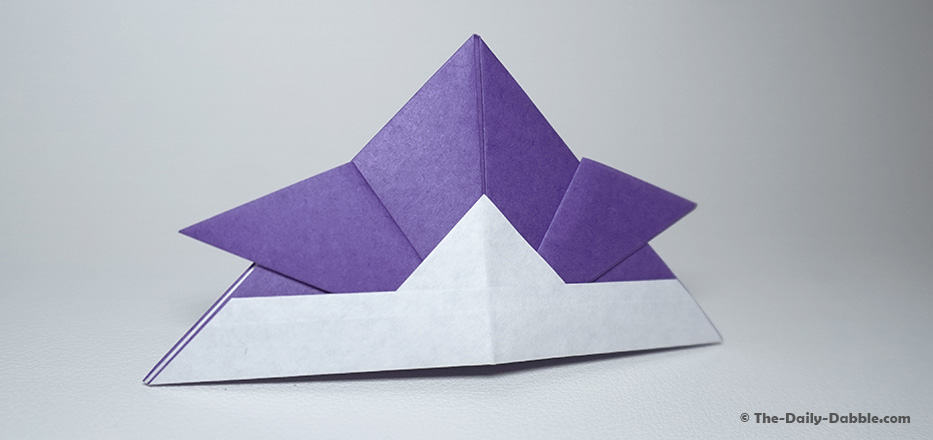
There you have it, a traditional origami samurai helmet!
If you liked this helmet, you might also want to learn how to fold paper claws to aid you in battle!
I hope you enjoyed the guide and if you would like to learn how to fold more origami, consider checking out our growing collection of origami guides!
Thanks for reading, and happy folding