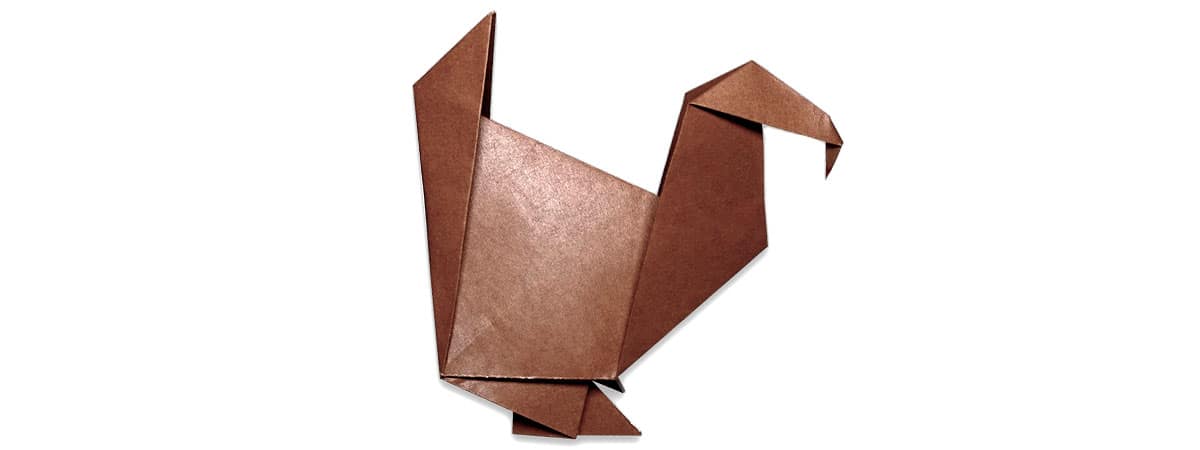
This guide will teach you how to fold a traditional and easy origami turkey!
The origami turkey is a perfect addition to any Fall or Thanksgiving decorations and can make an excellent addition to your papercraft collection.
This beginner-friendly origami design requires a single piece of paper and about five to eight minutes of your time.
Let’s get folding!
To make a paper turkey, you will need a single square piece of paper. You can use regular printer paper cut into a square; however, I recommend origami paper for better-looking folds, and that traditional origami feel!
In this tutorial, I’ll be using a multi-color 6 x 6 sheet of origami paper, but you can use single-colored paper as well.
1. Flip the paper so that the color facing down
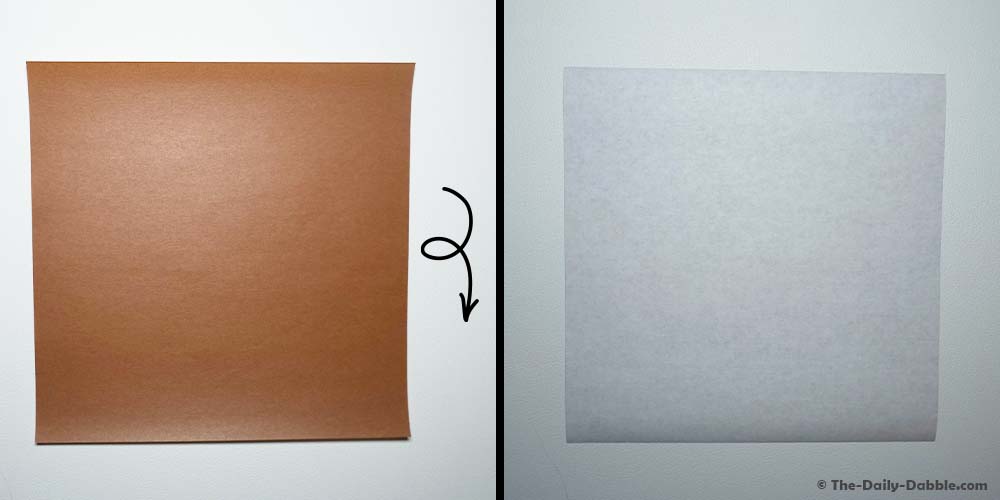
Begin by flipping your paper so that the color you want your turkey to be is facing down.
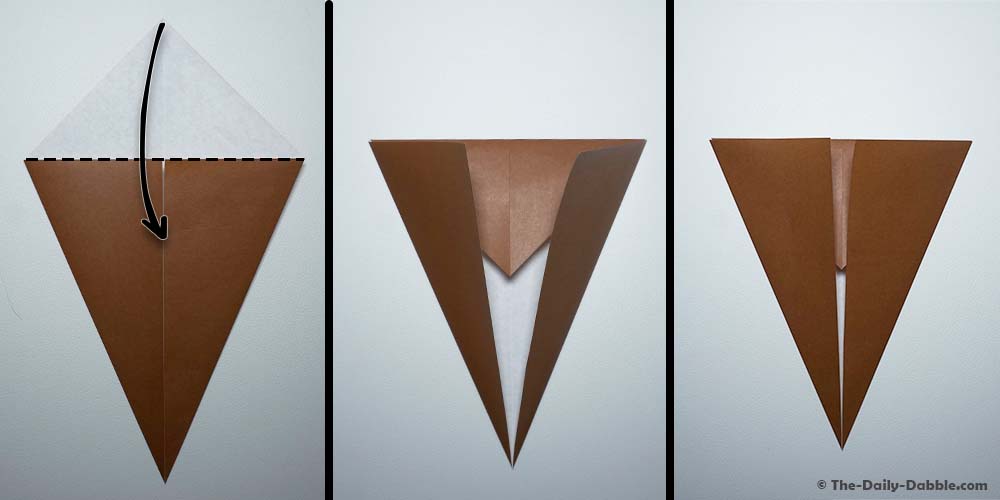
2. Fold the paper in half diagonally, then unfold
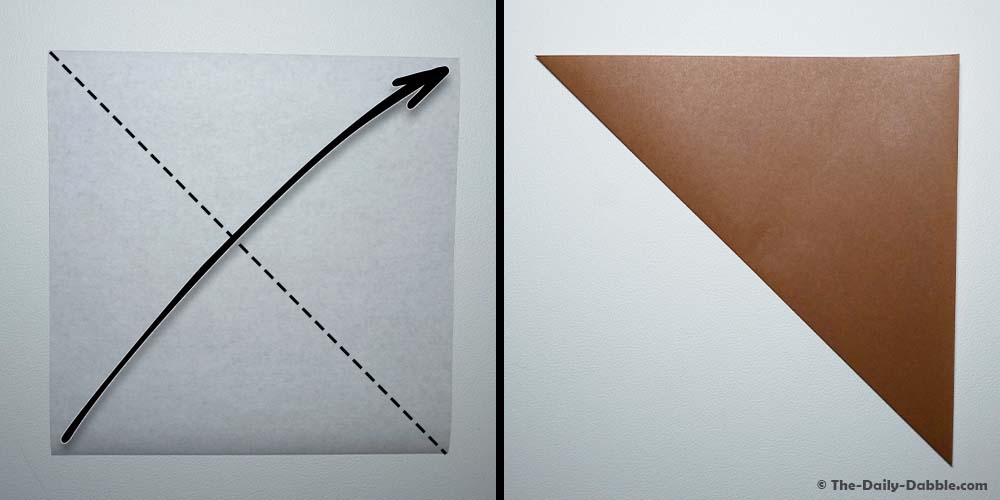
Fold the paper in half diagonally, bringing the bottom-left corner to the top-right corner. Crease and unfold.
3. Fold the left and right edge to the center crease
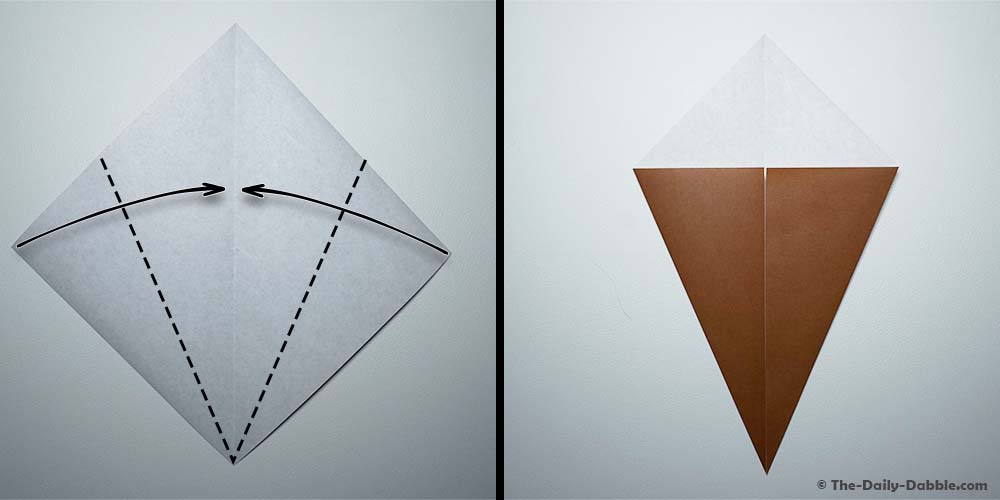
Next, fold the bottom-right edge of the paper over to the center crease. Then fold the bottom-left edge of the paper to the center crease.
For a crisp fold, begin creasing at the small section first and work your way up.
Origami 101: At this point, you have folded what is called the kite base. Origami bases are starting points that can be continued into other creations. The kite base can be folded into a variety of things such as the paper swan. To learn more about origami bases check out our guide: The 12 Traditional Origami Base Folds!
4. Fold the top corner down and tuck it under the bottom flaps
Fold the top section down and tuck it under the two flaps you created in the last step.
You can unfold the flaps to make this step easier.
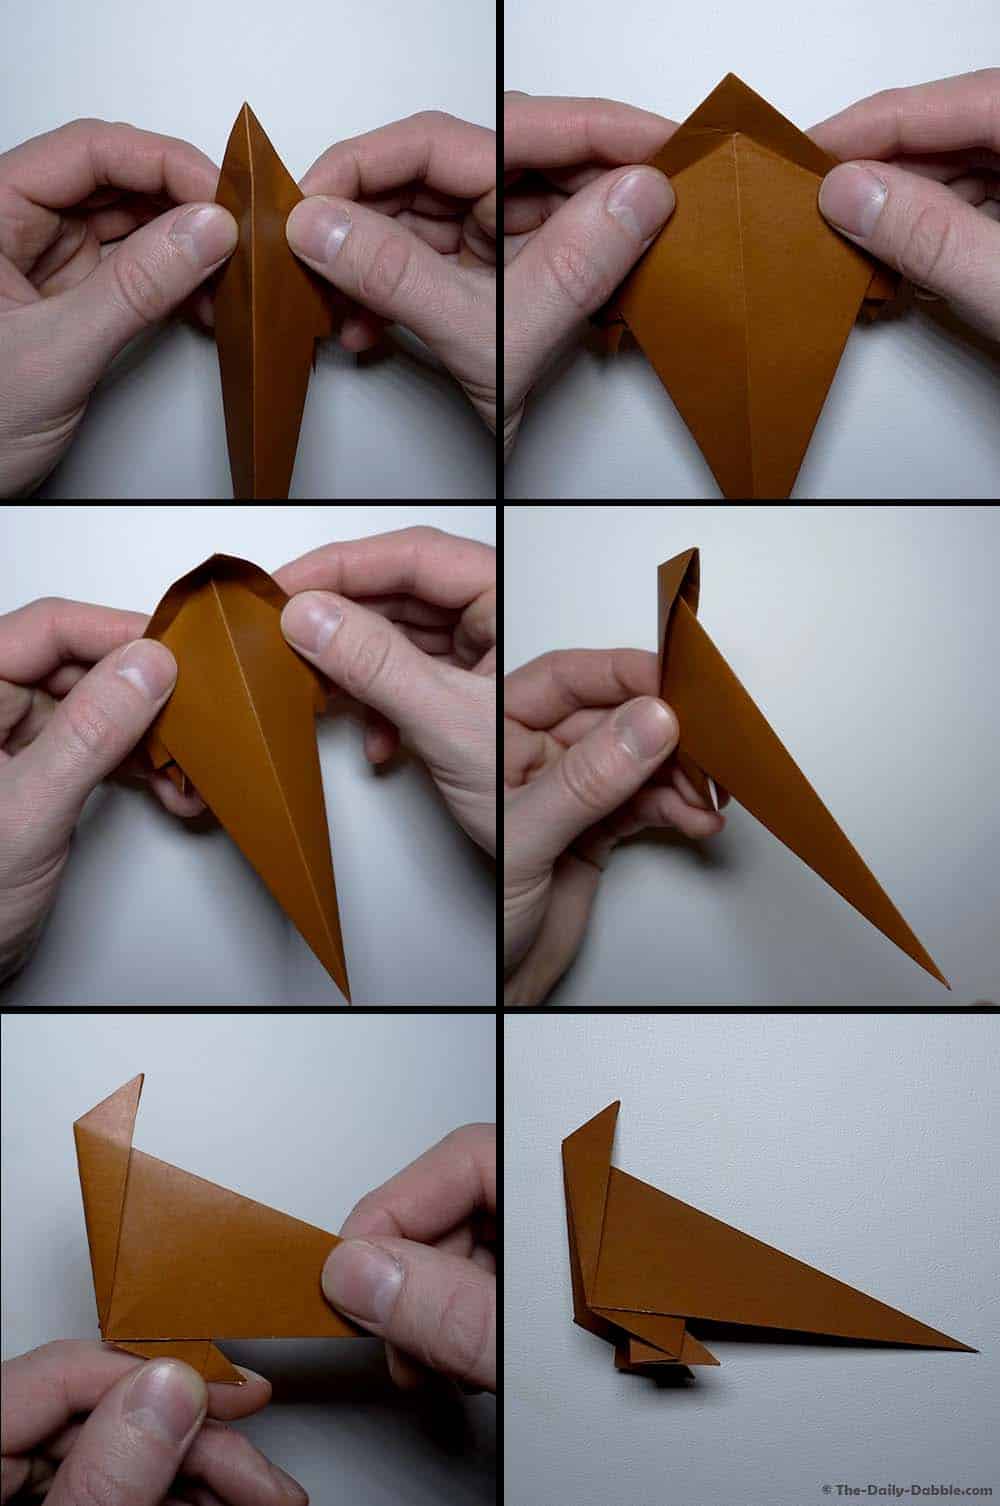
5. Fold left and right corners to the center crease, then unfold
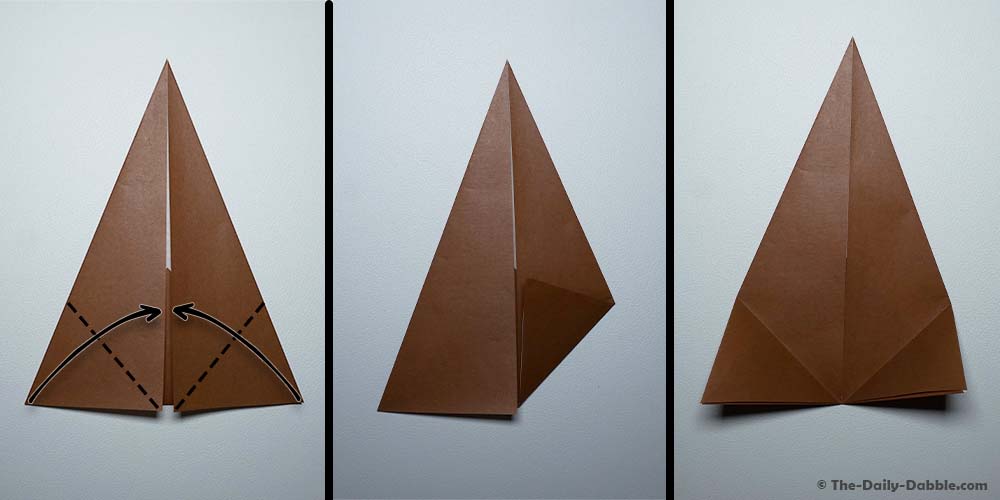
Rotate the paper so that the short side is facing towards you. Fold the bottom-right corner to the center crease. Then, fold the bottom-left corner to the center crease.
Crease both folds well and then unfold both corners.
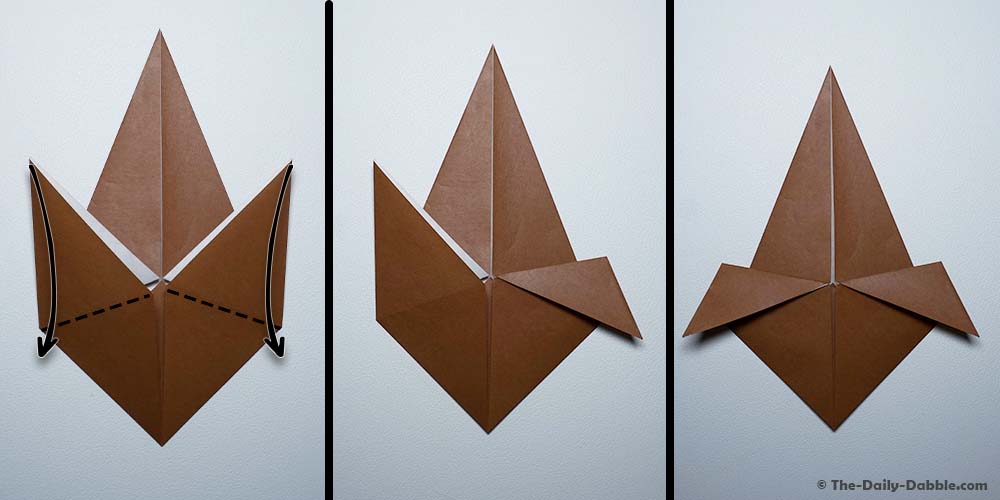
6. Inside reverse fold the right flap upward
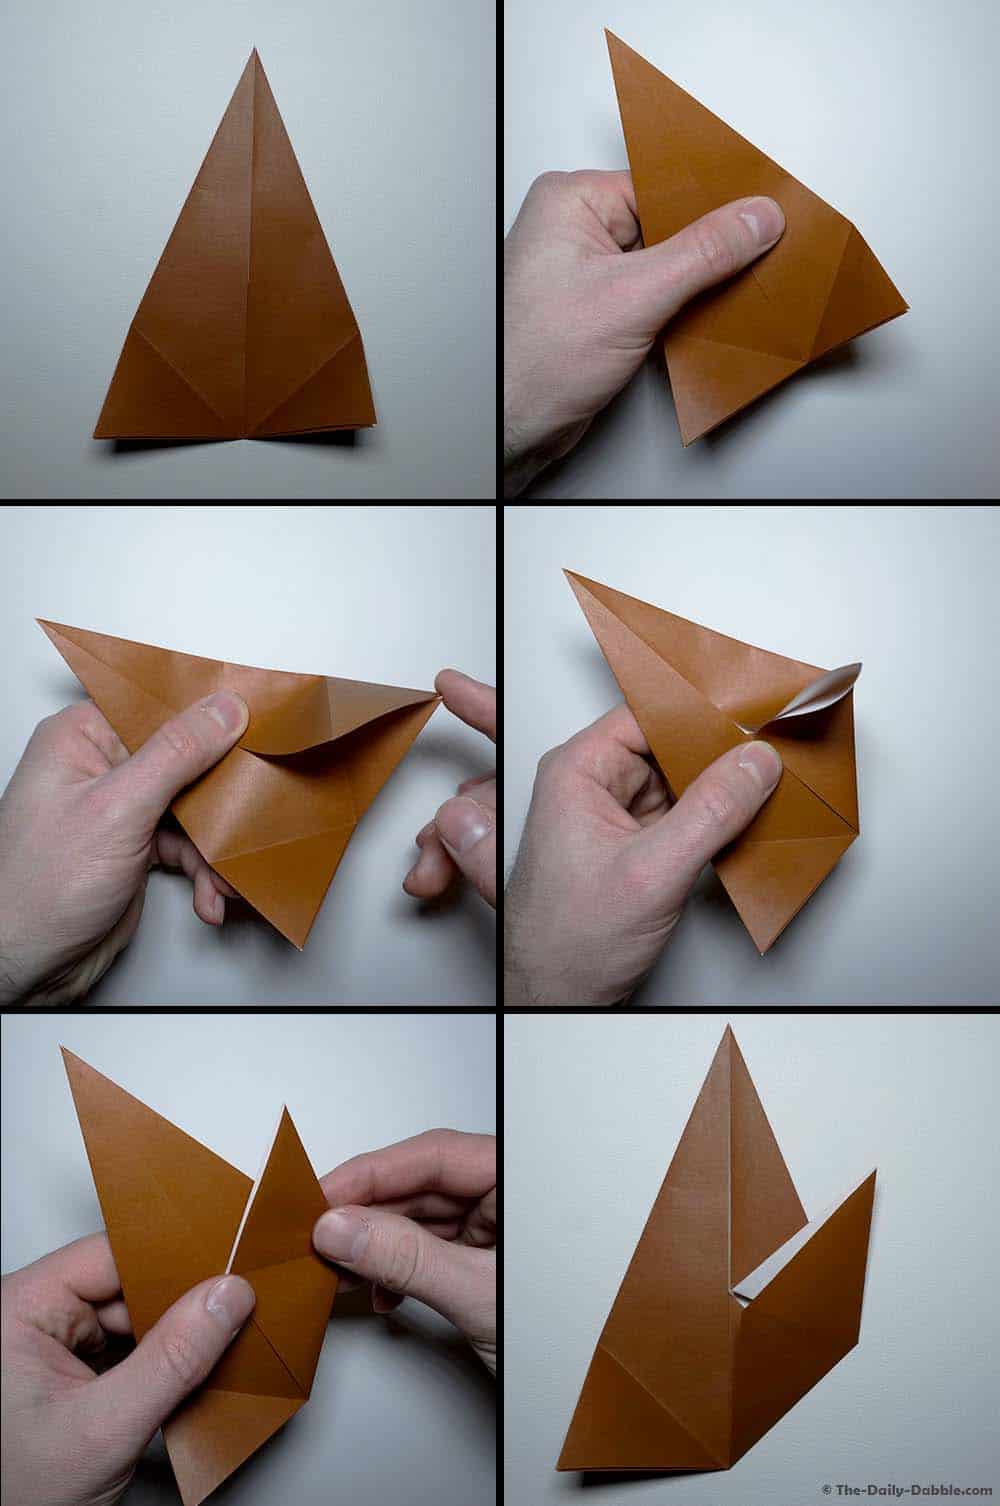
Here comes the tricky part! Pinch the middle area of the right section, directly above where you made the previous fold.
Using your finger, push the bottom-right corner inward to open up the paper. Keep pushing and make an inside reserve fold—using the crease as a guide. Fold the bottom edge to the center crease and squash fold the flap upward. The end result will create an upward-facing point.
7. Inside reverse fold the left flap upward
Repeat the previous step on the left section of the paper.
Using your finger, push the bottom-left corner inward to open up the paper. Keep pushing and make an inside reserve fold—using the crease as a guide. Fold the bottom edge to the center crease and squash fold the flap upward. The end result will create an upward-facing point.
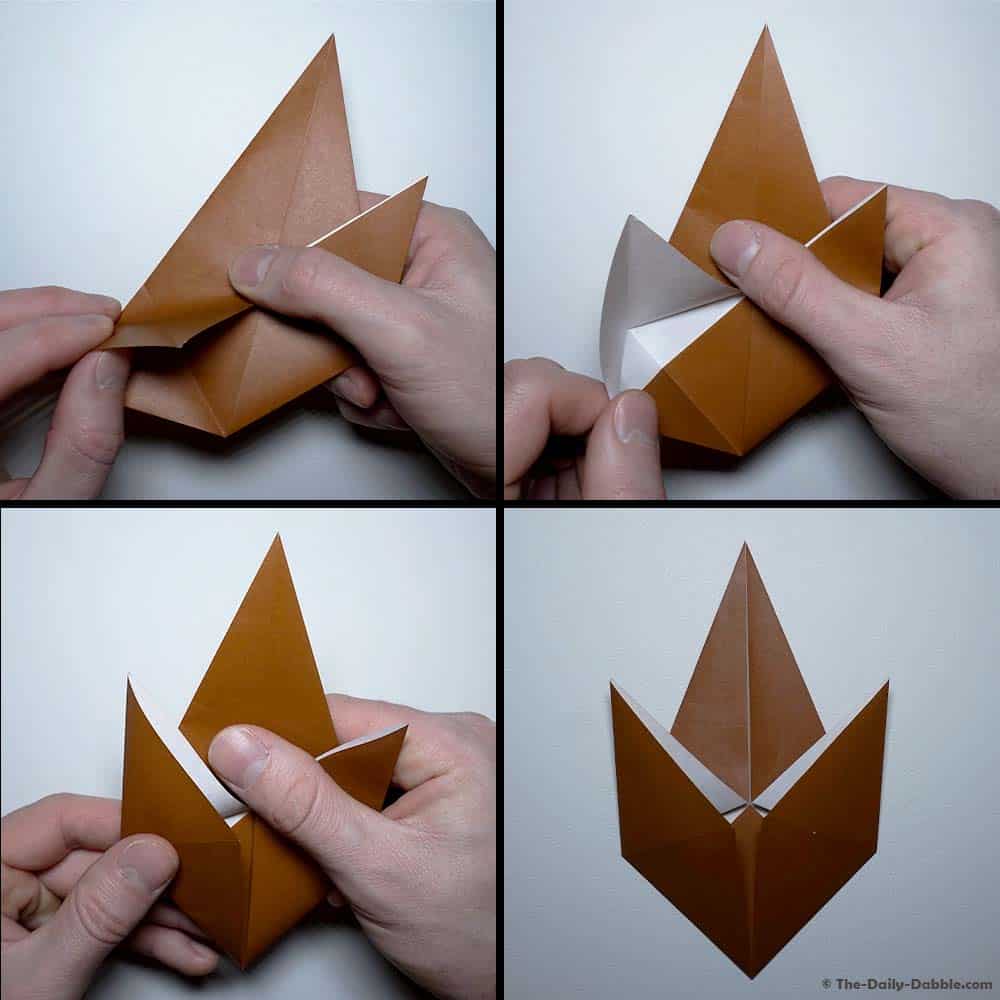
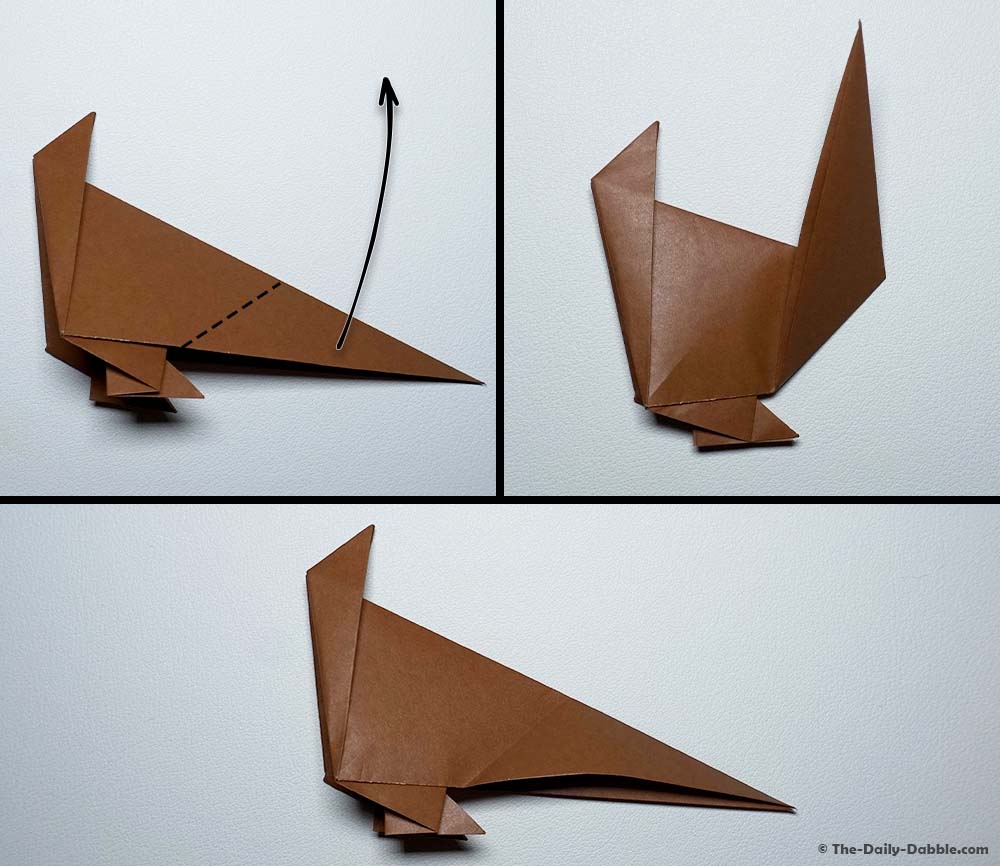
8. Fold the left and right flaps down to the crease
Next, fold the left and right sections (the pointy flaps we just created) down to the crease.
9. Fold the left and right flaps upward
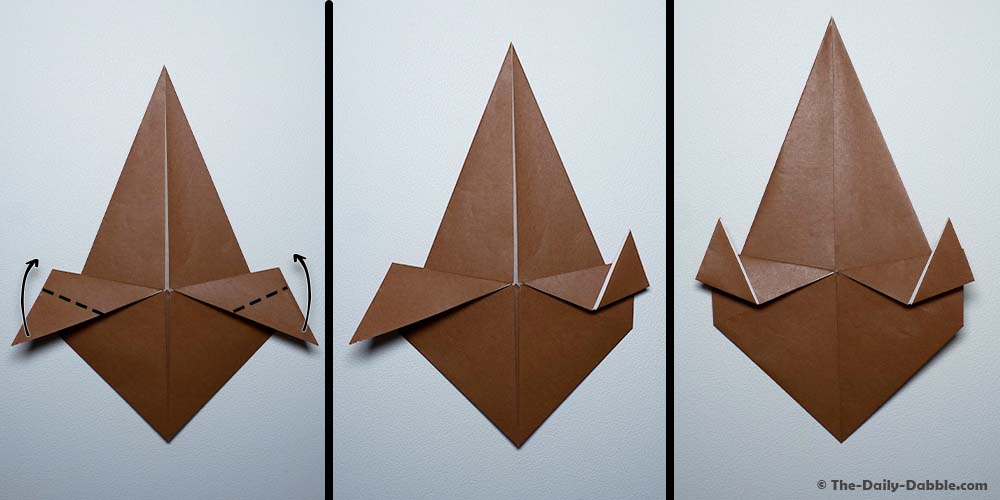
We’re going to make one more fold on both flaps to complete the turkey’s feet.
Fold the right flap upward, keeping the right edges aligned. Then repeat with the left flap. Take a moment here and flatten everything down nicely.
10. Fold the paper in half lengthwise
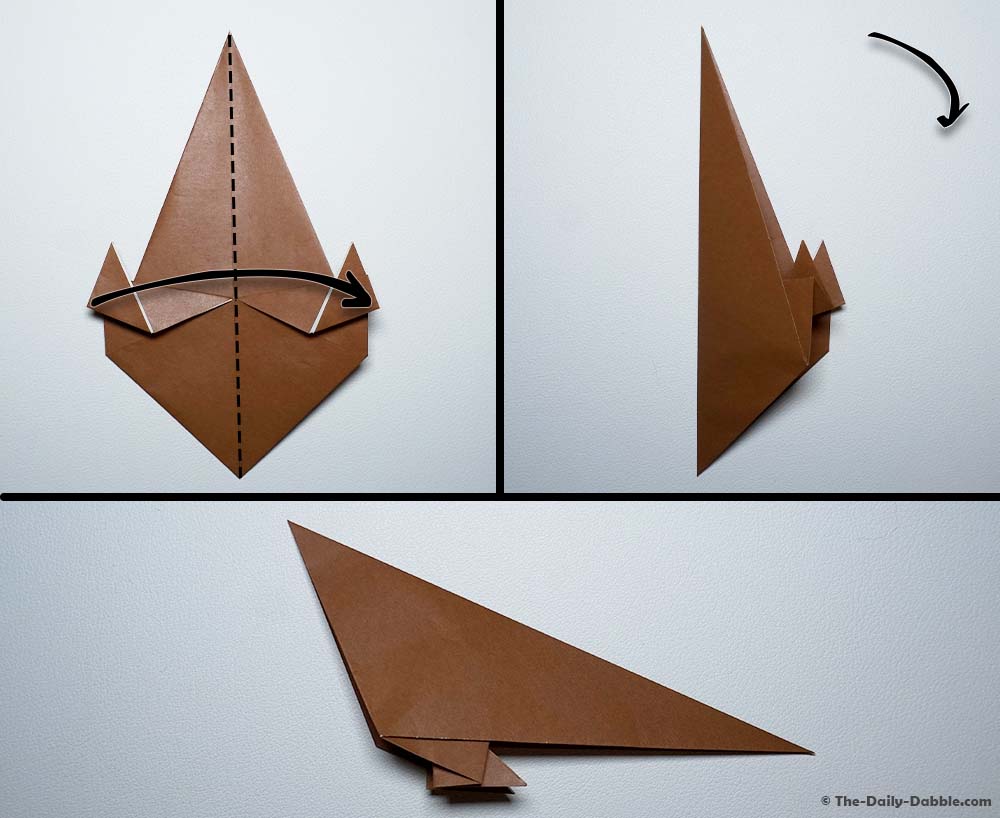
Next, fold the paper in half lengthwise and crease well. Rotate the paper 90 degrees so that the long skinny section points right.
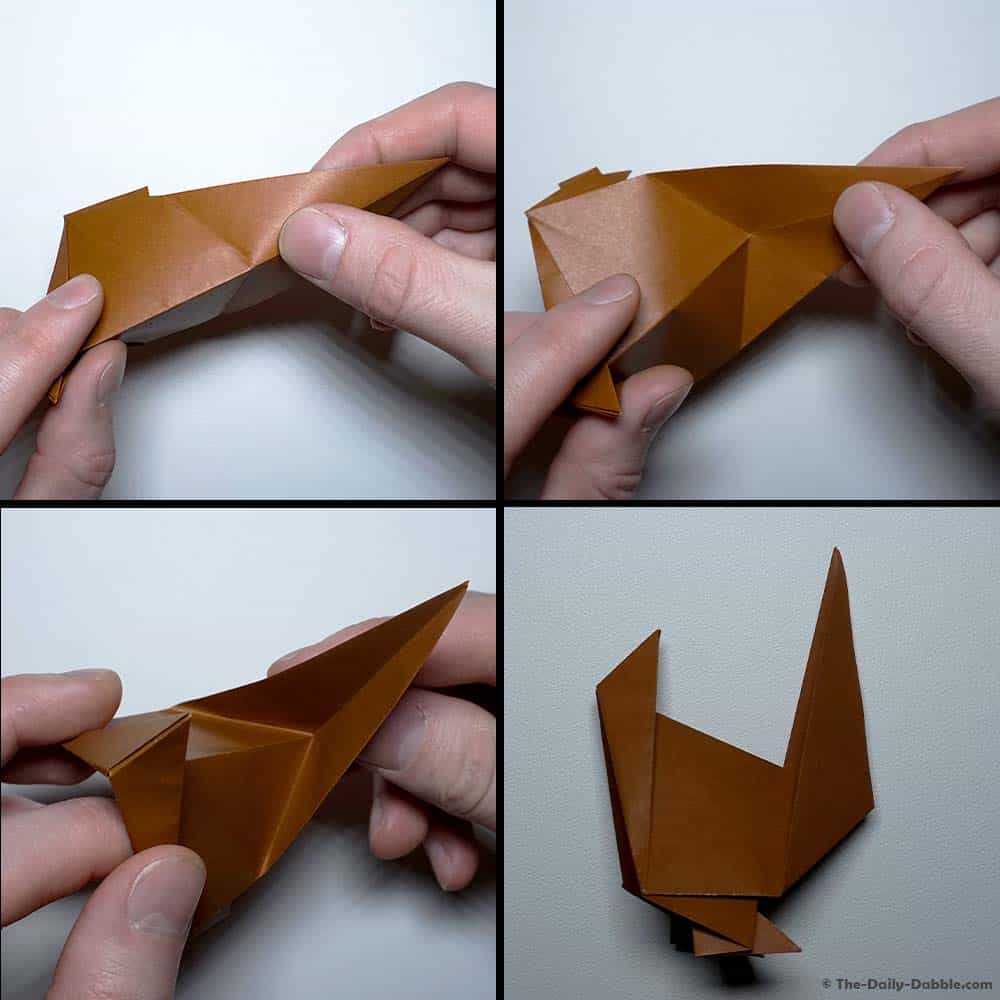
11. Crease the tail
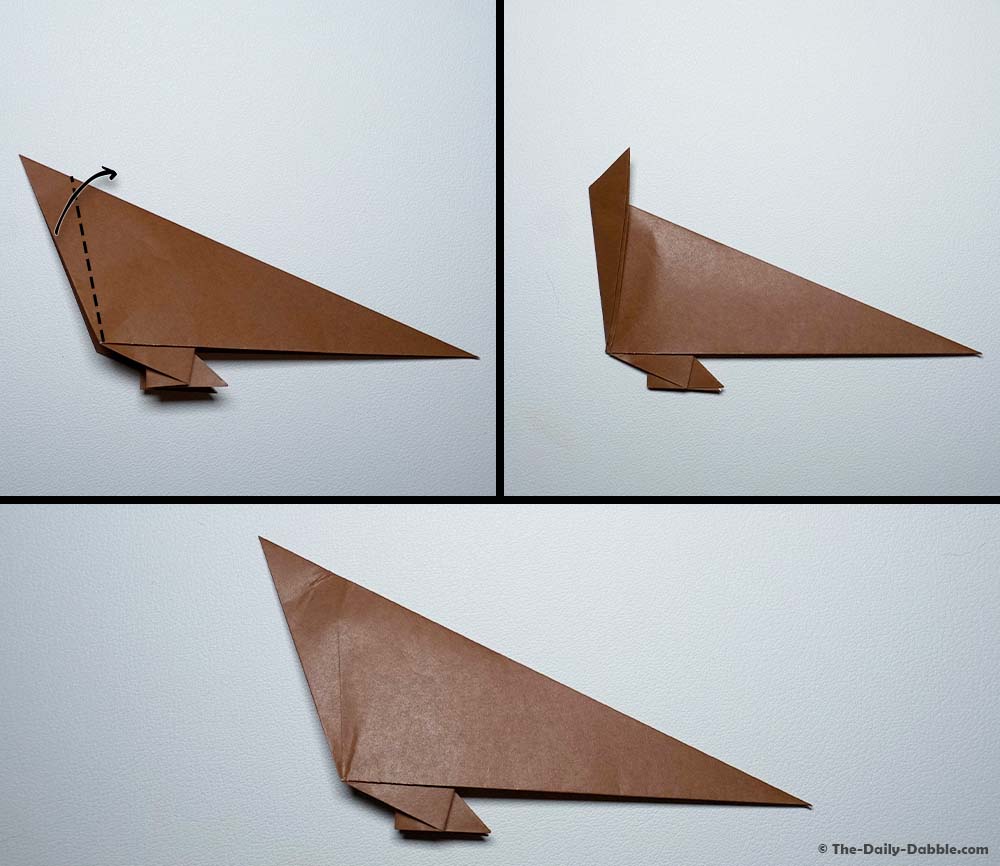
Fold the left edge slightly over to create the crease for the tail. You can adjust this fold to your liking and create tails of different shapes and sizes.
12. Outside reverse fold the tail
Outside reverse fold the crease that you just made to complete the tail!
13. Crease the neck
Fold the right section upward to create the crease for the turkey’s neck. Just like the tail, you can adjust this fold how you please.
14. Outside reverse fold the neck
Outside reverse fold using the crease you just made to finish the neck!
15. Crease and inside reverse fold the head
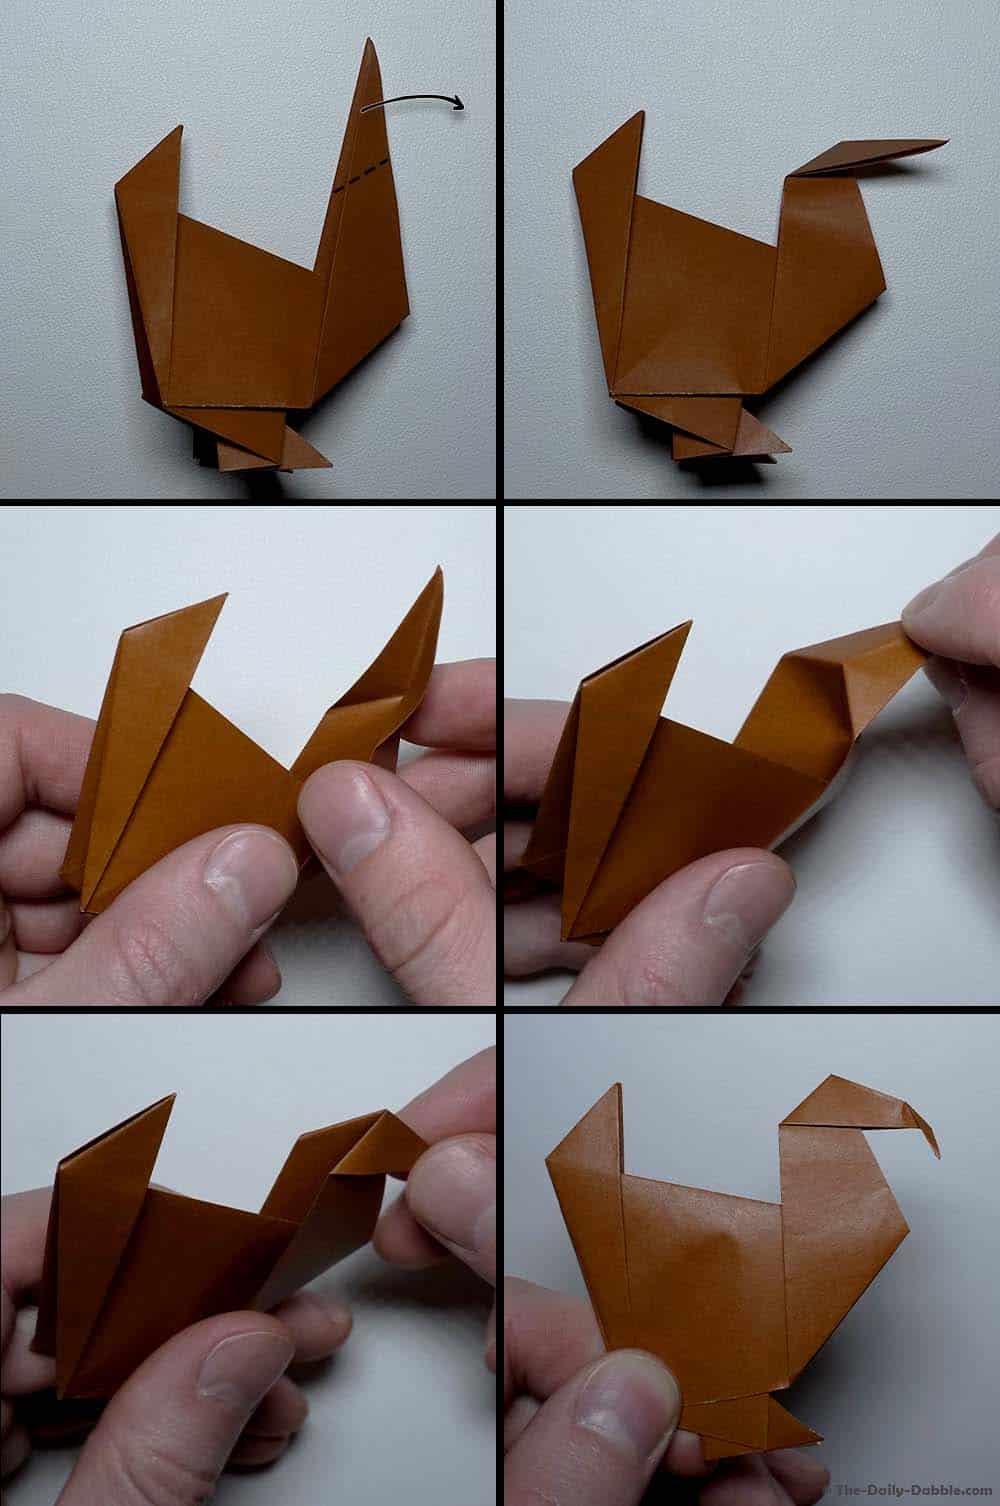
Now it’s time to make the head! Fold the top point of the right section to the right and crease. Then make an inside reverse fold following the crease.
16. Crease and inside reverse fold the beak
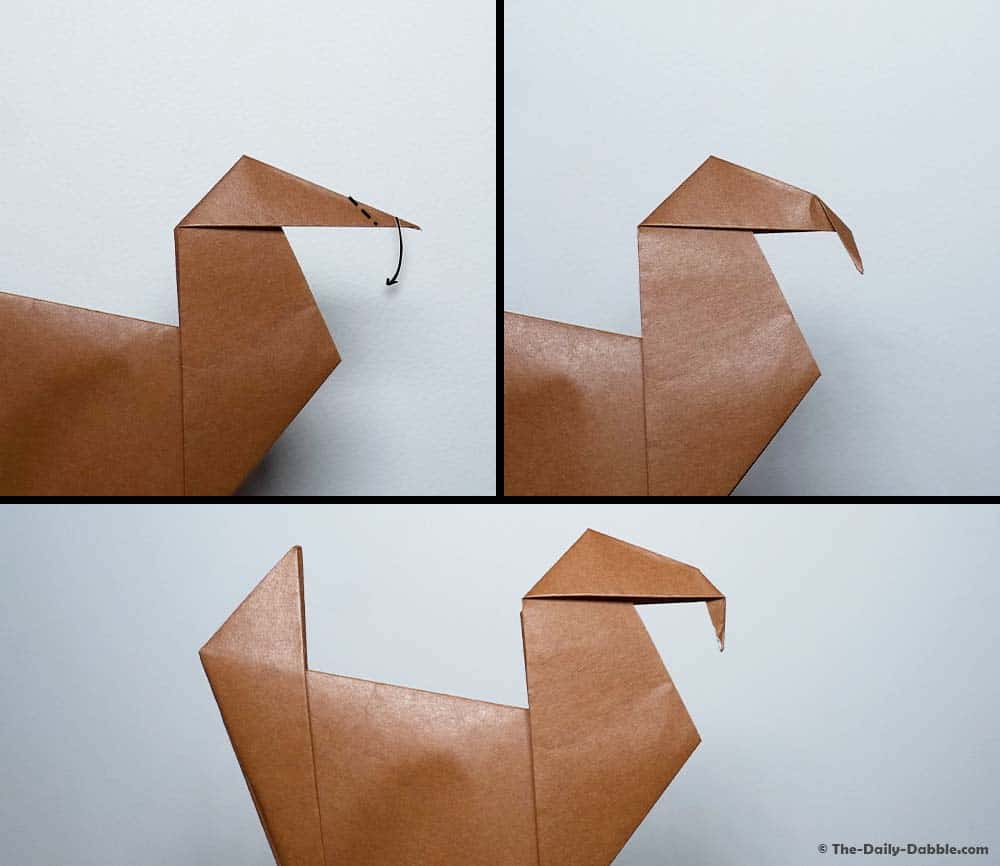
Let’s finish up our turkey by giving it a little beak. Fold the tip of the head down and create a create. Once again, make an inside reverse fold using the crease as a guide.
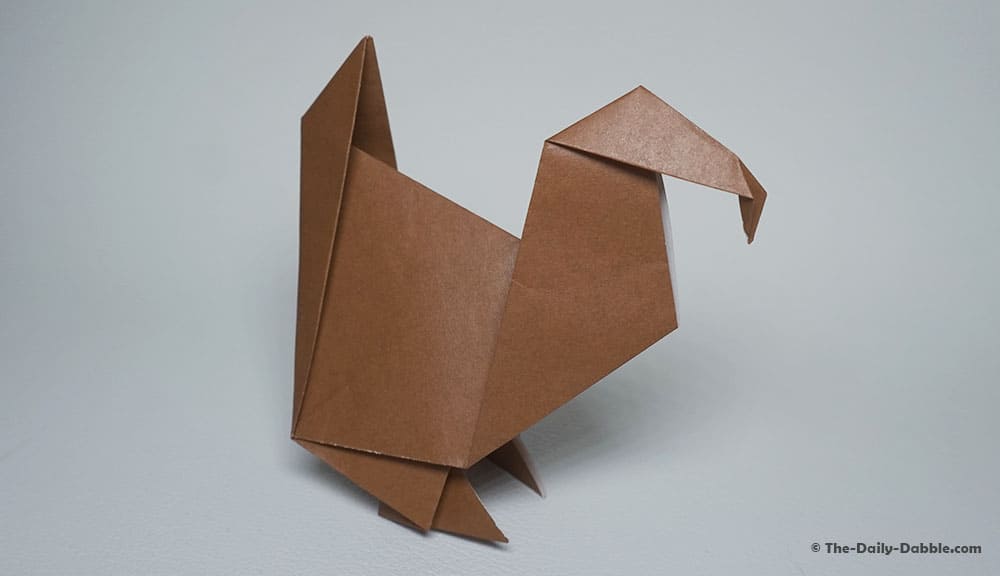
Flatten everything down well, and there you have it, an easy origami turkey!
You can now stand your turkey up on a desk or table and give it all the decorations you desire!
I hope you liked folding this little turkey and if you would like to learn how to fold some other incredible birds, consider checking out our entire collection of origami birds—including the infamous crane!
Also, if you would like to jump further down the origami rabbit hole, be sure to check out our growing collection of origami guides here. I think you’ll be surprised at how many easy origami designs there are!
Thanks for following along and “gobble gobble” (happy folding)!