
Follow this folding guide to guide to learn how to make an easy origami turtle, or tortoise.
This paper turtle design has mostly beginner-level folds but does have a few intermediate ones.
Nevertheless, you should be able to complete this project in about 5- 10 minutes
Let’s make an easy origami turtle! [FOLDING INSTRUCTIONS]
For this tutorial, you will need one sheet of square origami paper.
If you don’t have square paper, you can always just cut regular paper into a square.
You can use whatever color paper, but the one I used is green on both sides.
STEP 1. Fold the paper in half two ways from the points
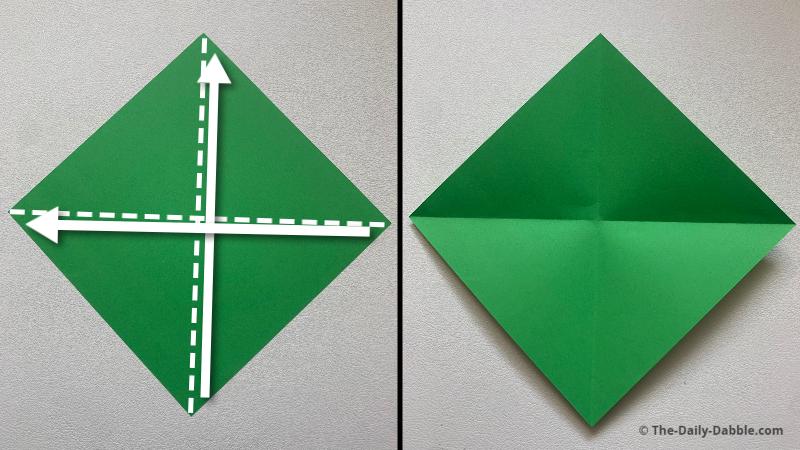
Fold the paper from one point to another to make two center creases, and then unfold it.
Repeat the process again from the opposite points.
STEP 2. Fold the paper in half two ways from the edges
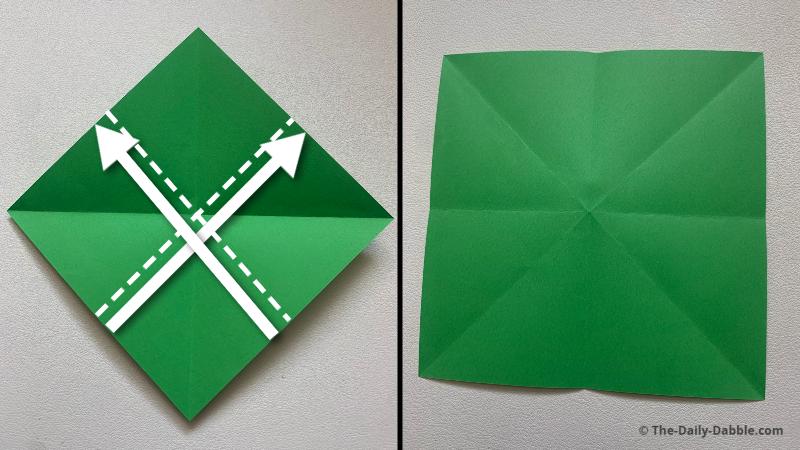
Fold the paper from one edge to another to make a crease and then unfold it.
Repeat the process again from the opposite edges.
STEP 3. Bring three points to the center
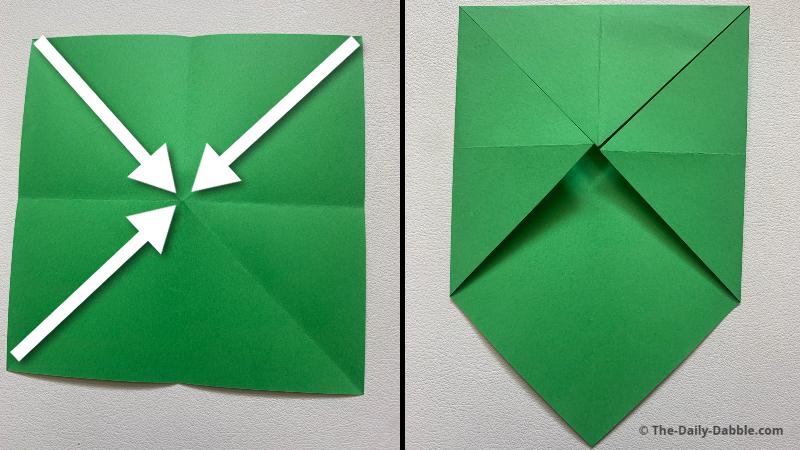
Fold three of the points to the direct center as evenly as possible.
STEP 4. Flip over and fold the last point to the center
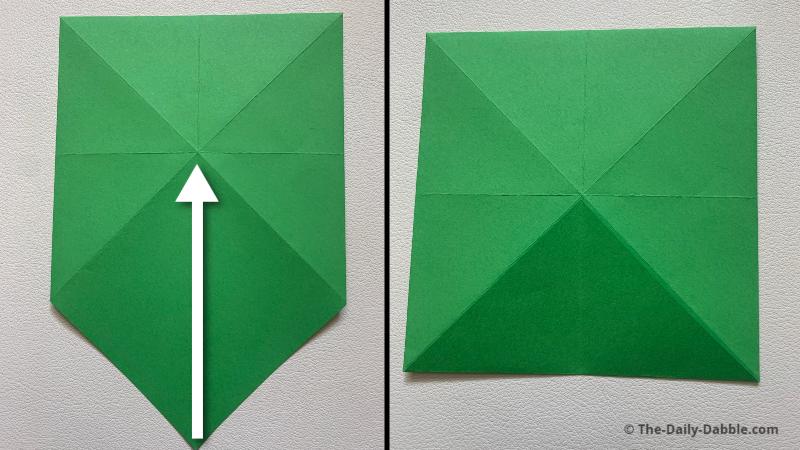
Fold the last unfolded point to the direct center on this side.
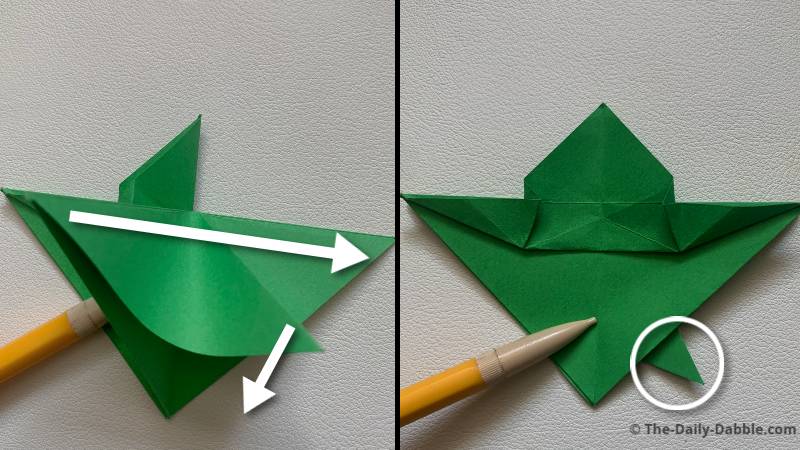
STEP 5. Push two outer edges to the center and then squash the rest down over the top
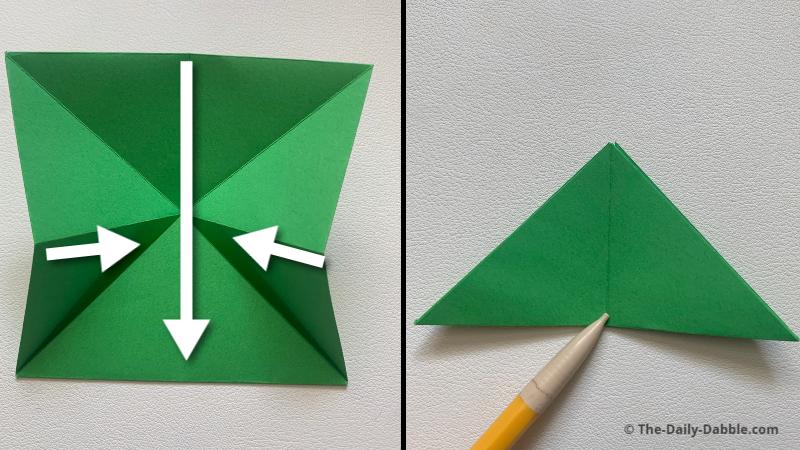
Fold the square into a triangle by pushing two edges inward and then the top down over them.
We now should have a slightly modified origami waterbomb base.
STEP 6. Fold the upper flap twice and then unfold
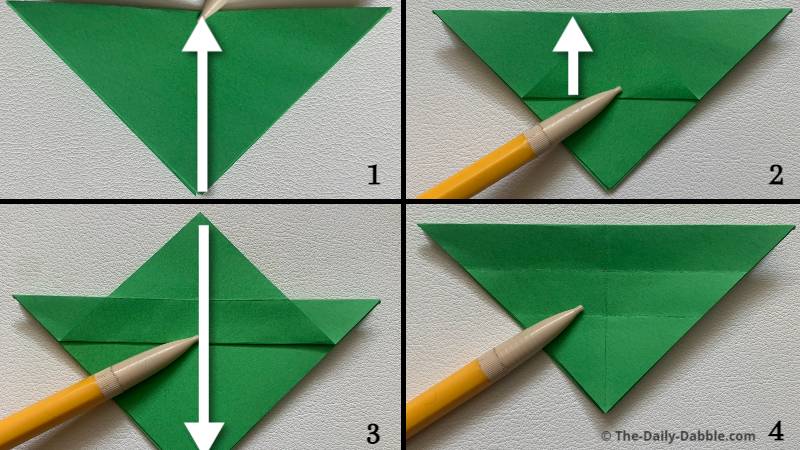
With the point facing down now, fold the tip to meet the top edge.
Fold the crease you just made to the top edge to make another one.
Unfold the tip completely once you make these two folds.
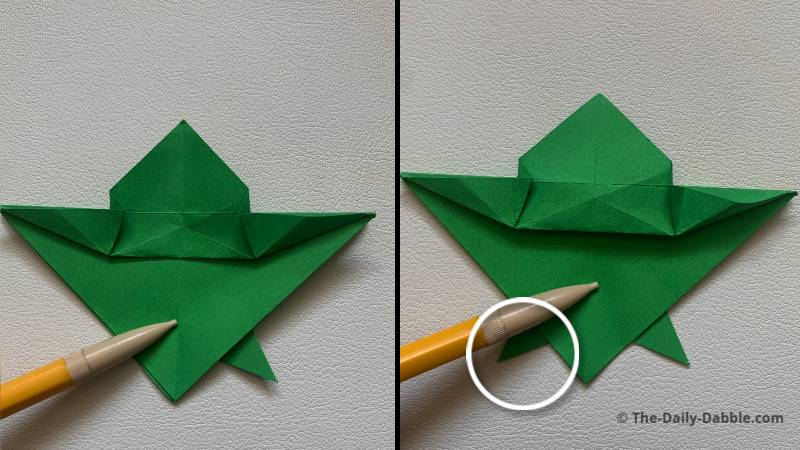
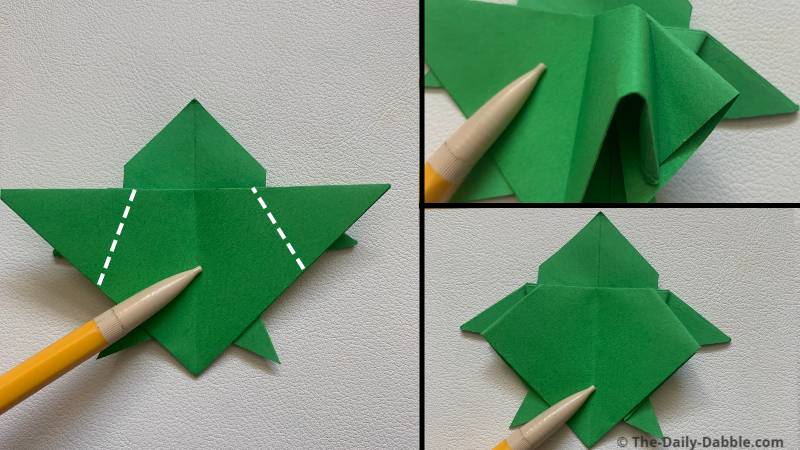
STEP 7. Make four little shaping folds on the right side
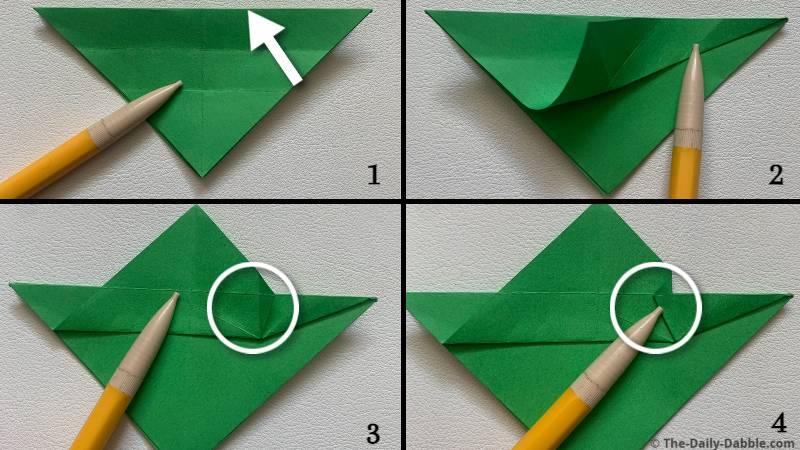
First, fold the bottom right edge to meet the top edge but only crease it to about the center of the paper.
Next, bring the bottom point straight up while creasing the extra over the top to the left.
STEP 8. Repeat the process on the left side
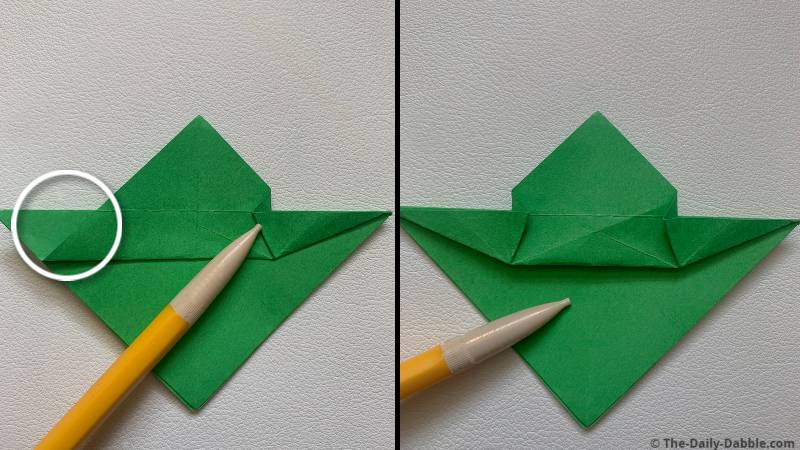
Repeat the same process of folds on the left side to match the right.
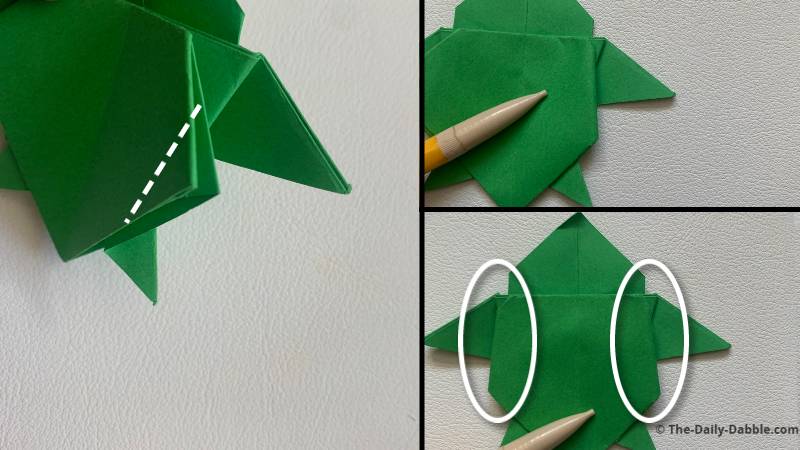
STEP 9. Open the right flaps and mountain fold the middle one down
Shape one of the legs of the turtle by opening the right middle flap up and then mountain folding it down.
STEP 10. Repeat the process on the left side
Open up the left middle flap and then mountain fold it down evenly to match the right one.
STEP 11. Fold the middle flaps up toward the head
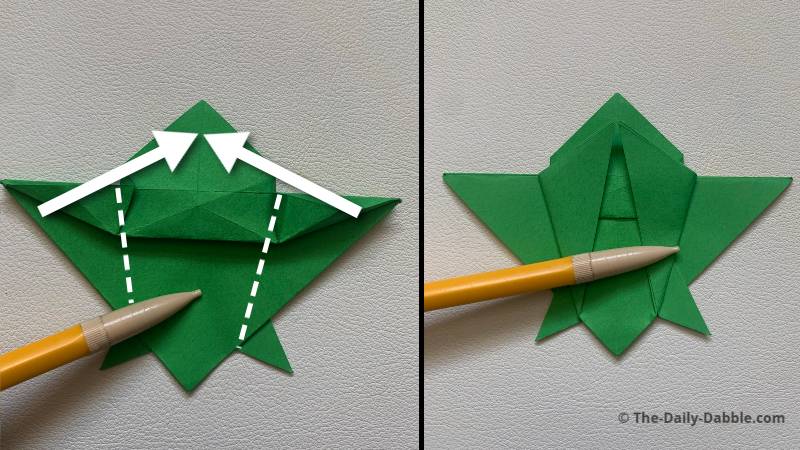
We will start shaping the upper flaps by folding them upward as evenly as possible.
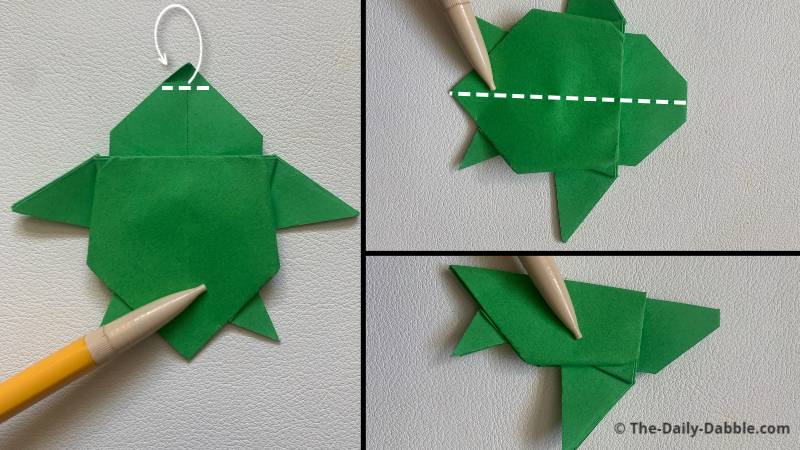
STEP 12. Fold the flaps diagonally downward
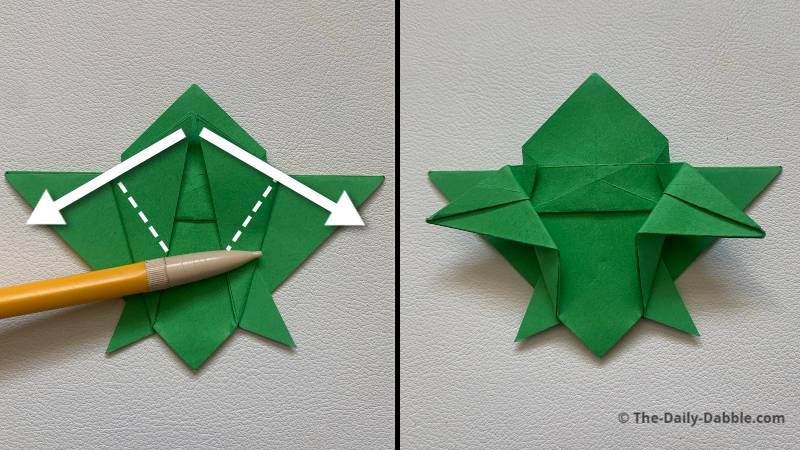
Fold the same flaps back down at an angle.
Flip the turtle over after you have made both of these folds.
STEP 13. Shape the shell with two folds
Fold both the outer tips underneath to start to shape the shell how you want it.
14. Finish shaping the paper turtle shell
Shape the new middle points you just made by folding parts underneath.
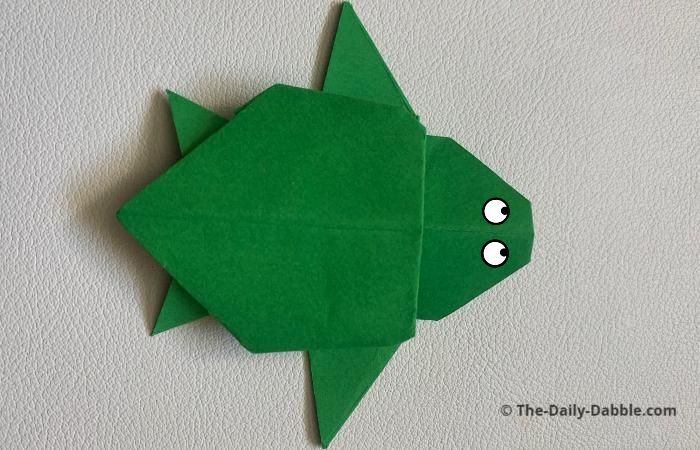
15. Fold the tip of the head under, and then the whole turtle in half
Fold a bit of the head under, then squash the turtle in half over that fold.
Now you know how to fold an origami turtle that you can decorate as you please!
If you are looking to fold some more awesome origami designs, I recommend our easy origami fish and origami duck instructions.
Happy Folding!