
In this guide, we will cover exactly how to make easy origami paper claws in 8 simple steps.
These are the classic claws that are simple to make and are fun for kids.
This is one of our easy origami folding guides that doesn’t require any tape or cutting and one claw can be folded in just 3-5 minutes.
Check out the paper samurai helmet instructions if you want something to go with your fierce claws.
Let’s get started!
For this guide, I used a regular sheet of printer paper but any rectangular origami paper will work just fine.
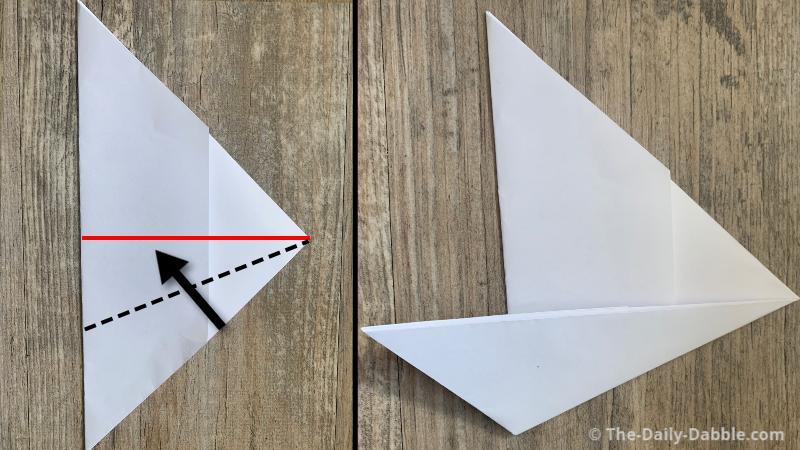
1. Fold the top edge to meet the left edge
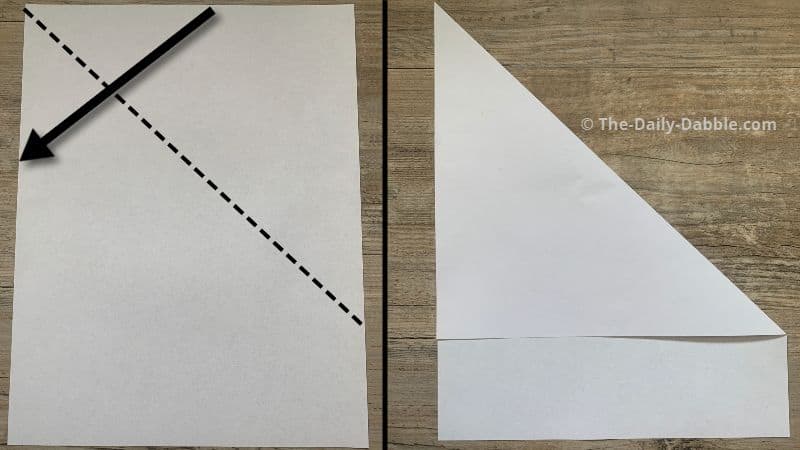
Start by bringing the top edge of the paper to match the left edge.
2. Fold the triangle portion in half
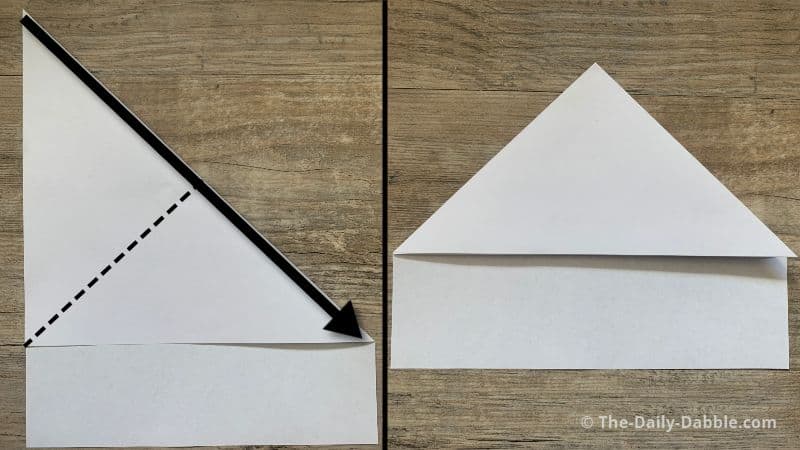
Bring the top left point to meet the bottom right point of the part you previously folded.
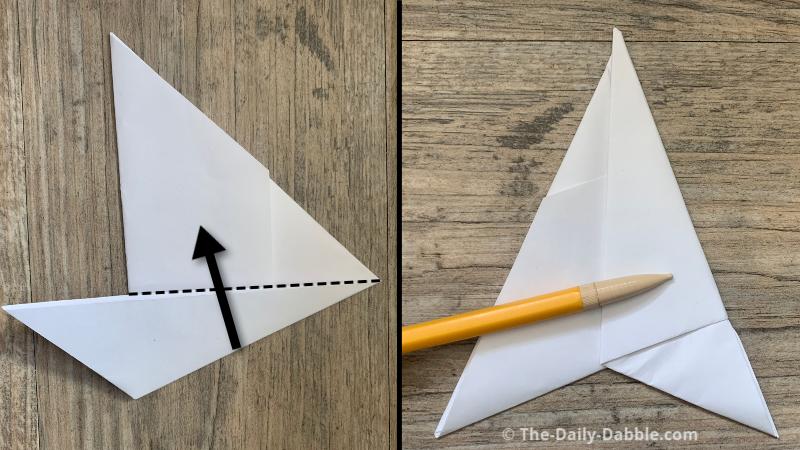
3. Fold the lower edges to meet the bottom of the triangle
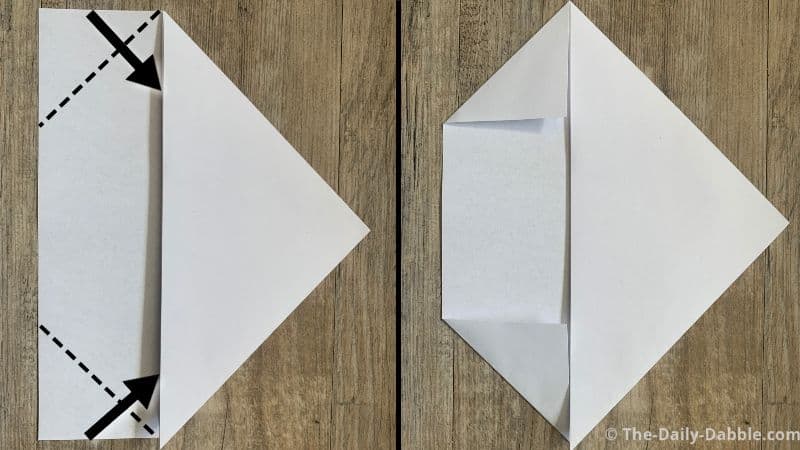
Fold the outer edges of the non-folded rectangular part to meet the bottom of the triangle.
4. Fold the whole lower portion up evenly
Bring the smaller portion of the paper towards the tip of the triangle part.
The crease will end up being right at the bottom of the triangle.
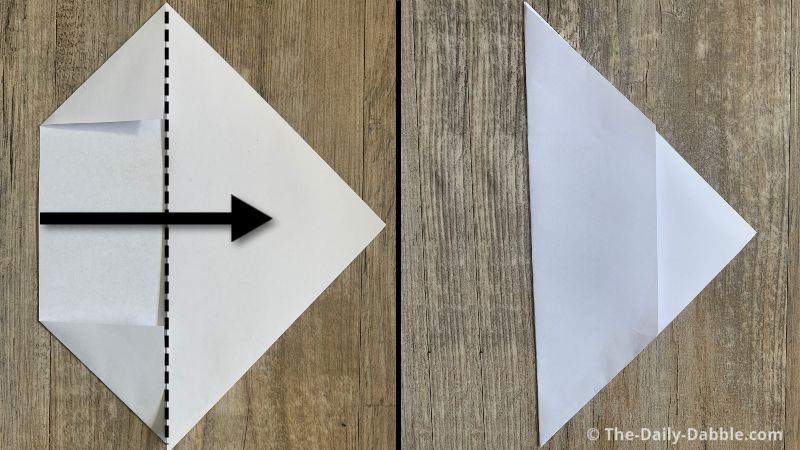
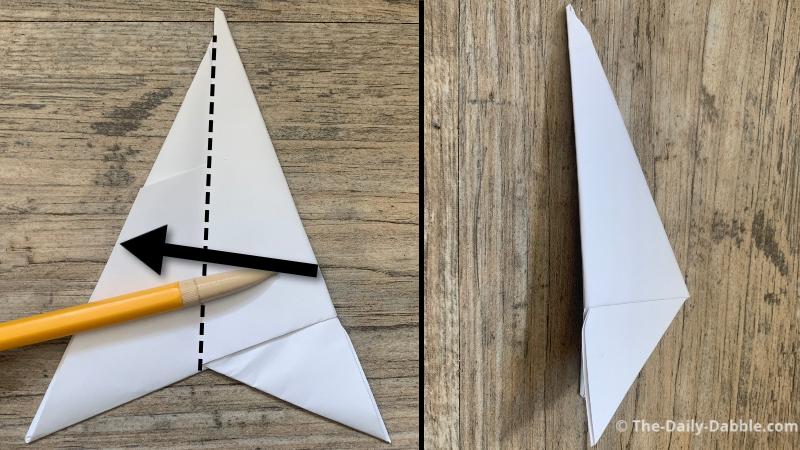
5. Fold the right edge as close to the center as you can
Bring the right edge over and as close as you can guess to the center.
This fold doesn’t have to end up perfectly in the middle.
6. Fold the right part over itself as evenly as possible
Starting from the right side, fold the paper to the left and over itself.
Again, these folds don’t have to look exactly like the one in the picture as these claws will still turn out just fine.
7. Fold the paper over itself again
Just move the right side over the left using the middle edge of the right side as the crease point.
The sides don’t have to match perfectly to finish the claw.
8. Tuck one side into the other that has the pocket

Make sure to tuck it in as far as it will go to make the claw more sturdy.
Now you know how to fold your own paper claw and you can repeat the process to make enough for all your fingers!
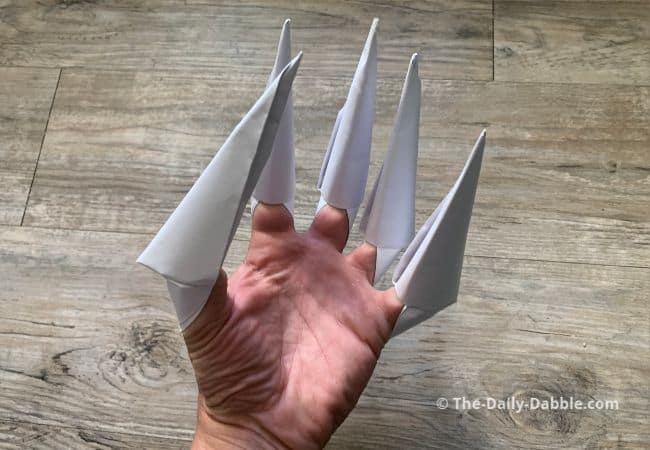
Remember the edges can be slightly sharp so please be careful!
For another great paper folding guide that is great for kids, check out the instructions for a traditional origami fortune teller!
Happy Folding!