
What do you call two rabbits racing down a road? The fast and the furriest.
This is one of our easy-to-follow guide origami guides that will show you how to fold a traditional origami rabbit.
This paper rabbit stands up and is great for a simple kids easter project, or just for fun!
The design is not too hard for beginners and will take about 5 to 10 minutes to complete.
Let’s start folding the origami paper rabbit! [TUTORIAL]
For this origami rabbit, I use a multi-colored 6 x 6 sheet of origami paper that is white and brown on opposite sides.
If you don’t have a square piece of paper, you can always cut regular paper into a square.
We will start with the white side up, if you are using multi-colored paper.
In this case, the rabbit will be brown with white showing on the inside of the ears.
STEP 1. Fold the piece of paper in half from point to point
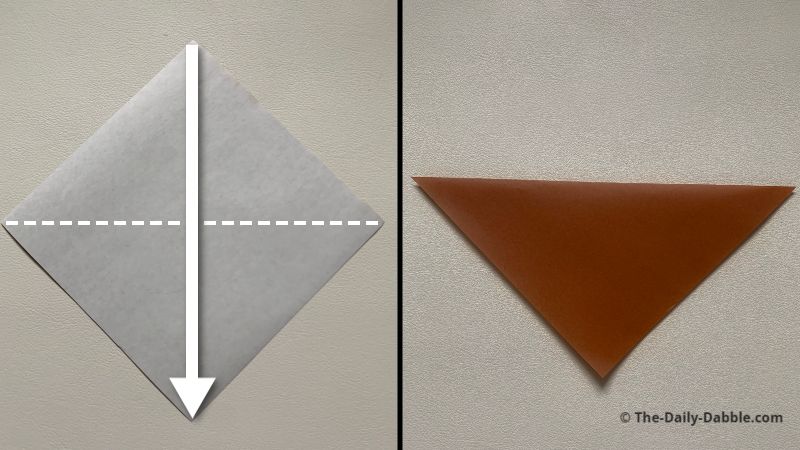
Fold the paper in half and rub the edge of the fold to make a good crease.
STEP 2. Fold the top points to the bottom one
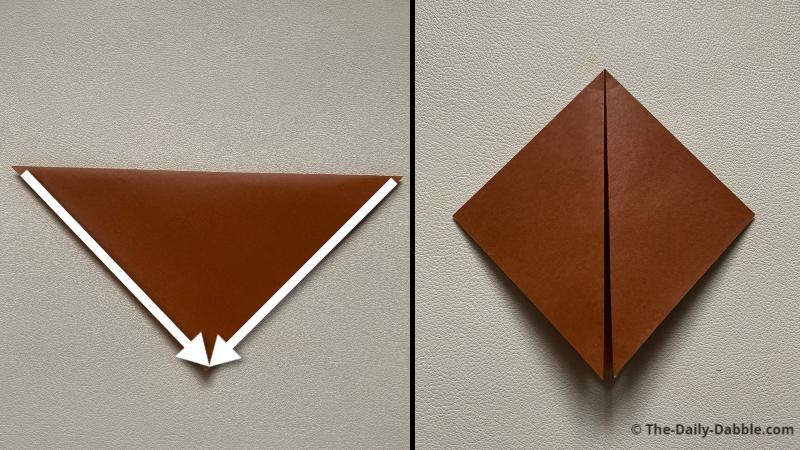
Make a square by bringing the upper tips to the bottom one while matching the edges evenly.
STEP 3. Fold the lower edges to the centerline

Bring the lower left and right edges to meet the vertical centerline.
STEP 4. Fold the top edges of the upper flap down
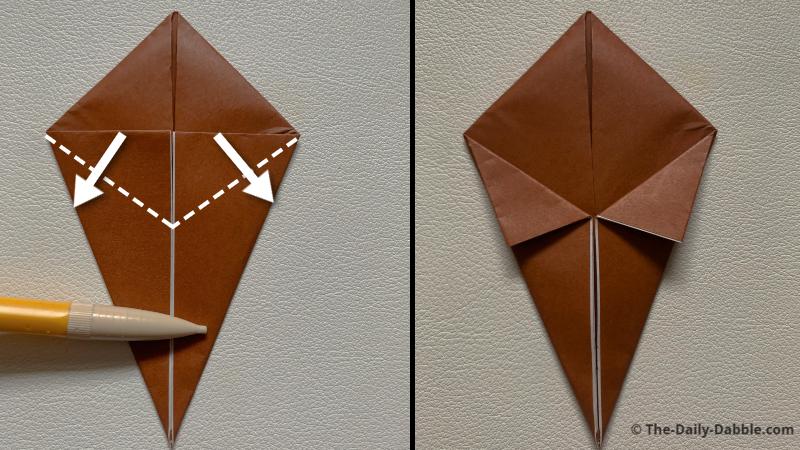
Match the top edges of the upper flap to the lower right and left edges.
STEP 5. Open the flaps and squash fold them down
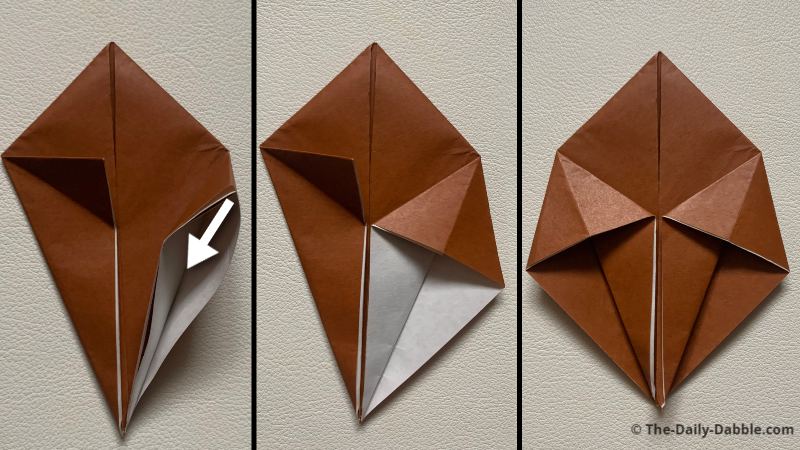
Open one flap at a time, and squash fold them down using the existing creases.
STEP 6. Fold this rabbit directly in half
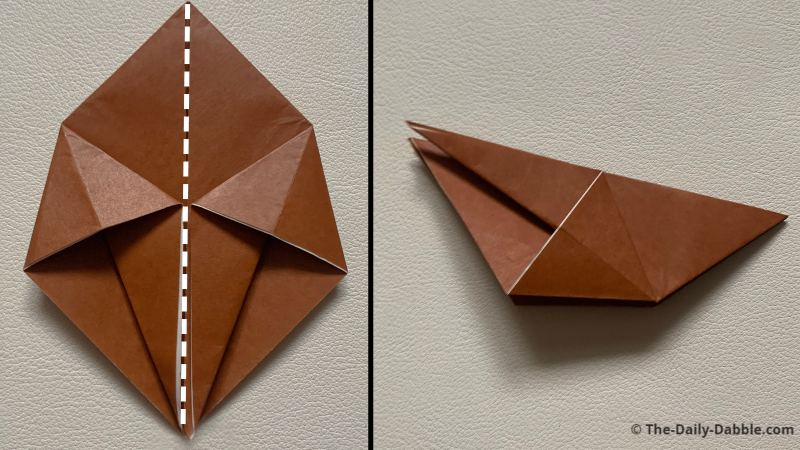
Fold the paper in half with the white side inside.
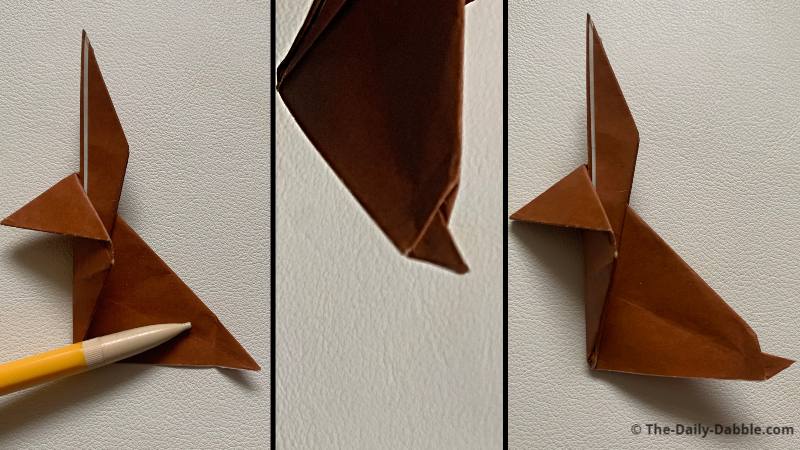
STEP 7. Fold the first ear upward
Fold one ear in and upwards where it naturally folds to.
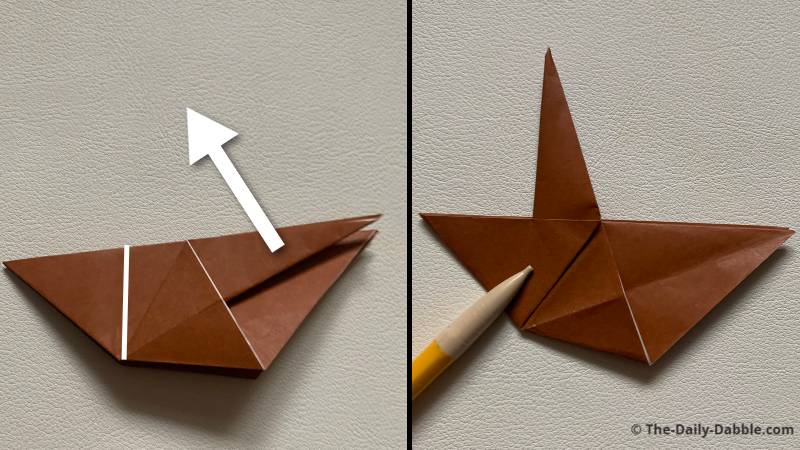
STEP 8. Flip it over and match the other ear fold
On the other side, repeat the same type of fold to match the other ear closely.
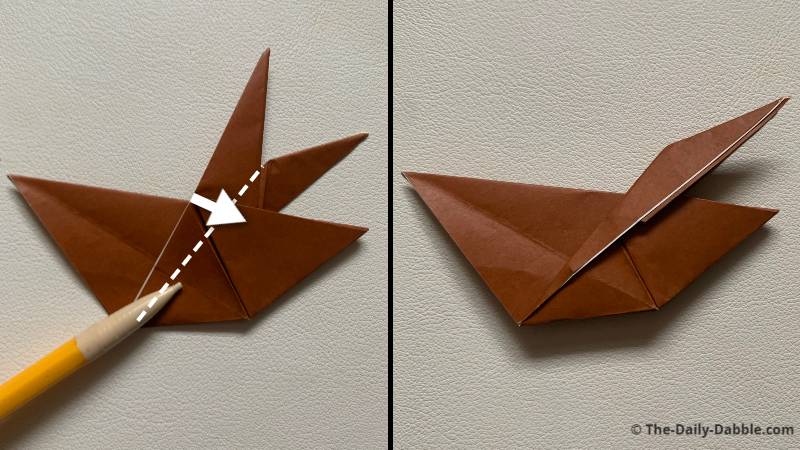
9. Make one ear by folding it over
Fold one ear diagonal almost in half at the top but less and less as you get towards the bottom
This fold doesn’t have to be exactly as the pictures above, but just close as you can.
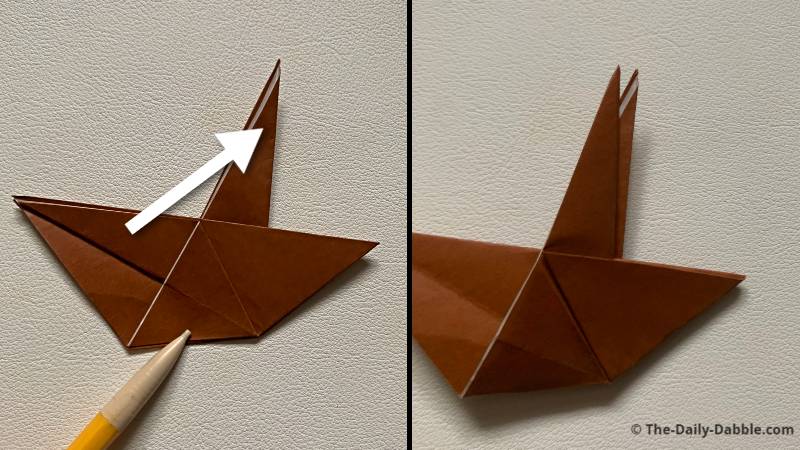
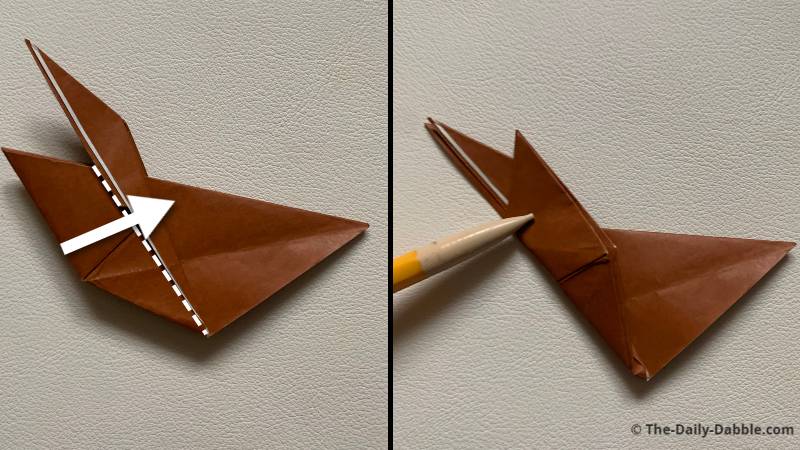
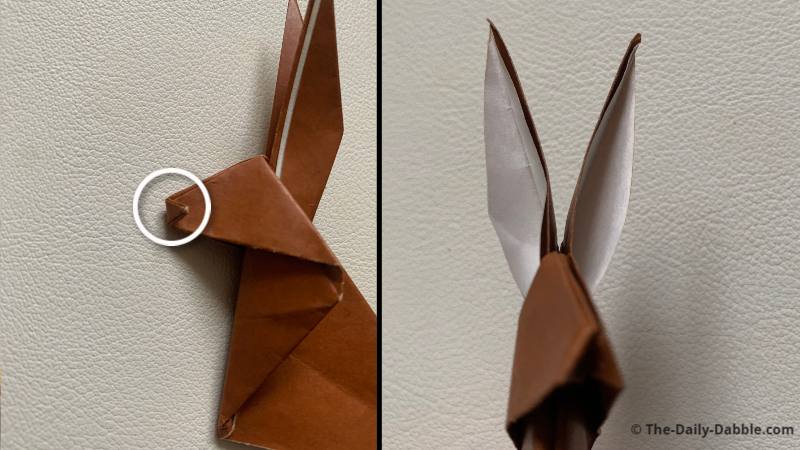
STEP 10. Repeat the process on the other side
Take your time and match this fold closely to the one in the last step.
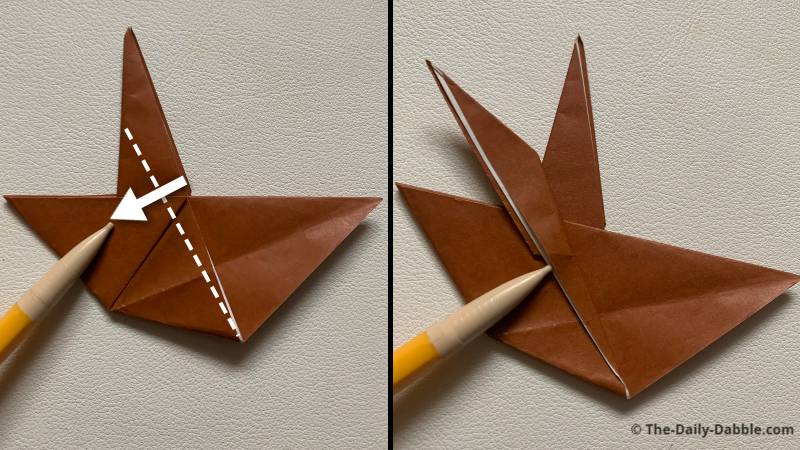
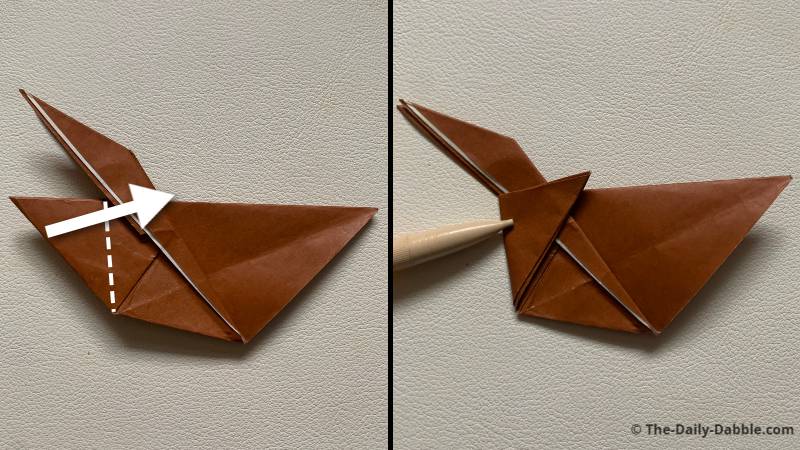
STEP 11. Fold the front along the edges of the ear
Fold the smaller part over the ears back and forth on both sides.
We do this to loosen the paper and crease for future folds.
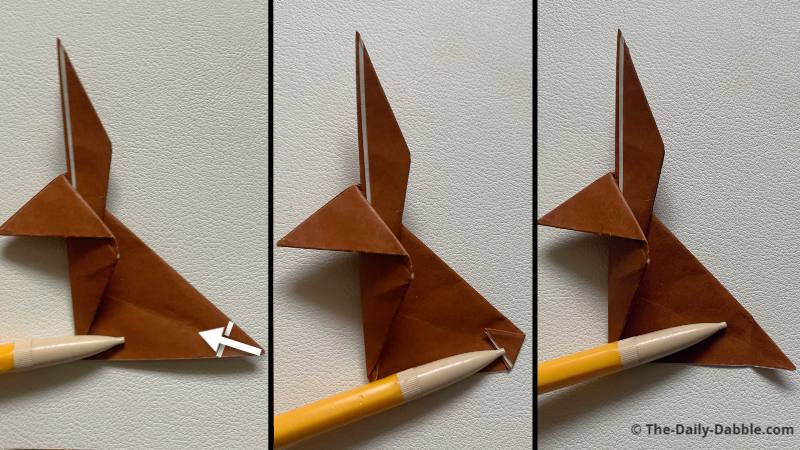
STEP 12. Repeat the process with half of the front triangle
Fold the part shown to the right and then over to the other side the same way.
STEP 13. Open the front and fold the edges to the body

After opening the front portion, pull the middle points back and flat against the body.
STEP 14. Fold the tip of the tail over on both sides
Fold a portion of the tail over on both sides to make little creases.
STEP 15. Reverse fold the tail inside to shape the tip
Push the tail inside and then pull the tip out while leaving a bit of the fold inside.
STEP 16. Fold the nose tip and then reverse fold it inside
Fold the end of the nose over on both sides and then push it inside the head.
You can now open the ears up and finish shaping the rabbit how you like!
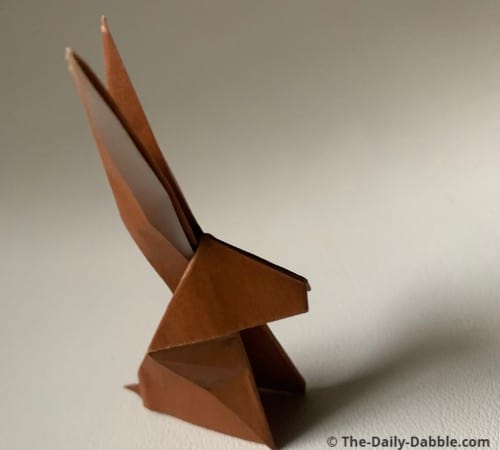
Now you know how to make an origami rabbit!
Check out the origami chicken and crane folding instructions if you want to fold another traditional design!
Thanks for Reading and Happy Folding!