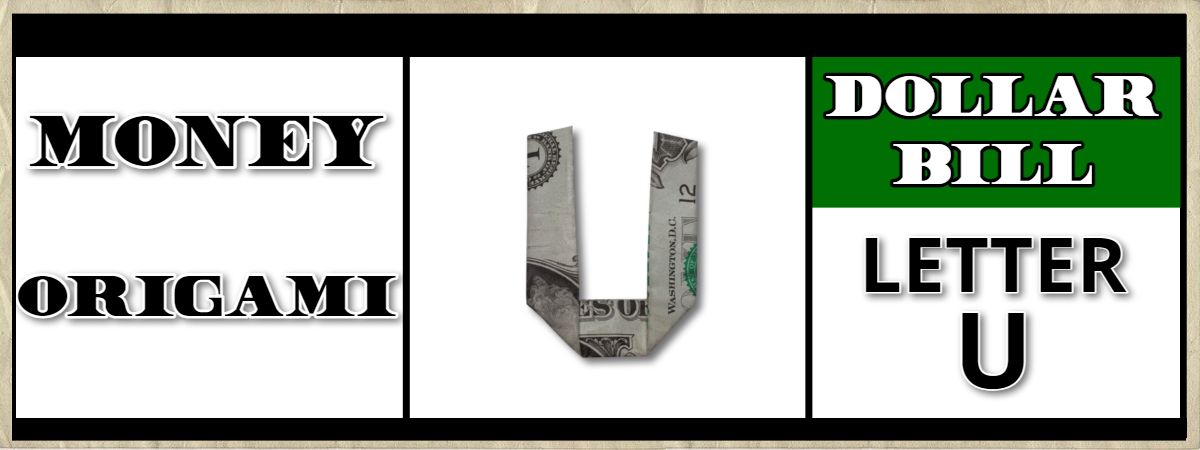
Follow this tutorial to fold a dollar bill origami letter U.
The money letter folding tutorials can help you make a cool cash message for a unique gift.
This letter has 7 easy-to-follow steps with pictures to help you fold it in just a few minutes.
Let’s get started!
STEP 1: Fold the dollar in half lengthwise
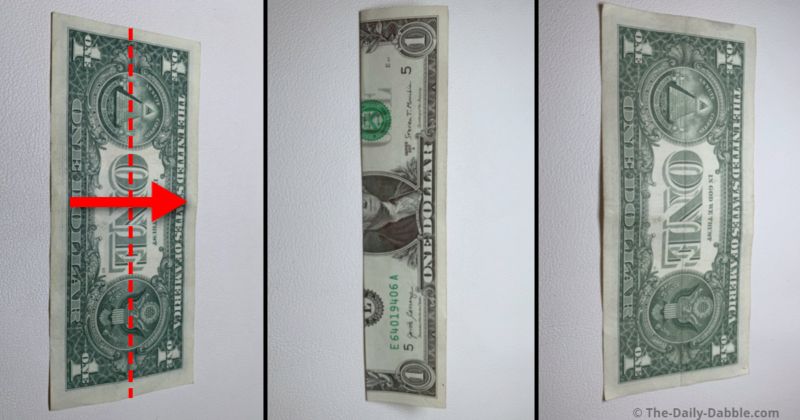
Starting on the back, make a lengthwise fold directly in half.
Make a good crease by rubbing the folded edge and then unfold it.
STEP 2: Make two folds on the lower half
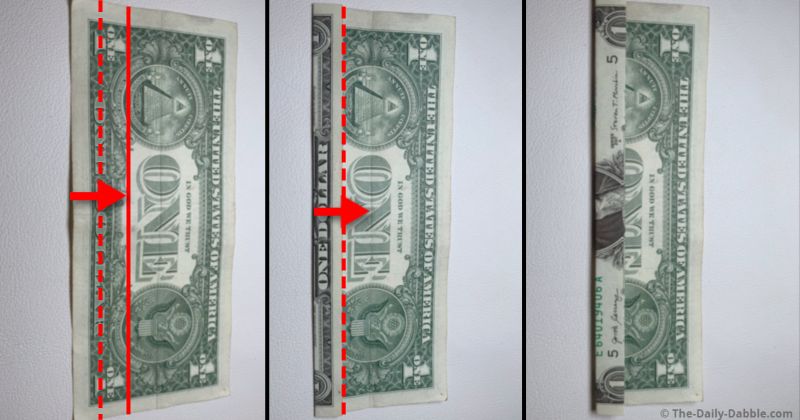
Fold twice on the lower half to divide the lower half of the bill into thirds.
The first fold goes to the solid line shown, and the dashed line is where the first crease will be made.
For the second fold, bring the edge over to the center.
STEP 3: Repeat these fold on the top half
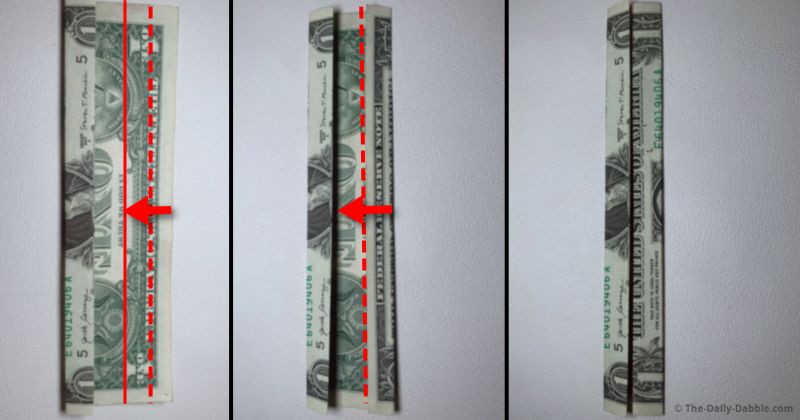
Make the same type of folds to the middle to make it symmetrical.
Flip the dollar over to the face side for the next step.
STEP 4: Form pointed creases on the right side
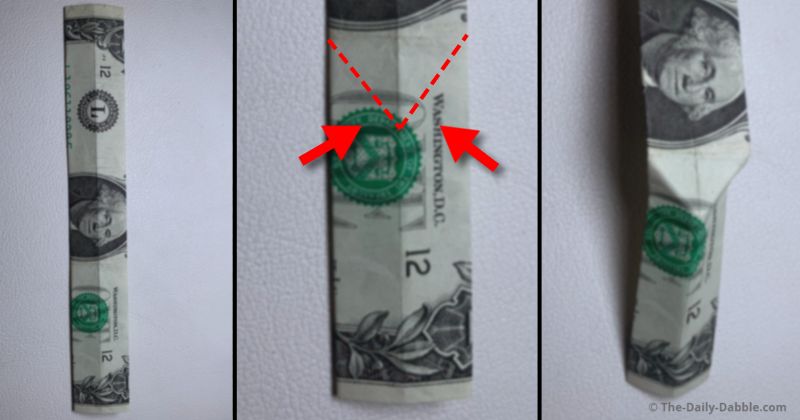
Hold the center portion and push in from the right to make this pointed fold.
If you don’t get it exactly where shown, it can be adjusted later.
STEP 5: Make a similar fold to the left of center
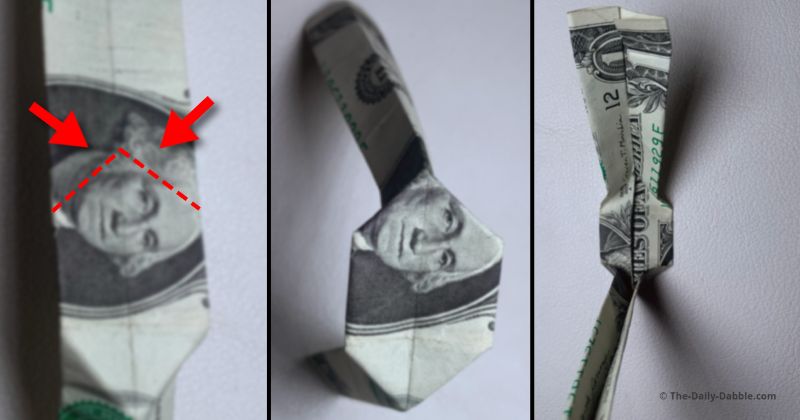
For two creases at similar angles but point to the left.
Don’t close it but rather flip it over to the bottom for the next step.
STEP 6: Fold a small section of the right part it
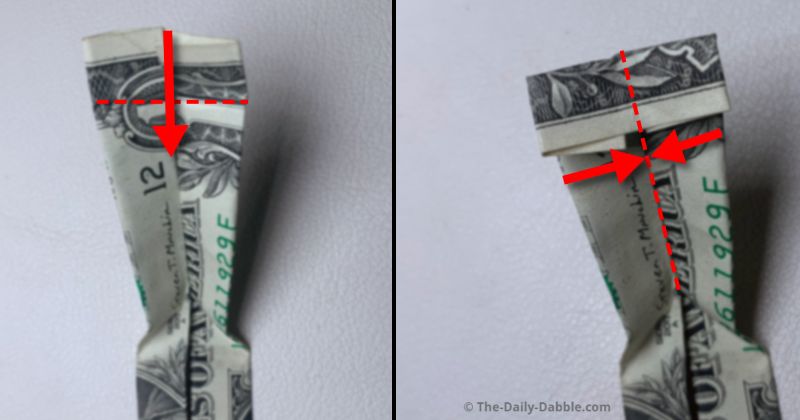
With the words on the bill right side up, fold a portion of the right in towards the middle.
Close the bill up to get an idea of how you need to fold in on the other side to match.
STEP 7: Match the left and right lengths
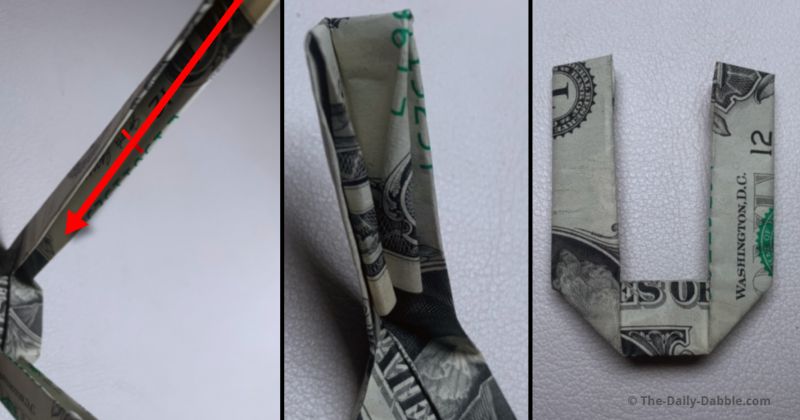
Fold a section of the left side so the letter ends up nice and even.
Make simple length adjustments where needed and tuck the folded portion to hide them from view.
Now you know how to fold a money origami letter U!
PREVIOUS: Dollar Bill Origami Letter T
NEXT: Dollar Bill Origami Letter V
MORE: Money Origami
Happy Folding!