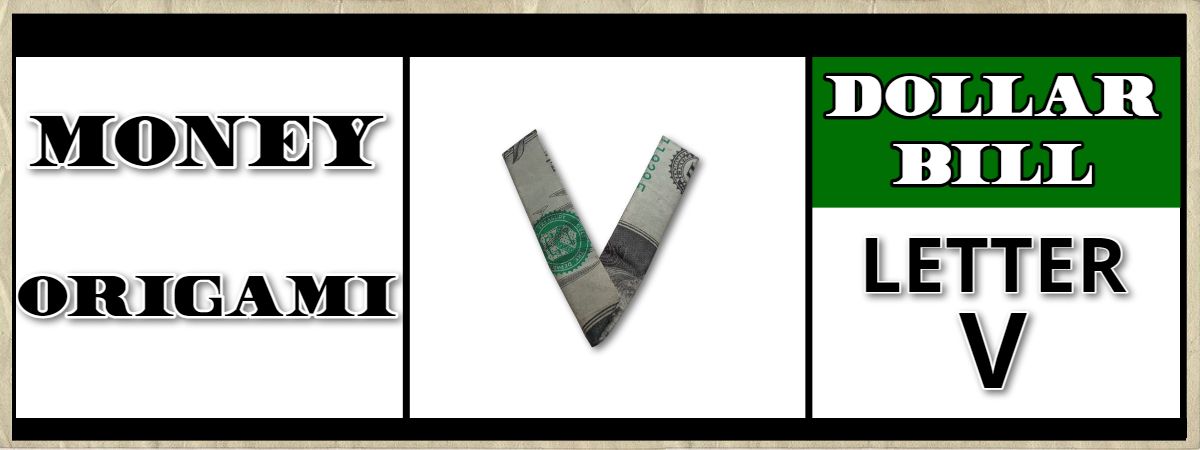
In this tutorial, you’ll learn how to fold a dollar bill into an origami letter V.
This is a simple money folding tutorial that can be completed by most in 5-10 minutes.
You can use this to spell a message, someone’s initials, or for a cool addition to an art project!
Let’s get started!
STEP 1: Fold the dollar in half lengthwise
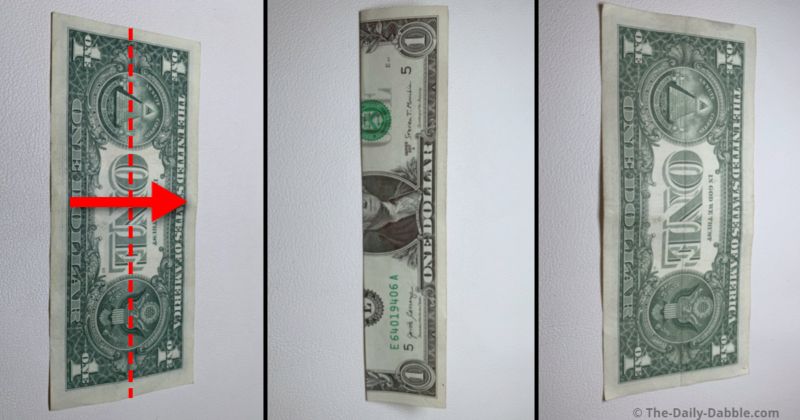
We will start on the back of the bill and fold it in half evenly from top to bottom.
Press the edge of the fold to make the crease visible.
STEP 2: Make two folds evenly to the middle
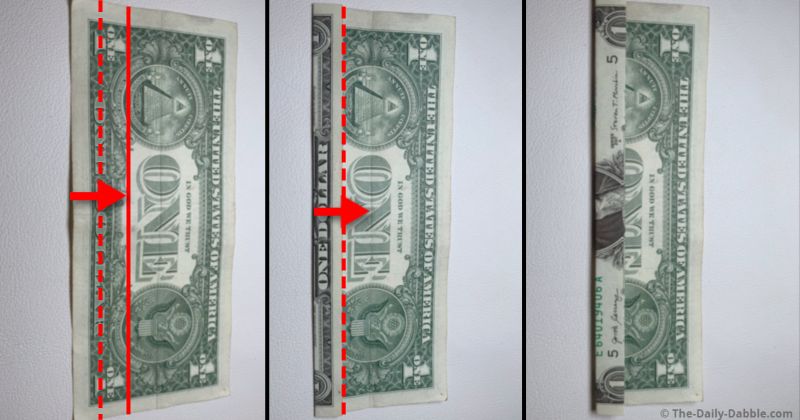
On the lower half, make two even folds to get to the center of the bill.
Use the solid line as a reference for where to make the first fold to.
The second fold will take the edge to the middle crease.
STEP 3: Make mirroring folds on the other side
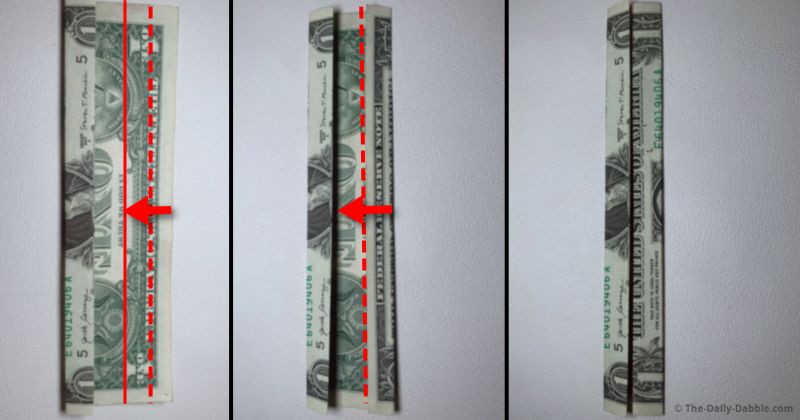
Repeat the process by making another two folds to the middle on the upper half.
Make sure everything is pressed flat and then flip over the bill for the next step.
STEP 4: Form a pointed crease on the right side
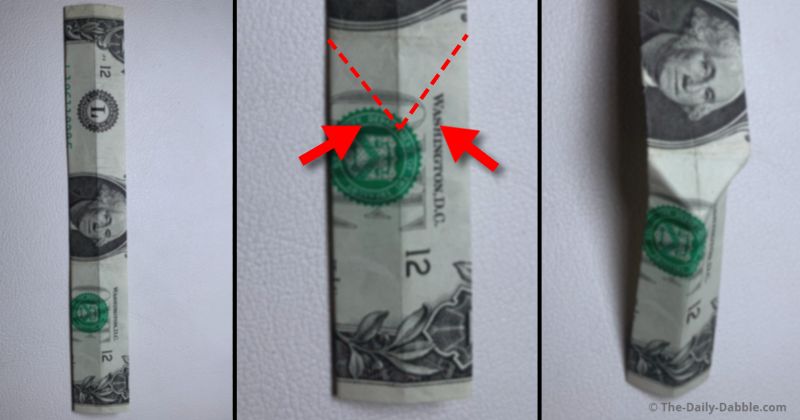
Hold the middle of the bill and push in on the end with a few fingers to make the crease as shown.
Closing the end temporarily and looking at the bottom side can help you form the lines evenly.
STEP 5: Make another pointed crease
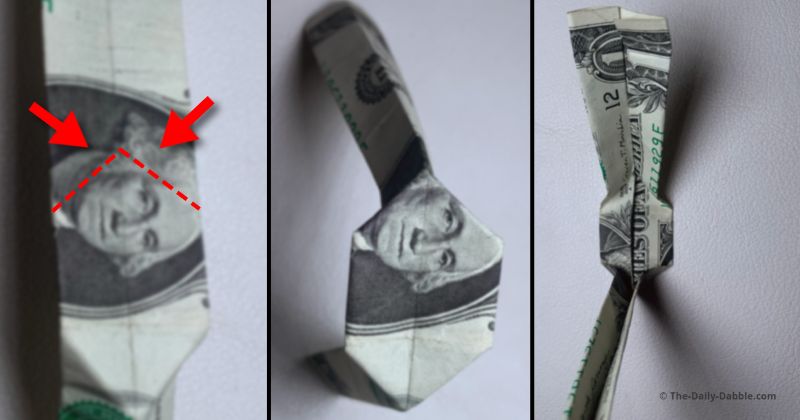
Using the same technique, make a crease near the center and pointed the opposite way.
Close the end and press the crease to make sure they are prominent.
STEP 6: Fold the bill lengthwise in half
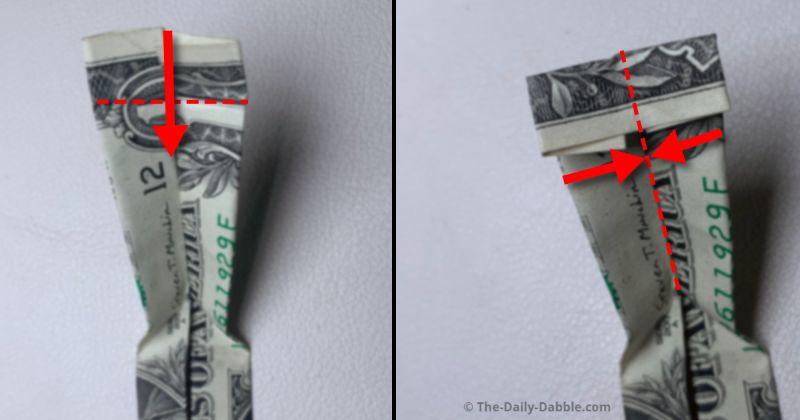
It can help to do steps 6 and seven together to ensure the sides end up even.
Fold a section of the shorter side over so that it can be closed inside of the bill.
STEP 7: Match the long side to the shorter one
Fold the long side over and inside itself to match the length of the opposite side.
Flatten the bill on its face side for the last step.
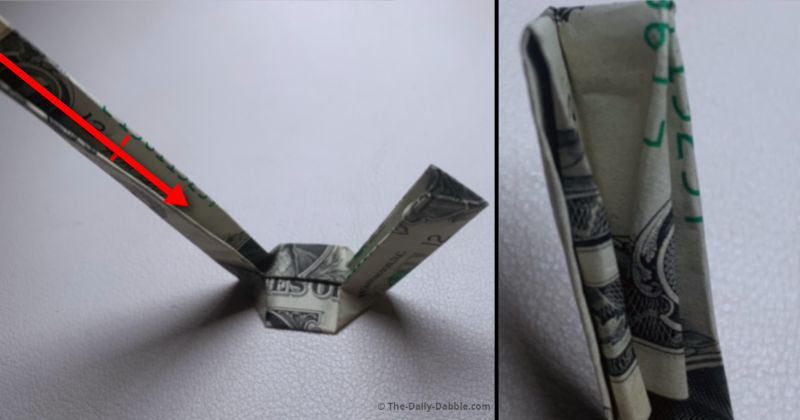
STEP 8: Make one last pointed crease
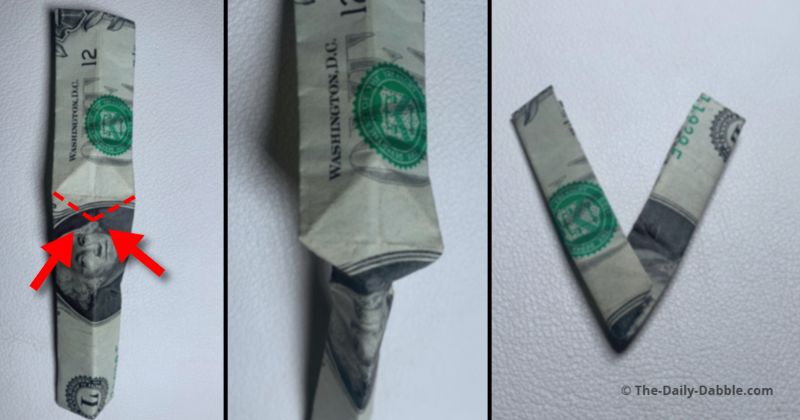
Between the other two pointed creases, make one more so that the letter can be closed to the proper shape.
Close the letter up into shape and tuck in the middle section that may stick out.
If it looks uneven for some reason, open it and adjust the pointed creases as needed.
To help it stay flat you can put it under some heavy books for 10 minutes or so.
Now you know how to fold a money origami letter V!
PREVIOUS: Dollar Bill Origami Letter U
NEXT: Dollar Bill Origami Letter W
ALL: Dollar Origami Alphabet Letters
Happy Folding!