This quick origami guide shows how to fold a dollar bill into the letter P.
There are 8 steps for the letter P and it is a pretty easy project.
If you are looking to spell something, you can find tutorials for all letters in our dollar origami alphabet guide.
Let’s get started!
STEP 1: Fold the bill in half lengthwise
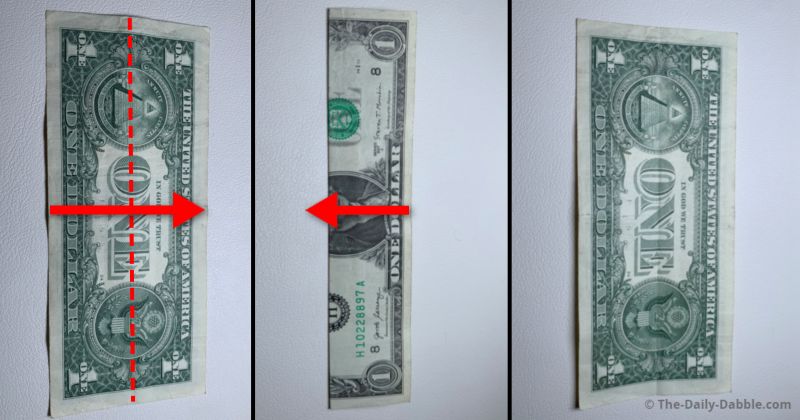
We will start on the backside of a dollar bill.
Start by folding the dollar directly in half evenly, matching the bottom to the top.
Press the edges of each fold made in this tutorial to make noticeable creases.
Once this step is completed, open it back up.
STEP 2: Make two folds over to the center
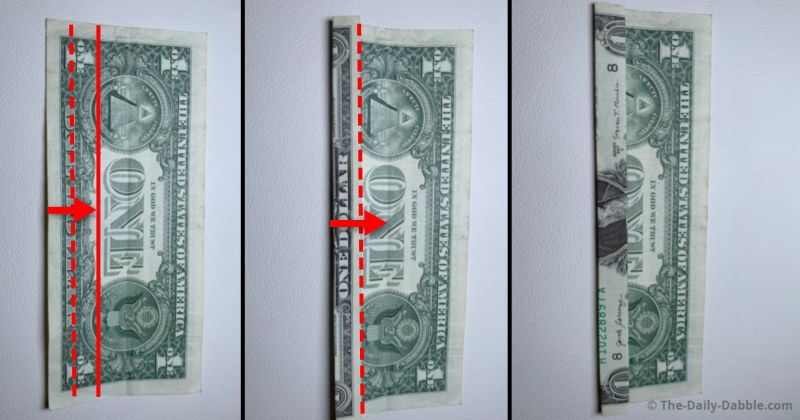
For the next two steps, we will divide the upper and lower halves both in thirds.
The solid line shows where to make the first fold to ensure it is even.
Make the second fold to the middle crease made in step 1.
STEP 3: Repeat the process on other side
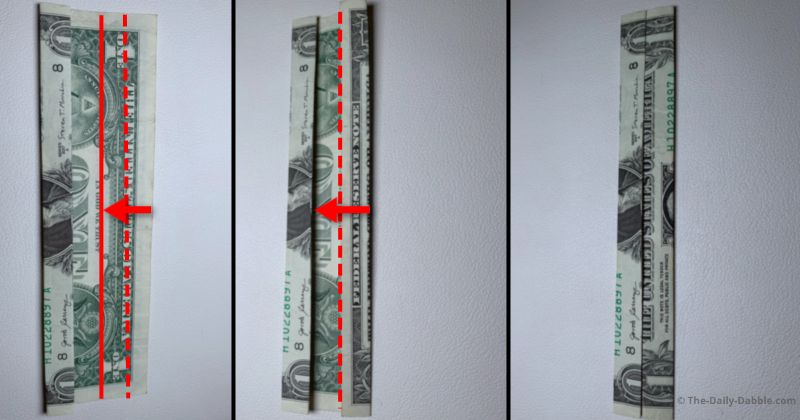
Make another two folds on the upper half the same way.
When these are made you can flip it over to the face side for the next step.
STEP 4: Form two creases and pinch the end
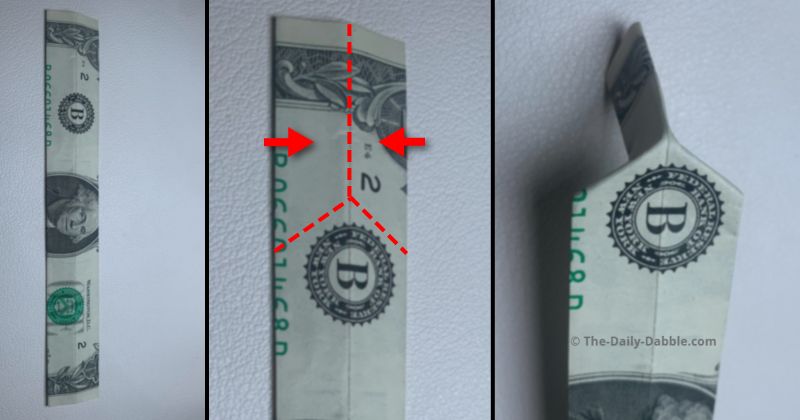
Grab the middle section and pinch the end to form these two pointed creases.
The dashed lines show about where the creases should be.
If they are not perfect at the end you will be able to adjust the lengths.
These are the same types of folds you will make in the next few steps.
STEP 5: Make two creases the opposite way

Further to the right, form another two creases in a similar fashion.
You can pinch the right closed to form the edges, but this side will be opened a bit for the next step.
STEP 6: Repeat the same type of folds again
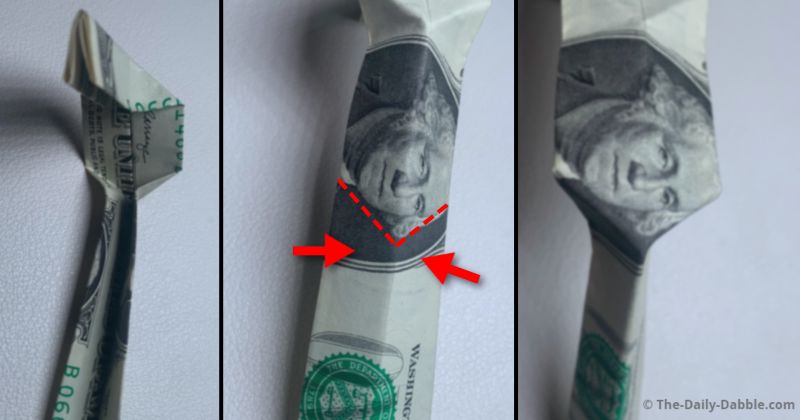
Repeat the process one more time a little further down next to the face.
You can close the right edge completely now to prepare to finish the letter.
STEP 7: Close and flatten the letter P
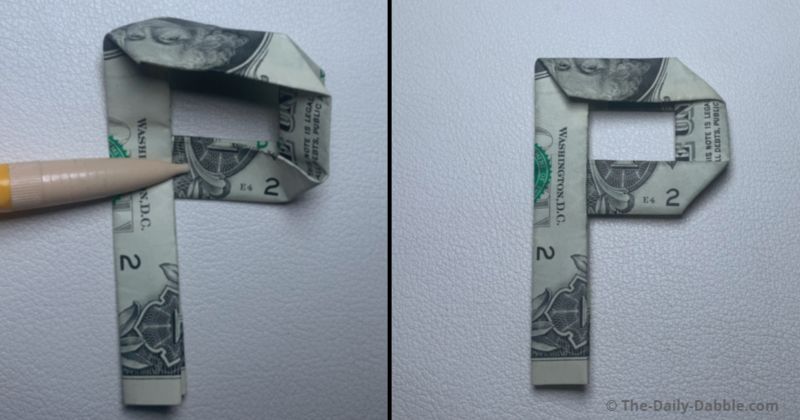
Bring the short side inside the longer left one to give the letter shape.
Close up the top flaps and take some time to press and flatten the letter.
Adjust the lengths of edges as needed if the letter looks a bit uneven.
Once you are satisfied with the look, a little time under a heavy book can help it stay in place.
Now you know how to fold a money origami letter P!
PREVIOUS: Dollar Bill Origami Letter O
NEXT: Dollar Bill Origami Letter Q
OTHER DESIGNS: 30+ Easy Dollar Folding Tutorials
Happy Folding!