Learn how to fold a dollar origami letter Q in just a few minutes with this guide.
This tutorial has 7 steps and is pretty easy once you figure out the basic folds.
Start spelling someone’s initials or a special message for a fun gift with cash!
Let’s get started!
STEP 1: Fold the bill lengthwise in half
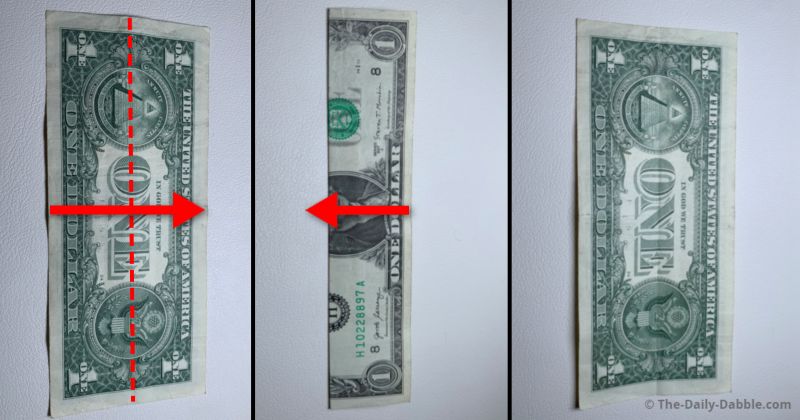
Starting on the back, fold the dollar directly in half lengthwise.
For this step and the rest, be sure to rub the edges of the folds to help keep it flat.
Open the bill after the crease has been made.
STEP 2: Divide the lower half into thirds
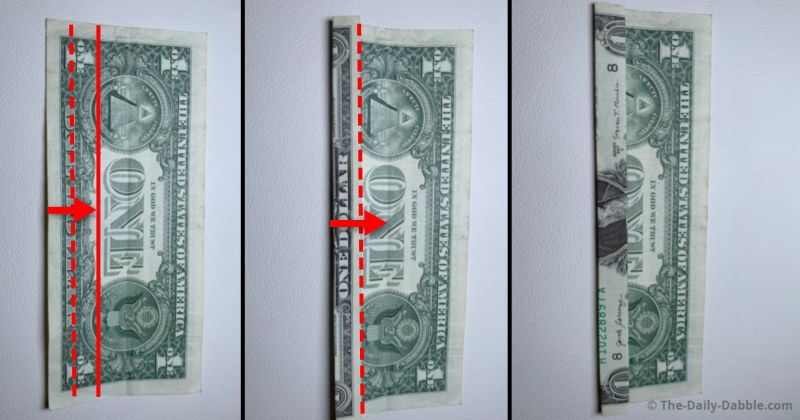
The solid line shows where to make the first fold in order to keep it even.
Bring this folded edge over to the center crease for the second fold.
STEP 3: Repeat the process on the top half
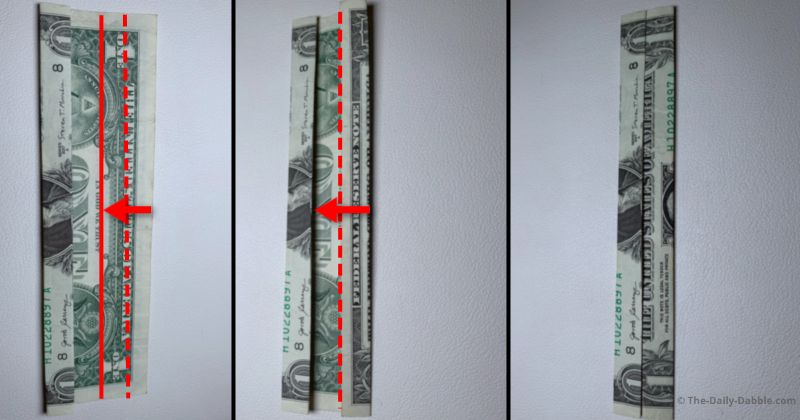
Make another two folds on the upper half of the bill.
Use the picture as a guide for the first step, and the second will go to the crease made in step 1.
STEP 4: Pinch the end to make a pointed crease
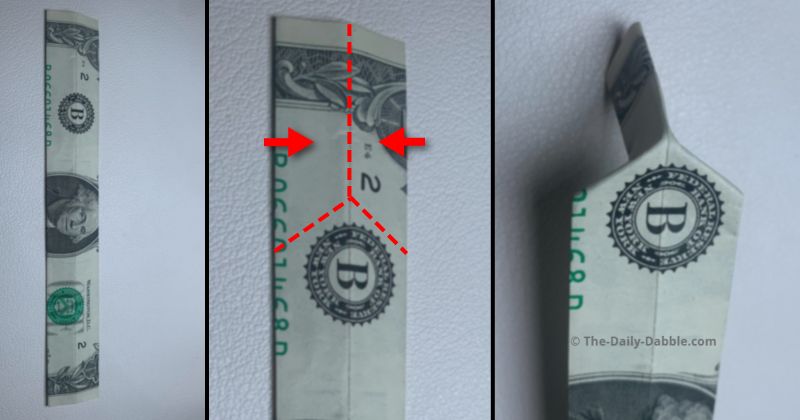
Make this point crease on the left side by holding the center and pinching the end in.
Manipulate the creases until they get even before forming solid creases.
STEP 5: Fold the dollar lengthwise in half
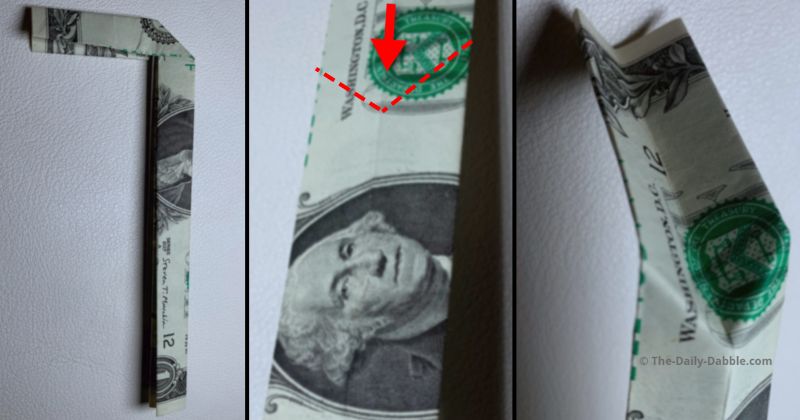
Flatten the bill as shown in the first picture, and then open it back up.
Use the process in the last step to make a pointed crease the opposite way.
This will be made on the right side of the face.
STEP 6: Make one more pointed crease
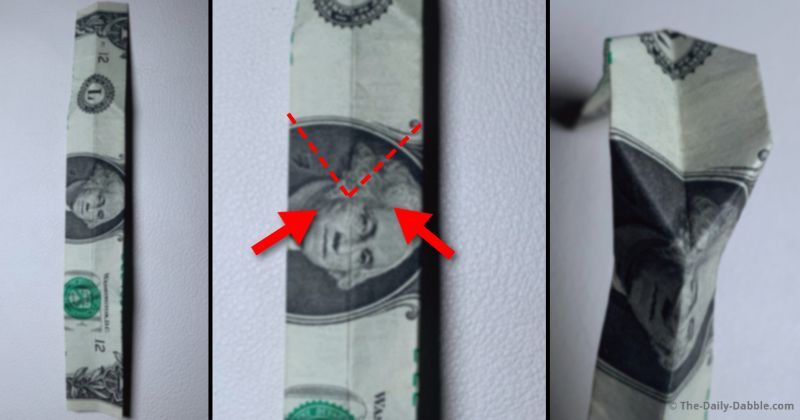
Make this last pointed crease pointed the opposite way of the one made in step 4.
These two points will be close lengthwise up to start closing the letter.
STEP 7: Flatten the dollar and finish shaping
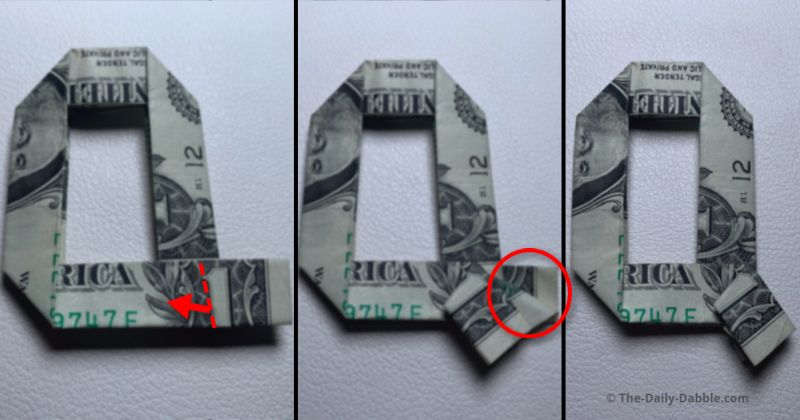
Close the folds that have been made to form the Q shape.
Put the last shaping touches on by folding the long tip over to rest at an angle.
Match the back part the same way and tuck in any areas that are showing.
Now you know how to fold a money origami letter Q!
PREVIOUS: Dollar Bill Origami Letter P
NEXT: Dollar Bill Origami Letter R
ALL: Money Origami Alphabet Letters A-Z
Happy Folding!