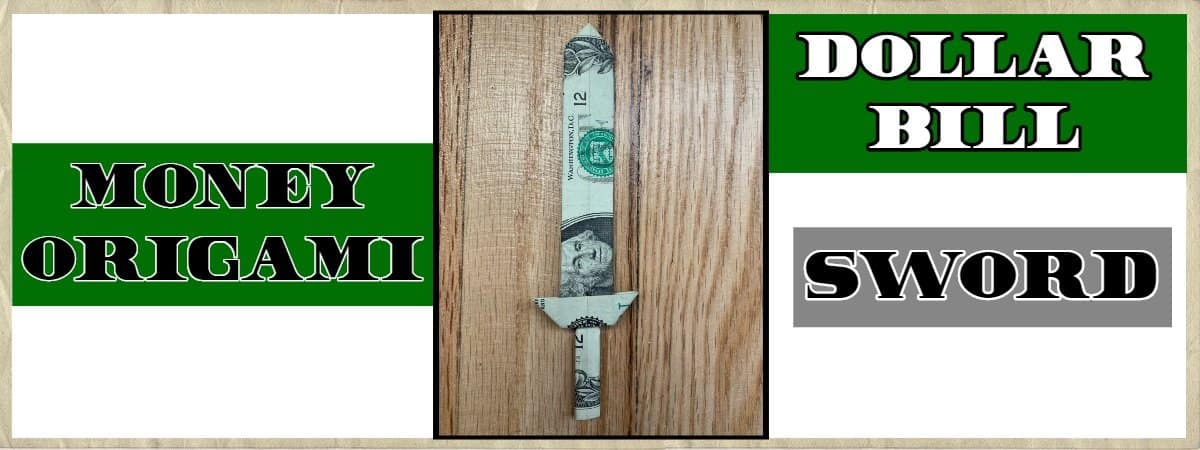
Fold an awesome dollar bill origami sword in 13 steps with this money origami guide.
This dollar sword is sure to impress and be a fun gift to share with family and friends.
Follow this detailed guide with pictures, and you will have your own dollar sword in less than 5-10 minutes!
When you are done may also like these other money origami guides:
How to Fold a Dollar Bill Into a Money Origami Sword
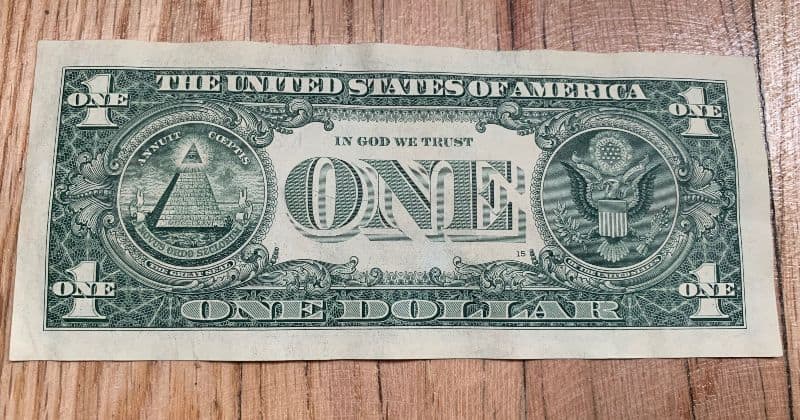
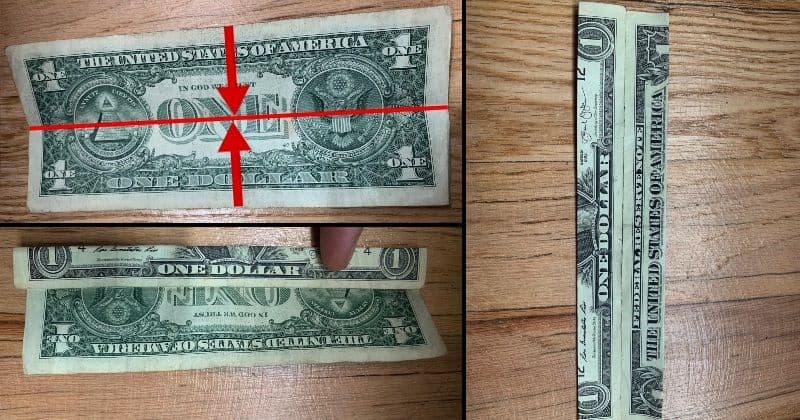
We will start on the backside of the bill so that we can have George Washington on the blade of the sword.
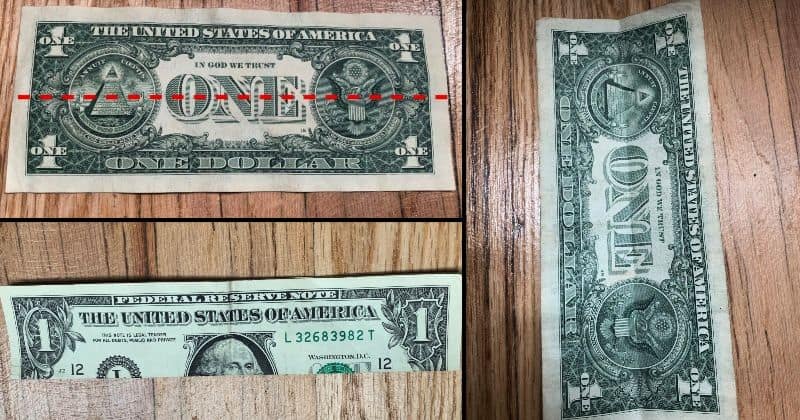
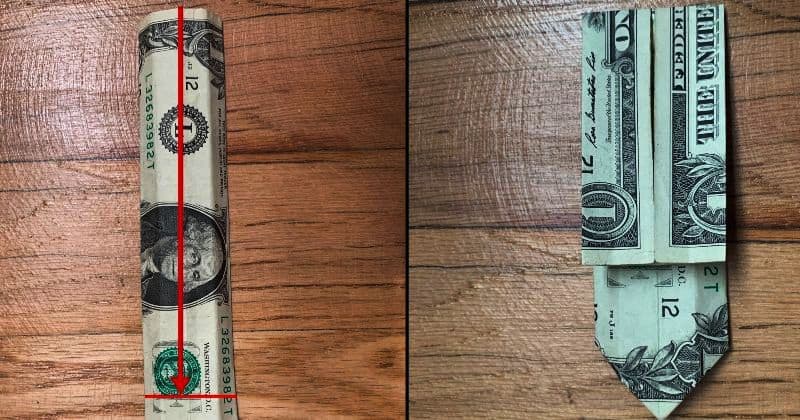
Step 1: Fold in half lengthwise to crease it, then unfold it
Step 2: Next, fold the top and bottom lengthwise to meet the crease
Step 3: Make the sword point
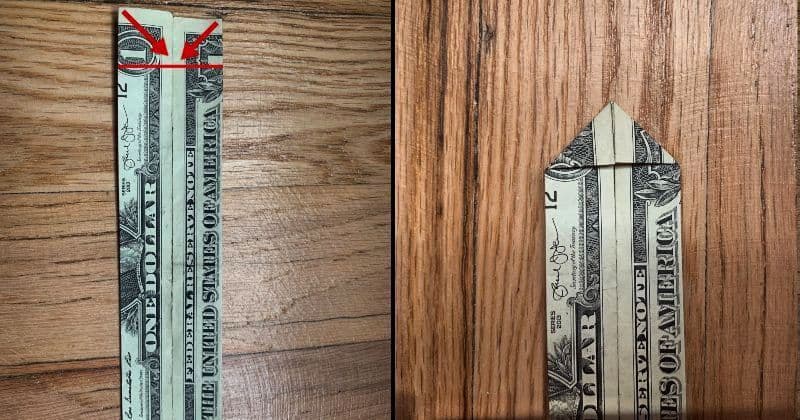
Fold the left and right top corners down to form the point of the sword.
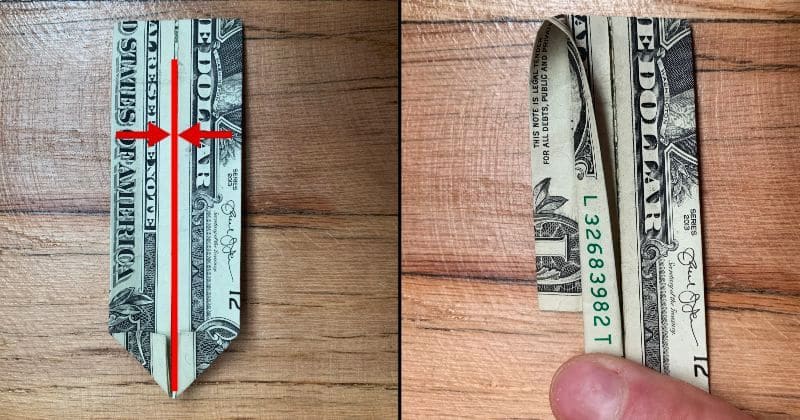
Step 4: Fold the edges lengthwise once again
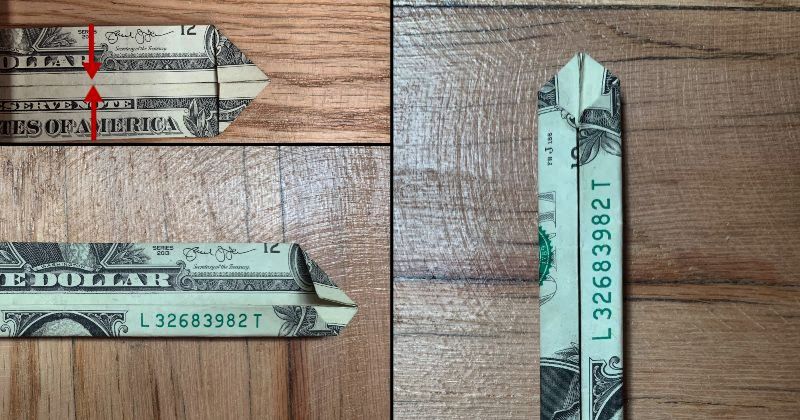
Step 5: Open the fold just made and flip it over completely
Open the previous inward folds and flip the bill over to the face side.
Step 6: Fold the non-pointed side down to the “E”
Fold the edge to meet the “E” on the word “ONE” on the bill.
Step 7: Flip it over, and fold the top flap lengthwise to meet the crease
When you make the fold, you will have to squash fold the point that formed from folding the edges to the crease.
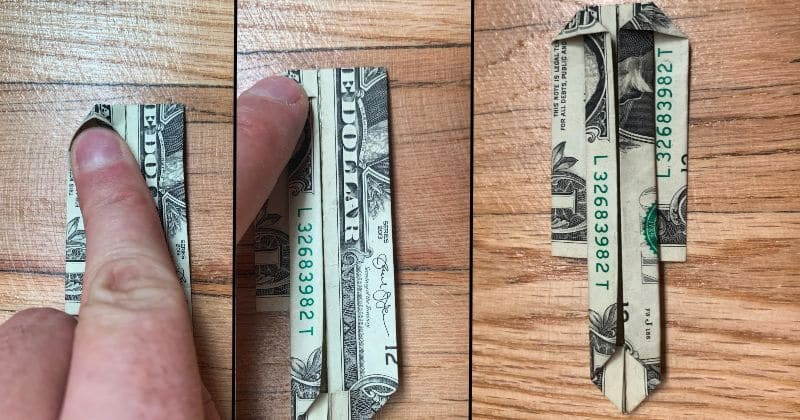
The easiest way to do this is to stick your finger or a pencil in there to make sure it will be flat when squashed.
Step 8: Flip it over and fold the flap out
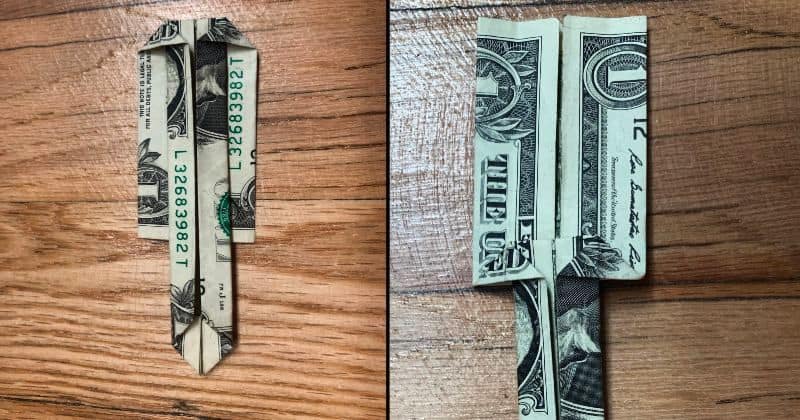
Simply bring the lower flap out and flat. It will help to temporarily flip it over while doing this step
Make sure to crease it once folded.
Step 9: Fold both the left and right sides to the edge of the last fold
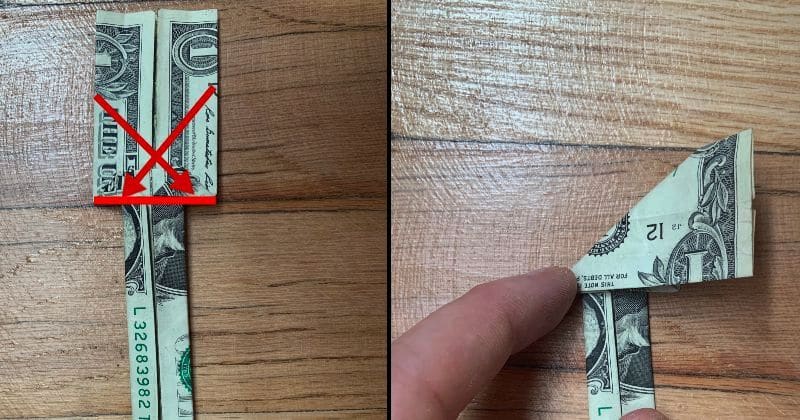
You fold the top left down and crease it.
Then open it up to do the same thing on the right side.
Again the whole point of this is to make a crease on both folds and then unfold it.
The creases you make will look like an “x,” as shown in the next picture.
Step 10: Fold the top down over the sword and crease it
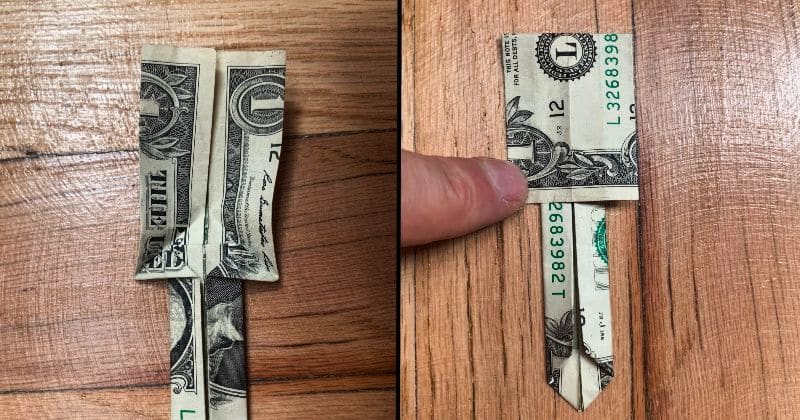
Bring it as far down as it will naturally fold over the middle edge and crease it.
Once you make the fold and crease it, you then unfold it.
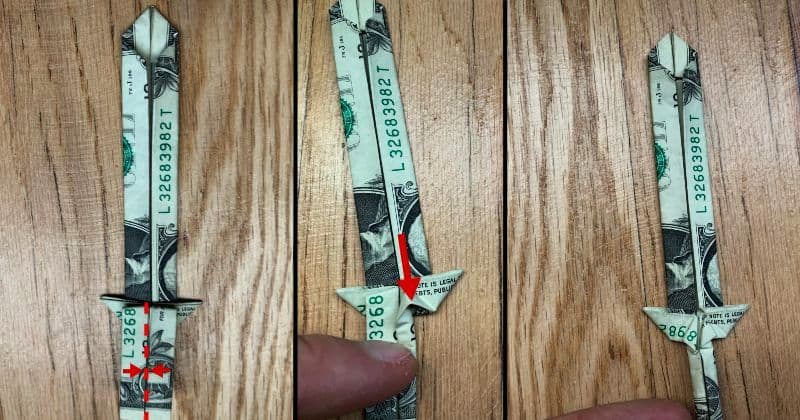
Step 11: Fold the handle in and squash and fold it down
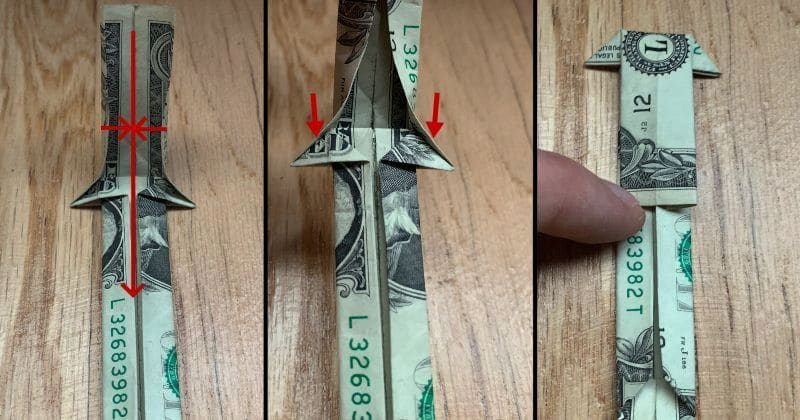
Start by folding the handle into the middle where the edges meet.
You will then have to make sure to squash fold the middle pointed edges to make sure they are flat as you fold it down.
Step 12: Fold the handle back up to make a crease
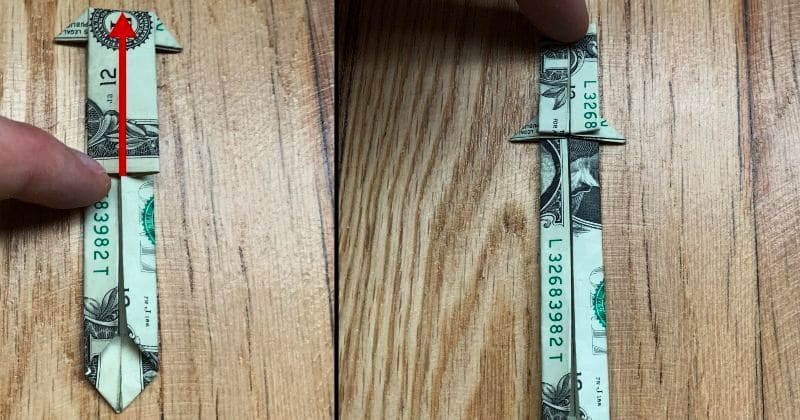
Make the fold to crease where the handle meets the blade part of the sword.
Step 13: Round the handle by folding it in
Fold the handle in half lengthwise, and squash fold the little points that are made.
This part is never gonna look the same twice; you can just shape the handle to your liking.
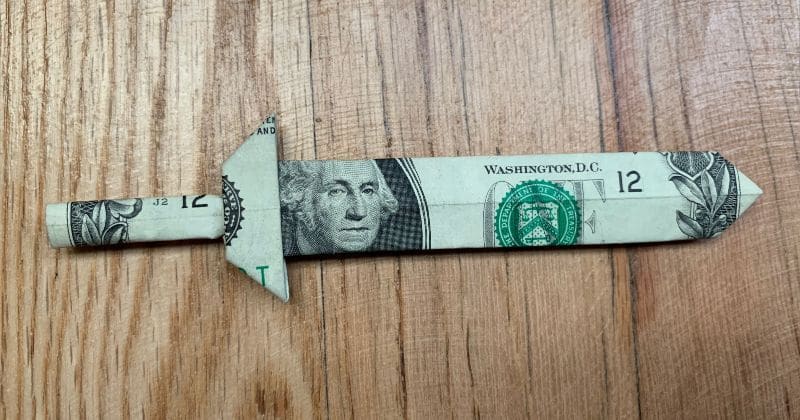
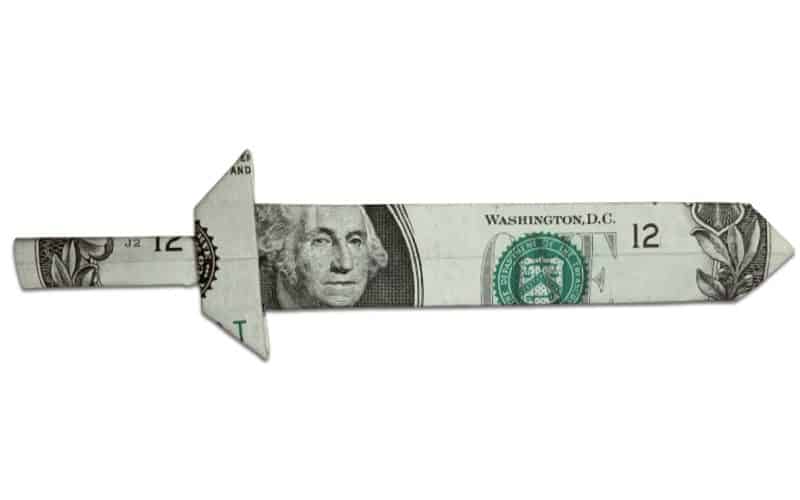
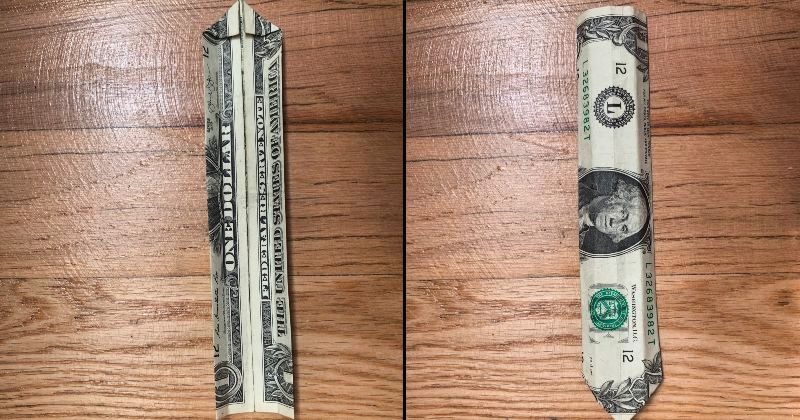
That’s it! You now have a finished dollar bill origami sword!
- Practice folding, or designing your own money origami with the help of fake bills
- Double-sided and Actual Size - Choose from $1, $5, $20, $50, or $100 design
- Use this handy little origami tool to score, crease, smooth, or burnish paper, tissue, and cardboard.
- This 6-inch bone folder is made from durable genuine ox bone, not inferior plastic or wood.

- High-Quality Origami Paper 200 Sheets 20 Vivid and Vibrant Colors
- Same Color on Both Sides, Holds a Crease, Won't Curl at the Edges
- Most Popular Size 6 Inch by 6 Inch
You may also like these other money origami guides: