
Gifting a handcrafted money origami tulip would be a thoughtful and unique way to brighten someone’s day. Folding the paper bill into an artistic tulip shape adds a personal touch and thoughtful care.
In this guide, we will go over each step of folding a dollar bill into a money origami tulip. This is a beginner-level project that can be made in 5-10 minutes.
You may also like these other money origami guides:
Let’s get started!
How to Fold a Dollar Into a Money Origami Tulip
For this guide, I used a one-dollar bill for the tulip and a green sheet of square origami paper for the stem.
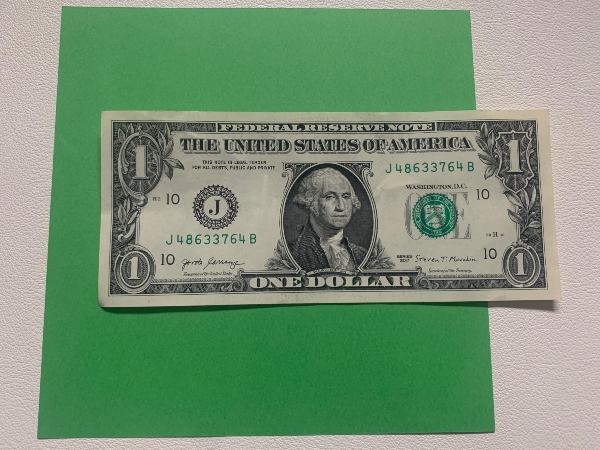
For this tulip, we will start on the front of a one-dollar bill.
STEP 1: Fold the bill in half from left to right
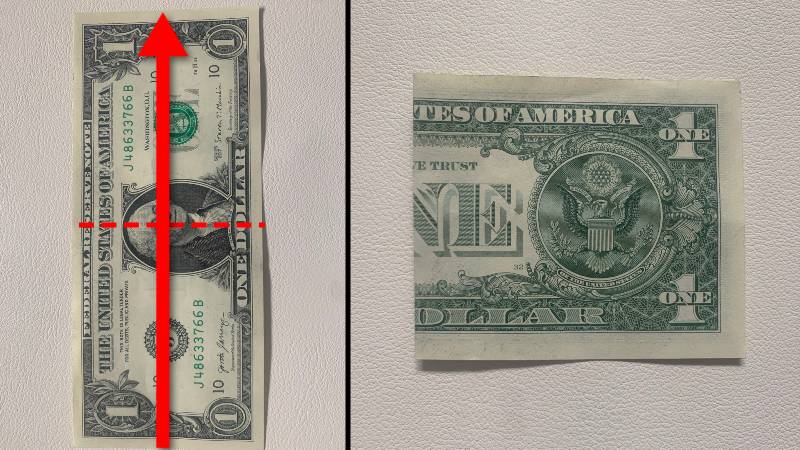
Once you have folded the bill in half to make the crease, unfold it again.
STEP 2: Fold the bottom edges to meet the crease
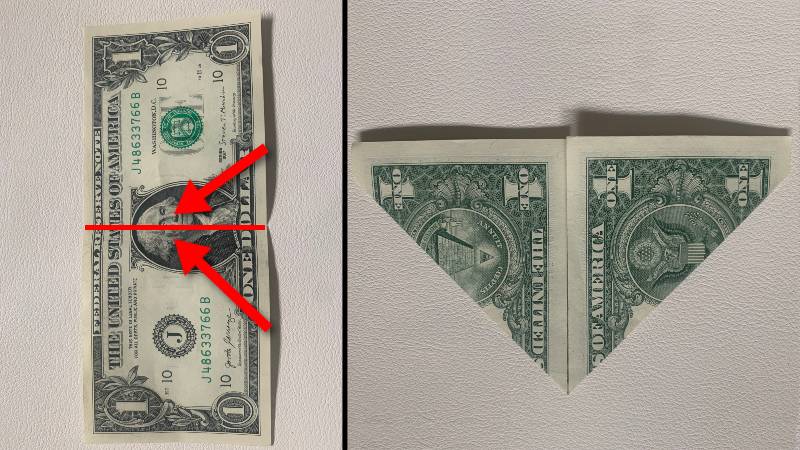
Make sure to run your finger along very fold to ensure a good crease is made.
Flip this bill over before moving to the next step.
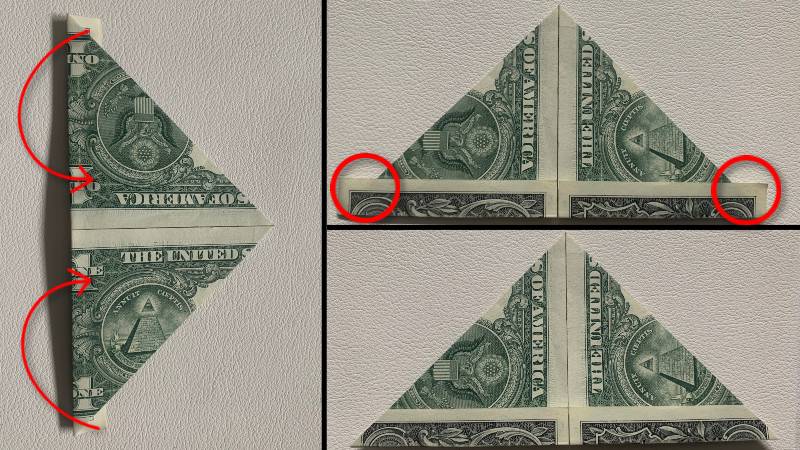
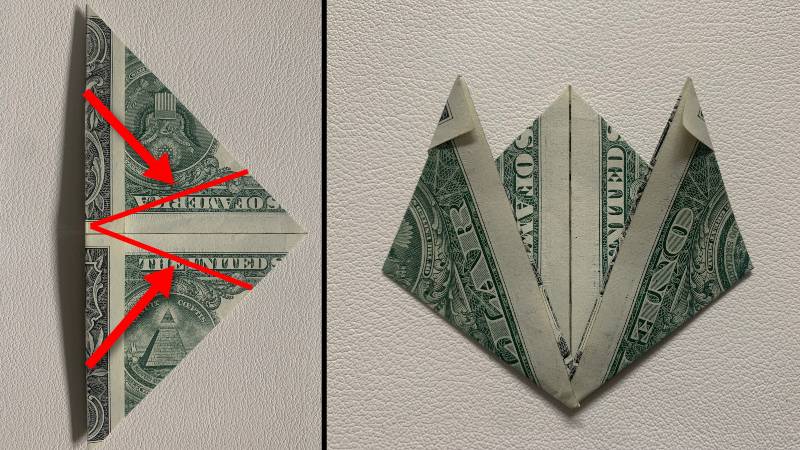
STEP 3: Fold the bottom flaps up

Flip this bill over before moving to the next step.
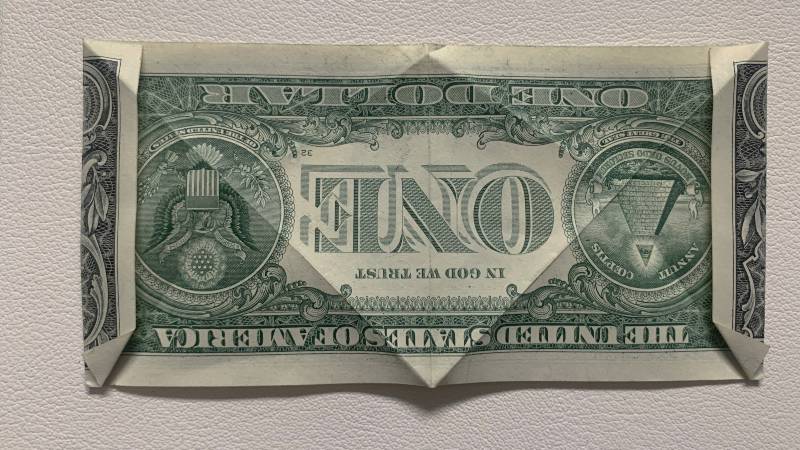
STEP 4: Fold the flaps to the other side and tuck the edges behind
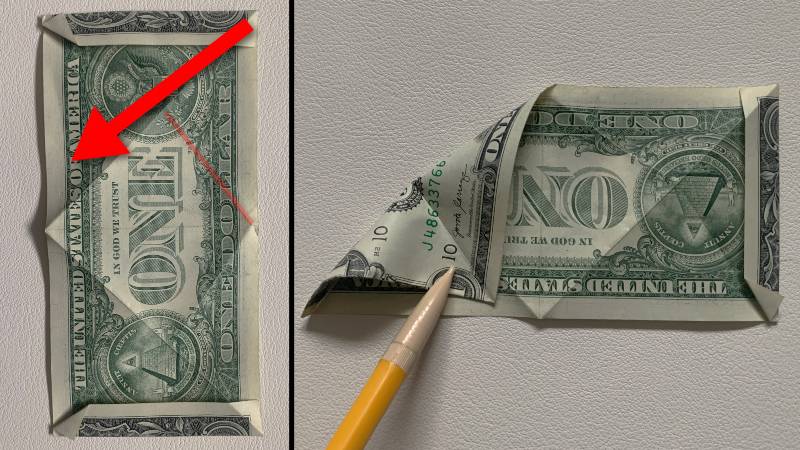
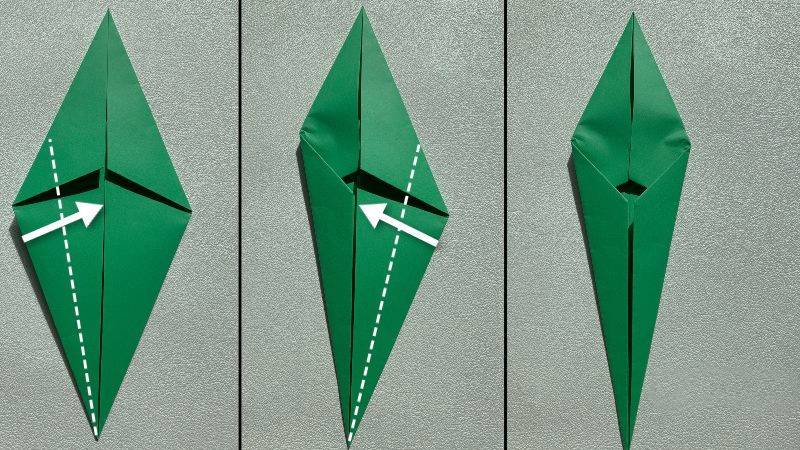
STEP 5: Fold the bottom edges up at an angle
This is not how it is going to stay, the purpose of this fold is just for the creases.
STEP 6: Unfold the bill almost all the way
STEP 7: Use the creases to reverse fold the tulip
Fold one side down without creasing and then flip the bill over for the next step.
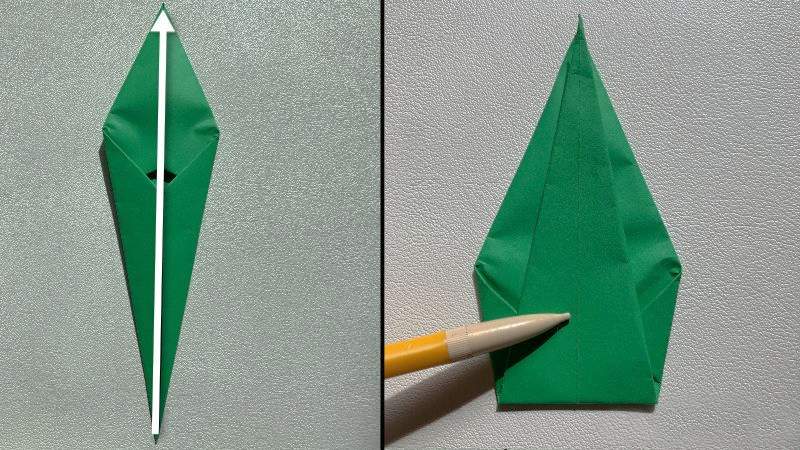
For steps 7-9 we are just using the crease lines that are already on the bill.
STEP 8: Fold that side down on the front
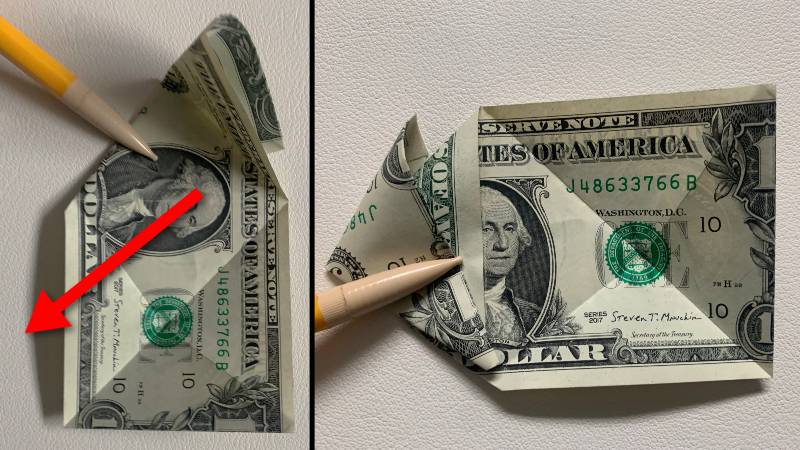
This is where you can shape one side of the tulip and crease it down flat.
STEP 9: Repeat the process for the other side of the bill
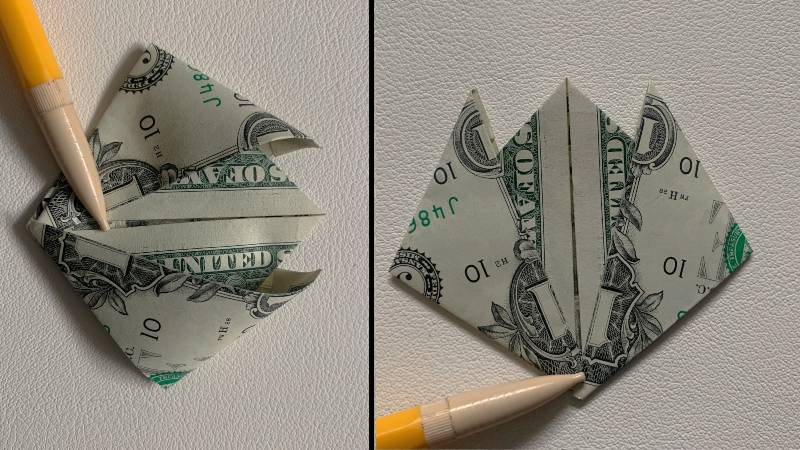
Shape this side as evenly as you can with the other before creasing it flat.
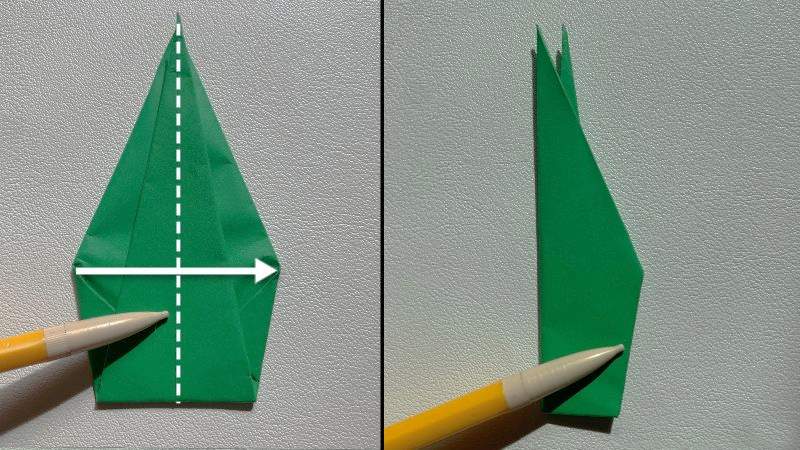
Now we will fold the stem and leaf with the regular origami paper.
STEP 10: Fold this paper in half from point to point
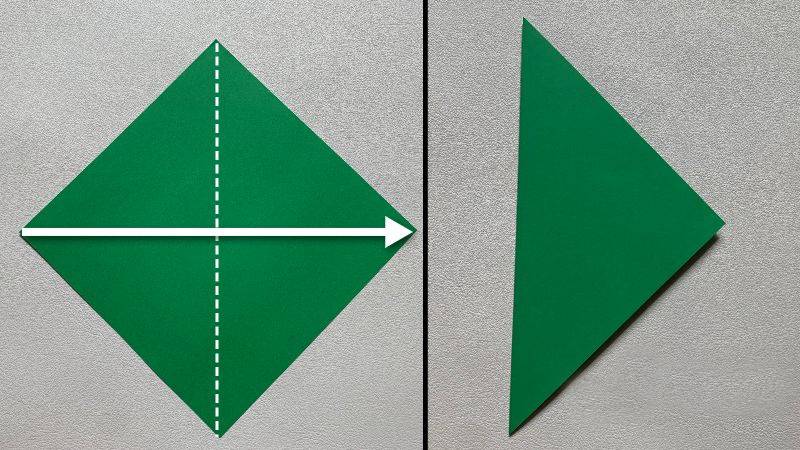
Unfold this after you have completed the fold.
STEP 11: Fold both bottom edges to the center crease
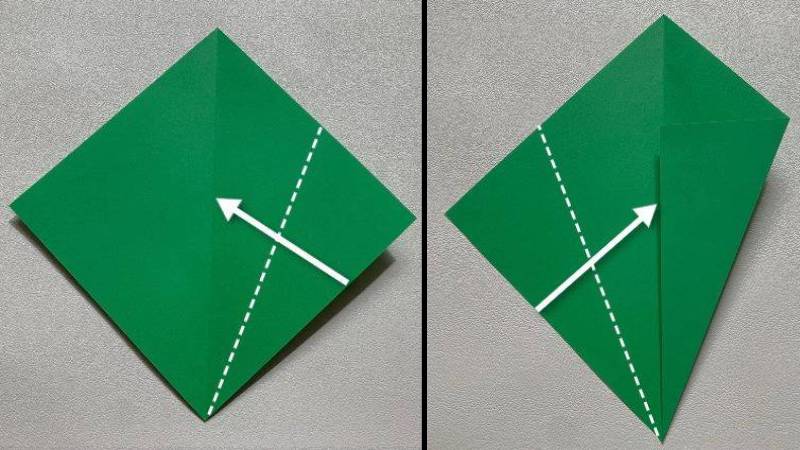
With the two points of the paper at top and bottom, bring the lower left and right edges to the middle crease.
Rub the edges of the creases well after both folds.
STEP 12: Fold both top edges to the center crease
Bring the upper edges down to meet the middle creases on at a time.
Be sure to crease the edges of the fold to keep things flat.
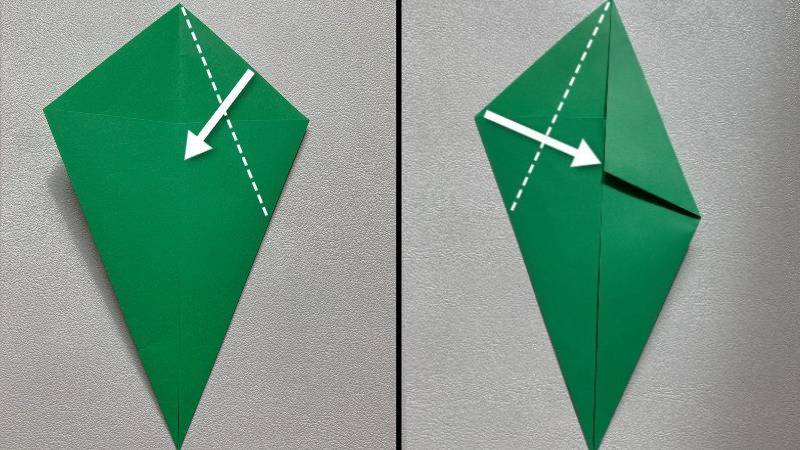
STEP 13: Fold the bottom edges to the center again
Bring the lower edges to meet at the lower half of the middle crease.
STEP 14: Fold the paper in half from bottom to top
Take the entire lower half up to make the lower point meet the top one.
STEP 15: Now fold it in half from left to right
Fold the paper directly in half from left to right.
STEP 16: Pull the inner stem away to give it shape
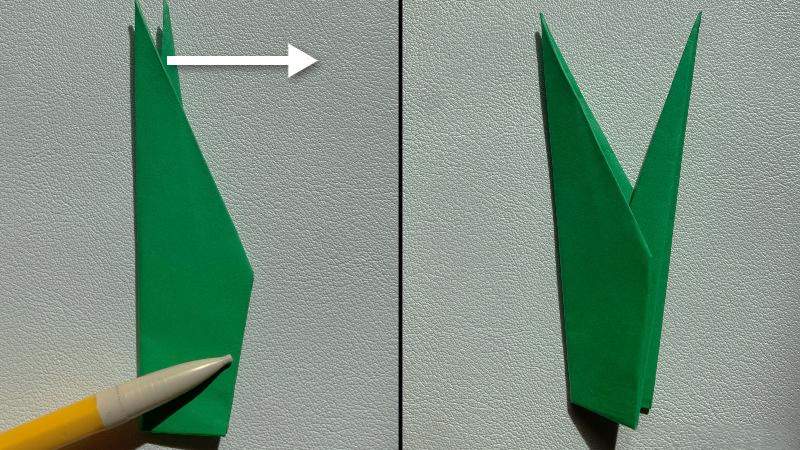
Separate the inner stem a bit to finish shaping.
Now you can tape the stem in the tulip and you are done!
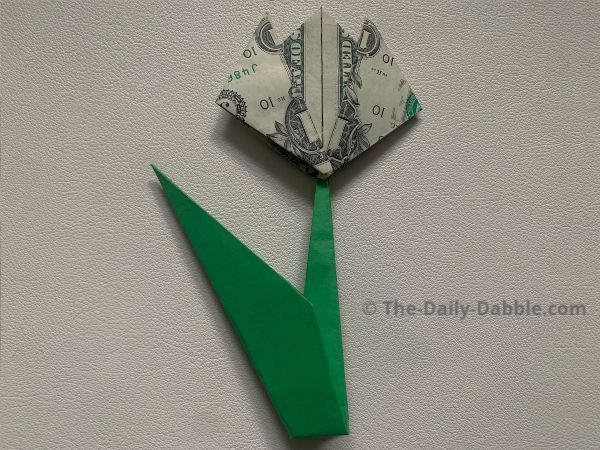
Learn how to make more flowers like this with by visiting our money origami flowers collection
Check out our easy origami tulip guide to learn how to make this out of all paper instead!
Happy Folding!