Follow this step-by-step to make a dollar bill origami letter O.
There are 10 steps that will take about 5-10 minutes to complete.
You can find tutorials for all the letters in our money origami alphabet letter guide.
Let’s get started!
STEP 1: Fold the dollar lengthwise in half
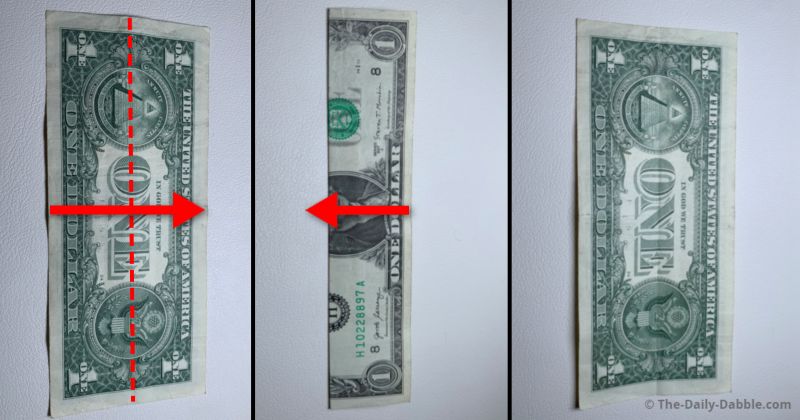
Starting on the backside of the bill, fold it in half lengthwise.
Rub the folded edge to make a visible crease and then unfold it.
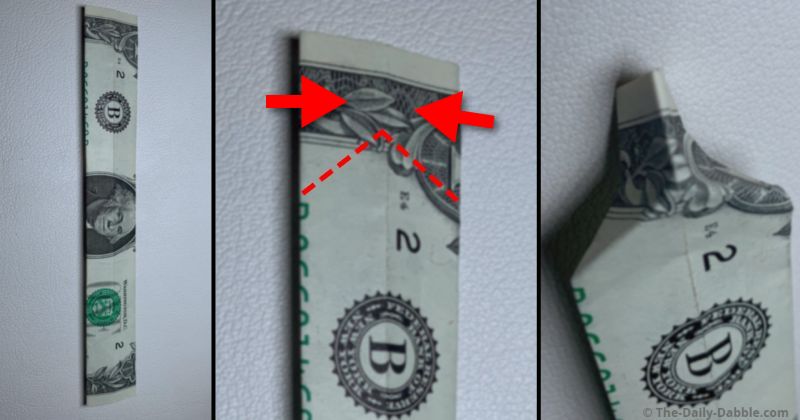
STEP 2: Make two even lengthwise folds
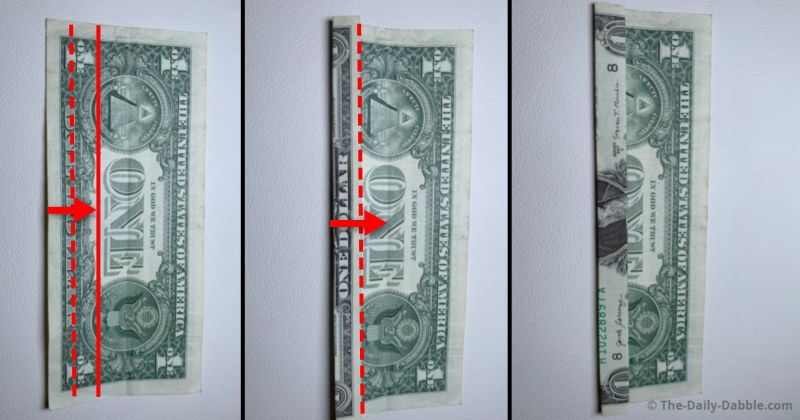
Starting on the lower half, make two even folds to the crease line.
The first fold will go to the solid red line shown.
Use the dashed line as a guide for where the crease will be.
The second fold will go to the center crease made in step 1.
STEP 3: Mirror these folds on the upper half
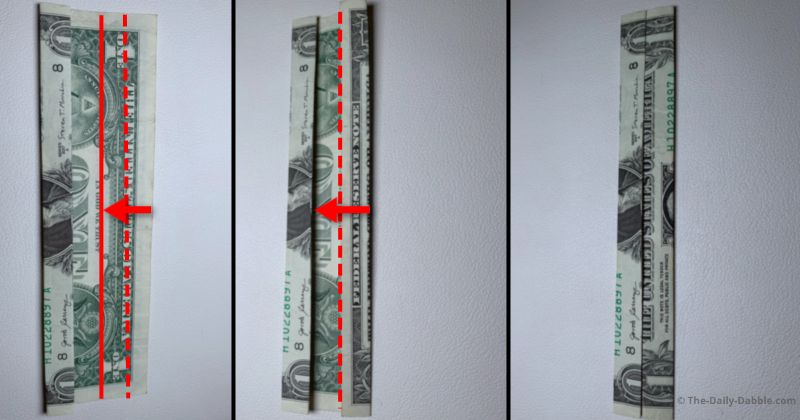
Make another two even folds to the center of the bill.
Rub the edges of each fold well to ensure everything is flat and even.
STEP 4: Make pointed folds on the left edge
We will start folding on the face side of the bill.
On the left side, make two creases forming a point.
Pinch the end together and fold the tip under the bill a bit.
STEP 5: Make another two creases forming a point
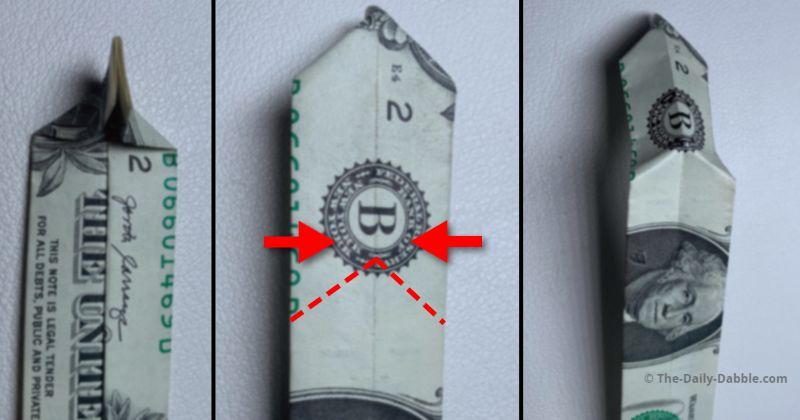
Just like the previous step form another two creases to form a point.
Use the dashed line again to get an idea of where the crease will be.
Pinch the left side and push it over a bit as shown in the last picture.
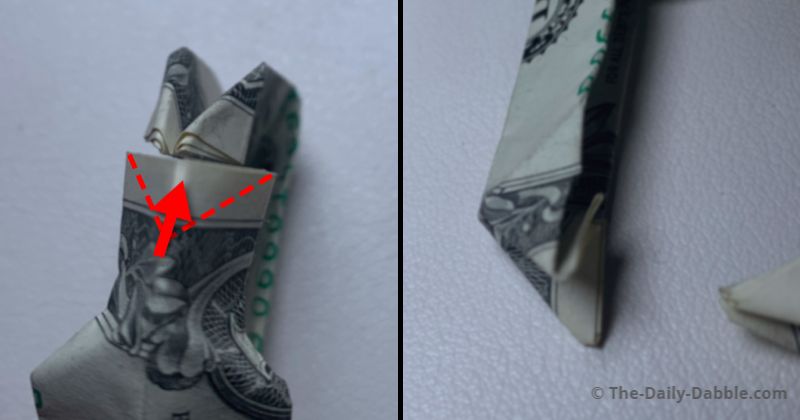
STEP 6: Form another two creases at the center
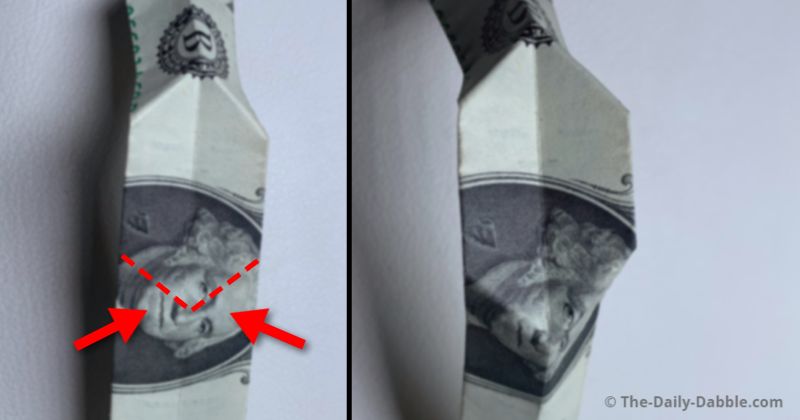
Make another two creases pointed to the right, at the center.
This time pinch the right side and fold it under a bit.
STEP 7: Make another fold further right

Pinch the middle and form the left pointed creases.
Push the right end over a bit; we will make another fold on it in the next step.
STEP 8: Fold the inner edge flaps outward
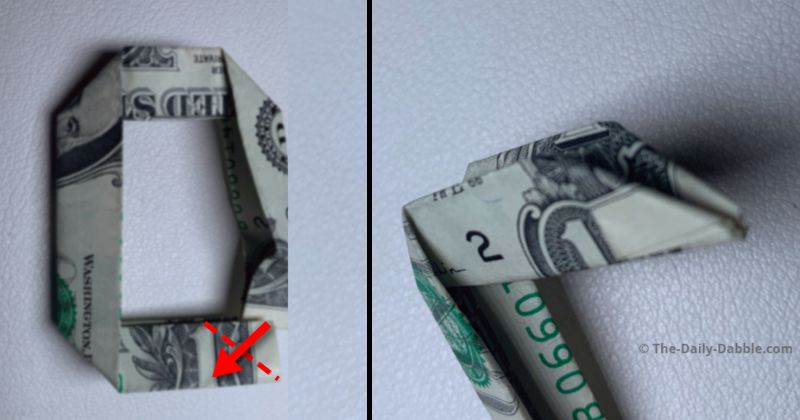
On the same side, fold the inside corner flaps out.
Be sure to fold both outward, as this is how the letter will connect to itself.
STEP 9: Fold the middle in of the other tip
Press the center of the other tip in while forming a point inward.
This will allow you evenly place the other side in and connect them.
STEP 10: Connect the flaps and flatten the O
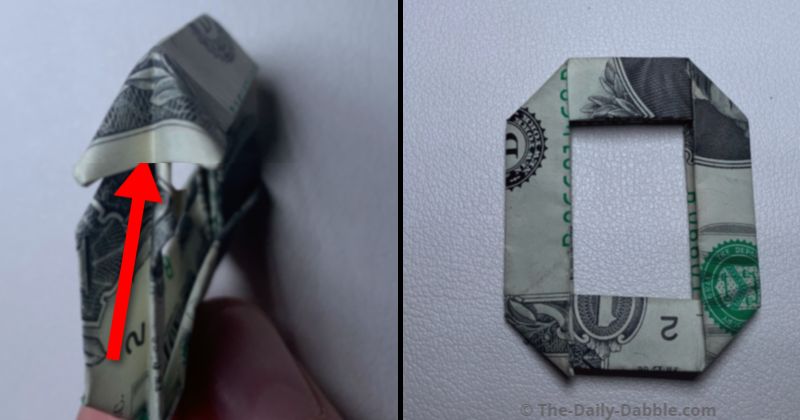
Slide the end formed in step 8 into the last, and then flatten the bill.
If something looks off you can adjust corners and lengths as needed.
Now you know how to fold a money origami letter O!
PREVIOUS: Dollar Bill Origami Letter N
NEXT: Dollar Bill Origami Letter P
ALL: Money Origami Alphabet Letters
Happy Folding!