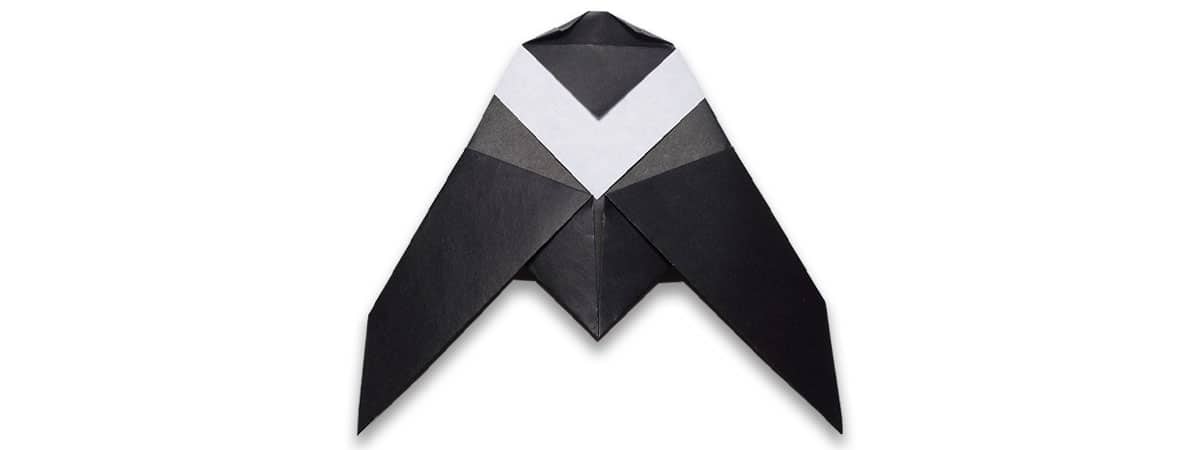
Believe it or not, the fly symbolizes motivation, courage, and the will to power through even the most difficult trials.
In this paper-folding tutorial, you will learn how to fold an easy origami fly in 3-5 minutes.
After folding this fly, consider checking out our growing collection of other easy origami bugs!
Let’s get folding!
To make a paper fly, you will need a single square piece of paper. You can use regular printer paper cut into a square; however, I recommend origami paper for better-looking folds and that traditional origami feel!
In this tutorial, I’ll be using a multi-color 6 x 6 sheet of origami paper, but you can also use single-colored paper.
1. Flip the paper color side down
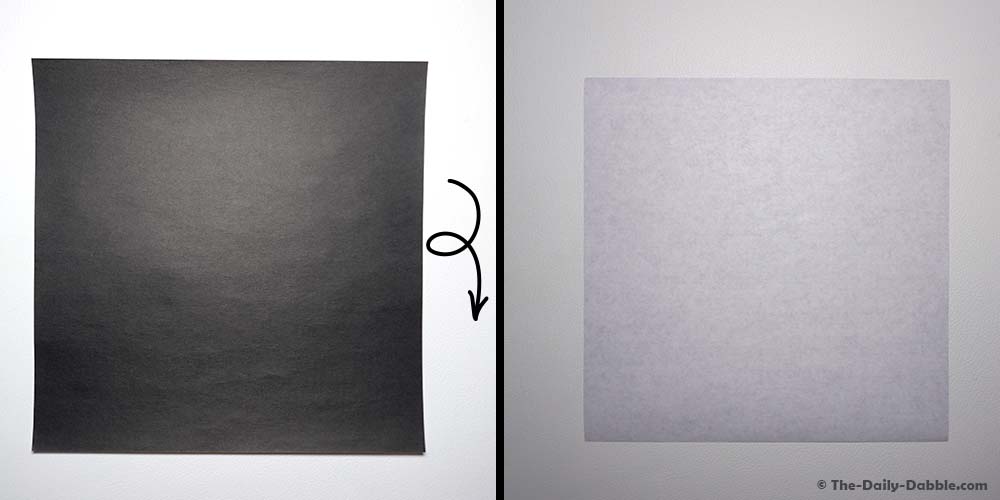
If you are using dual-color origami paper, you’ll need to decide the color scheme of your fly.
Whichever color is facing down to start will represent the fly’s body. Whichever color is facing up will dictate the color of the stripe.
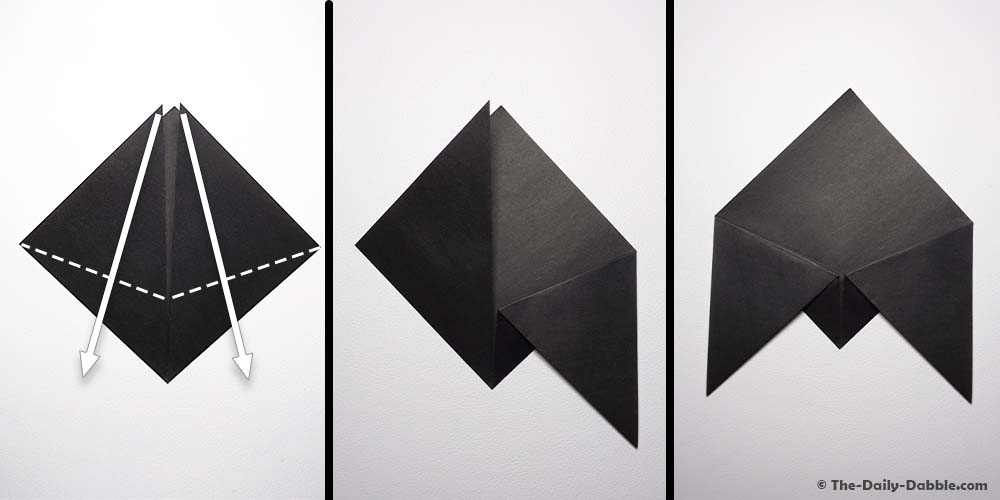
2. Fold in half diagonally
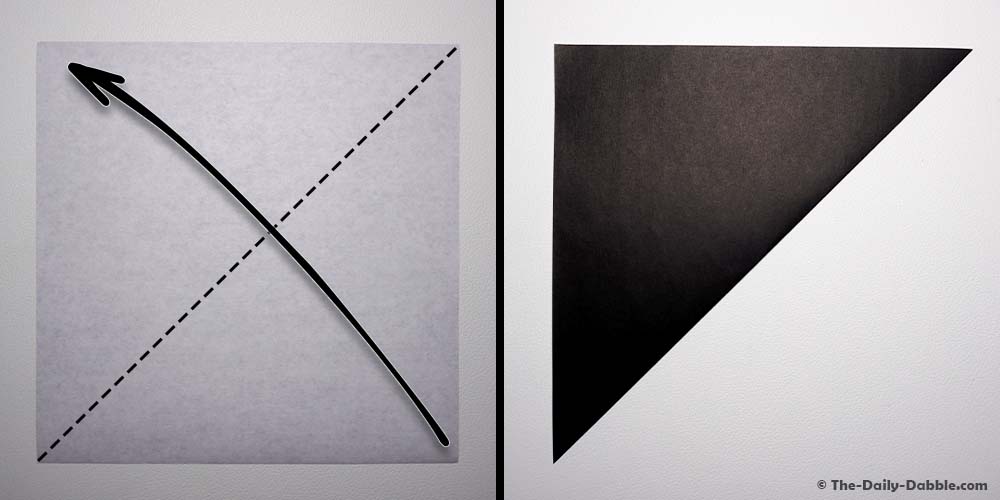
Fold the sheet in half diagonally—bringing the bottom-right corner to the top left corner.
3. Fold the corners to the top
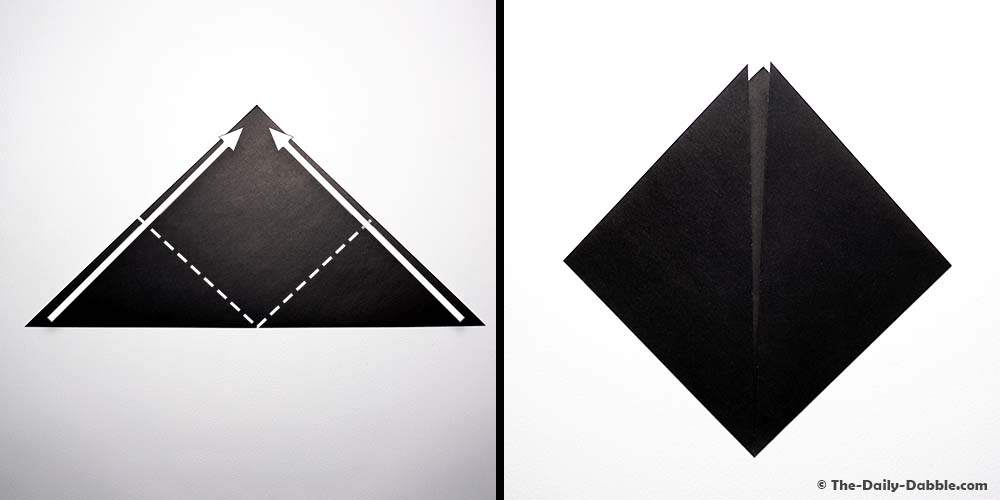
Rotate the paper so that the long side is down and fold the left and right corners to the top corners, aligning them with the center crease.
Origami 101: You have now folded the square base, one of the many common bases that can be used for many different designs. Learn more about origami bases here.
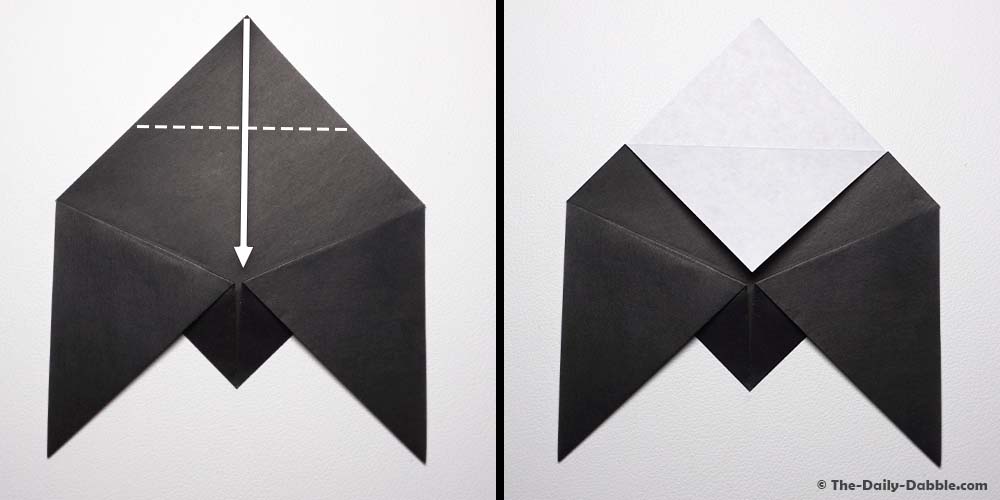
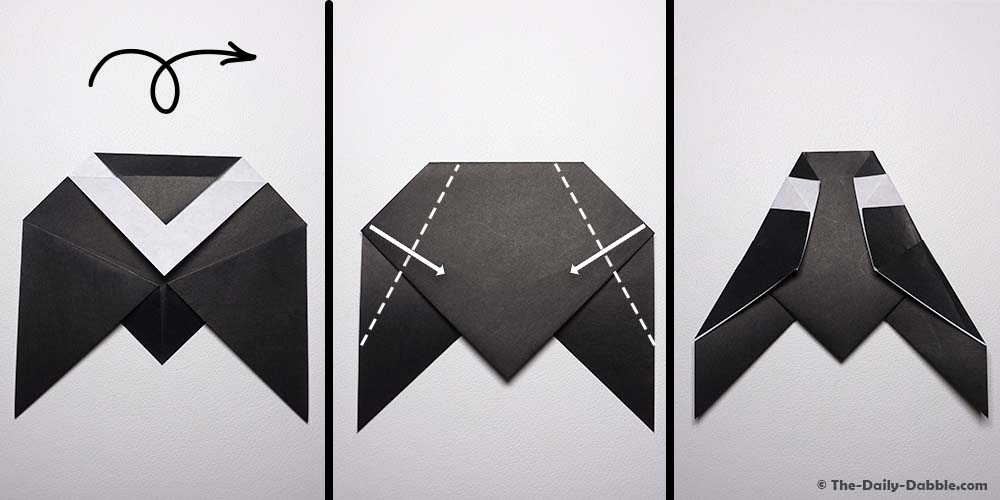
4. Fold the left and right points down at an angle
To make the wings, fold the left and right points down and outward.
You can adjust these folds to give your fly larger or smaller wings.
5. Fold the top-layer flap down
Grab the upper layer of the top point and fold it down to meet the creases of the wings. You can also play around with this fold to make them fly longer or shorter.
6. Fold the top corner down, then unfold
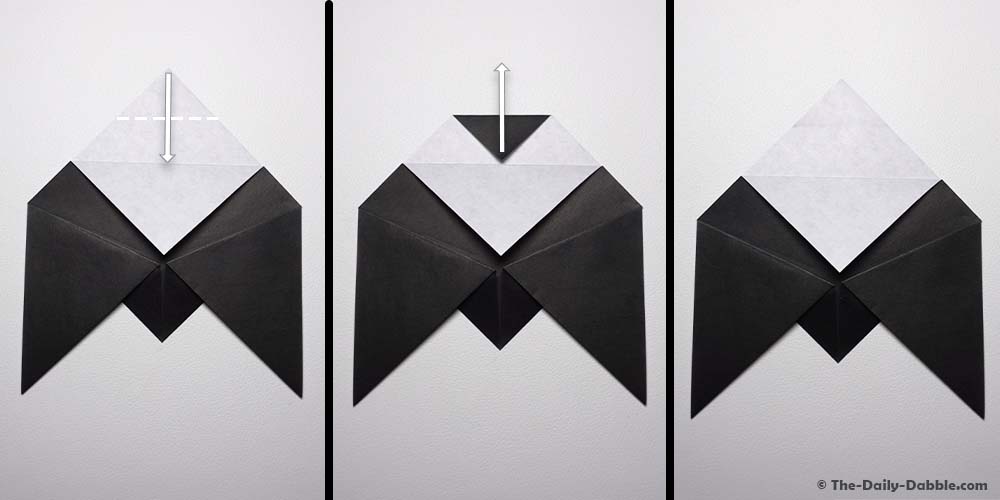
Next, fold the top corner down to the top of the last fold. Crease well and then unfold.
7. Fold the top corner down, aligning the creases
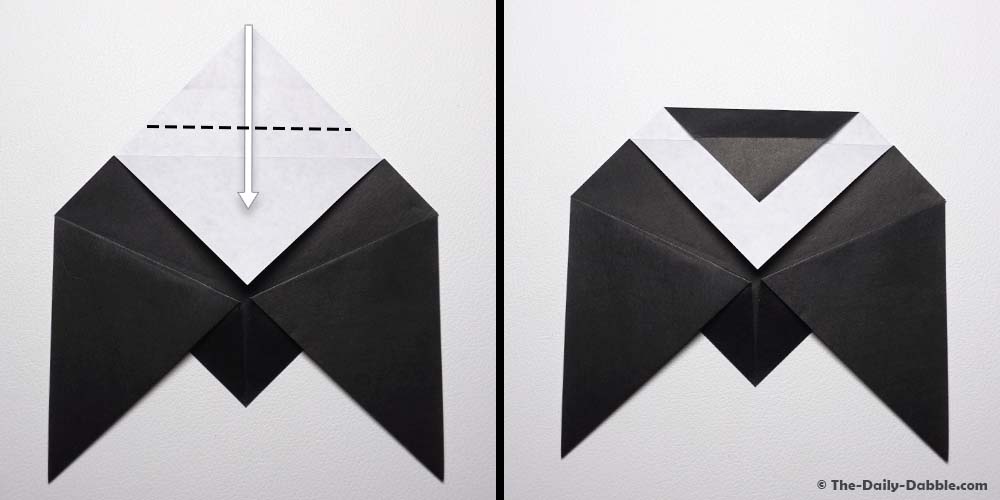
This time fold the top corner down further and align the crease from the last fold with the top edge of the lower flap.
8. Flip over and the sides in
Now flip the paper over and fold the left and right edge inward and at a slight angle. Take a moment here to crease everything well.
9. Flip over and fold the top corners down
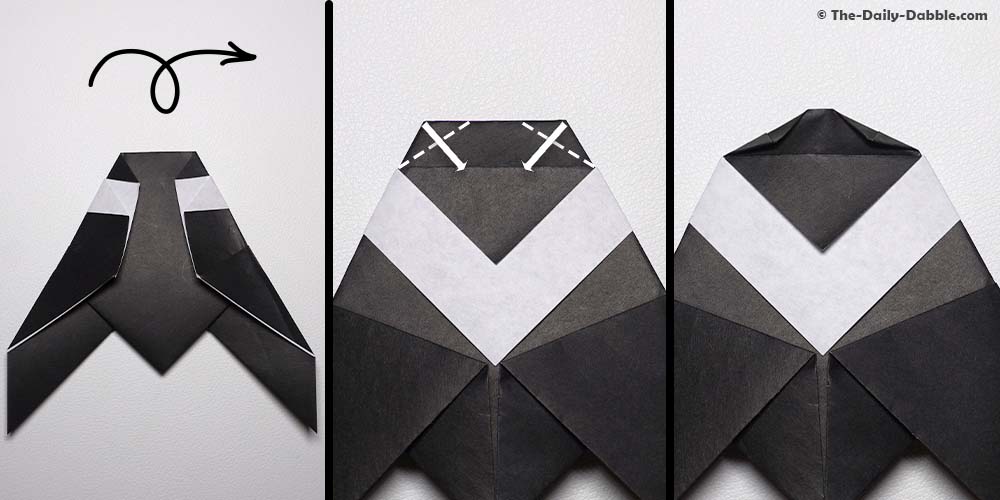
Let’s finish up the fly by making the eyes! Flip the paper over again and bend the top left and right corners down to the upper crease.
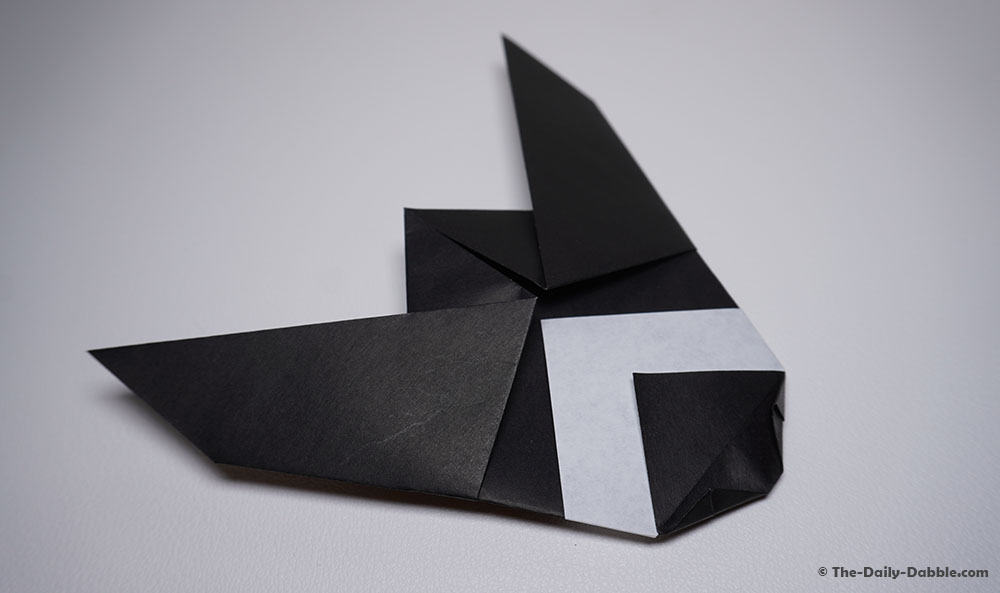
And there you have it, a traditional and easy origami fly!
Like the looks of this remarkable paper fly? Then you’ll probably enjoy our guide on the origami cicada! The cicada’s design is very similar to the fly but has its own unique traits and will make a perfect addition to your origami collection!
If you found this guide helpful, please consider helping us out and sharing it with your friends and family, and see more easy origami ideas to fold.
Thanks for following along, and happy folding!