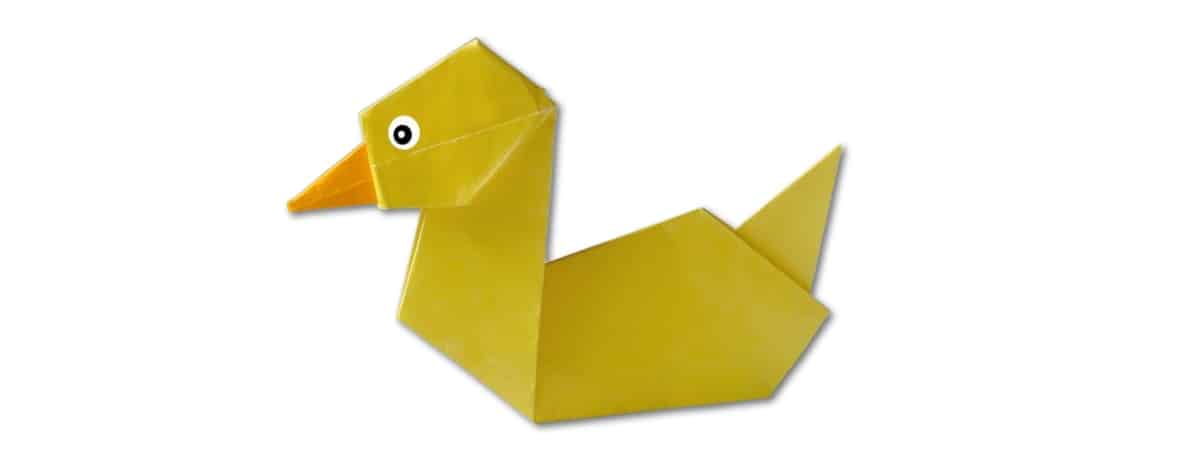
Learn how to fold an origami duck with these detailed folding instructions.
This guide has a few intermediate-level folds but is mostly easy and can be completed in under ten minutes.
The duck, once finished, stands up on its own and can be decorated to your liking.
Let’s get folding!
For this guide, we use one sheet of square origami paper that is yellow on one side and white on the other.
Here is a guide to turn rectangle paper into a square for origami, if you don’t have any square sheets on hand.
We will start on the white side of the paper to ensure the duck is yellow.
1. Fold the paper in half from one point to another

Make a crease in the paper from one point to another and then unfold it again.
2. Move the paper in half, but only crease half
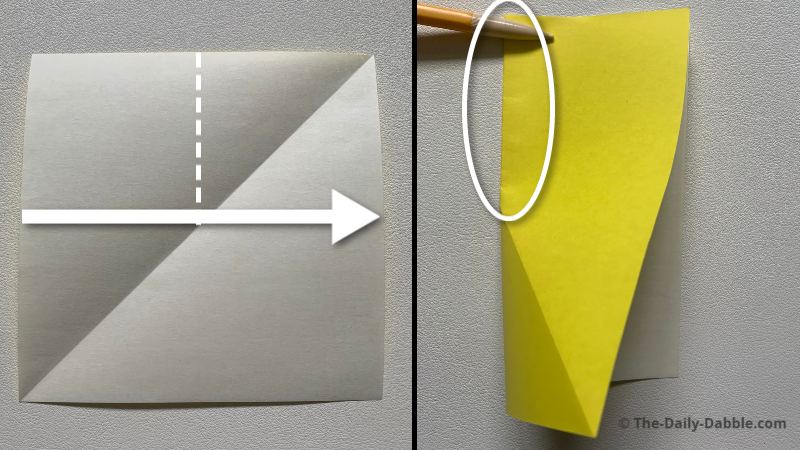
Act like you are folding the paper in half from edge to edge and then just make a light crease.
The crease will be on the upper half from the top to the diagonal line.
After making the half crease, unfold the paper again.
3. Fold the bottom right to the line shown
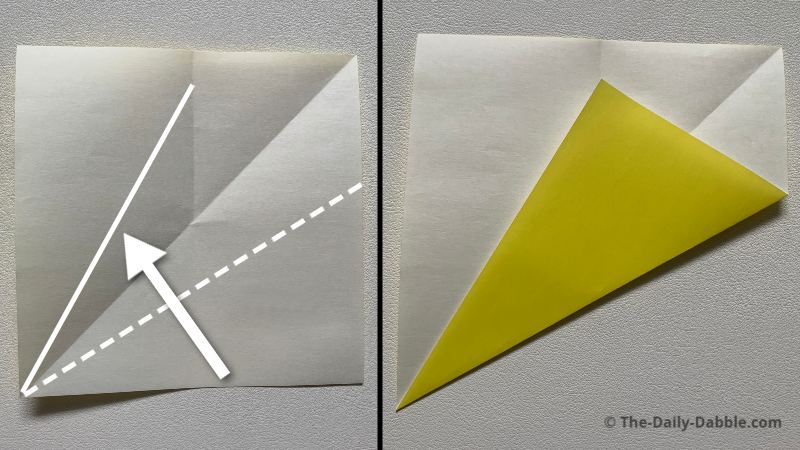
We can use the crease we made in step 2 to guide where the bottom right point will end up.
Unfold the paper again after completing this fold.
4. Fold the left edge to the crease you just made
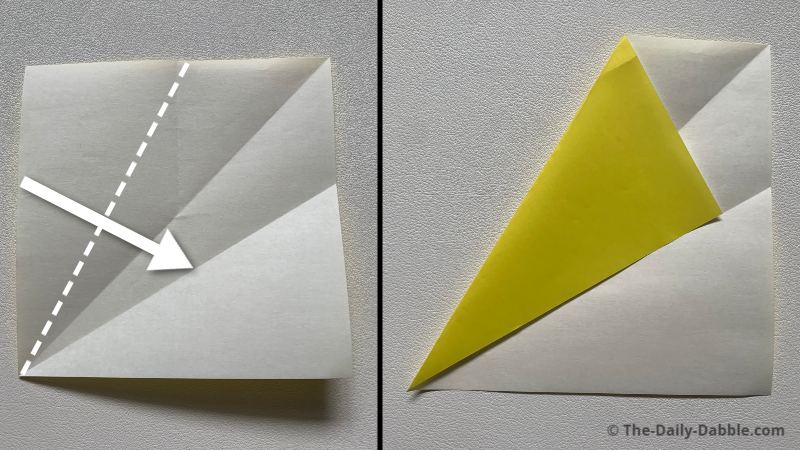
Use the crease just made as a guide to fold the left edge.
We will again unfold this after the crease is made.
5. Fold both bottom edges to the diagonal creases
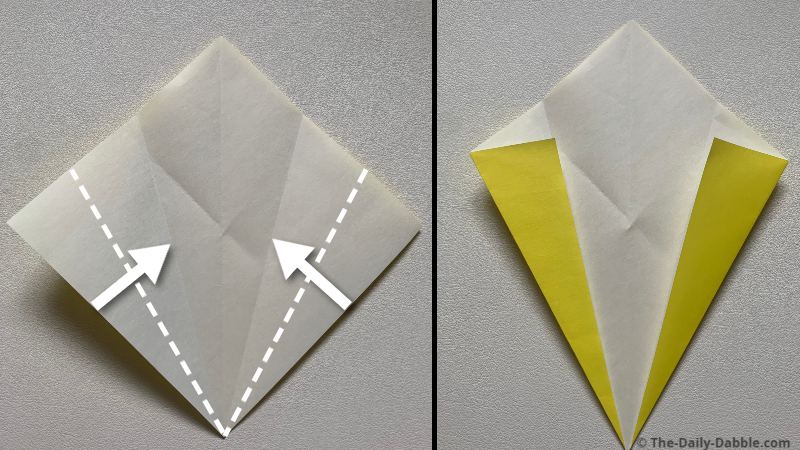
Bring the bottom edges to their closest diagonal crease.
6. Fold both bottom edges to the center crease
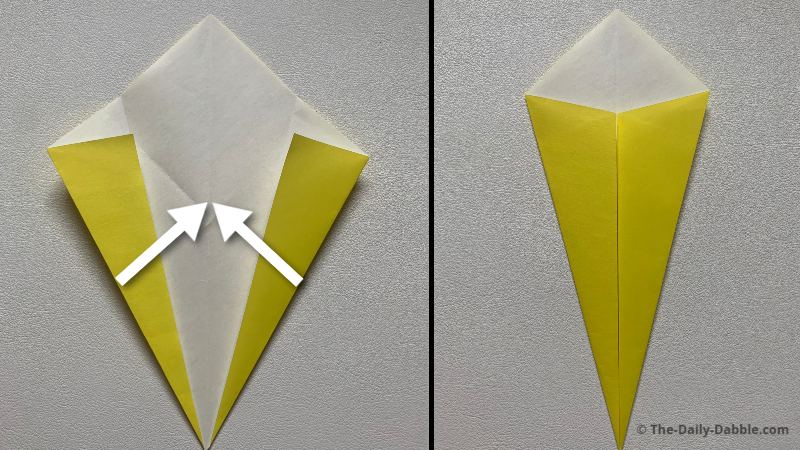
Bring both lower edges to the center crease and rub the edges firmly.
7. Bring the bottom point to the top
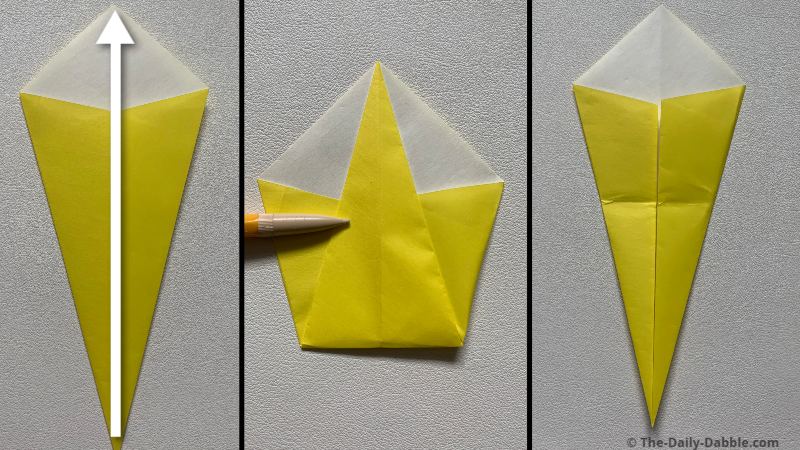
After folding the bottom to the top to crease it, unfold this step.
8. Fold the bottom tip to the crease just made
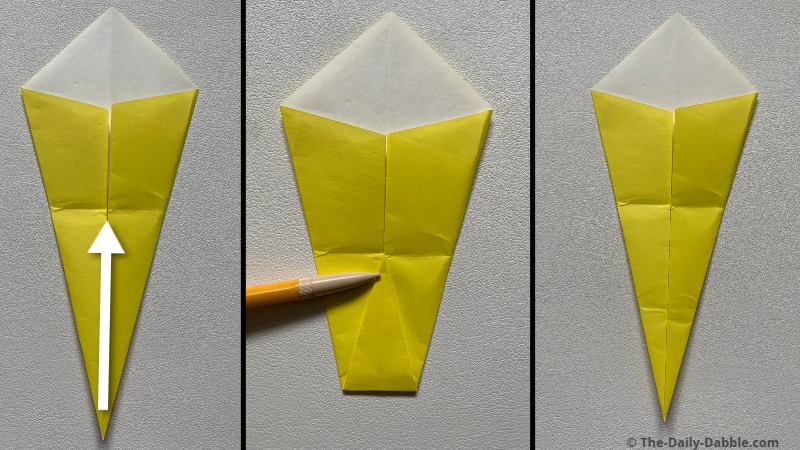
Once you have folded the bottom tip to the crease, unfold this step too.
9. Open the top tip and squash fold it down

Open up the top tip a bit and fold down the inner edges to meet the outer edges.
Flip the paper over after completing this step.
10. Bring the top edge down, then mountain fold in half

Bring the top edge down on the existing crease and then mountain-fold the paper directly in half.
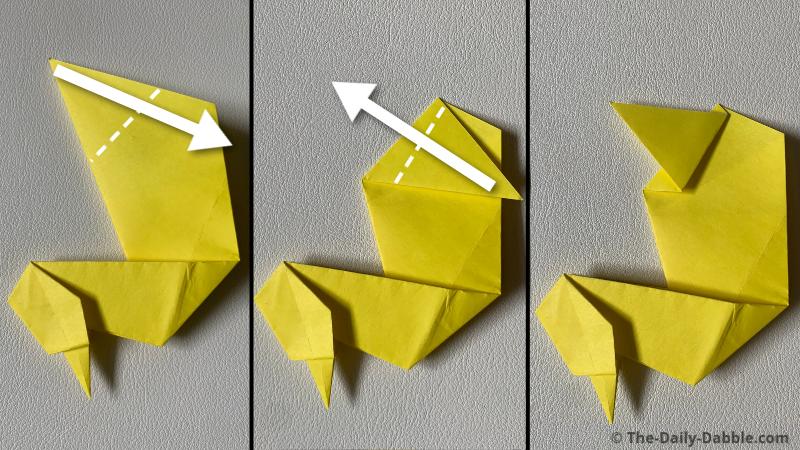
11. Fold the neck up to give it shape
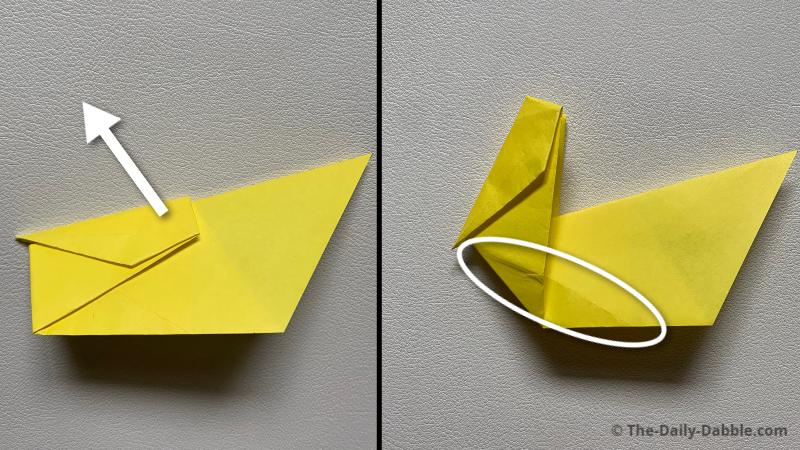
You can fold the neck wherever you want, but a good baseline is matching the creases, as shown in the right picture.
12. Move the head up a bit to shape it
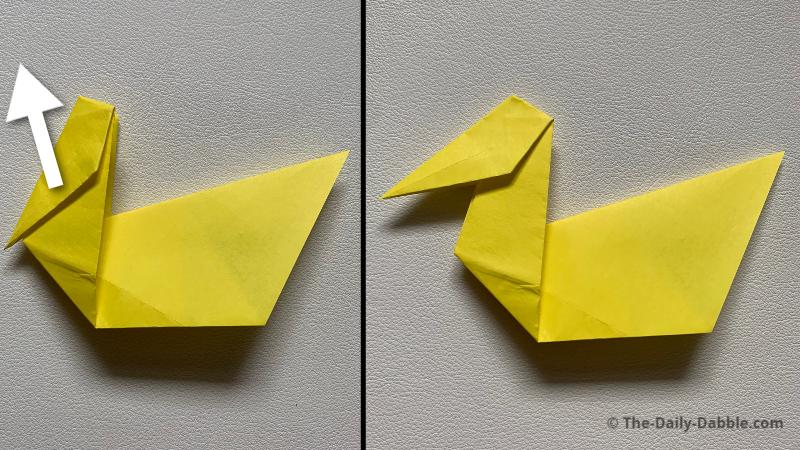
Move the head up a bit and push down on it to get it to stay.
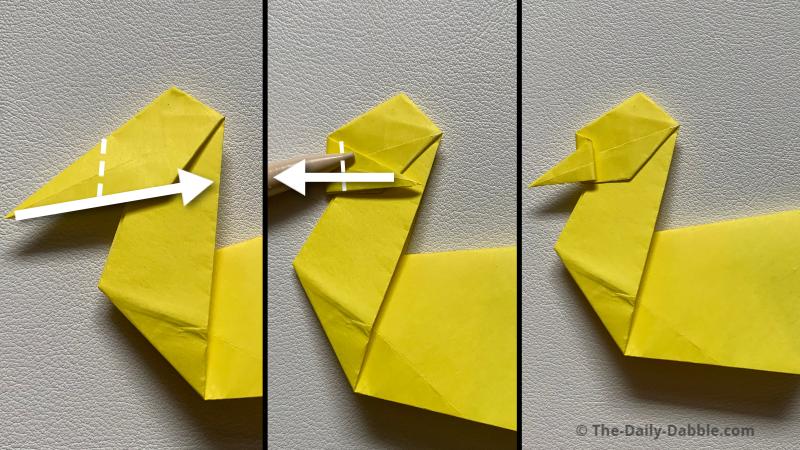
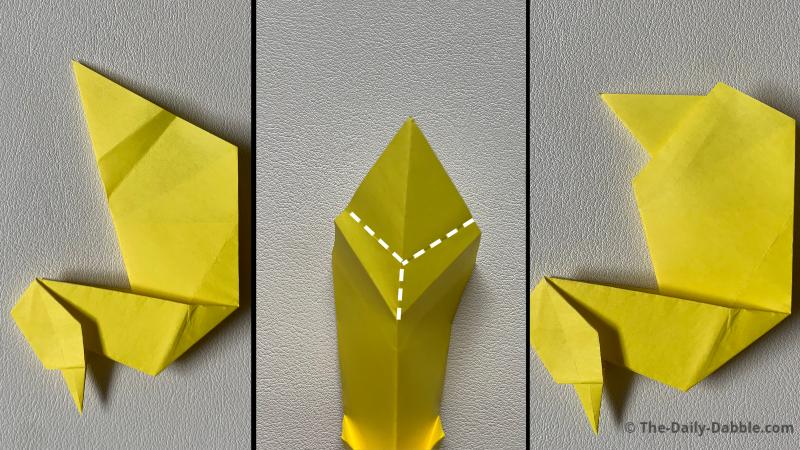
13. Fold the beak to the left and then back right
 <
<
Bring the beak to the back of the head and crease it down hard.
Then fold it back over the top of a little piece to the left.
14. Open up the beak and reverse fold it inside
Use the creases made in step 13 to reverse fold the beak inside.
No two ducks will be folded exactly the same, so you just have to shape it how you like.
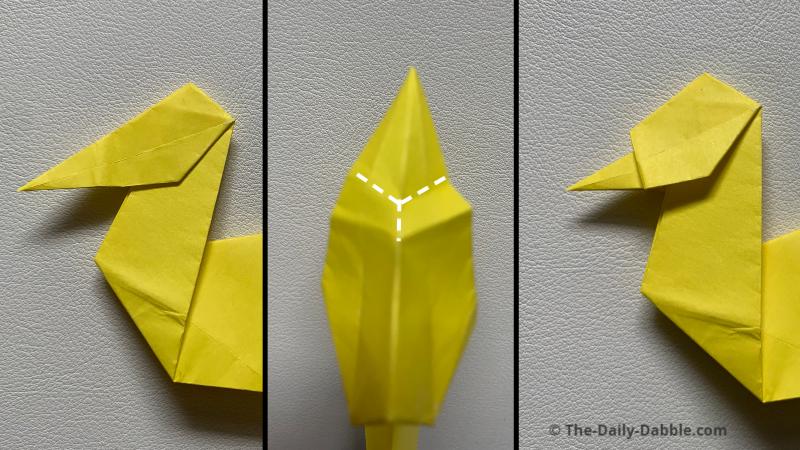
15. Fold the tail back and forth like the beak
Use the pictures as a guide for basic marks to know where to fold the tail to.
16. Open the ducktail and reverse fold it inside
After opening up the tail, the middle crease will be pushed inside the body of the fold.
Now you have your own paper origami duck!
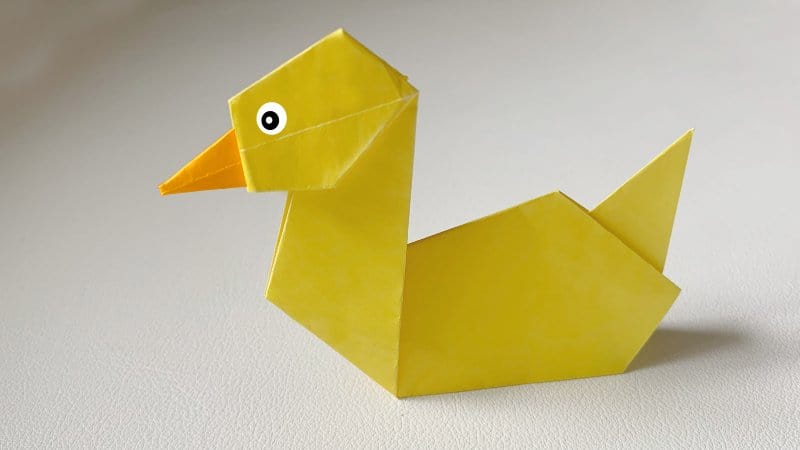
I chose to color add an orange piece of paper to the beak, but you can simply color it.
Adding an eye or other features also adds a little character to your creation.
If you are looking for another folding project, check out our easy origami bird instructions for another awesome design.
Happy Folding!