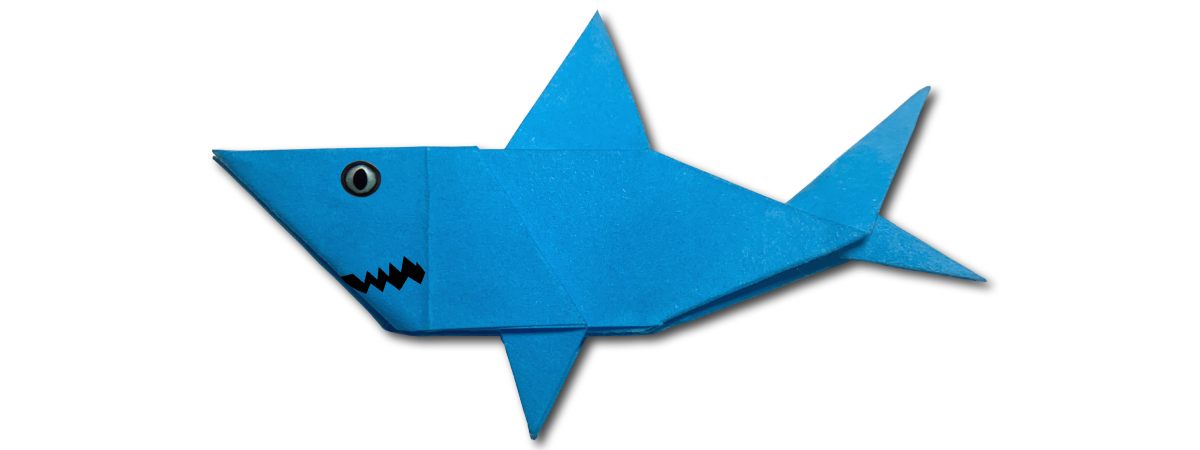
This folding tutorial teaches every step of how to make an origami shark.
The shark design is mostly easy with only a few tricky folds that a beginner can certainly do.
I used 15×15 cm square origami paper, but the bigger the sheet, the easier it will be to fold.
If you don’t have any square origami paper, here’s how to make regular paper into a square.
When using double-colored paper, start with the color you want the shark to be down.
Let’s get folding!
1. Fold the paper in half diagonally
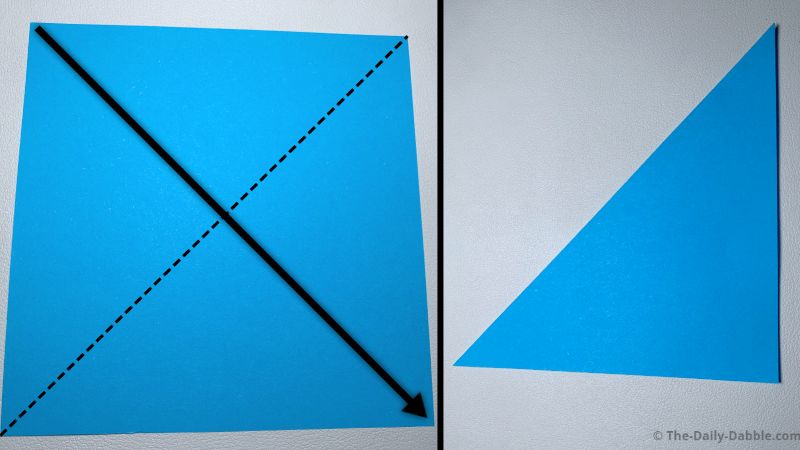
Fold the paper in half from one corner diagonally across to another.
Make and rub the crease, then unfold it.
2. Fold diagonally the opposite way
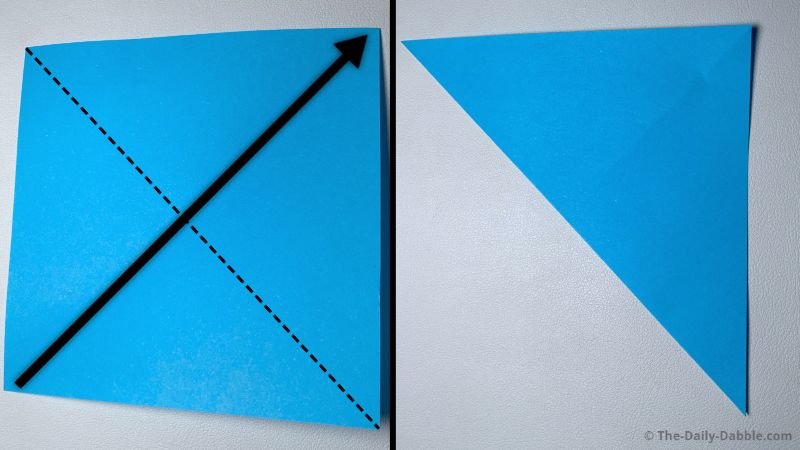
Fold it in half again from the other corners to make another crease.
You should now have two even creases that form an X.
Don’t unfold this or refold it if you already have.
3. Form a little crease by folding the top layer
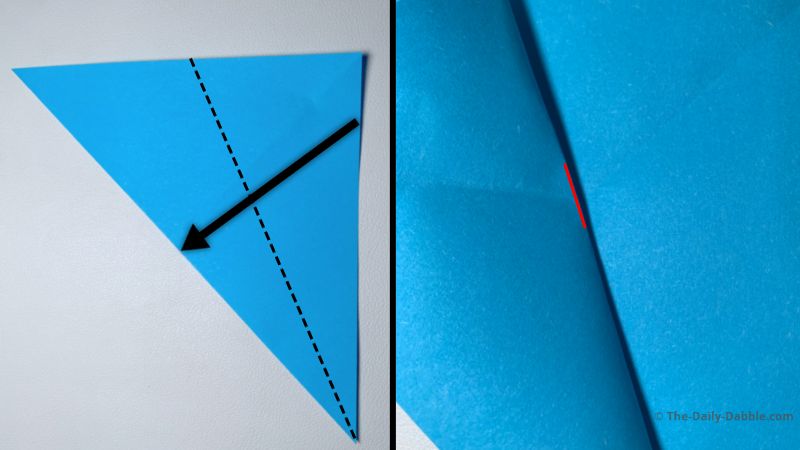
Bring just the top layer over to the closed edge but don’t crease the whole thing.
Just press down on the center to make a visible reference point for the next step.
If you creased the whole thing it will not affect the final look, we just need a mark for the next fold.
4. Fold the bottom evenly to the reference point

Fold the closed edge to the reference point evenly.
Press the edges firmly and unfold the whole thing to a square for the next step.
5. Fold the top left edge to the close crease
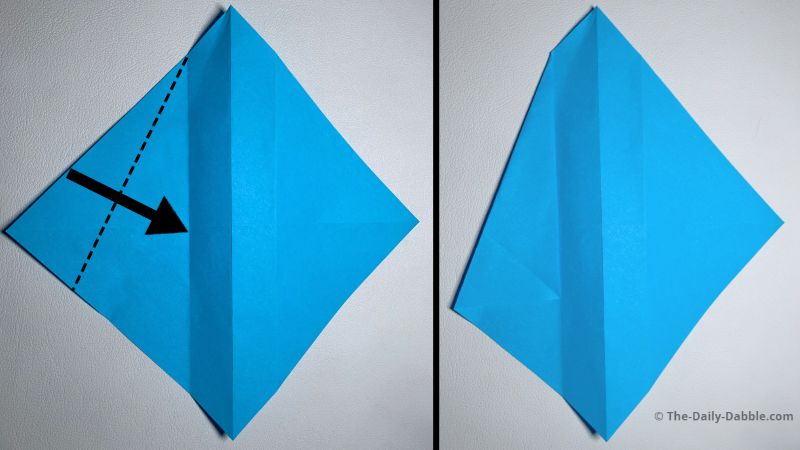
With the main center crease vertical, we will start folding on the left half.
Bring the top left edge to meet the closest vertical crease.
Press the fold firmly and then unfold.
6. Fold the lower left edge to the close crease
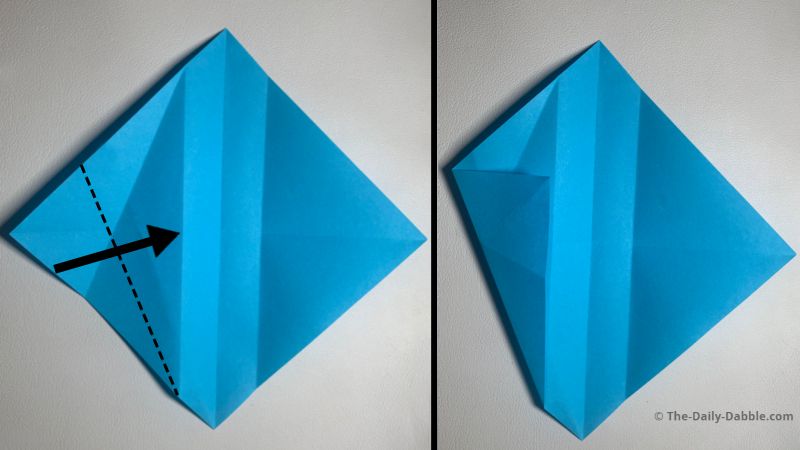
Bring the lower left edge to meet the closest vertical crease.
Rub the edge firmly as always and then unfold it.
7. Pinch the corner along the new creases
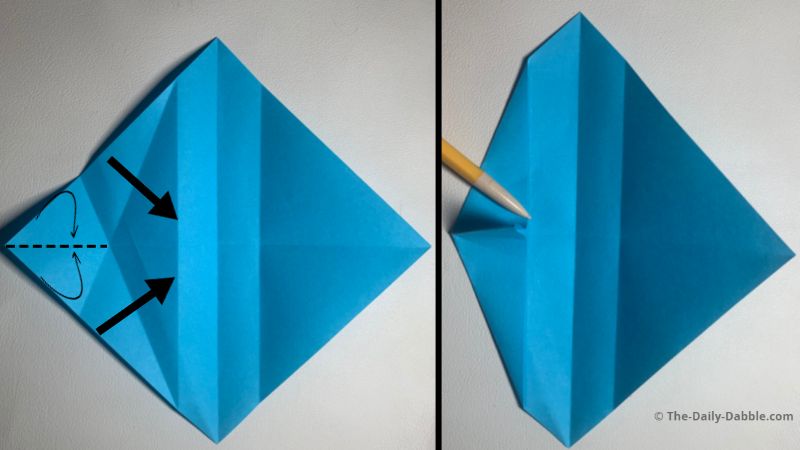
Pinch both sides of the left tip and bring and close the previous two folds over again.
Make sure the point that is sticking up forms evenly and straight.
8. Repeat steps 5-7 on the other side
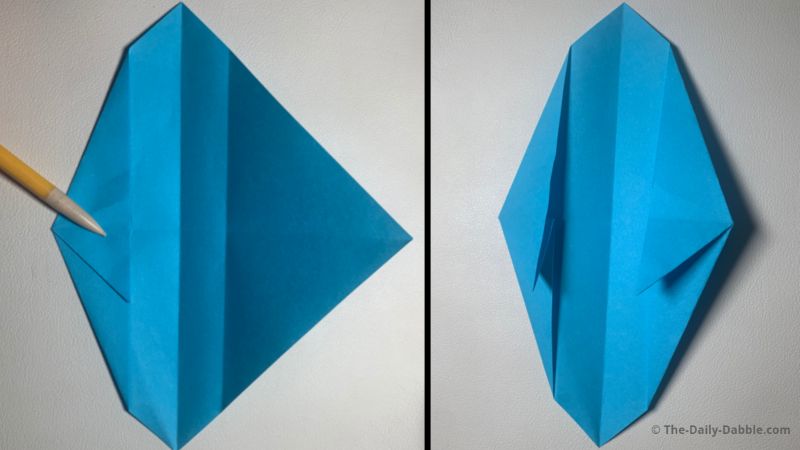
Fold the top and bottom edges of the right side to the closer middle crease, one at a time.
Then from the point as you bring the right sides along the formed creases.
Lastly, make sure the flaps are both folded down.
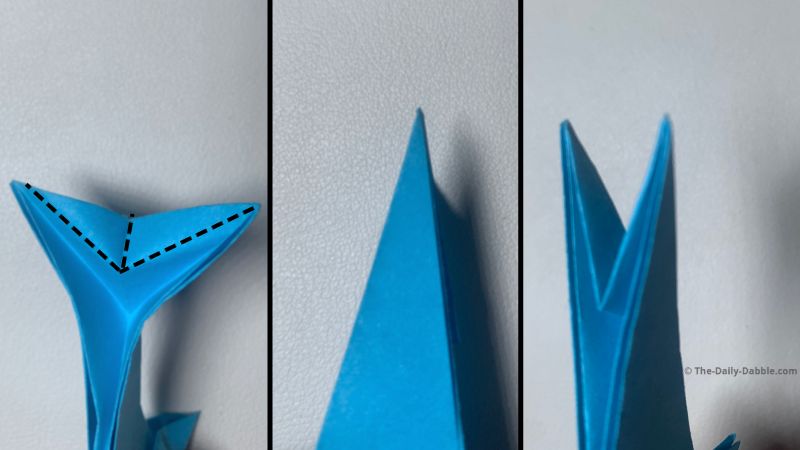
9. Fold the top point down evenly
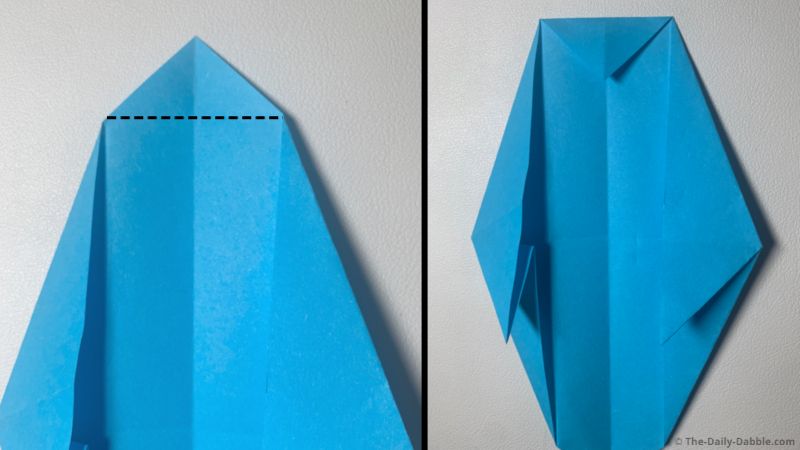
Fold the top point down to make an even edge.
Once the crease is made, flip the whole shark over for the next step.
10. Make two even folds
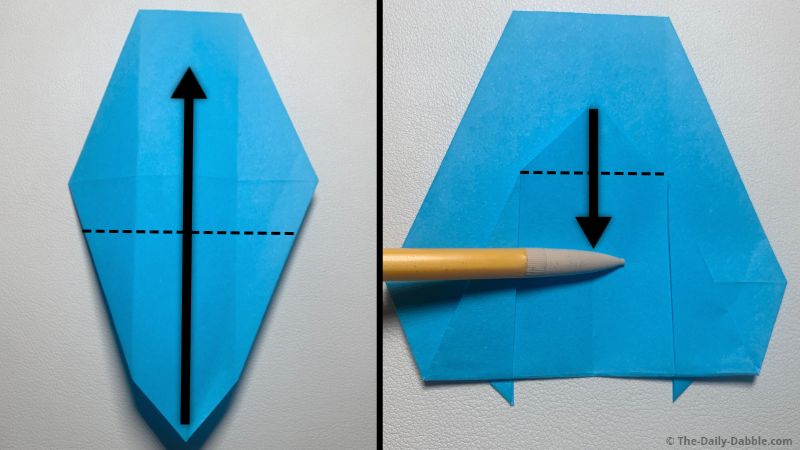
Bring the pointed side to where the fins just show a bit as shown.
Make sure it is even before creasing and then fold the tip down evenly just to make a crease.
Unfold this last tip fold before moving to the next step.
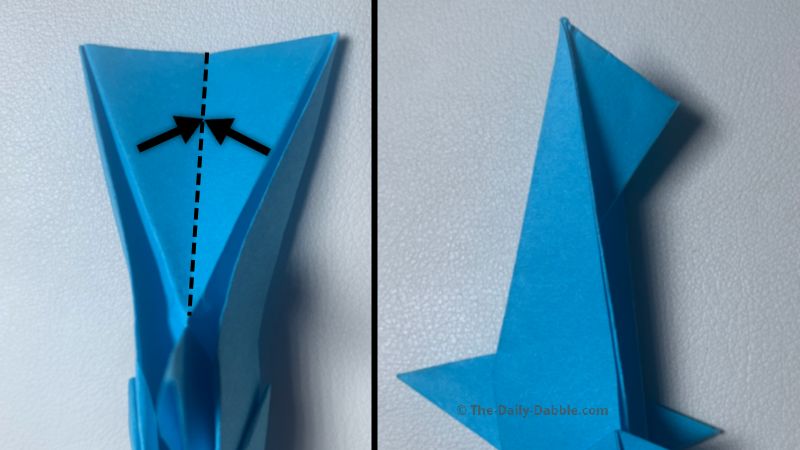
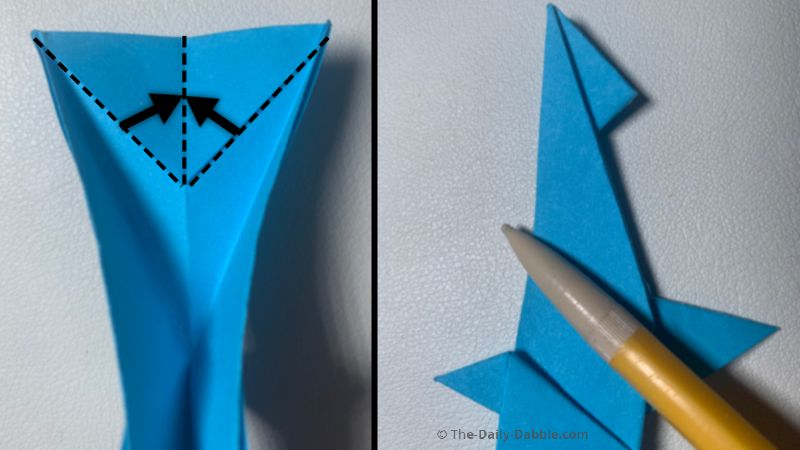
11. Form the top fin with diagonal folds
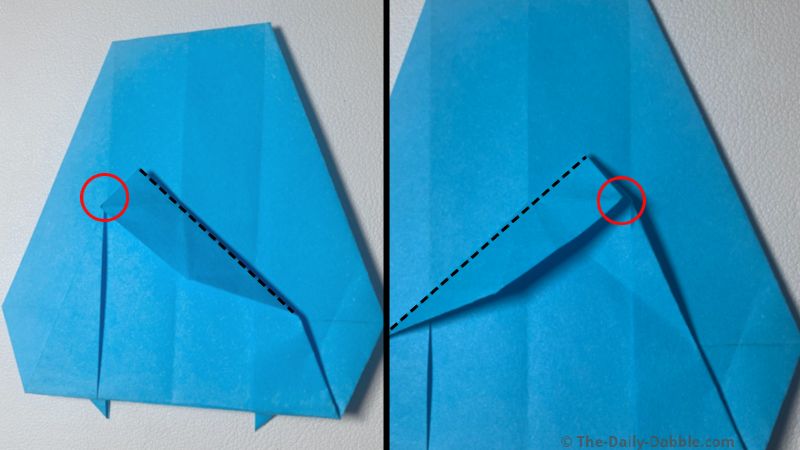
The whole goal is to make two even folds so that you can form the fin upwards.
This process is the exact same as steps 5-7.
Once the diagonal folds are both made and opened back up, start to form the fin.
Close the shark in half once you get the fin into shape.
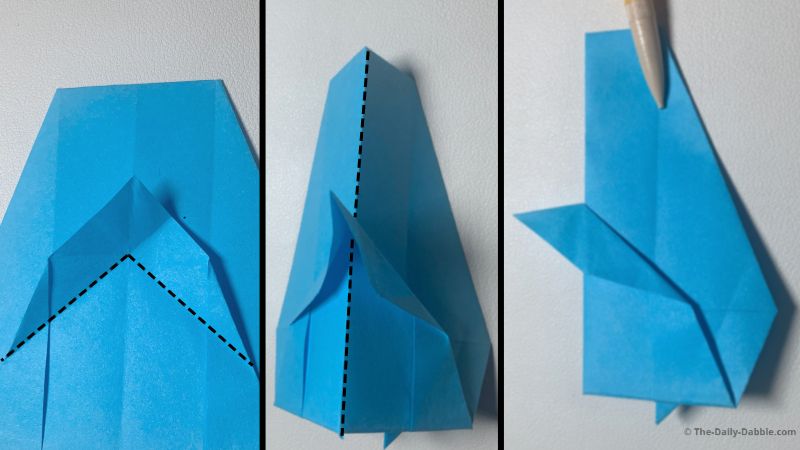
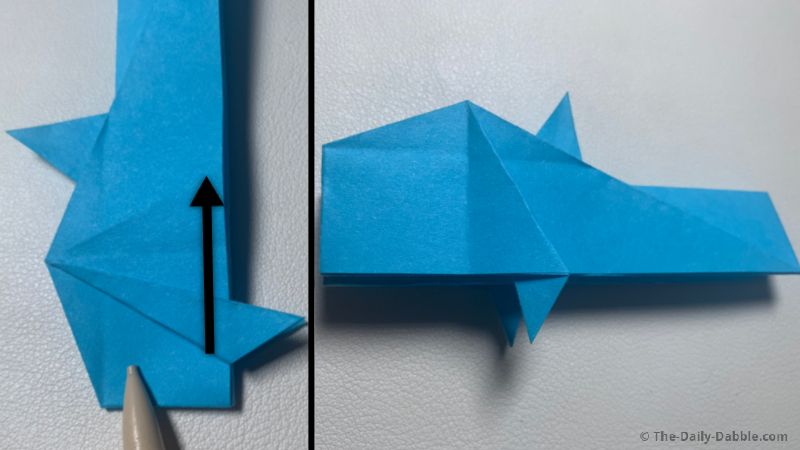
12. Fold both sides up along the middle crease
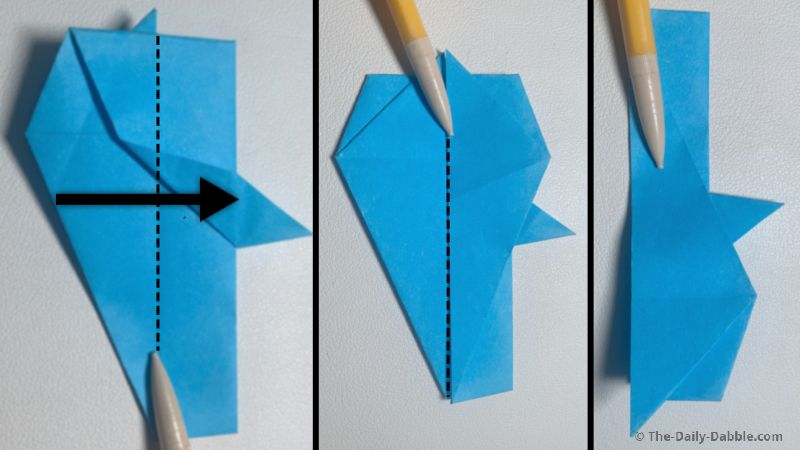
Bring the lower part on each side up at the middle crease.
The side with the single top fin is the top if you have it sideways and are confused.
These will be natural folds along the middle crease.
Once you have done this on both sides, it should be symmetrical and even.
13. Even out the front portions of the top
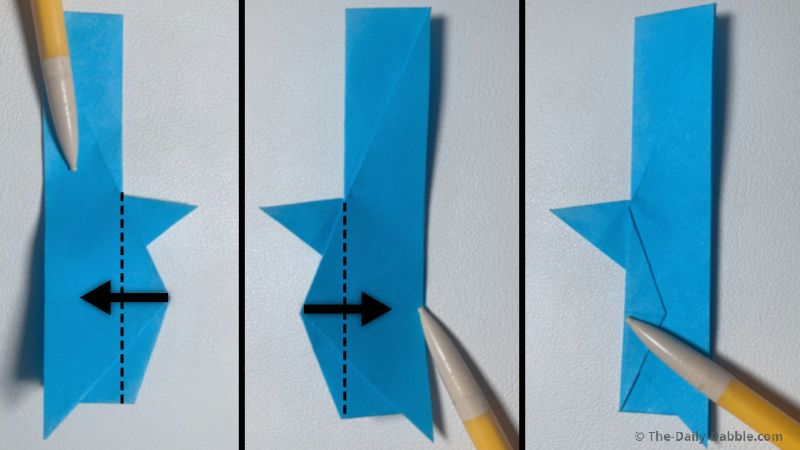
Fold the tops of the head to match the sheet in the middle.
Do this on both sides and press the edges well.
Unfold both of these folds on both sides once you have made the creases.
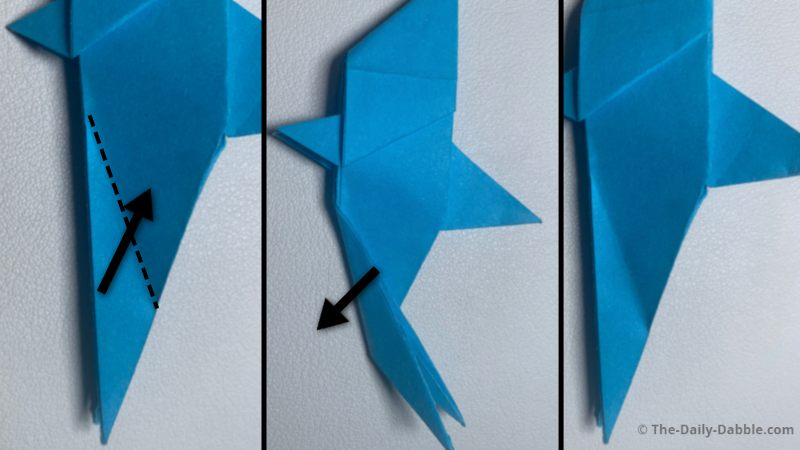
14. Form the lower fins
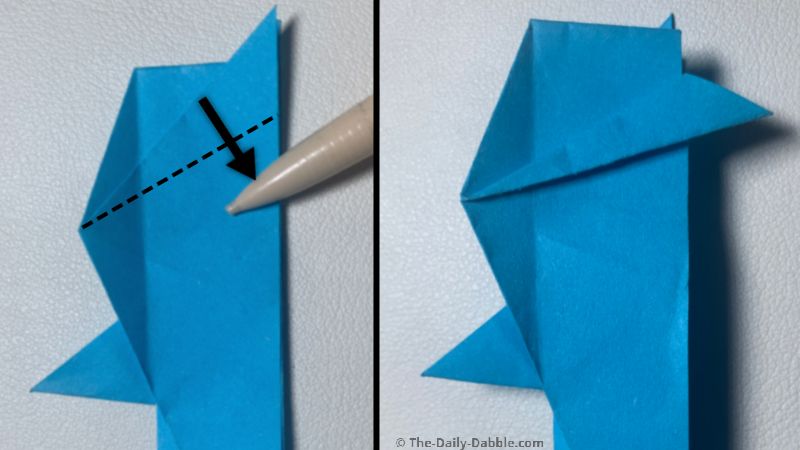
Starting at the front or face of the shark, make a diagonal crease to shape the lower fin on one side.
Flip it over and mirror the same fold inward to match the fin on the other side.
As long as the fins are shown below and end up matching, it will look good.
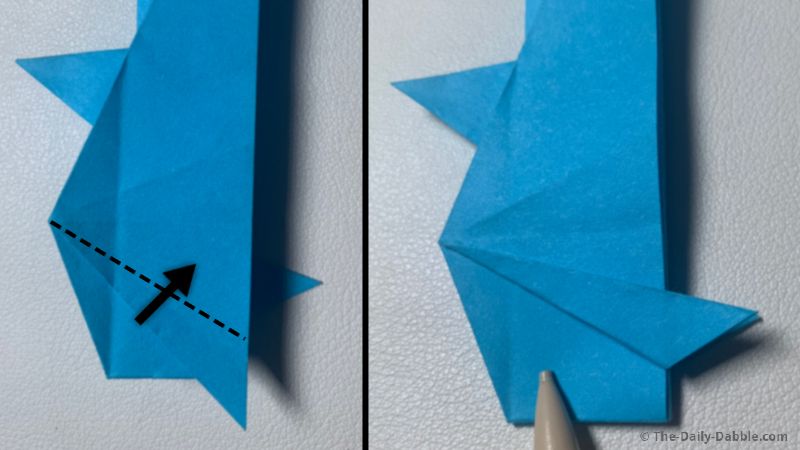
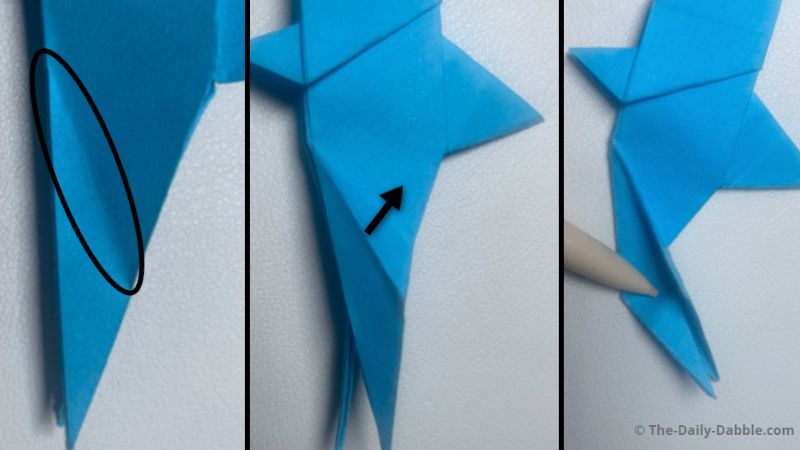
15. Bring the fins over on the natural crease
Simply move the fins over toward the middle on each side.
Take some time to ensure the edges are creased firmly.
16. Fold the tops evenly inside
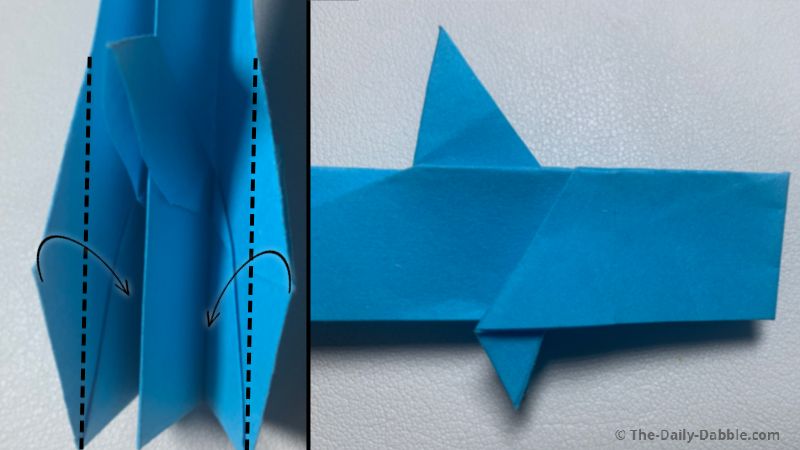
Fold the tops in evenly to make the body of the shark rectangular.
This is basically the opposite of what was done in step 13.
17. Open the bottom and shape the head
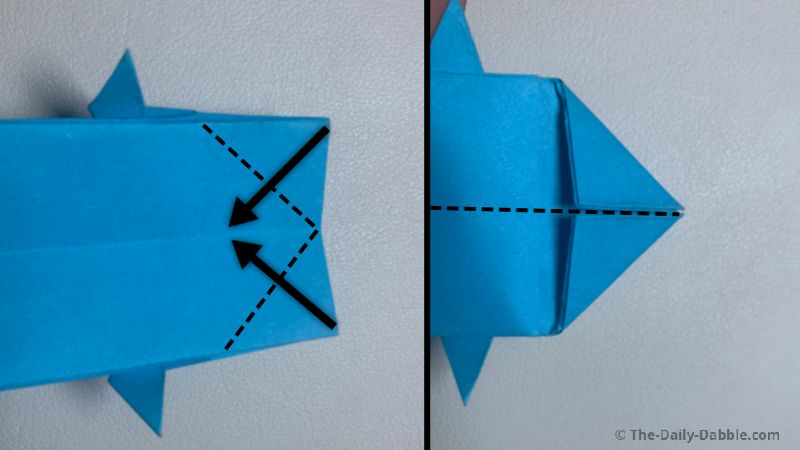
Open the bottom of the shark so it is flat and fold the front tips to the middle crease.
Make sure the folds are creased well and then close the shark back over these folds.
18. Fold the tail over

Fold the tail over where it naturally falls towards the belly of the shark.
Rub the crease edge well and then unfold this step back to where it was.
19. Open the tail and reverse fold it down
With the tail portion open press the middle crease down.
Bring the tail closed so the extra portion is pointed down.
20. Reverse fold the tail from the bottom
Now looking at the tail from the bottom, repeat the process.
Pinch the tail at the middle point of the triangle and fold the extra portion to face the top.
21. Fold the tail one more time so its even
From the top again, repeat the same time of fold as in the last two steps.
The tail will end up totally even as shown.
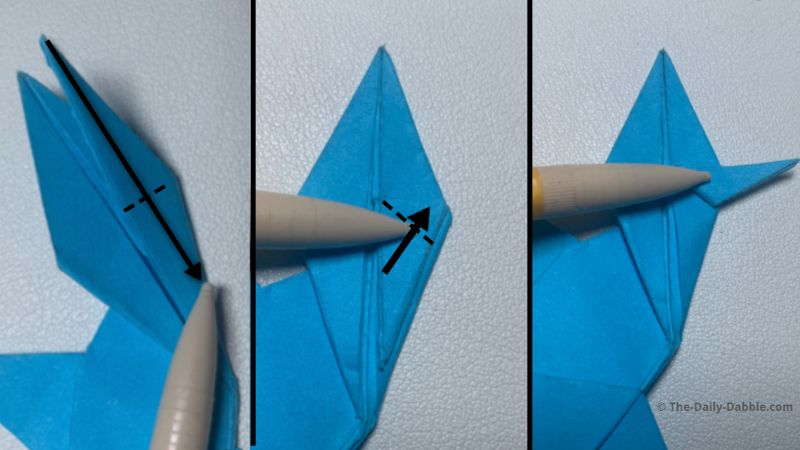
22. Make a diagonal fold on the tail
These are the last few tail folds that will complete the shark.
Make a diagonal fold as shown from the bottom rear up.
Once you have made the crease firmly, unfold it for the next part.
23. Mountain fold this new crease
Open the tail a bit so you can pinch the crease into a mountain fold the opposite way.
Take the peak of the fold over towards the body of the shark.
24. Fold the right flap down and over
Bring the right flap down evenly to match its bottom.
Next, bring the right edge of this now lower flap to the horizontal middle line.
25. Close the tail to finish
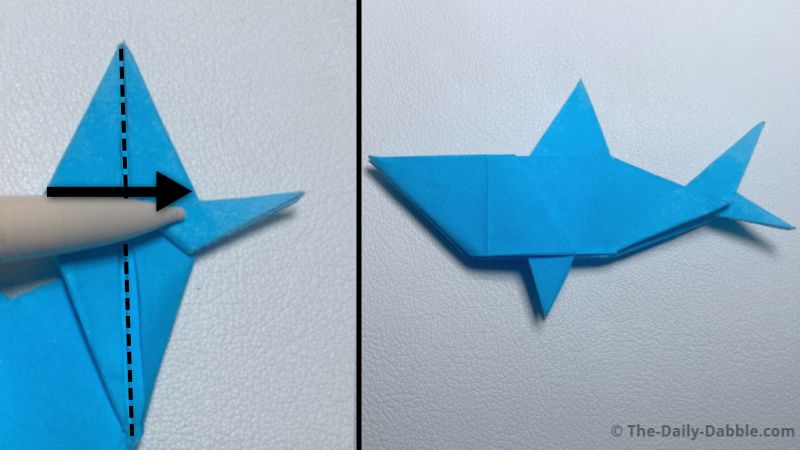
Simply close up the tail to finish the shark.
Now you know how to fold an awesome origami shark!
Visit our easy origami ideas to get a ton of designs like this to fold for fun!
If you liked this one you may like the easy origami fish!
Happy Folding!