
Don’t have an envelope when you need one or want to make a colorful one? We got you covered!
If you have a piece of paper you can make your own easy origami envelope in just a few minutes.
This envelope will require no cutting, tape, or glue to complete.
Be sure to check out our origami collection for plenty more tutorials!
Let’s get started!
For this guide, I used colored square origami paper that is white on one side and blue on the other.
If you need square paper but don’t have any on hand, you can make regular paper square with this quick guide.
I want the blue on the outside of the envelope so we will start the first fold with the white side up.
1. Fold the paper in half diagonally point to point
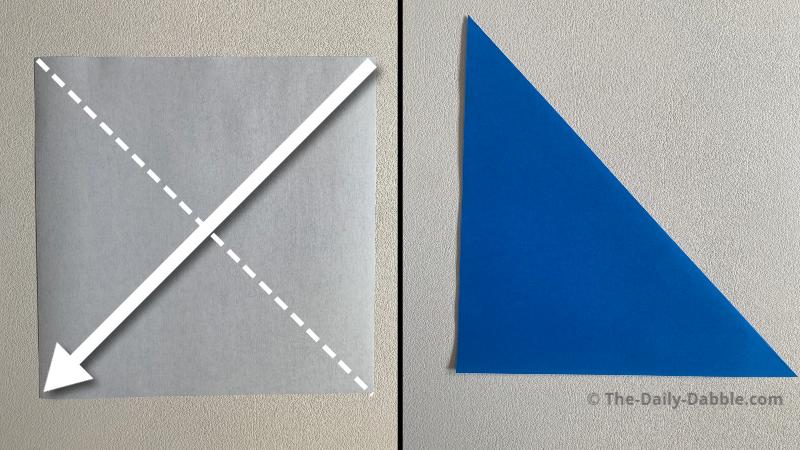
After you make this first fold, unfold the paper for the next step.
2. Fold it in half again from the opposite points

Unfold the paper again after completing this step.
3. Bring the two middle points to the center
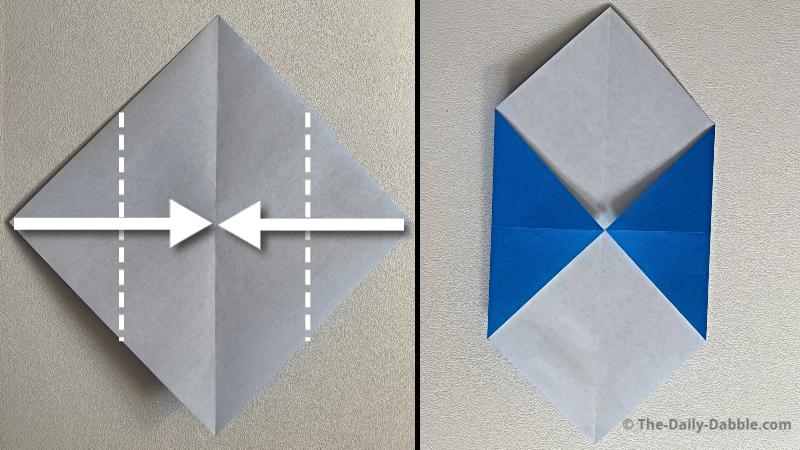
Fold the two middle points to the center of the paper and give them a good creasing.
4. Fold the top point down to just pass the center
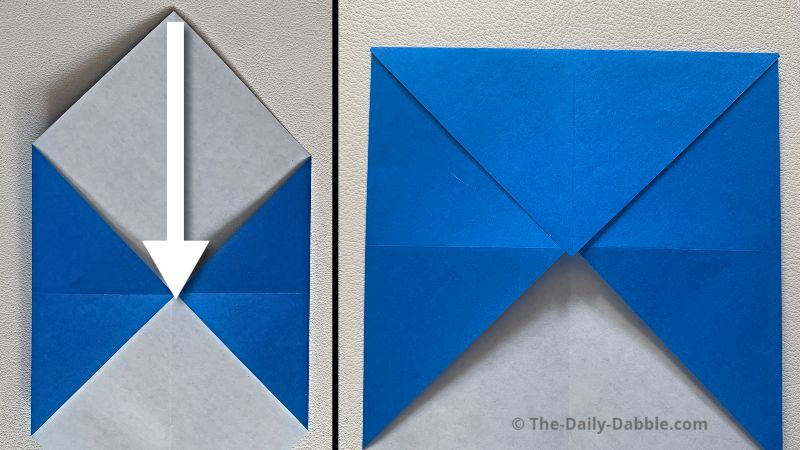
It is important to make this fold just past the center so that it can be tucked in later if you want.
After making sure the crease is made, unfold this top flap before moving to the next step.
5. Fold the bottom point to the crease you just made
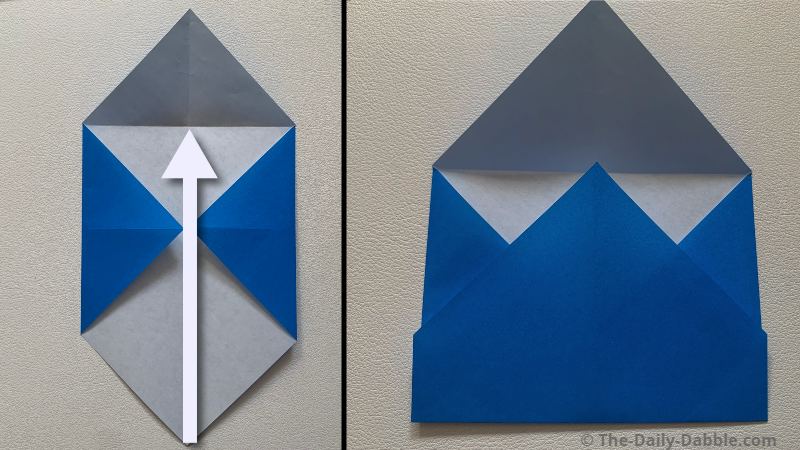
After making this fold unfold it again.
6. Fold the bottom right side to the lower crease
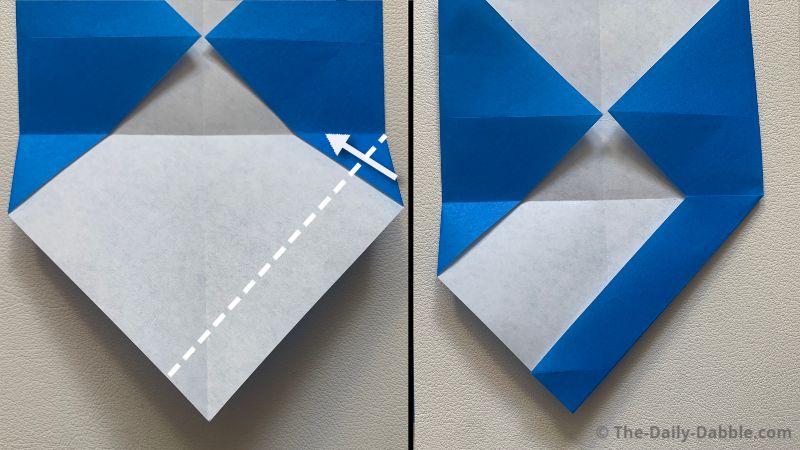
To make this fold just match the flat side that is just under the crease to that crease.
Unfold this flap after it has been made.
7. Repeat the process with the bottom left side

Do the same thing again with the bottom left side and unfold it when you are done.
8. Bring the bottom point to the lower crease
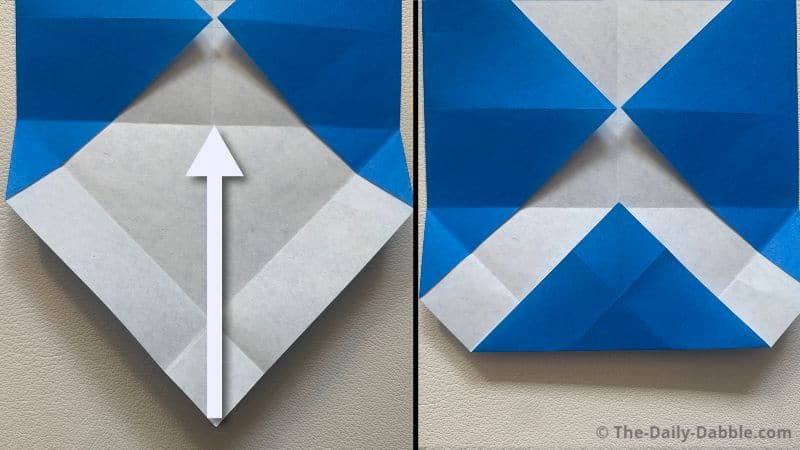
9. Fold the lower flaps in over the bottom point
These are simple folds using the creases that already have been made in previous steps.
The purpose of this fold is to make some creases to refold the point during the last two steps.
Unfold the bottom point completely now before the next step.
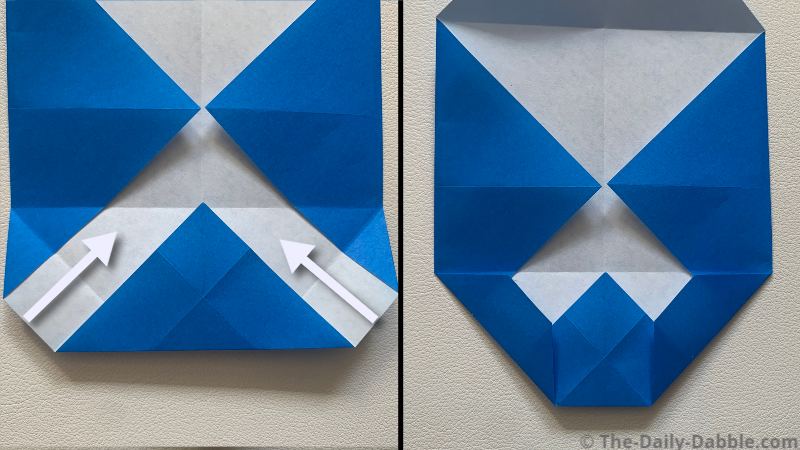
10. Fold the lower side flaps in first
Before we fold the point again this time, fold the flaps in again.
11. Fold and shape the point over the lower flaps
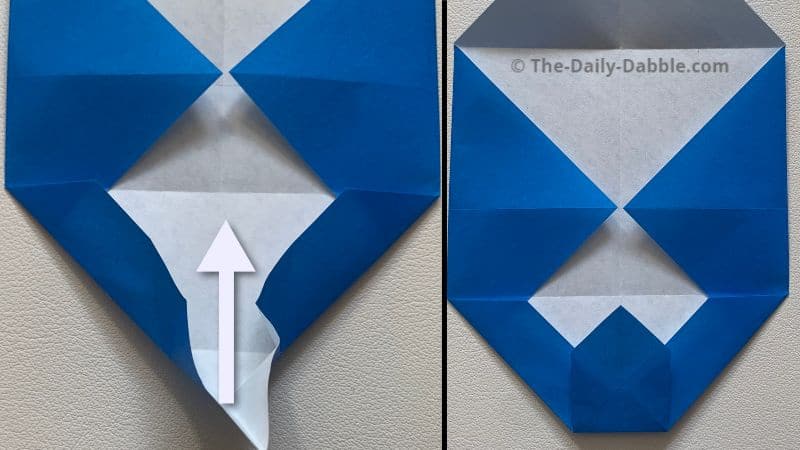
You will have to manipulate the point a bit to get it straight.
Fold it as evenly as you can and crease it down flat.
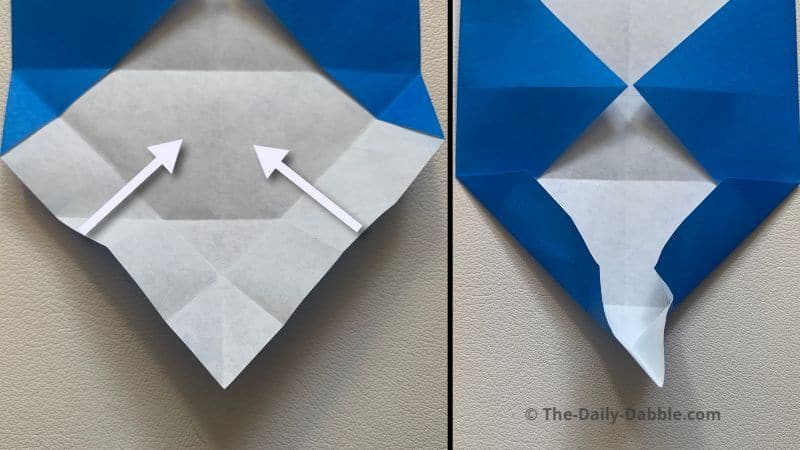
12. Tuck the middle points behind the lower one
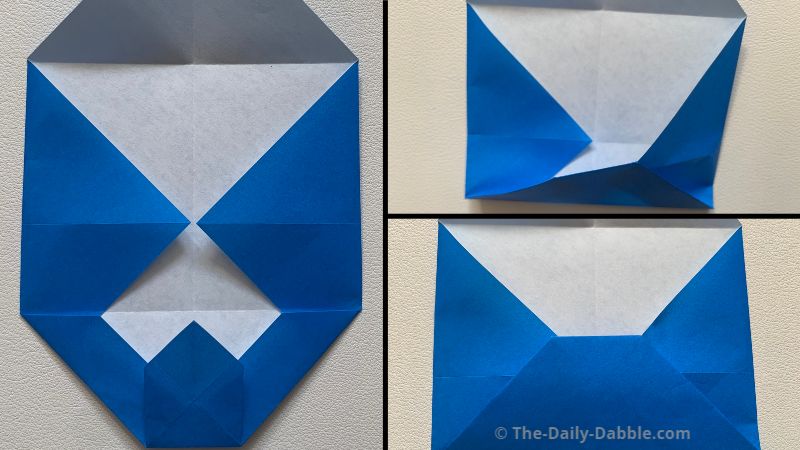
Complete the envelope by moving the bottom flap up and tucking the side points in behind it.
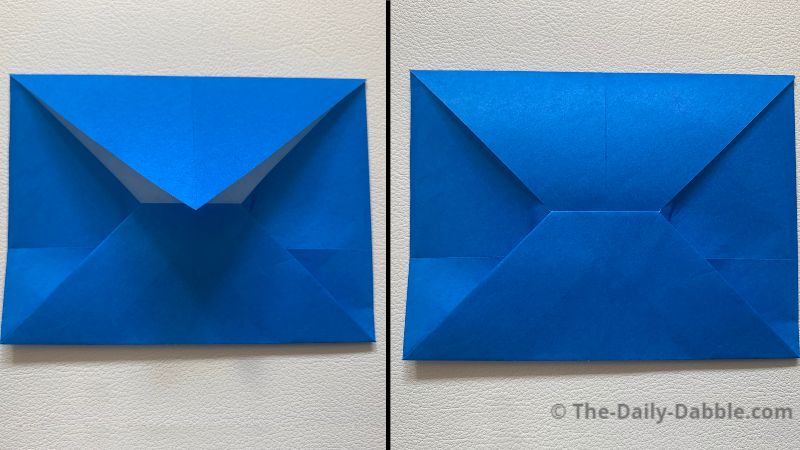
Now you know how to make a quick and easy envelope!
You can slide the top point in to close it or just tape it closed to seal it up.
Need a quick give gift to put in your envelope? Check out dollar bill origami guides to make a creative money gift to slide inside!
You can also make the origami box with lid, which is another practical origami design.
Thanks for reading and Happy Folding!