
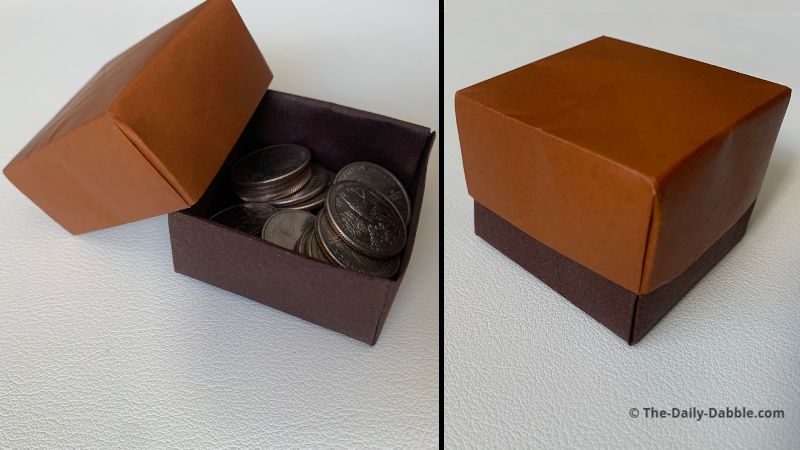
These detailed instructions cover the steps for folding an easy origami box and optional lid.
This masu box can be anything from a coin holder to a candy dish.
You could even use this as a unique gift box when you fold the box and lid.
This project is beginner-level and can be folded in less than ten minutes.
Let’s get folding!
For this tutorial, we will use two sheets of square origami paper or one if you just fold the base of the box.
In the chance you don’t have square paper, you can cut regular paper into a square.
You can use whatever color paper, but this one has white on one side and brown on the other.
1. Fold the paper in half from left to right
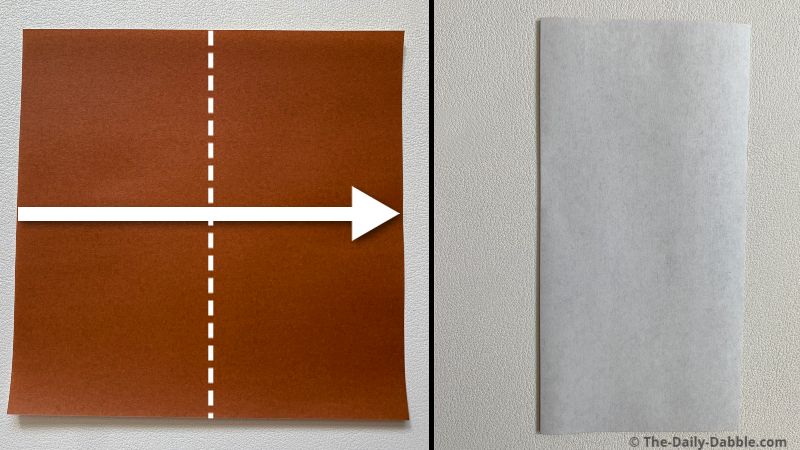
Fold it directly in half to make a crease and then unfold it.
Origami 101: In steps 1-3 you will fold the origami blintz base which is one of the main origami bases. This base is the beginning of many awesome designs.
2. Fold it in half the opposite way
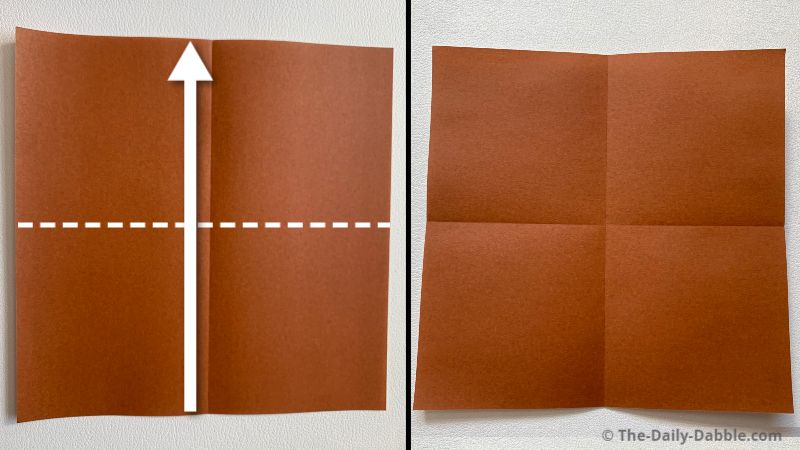
We will now fold the paper in half the opposite way to make a crease and then unfold it again.
We will start the next step on the other side of the paper.
3. Fold all corners to the direct center
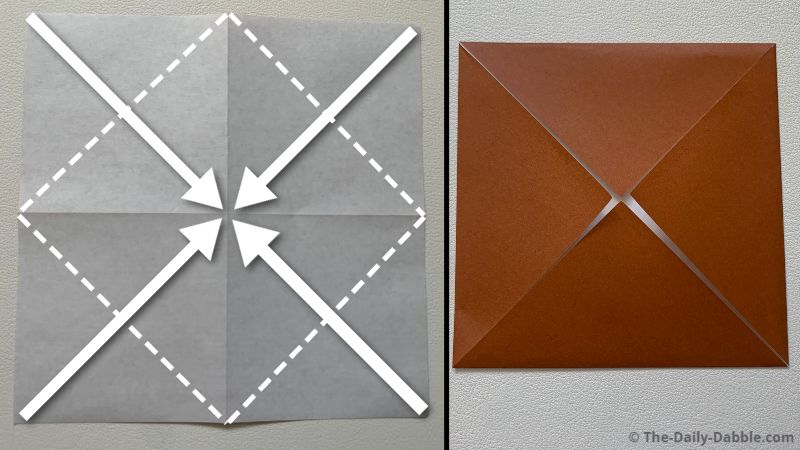
Bring all points as evenly to the center as you can while using the previous crease lines as a guide.
4. Fold the two outer edges to the center
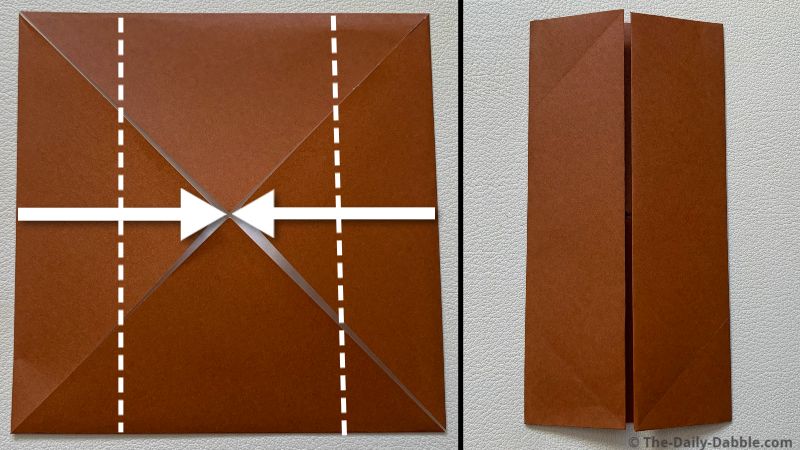
If you lift the center points a bit, you will be able to see the exact center again.
You can use the top and bottom edges to help you guide the fold as even as possible.
5. Repeat this process the top and bottom edges
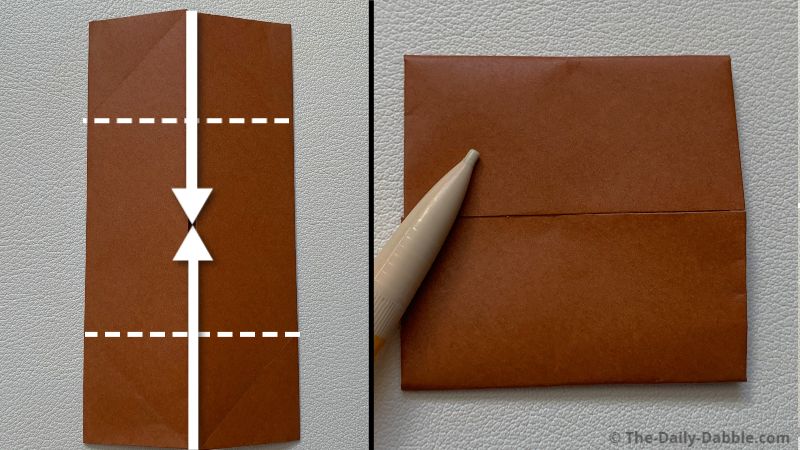
You can use the left and right edges this time to guide your fold and find the halfway mark.
If it helps to find the exact center, you can first fold the paper direct in half from top to bottom and make a mark to fold to.
We will be unfolding the paper most of the way in the next step.
Steps 1-5 are just for making the proper creases to assemble the box.
6. Unfold most of the way and bring the edges of the top square to the center
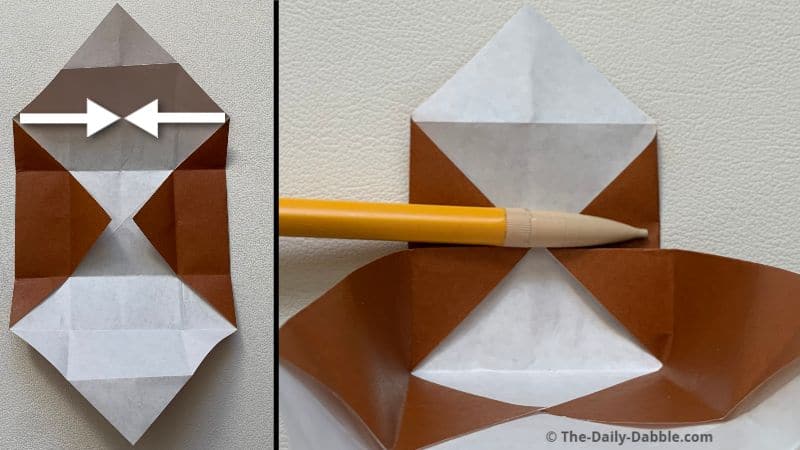
First, unfold the paper most of the way until you have just two of the edges folded to the center as in the picture.
We will start folding the box together by bringing the edges of the second crease from the top to the center.
When you do this, you will start to form two edges of the box.
7. Fold the top point inside to the bottom of the box
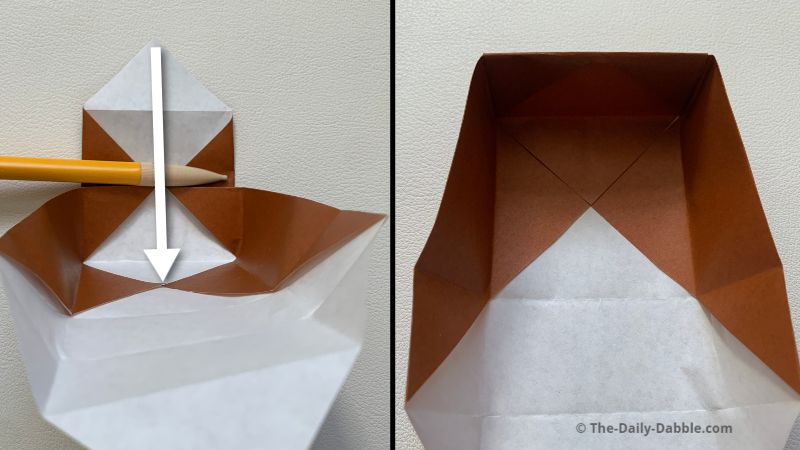
This fold will keep two of the edges of the box in place.
8. Repeat the same process for the other side

If you want a box and lid, move to the next step with the second paper.
9. Fold the left and bottom edges in just a bit
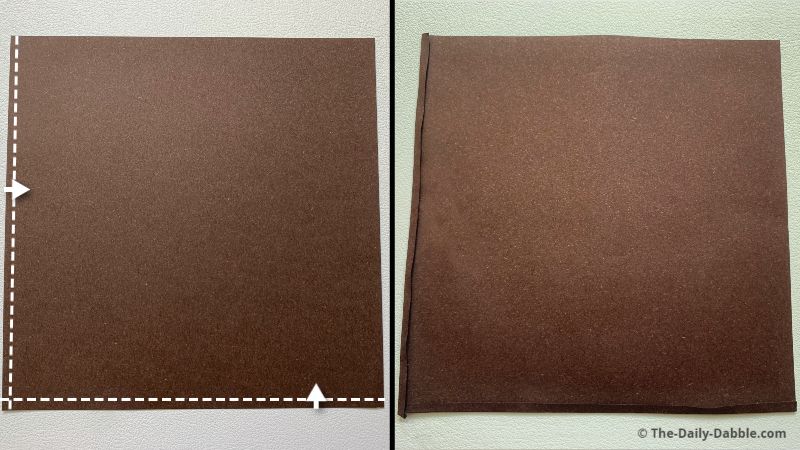
This will be the new bottom to the box, so it has to be slightly smaller than the other paper.
We have to fold two touching edges in slightly to ensure this half will fit.
Fold them as even as you can; just remember, the more inward you fold, the looser the fit of the lid.
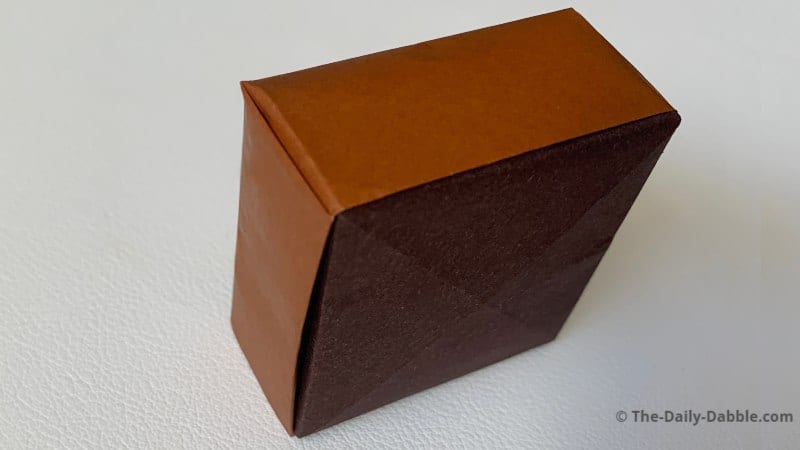
10. Repeat steps 1-8 to fold the bottom box the same way
If you repeat the first eight steps on your second paper, you can complete the box with a lid!
Check out our modular origami cube instructions if you want another simple but fun project!
Happy Folding!