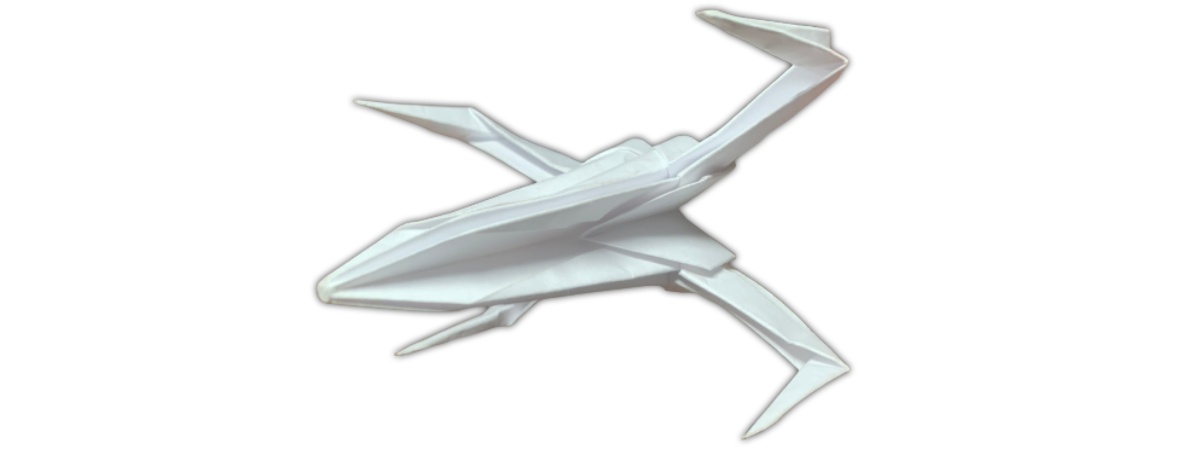
Make an origami Star Wars X-Wing Starfighter with this step-by-step guide with detailed pictures and instructions.
I would put this at intermediate difficulty but I’m certain even a beginner can get this done. There are a lot of repetitive folds but only one or two challenging ones.
This fold will take 15-20 minutes plus depending on your experience. The nice thing is that it doesn’t have to be perfect to still look awesome!
This is just one of the hundreds of easy paper-folding ideas you can find in our origami collection.
Let’s get folding!
To make this paper X-wing, you can use any size of square paper. I simply cut a printer paper into a square but thinner origami paper will be a little easier to manipulate.
1. Fold the square in half diagonally
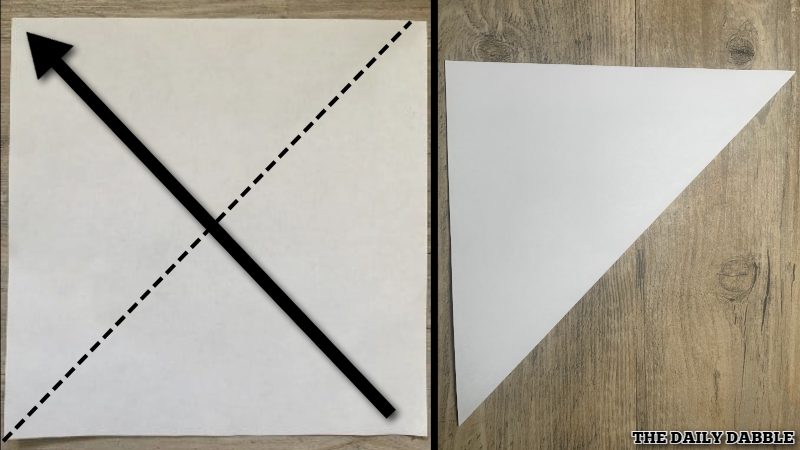
Match the bottom right corner to the top left to make a diagonal crease.
Rub the edge of the crease well for each fold to make sure it all ends up even.
2. Fold it diagonally on the opposite corners
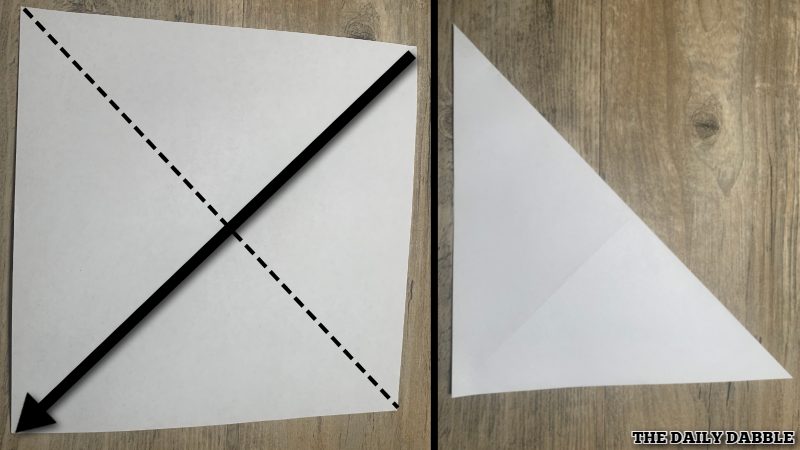
Open up the previous fold and make another diagonal crease from the opposite corners.
After rubbing the crease, open it up for the next fold.
3. Make two straight folds in half both ways
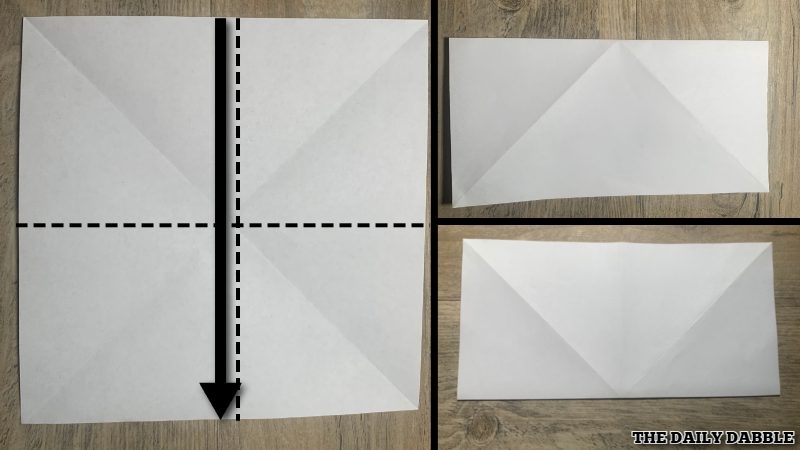
Simply fold the paper from top to bottom, and make a solid crease.
Open it up and fold it in half from left to right to complete these two half folds.
Lastly, unfold the paper for the next step.
4. Close the paper into a smaller square
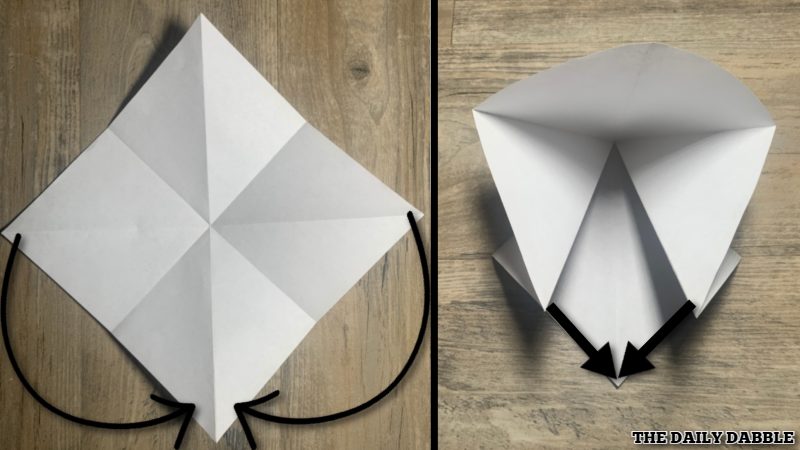
Start by rotating the paper so that the points are at the top bottom, right and left.
Pinch the middle creases so that they are like mountains and the diagonal ones are like valleys.
Begin bringing the middle points down to match the bottom one.
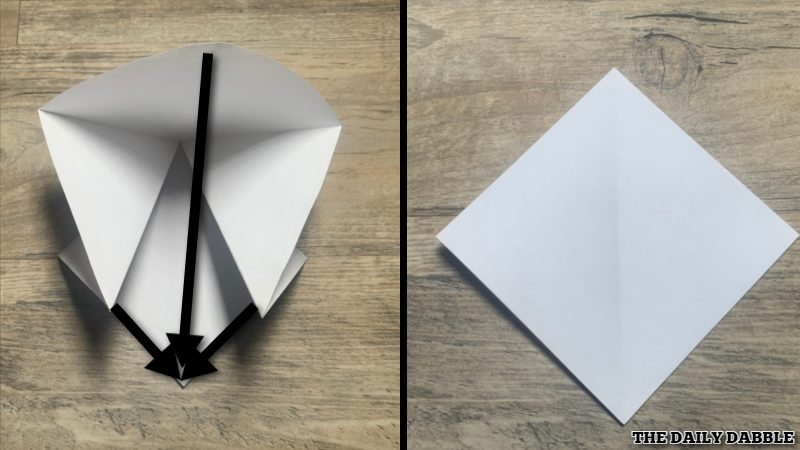
Fold the top point down over the top of the middle one to form an even square.
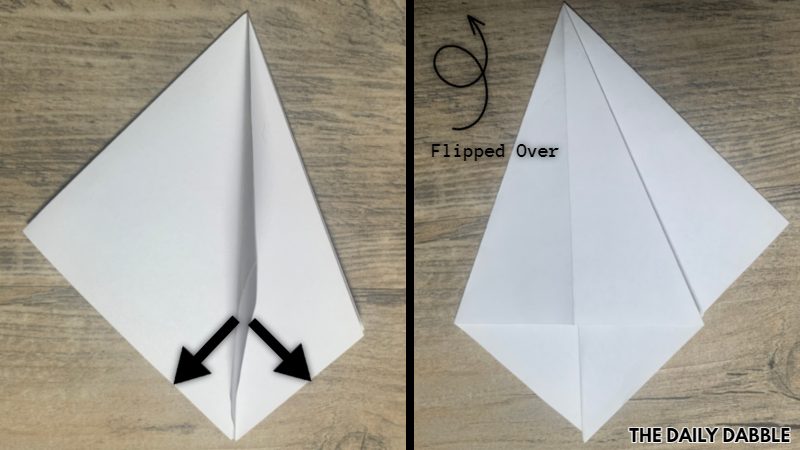
5. Open the left flap and squash fold it down
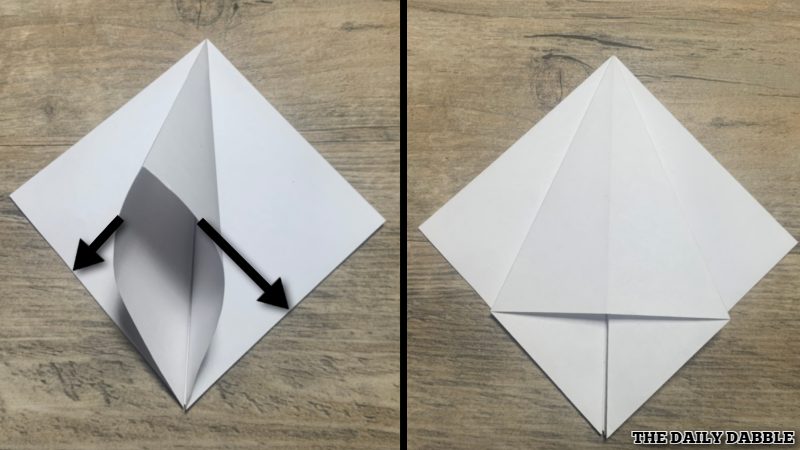
Open the left flap and flatten it down evenly to match the lower edges.
Remember to press all the edges firmly to ensure nice creasing.
6. Fold the right flap over and repeat the same fold
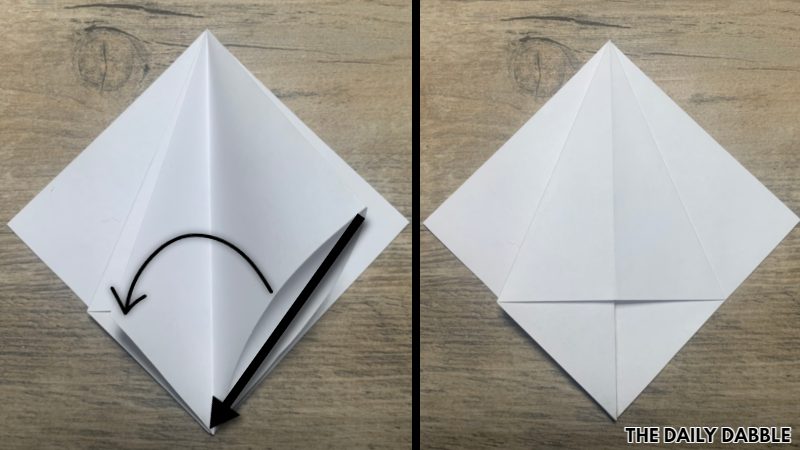
Bring the right flap over the previously folded flaps and make the same squash fold.
Once the edges are creased nicely, flip it over for the next step.
7. Fold another of the flaps the same way
Squash fold another of the flaps in the exact same way, pulling the lower edges to meet evenly.
The second picture is just a reference to know what it looks like from the other side.
8. Repeat this process once more on the last flap
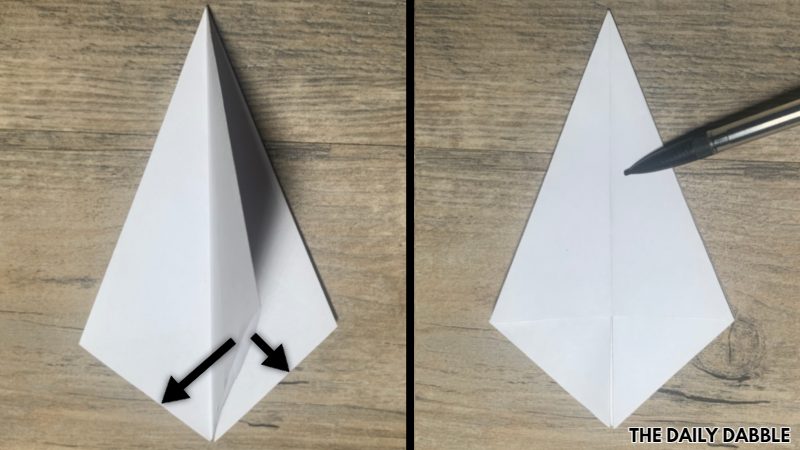
Using the same process, squash fold this last unfolded flap the same way as the previous three.
Press the edges firmly and proceed to the next step.
9. Fold the square in half diagonally
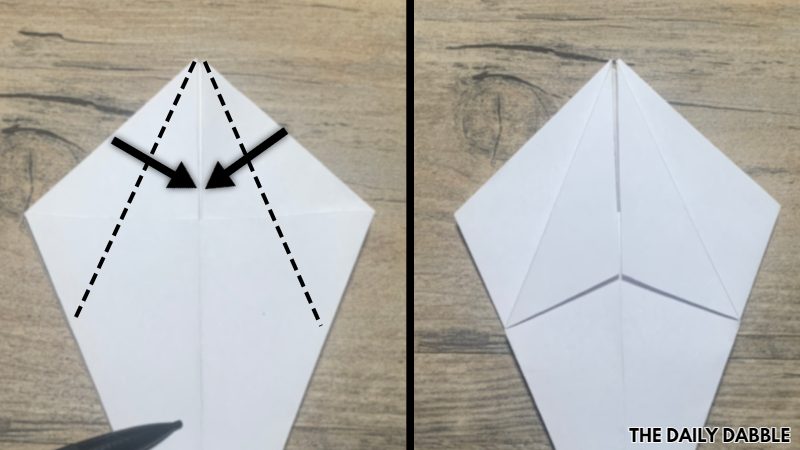
First, make sure you flatten this kite shape to where the vertical creases are open.
To clarify, there are two completely flat sides and sides where the vertical creases are open at the top.
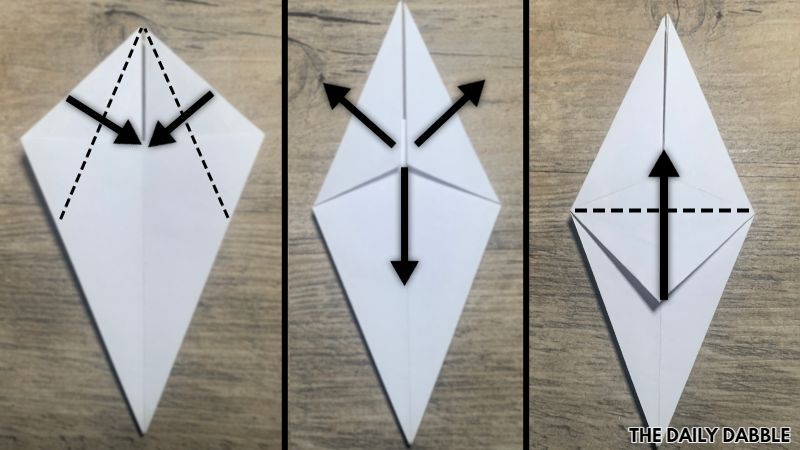
Bring the top edges to the middle crease, and press the edges firmly.
10. Open these flaps and squash fold them down
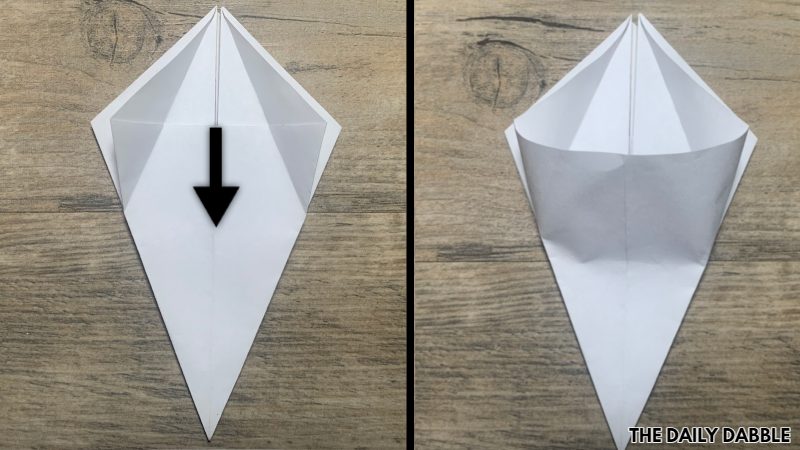
First, open the flaps that you just folded.
Open up all sides of this pocket and squash fold it down.
You will be taking the top edges back to the center while forming the bottom half so the edges meet at the center also.
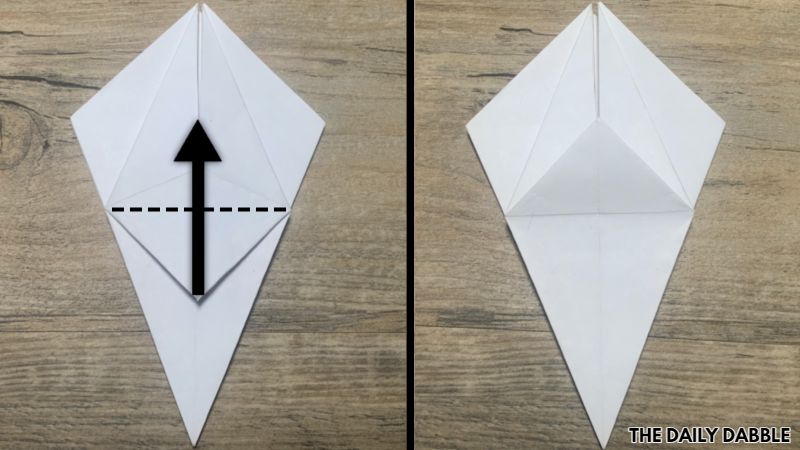
Finish this fold by folding the bottom point straight up.
You will be repeating this style of fold three more times on all sides.
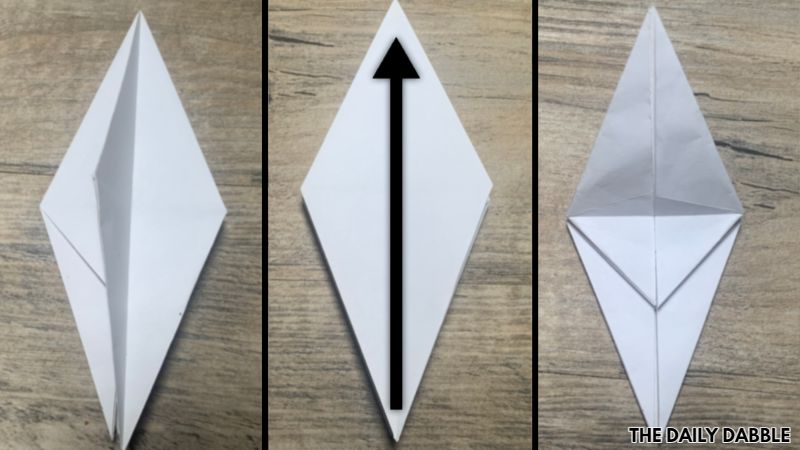
11. Bring the next long flap over and repeat
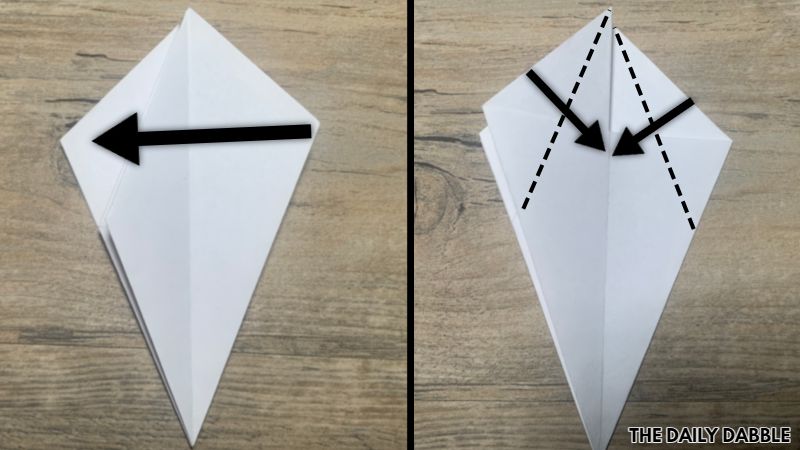
Bring these recently folded flaps over to the left as well as the next big flap.
Repeat the same exact style of fold just like the previous step.
Fold the top edges to the center, open up the pocket and squash fold it down evenly.
Finish it off by folding the lower flap up.
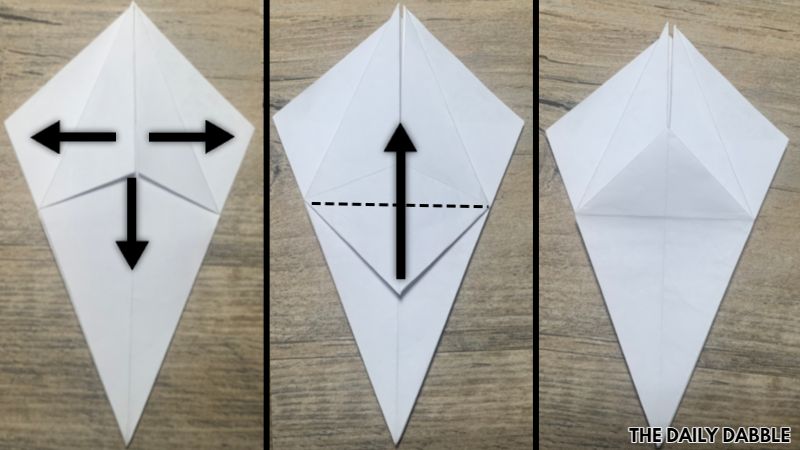
12. Flip it over and repeat this fold again
On the other side with the open edges at the top, repeat the same folds.
Remember to keep everything as even as possible and firmly press the edges of each fold.
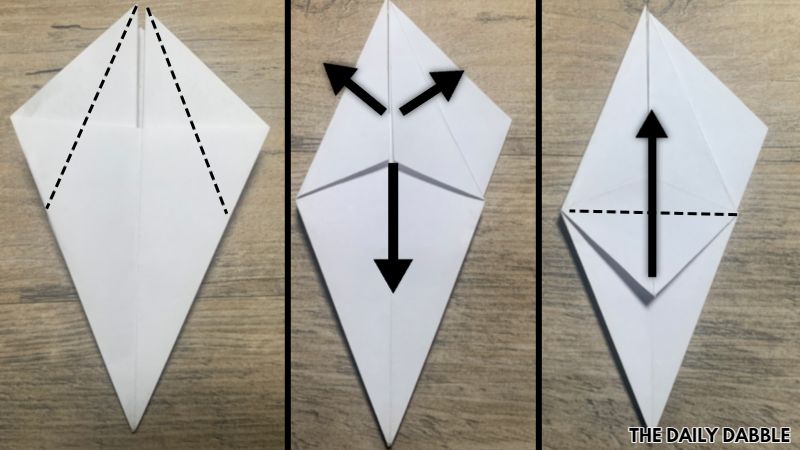
13. Fold the last unfolded side the same way
Repeat the same process one more time just like the three previous steps.
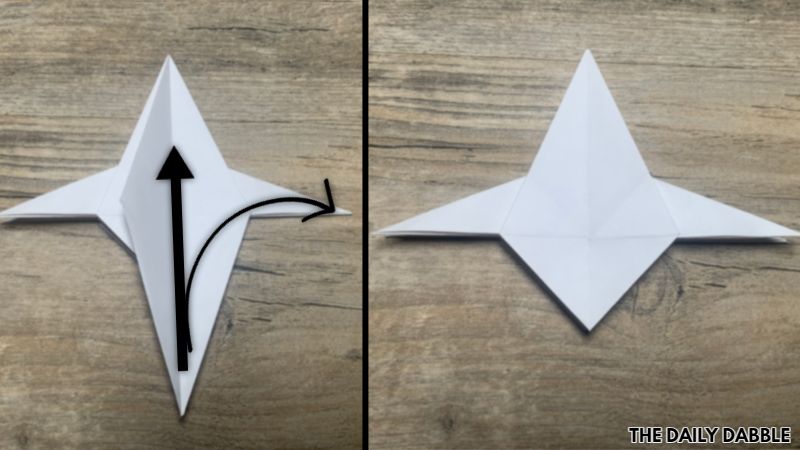
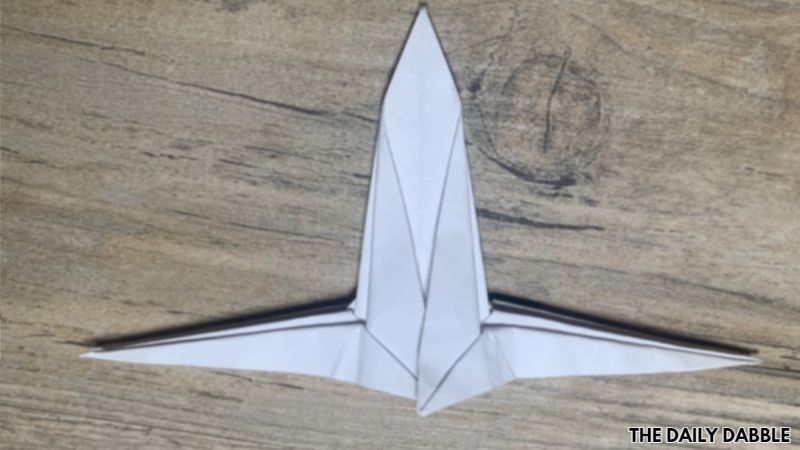
14. Form the first of four wings
Use these pictures as a reference to where this fold will start.
I rotated this so the inner points are pointed down.
Make sure the paper is flattened to where the flat faces are the top and bottom.
Bring the bottom edge up as we will use it to form the first wing.
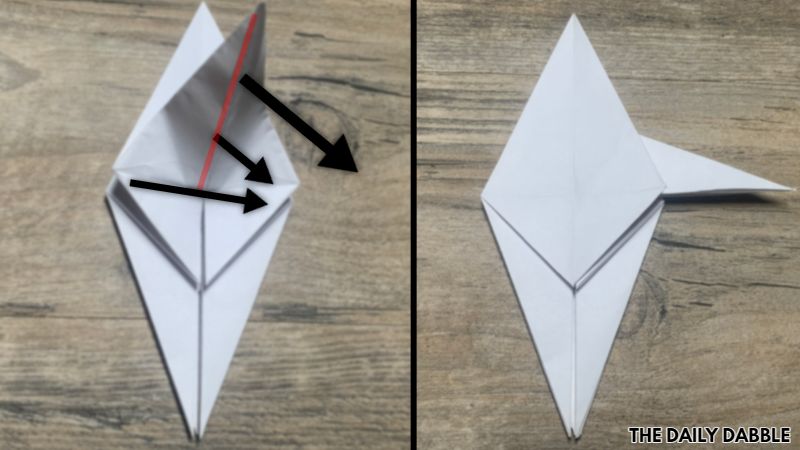
Pinch the top point and twist it over to evenly align straight to the right.
You will be closing the left side over the right to crease this fold that aligns with the horizontal crease.
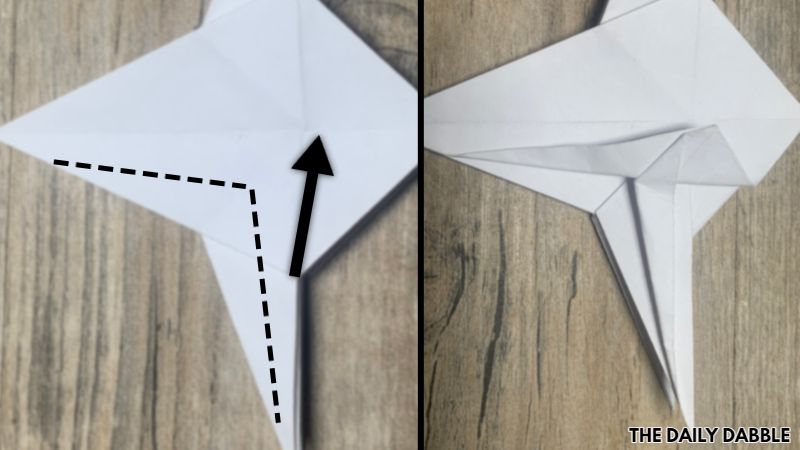
15. Fold the next wing to match over the previous

Open up the next flap over and bring the bottom point up.
Pinch this the opposite way the previous fold and close it up to evenly match the previous wing.
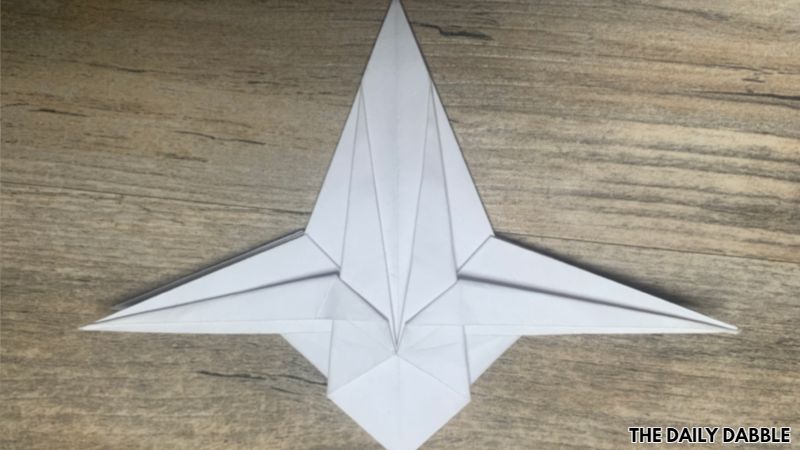
16. Form the next two wings
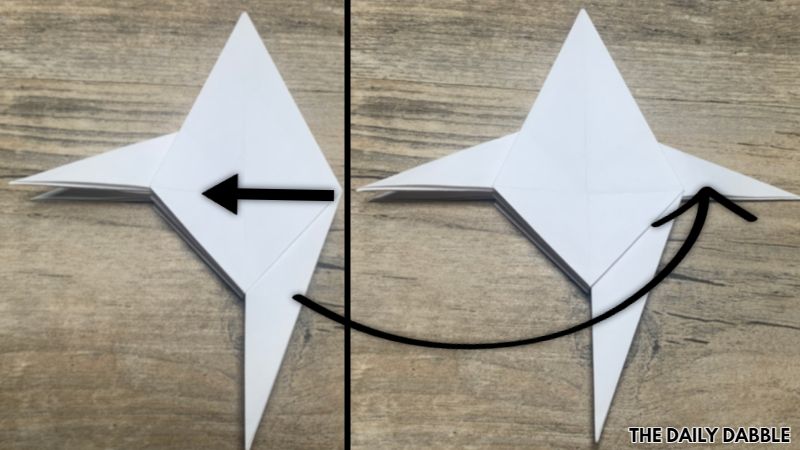
Flip the whole thing over and open up one right flap at a time to make the next two wings.
Fold the lower wing first, using the same process as the previous two steps.
Keep evenness and symmetry in mind while opening the top flap to complete the last wing.
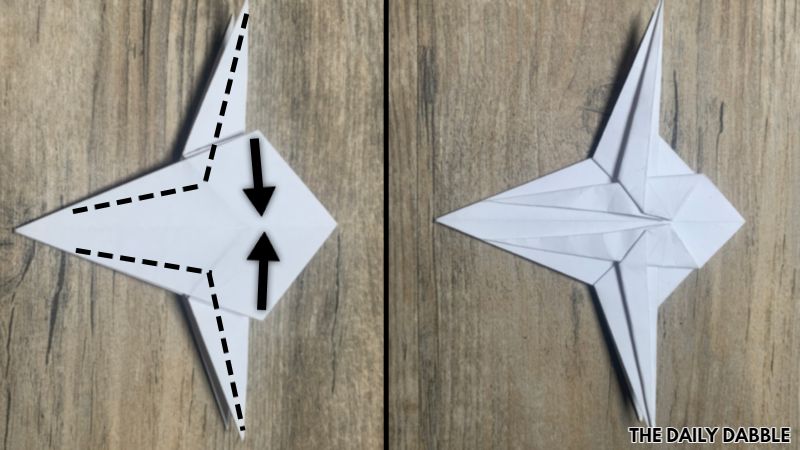
17. Fold the square in half diagonally
These are the most challenging fold of the design but don’t have to be perfect.
You will be able to reshape it later if you want to make some shaping adjustments.
Start by taking the top middle flap over to just above the center.
While you are doing this you want to carefully and evenly fold the left and right edges over as shown.
Repeat the same exact process on the other side to match the other side.
All that really matters is that they look as even and symmetrical as possible.
18. Flip it over and do the same thing to this side
Take your time and follow the same directions as the last step.
When they look even, remember to press the edges of the folds firmly.
19. Fold two middle tips over on both sides
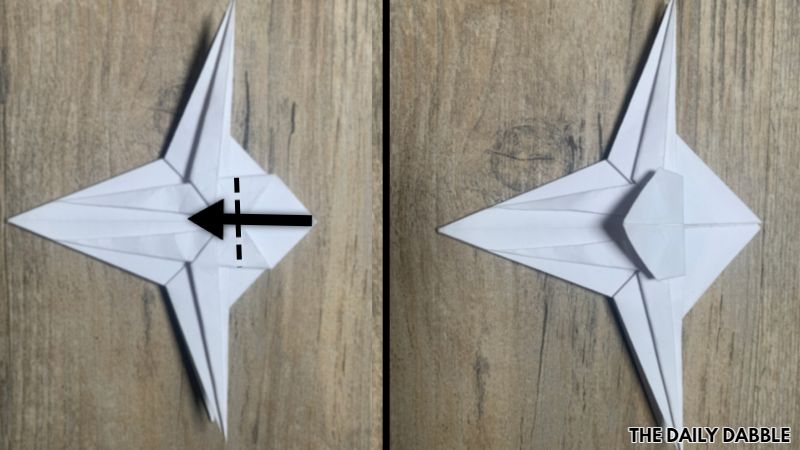
On both sides, fold the right middle tip over as far as it goes.
Press it down to keep it in place as best as you can.
Remember to do this on both sides that you just folded before moving on.
20. Make two folds on the right middle point
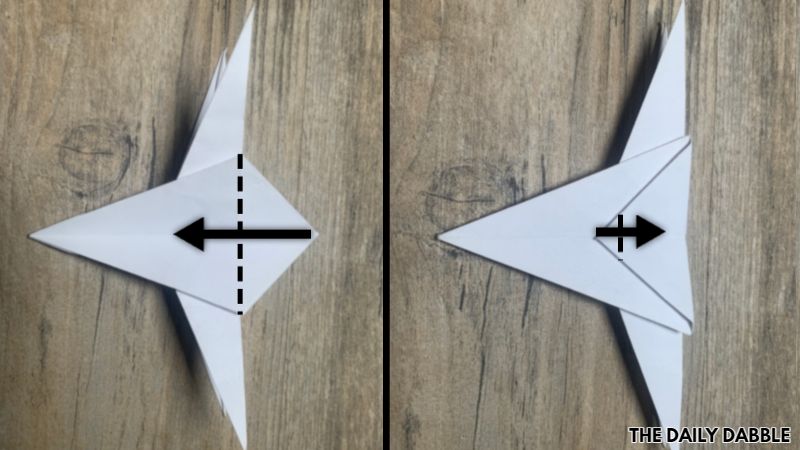
Start by closing up the two sides you just folded so that they are in the middle.
We will start folding with the flat unfolded sides on top and bottom.
Fold the middle tip over as far as it will go and then fold a little section of the tip back in the opposite direction.
Make these same folds on both sides.
21. Fold the first side over similarly to steps 17 & 18
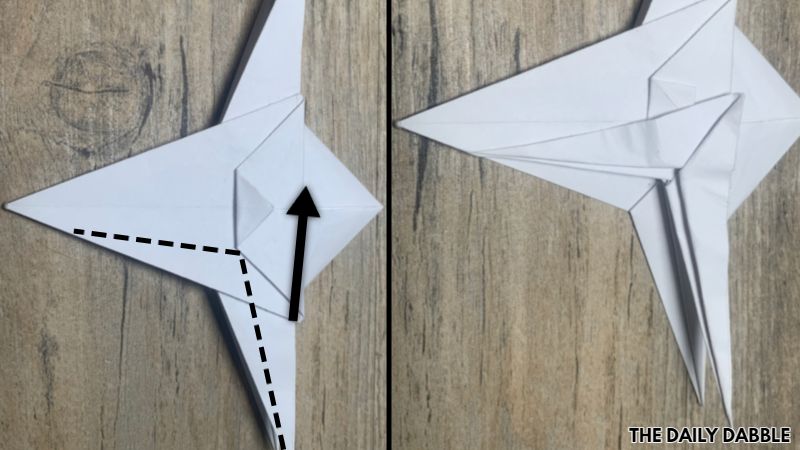
With the idea of the previous folds in mind, we will bring the first side over towards the middle.
This one will be brought over the middle line just a bit while you form the middle edges of the folds evenly.
Again this doesn’t have to look just like mine, but rather just end up even on both sides.
22. Match the opposite side with the same style of fold
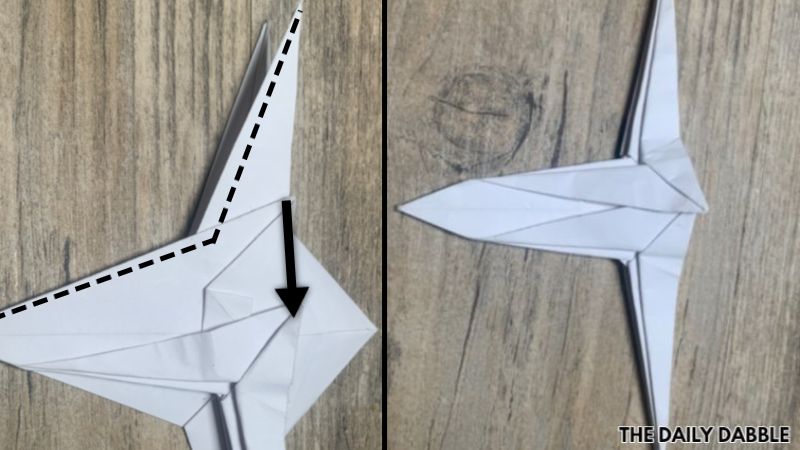
Bring the unfolded flap over the previous one and form the edges evenly to match the other side.
23. Make the same two folds on the other side
Flip it over and make the same fold from steps 21 & 22.
Take your time to make it look even, and make sure the edges are flattened well.
24. Reverse fold all four wings
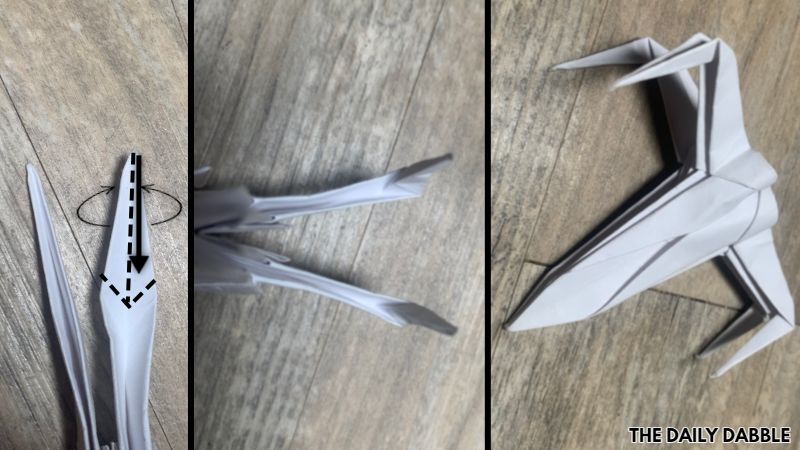
To make it look like the real X-wing you will need to shape part of the wing to point forward.
Do this by pinching the wings the opposite way they are facing and closing the outside over the inside.
Do all four wings while taking time to check they are all close to the same length and straight.
25. Finish shaping the X-wing
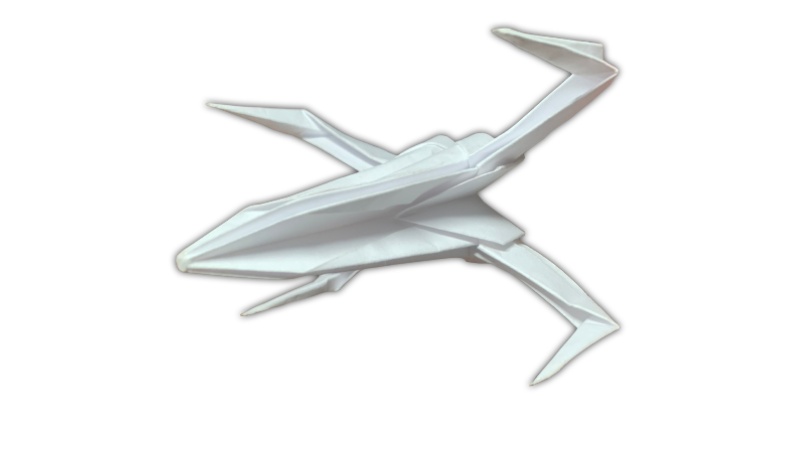
Optional shaping includes opening up the sides and shaping the back flaps to be more circular.
Simply curl those back flaps a bit, one at a time to give them some curve.
Now you know how to make an awesome origami X-wing starfighter!
Happy folding!